| Author |
 Replies: 18 / Views: 3,904 Replies: 18 / Views: 3,904 |
Page 2 of 2
|
|
|
|
Bedrock of the Community
United States
62064 Posts |
There is a trick they used to do to coins. They would take and push an image through a coin with two dies:    I know that would be a lot large and change the height of the coin. But try this; Look at the edge of the 'P' with a scope or strong glass glass to see if it is glued to the surface of the coin? There could be an edge you might see around the anomaly. |
|
Valued Member
 United States
477 Posts |
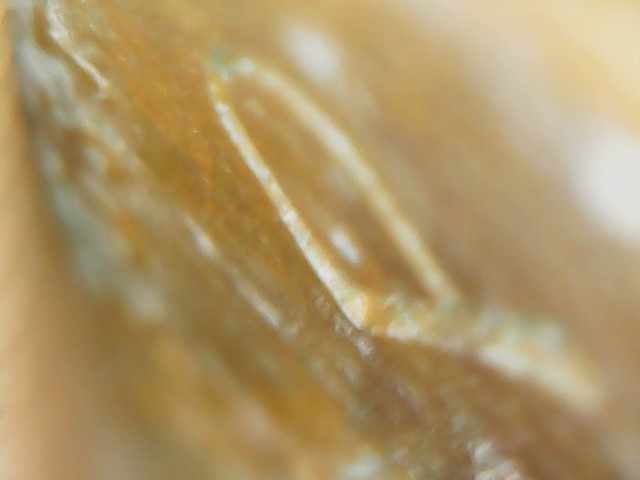
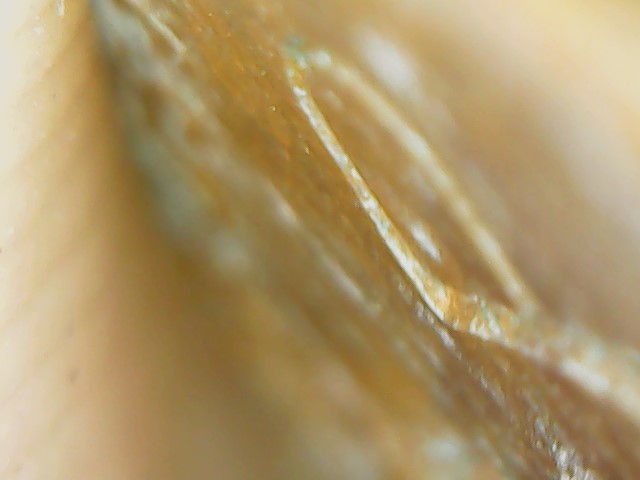
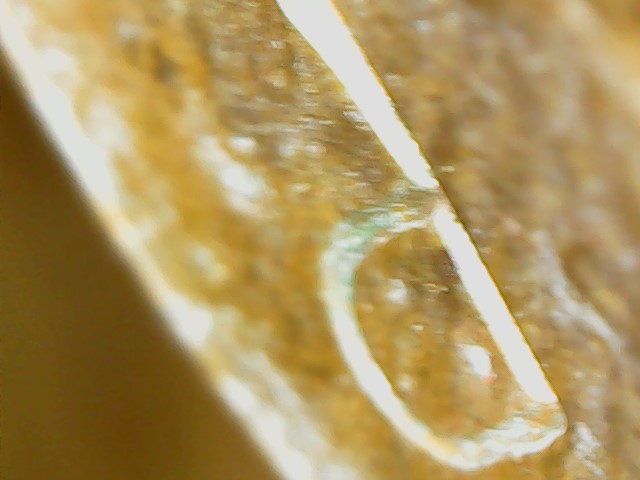
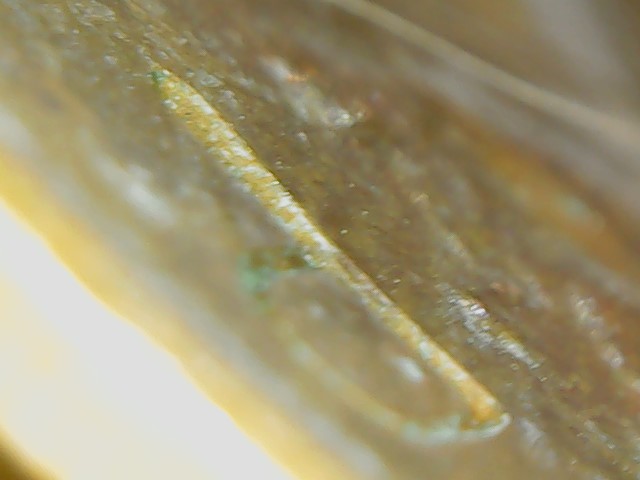
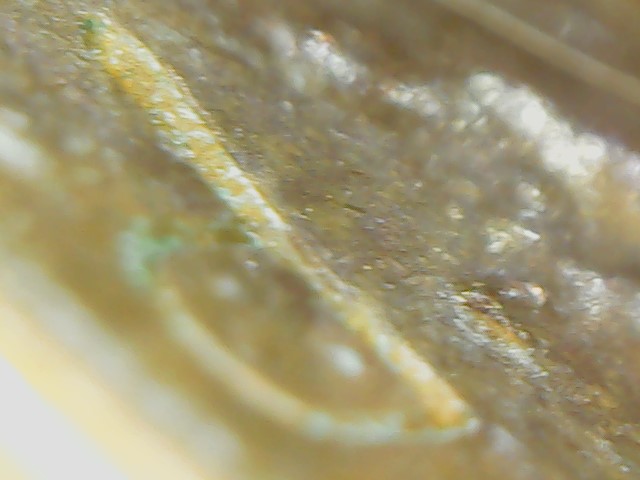
I've taken some more photos of the coin. At first I thought that the coin was stamped because of the way the light reflects off of it it looks like the P is carved into the coin or stamped into the coin with the P being lower into the surface of the coin. But when I looked under the microscope it appears that the P is coming out of the surface of the coin and is actually higher than the surface of the coin.   |
|
Valued Member
United States
477 Posts |
|
|
Pillar of the Community
United States
3656 Posts |
Someone just soldiered on their own for fun?
|
|
Bedrock of the Community
United States
62064 Posts |
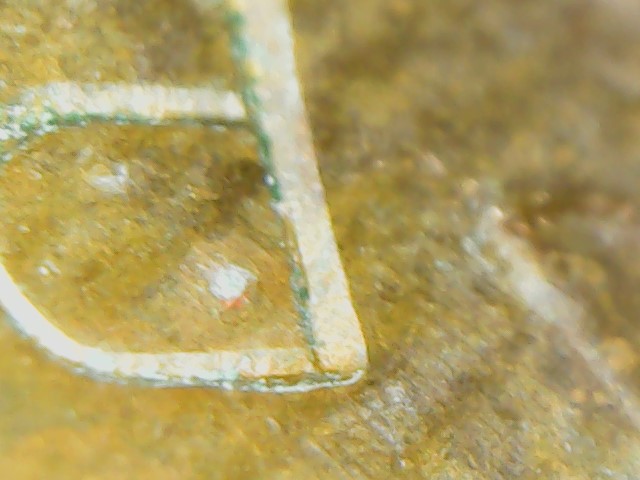
Well it is way to large for a mint mark. There were no 'P' mint marked cents. I also see a die scratch from the nose that shows on the field under that would be gone if the field was hovelled to make the anomaly.
|
|
Valued Member
United States
477 Posts |
|
|
Bedrock of the Community
United States
62064 Posts |
Yes. I can see where the loop is made from an different piece than the upright. You can see glue or soldier on the last image someone used to fasten it to the coin on the top of the 'P'. (last image)
|
|
Valued Member
United States
477 Posts |
haha ok somebody just soldered it on after it was minted?
|
|
Bedrock of the Community
United States
62064 Posts |
Looks like that. Maybe they wanted to make the only 'P' mint marked cent.
|
|
Bedrock of the Community
United States
17884 Posts |
Can we see an image of the whole coin? Obv and rev.
Edited by Conder101
03/09/2016 4:54 pm
|
|
Pillar of the Community
United States
740 Posts |
Keep it, it's interesting :D
|
|
Valued Member
United States
477 Posts |
Ya I think I'll keep it. I posted both sides a couple posts up. Thanks for the help guys.
|
|
Valued Member
United States
265 Posts |
Very cool, did ya find that in circulation?
|
|
Valued Member
United States
477 Posts |
Ya I did I don't see how someone can put this on with such precision. How is this done. I don't think it's solder because solder is silver in color. And when they glewed it down wouldnt they have to scrape off the excess? I just dont see how someone created this with such precision. Does anyone have any details on how this is done so accurately?
|
|
Bedrock of the Community
United States
62064 Posts |
It does look like it was made with two pieces. The upright is separate from the curved loop. One of the images you can see how that is noticeable. 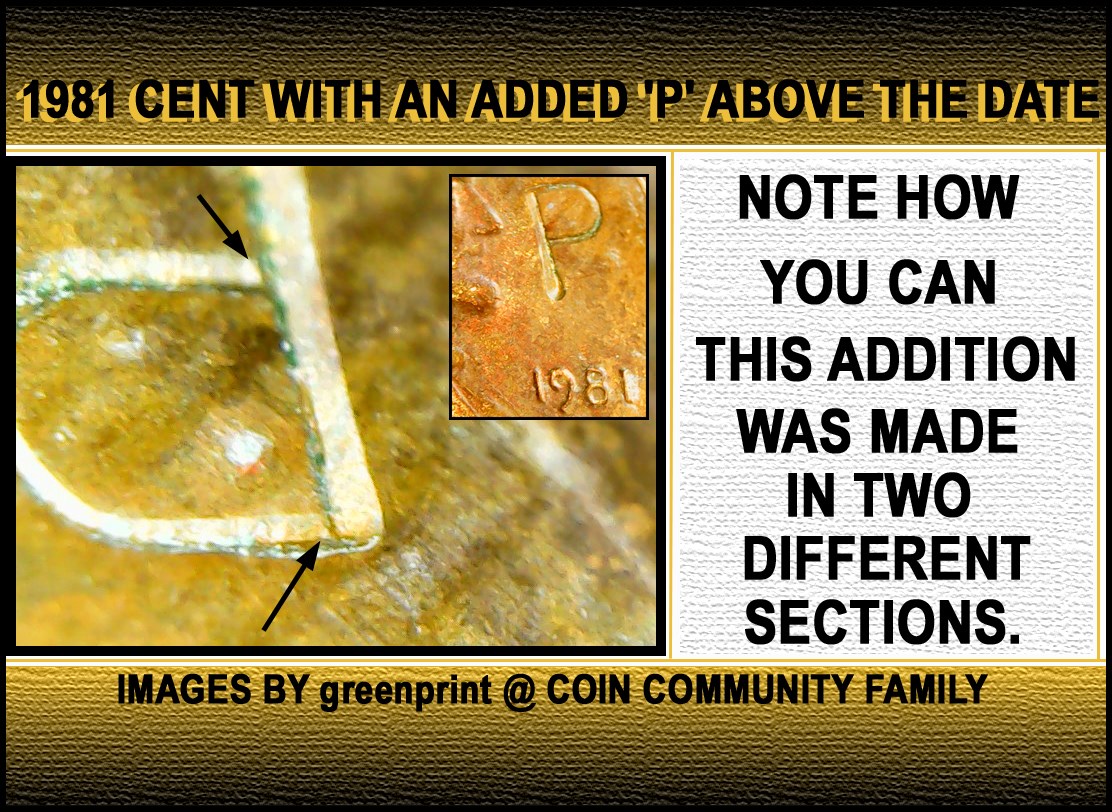 It maybe something with a copper base on the adhesive, because there is a lot of green in the area where it is attached and on top of the add on. I'm not seeing that anywhere else on the coin. Edited by coop
03/15/2016 1:31 pm
|
|
Page 2 of 2
|
Replies: 18 / Views: 3,904 |
Page 2 of 2
|