| Author |
 Replies: 20 / Views: 2,342 Replies: 20 / Views: 2,342 |
Page 2 of 2
|
|
|
|
Bedrock of the Community
 United States
26178 Posts |
I covered mine with a double layer of paper towel.
Inordinately fascinated by bits of metal with strange markings and figures
|
|
Pillar of the Community
United States
4041 Posts |
By "masking" I mean blocking off part of the light. A ringlight on its own shines from all clock positions. If you want to mimic the light of "normal" 10-2 lighting, you can add heavy black tape (like gaffer's tape) to cover the area from 3-9, and a small amount from 11-1. This will leave an opening from 9-11 and 1-3. You can adjust the size and position of these openings to tailor the light to whatever you want. Leave a small opening at 6 for a fill light. You're only limited by your creativity.
Contact me for photographic equipment or visit my home page at: http://macrocoins.com |
|
Valued Member
Italy
290 Posts |
Hello rmpsrpms! Quote:
If you want to mimic the light of "normal" 10-2 lighting [..] Could you explain a bit what this 10-2 lighting is? Is there a standard way coins should be lighted? Do you have any example shot? Thank you very much! |
|
Moderator
United States
100510 Posts |
Same as I do with all my coin images - with my cell phone.
|
|
Pillar of the Community
United States
4041 Posts |
Most people think of the 3 physical dimensions as height, width, and depth, ie XYZ. But you can describe those dimensions with other parameters with exactly the same results. For coin lighting, XYZ is very inadequate for describing what is important, so I use a different set of dimensions:
Distance from the coin
Clock position
Angle from horizontal
These 3 dimensions completely describe the position of the light the same way X Y and Z do, but are much more useful in setting up the lighting to meet illumination goals.
Regarding clock position, most coin photographers will light a coin either with a single light that shines from around 12:00, or more often with two lights, one at 10:00 and one at 2:00. Coins often depict things like people, eagles, or other physical objects, so these positions give a "natural" look to the design features, as if they were being lit by the sun coming from above.
Unfortunately, the 3 dimensions only describe the position of the light, but there is another important dimension: size. With the 4 dimensions of distance, clock position, angle from horizontal, and size, you can completely describe a lighting style.
|
|
Pillar of the Community
Russian Federation
5185 Posts |
Quote:
Most people think of the 3 physical dimensions as height, width, and depth, ie XYZ. But you can describe those dimensions with other parameters with exactly the same results. For coin lighting, XYZ is very inadequate for describing what is important, so I use a different set of dimensions:
Distance from the coin
Clock position
Angle from horizontal
These 3 dimensions completely describe the position of the light the same way X Y and Z do, but are much more useful in setting up the lighting to meet illumination goals For the mathematicians (and astronomers) in the audience: this is known as spherical coordinates, with the three dimensions corresponding to radius, azimuth, and elevation, respectively. (Another common set of terms for the same three dimensions - or geometrically the same, at least - is "altitude", "longitude", and "latitude".) |
|
Valued Member
Italy
290 Posts |
Thank you rmpsrpms! Which equipment do you use for lighting if I may ask? How do you diffuse? By the way, after your initial input I found this article which seems extremely well written: https://coinimaging.com/photography.htmlThanks! |
|
Pillar of the Community
  United States
6657 Posts |
hfjacinto, you take lovely coin pictures. Alas, I think your camera cost more than double the value of my entire coin collection. =)
One dumb question I have about the right light: does it go around the camera lens? Around the coin? My iPad macro lens sits about an inch off the coin.
Probably what I want for that setup is a ring light that shines inward, casting a narrow shaft of light at about 30 degrees to the coin surface. It might be more effective to use a single light source, and mimic the 10-2+6 setup with mirrors.
|
|
Pillar of the Community
United States
4041 Posts |
That article by Mark Goodman is indeed very good. He also wrote a book on Coin Photography (2 editions) that are excellent.
I personally use a masked ringlight for coins, not so different from what has been recommended on this thread, but smaller in diameter.
Good luck doing anything with only one inch between the lens and the coin, but there are some small diameter ringlights available that you might be able to make work with some creative work.
|
|
Valued Member
Italy
290 Posts |
Thank you rmpsrpms for the great info! Apart from lighting, which is a very complex topic on its own, I also find quite difficult in real life to keep the coin as parallel as possible to the lens, which is important when working with very shallow depth of fields. Has anyone found a copystand which actually locks the camera into a true perpendicular angle? All the ones I see basically rely on bubble levels.. which is still quite cumbersome process.  |
|
Pillar of the Community
United States
4041 Posts |
The best way to ensure the coin is parallel with the sensor is to place a small mirror where the coin goes. Stop down the lens to improve depth of field, and then focus on the camera lens as it appears in the mirror. Now you can adjust the camera so you are looking directly at the center of the camera lens, and the coin will be level.
|
|
Pillar of the Community
United States
6657 Posts |
I built a prototype contraption to cast an angled slice of light onto a little platform. I didn't bother much with focus tonight, I just wanted to get the mirrored field black. Turns out when you're super close, the coin reflects the inside of the box lid, but some black felt and painter's tape did the trick. I definitely need to get the light distance, filtering, and glare figured out. For all the deficiencies of the prototype, it did get the fields acceptably black and the devices relatively silver.   |
|
Valued Member
Italy
290 Posts |
Good morning Brandmeister! Have you tried playing with a photo-editing program to tweak the various light levels? That can help a tremendous amount! I took the liberty of playing with your last photo! Hope you don't mind. The idea is: the proof field needs to be black so you "lower the blacks", on the contrary you want the face to be bright so you "raise the shadows" and/or "whites". Lastly, you will have some details of the coin that are overexposed (they reflected the light and "blinded" the sensor of the camera) so you try to correct them by "lowering the highlights". In such black/white type of photos you can also lower saturation (how "colorful" a picture is) and/or play with "white balance" or "hue" to remove the yellow/whatever tint which derives from which light bulbs you used. 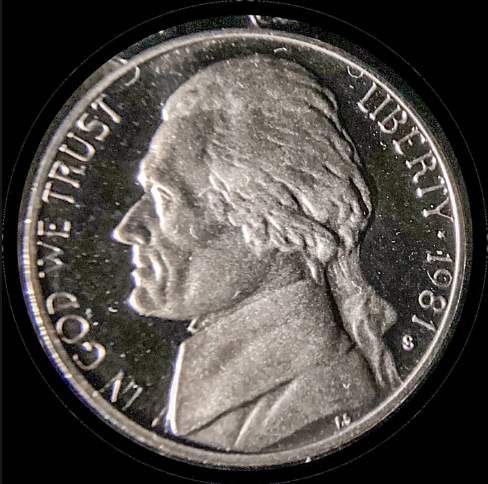 The coin seems to be inside a flip so that makes all more difficult and in this case also shows the dust more prominently. By the way, since the proof will have a lot of black, it's probably best to choose a different color for the background of the photo? Edited by joe_77
04/08/2024 03:27 am
|
|
Moderator
United States
191235 Posts |
Impressive contraption!  |
|
Pillar of the Community
United States
6657 Posts |
Thanks, Jbuck. Joe, I will give your ideas a try on the next iteration of the box. The coin wasn't in a flip. It was a folder-filler that I bought for a buck. The flip that it came in wasn't exactly sterile, and I handled the coin with gloves (plus there's a lot of dust from sawing cardboard with a steak knife). I didn't want to put a nice coin in the prototype in case I knocked it over making adjustments.
|
|
Page 2 of 2
|
Replies: 20 / Views: 2,342 |
Page 2 of 2
|


