| Author |
 Replies: 612 / Views: 111,707 Replies: 612 / Views: 111,707 |
|
|
|
Pillar of the Community
 United States
4038 Posts |
Very nice image! It could probably use a little bit of post-processing, but it's good "raw material". My only complaint is you should make the coin flat to the sensor. It is a little bit rotated CW. It might also be a little out of focus on the bottom. You should make sure the coin is flat vs the sensor to keep this from happening, and/or make the aperture a little smaller (larger number). For this coin at this image size f8 should be fine, maybe even f11
|
|
Valued Member
Canada
288 Posts |
Awesome. I will give it a shot. Any suggestions on how to process? I'm using photoscape I think.
|
|
New Member
United States
14 Posts |
I just finished putting together the El Nikor setup from page 1 of this thread. I'm still working on the lighting and camera settings, but I'm happy with the first results. Thank you for the help! 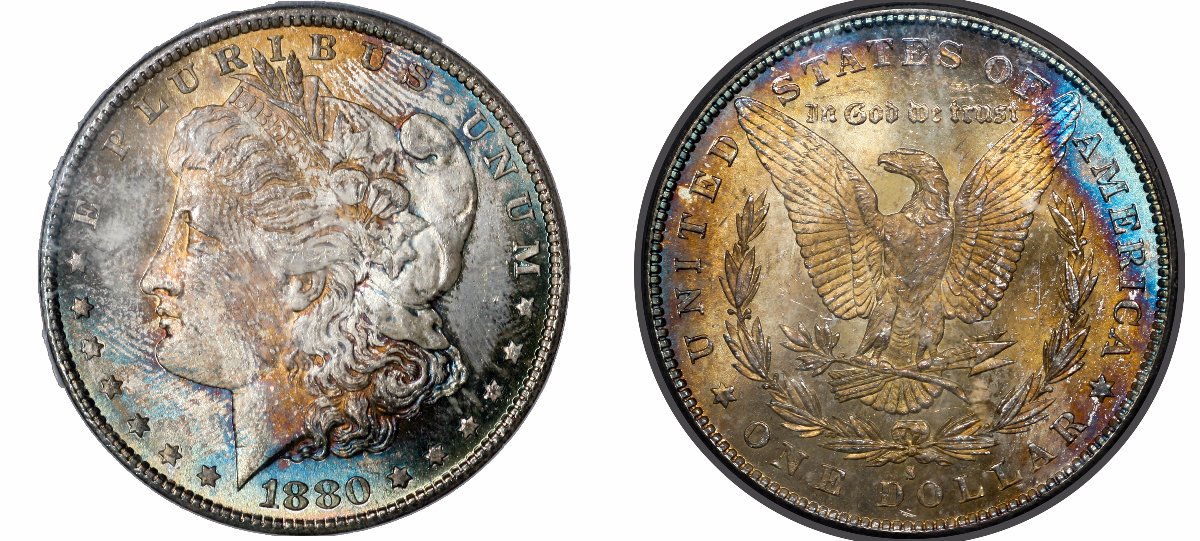 |
|
Pillar of the Community
United States
4038 Posts |
Looks like a good start! Keep posting and we'll all offer suggestions to improve. Quote:
Awesome. I will give it a shot. Any suggestions on how to process? I'm using photoscape I think. Numiscat, I missed this reply from you, sorry. Do you still want post-processing suggestions? Post a recent image and we can critique it and if appropriate offer post-processing tips. Contact me for photographic equipment or visit my home page at: http://macrocoins.com |
|
Valued Member
United States
359 Posts |
I have purchased the items needed for the <$400 setup. For anyone interested, here are some links and other info on purchase prices. I have no affiliation with these sellers.  Canon camera, body only Canon camera, body only (average ebay body only selling prices): 1100D Rebel T3 $151.36 550D Rebel T2i $144.61 500D Rebel T1i $139.45 1000D Rebel XS $101.32 450D Rebel Xsi $94.75 EOS-M42 Adapter: $3, https://www.ebay.com/itm/Aluminum-M....m2749.l2649M42 focusing helicoid, 17-31mm: $21, https://www.ebay.com/itm/M42-to-M42....m2749.l2649M42 extensions, 2 sets 7/14/28mm: $16 total, https://www.ebay.com/itm/Camrea-Mac....m2749.l2649M42-M39 adapter: $5.69, https://www.ebay.com/itm/M39-39mm-t....m2749.l2649Nikon 75mm EL-Nikkor Lens: $45, https://www.ebay.com/sch/i.html?_nk..._stpos=54401Tripod or preferably a copy stand with focusing rail.
You could build a copy stand and attach a focusing rail. I paid $17 for a focusing rail at: https://www.ebay.com/itm/2-Way-LP-0....m2749.l2649IKEA Jansjo LED lights, two: $30, These are discontinued on the Ikea website, so if you can't get to a store, ebay or Amazon.com are your best bets to get one. Canson Opalux Diffusion Material: $7, https://jet.com/product/Opalux-Tran...d6cf8d2a536bI did not buy these, only required for high magnification setups. M42-RMS Adapter: $15 Nikon M5 or Plan4 objective: $30 Total $145 + Camera body of your choice + copy stand Pics hopefully coming soon! Edited by ngs428
01/30/2018 4:36 pm
|
|
Pillar of the Community
United States
4038 Posts |
Excellent list ngs! I think the original budget for the camera body was $175, and now the XS can be had for a lot less, maybe $100. The budget for the tripod was $30, so now the "<$400" setup is the ~$320 setup. Quite a bargain for what it can do.
Contact me for photographic equipment or visit my home page at: http://macrocoins.com |
|
Pillar of the Community
United States
1475 Posts |
@ngs428 Very nice  Thanks for sharing. I've been looking for an updated setup. |
|
Valued Member
United States
359 Posts |
Has anyone had any luck with generic AC adapters? I think I need one for my $400 setup. I just used one I bought off ebay and it had to be removed with a pliers. DC coupler was jammed in the battery compartment. Yikes! How about one like this for my T2i: https://www.ebay.com/itm/Generic-AC....m1438.l2649Edited by ngs428
02/01/2018 11:07 pm
|
|
Pillar of the Community
United States
4038 Posts |
Only generic adapter I've used failed during use and blew up my Nikon camera. Never have tried again.
|
|
Valued Member
United States
359 Posts |
Thanks for the feedback Ray. I was hesitant to use the one I did. In the end I was just happy the camera still worked. I will try to find an OEM one. Too bad they are discontinued... Do you recommend using an 18% greycard or can I just use a white index card? I suppose I could spend the $9 to get a set.. https://www.amazon.com/Calibration-...p/B012TI52FS |
|
Pillar of the Community
Canada
9163 Posts |
I got my AC adapter from a Canon site, yes I pay more for it BUT I know it's the right one and has worked for me for 3 years now. If you look at a Canon adapter and a knock off you can see the difference, get the right one.
|
|
Pillar of the Community
United States
4038 Posts |
If you are just doing white balance, a white index card works fine. If you are using the card as a reference background, then you should use a grey card.
Contact me for photographic equipment or visit my home page at: http://macrocoins.com |
|
Valued Member
 Canada
478 Posts |
The easy part is getting the equipment.....the hard and frustrating part is figuring out the lighting. In fact, I was so frustrated I almost gave up. It seemed that what was working for everyone else was not working for me. I started with 2 jansjo lights than bought 2 more and no matter what I did, I couldn't get a good picture. I was lucky in a strange way, at that time, I was off work due to a injury and had nothing but time to play with the setup and find a solution to my lighting issues otherwise I probably would have gave up. First of all, I am the farthest thing away from being a photographer....before this setup, I didn't even own a camera! My main goal was I wanted a system that I could take pictures of hundreds of different coins without having to do any lighting adjustments between pictures. I came up with a system that works great and with very little adjustment between coins. Unfortunately, I don't have a picture of my setup but I will try to explain it the best I can....trust me, its not to complicated. Ive googled some pictures to help me explain the setup that Ive attached. The main light I use is a simple desk lamp with a telescoping arm (see attached picture). I than may use 1 jansjo light on the opposite side of the coin as secondary lighting just to take some shadowing away. Keep in mind, I never point any lights directly at the face of the coin....I always come at it from the side. In fact, the main desk lamp seems to work best at almost a horizontal plain with the coin. I just play with the position of the lamp a little until I get the desired look. My second secret is a simple piece of regular glass I stole from a picture frame.....MUST BE SCRATCH FREE AND CLEAN. Pictures say a thousand words so see the attached pictures I provided.......That is basically my setup!! One other little tip......Im not at my setup right now but I believe I just have a regular incandescent 40 or 60 watt lightbulb in the desklamp. Playing with different watts and different bulbs may be necessary to get the right bulb that works for you. Also.....I do this in my basement with all other lights off. The darker the room, the better. I hope I didn't ramble on to much and make it seem harder than what it really is. Good luck and I'm here if you need anything. The forum is great but I found that most that are trying to help just make it more confusing because I don't understand what they are trying to say....I needed someone to dumb it down for me because I'm a carpenter, not a photographer. Best Regards Brent 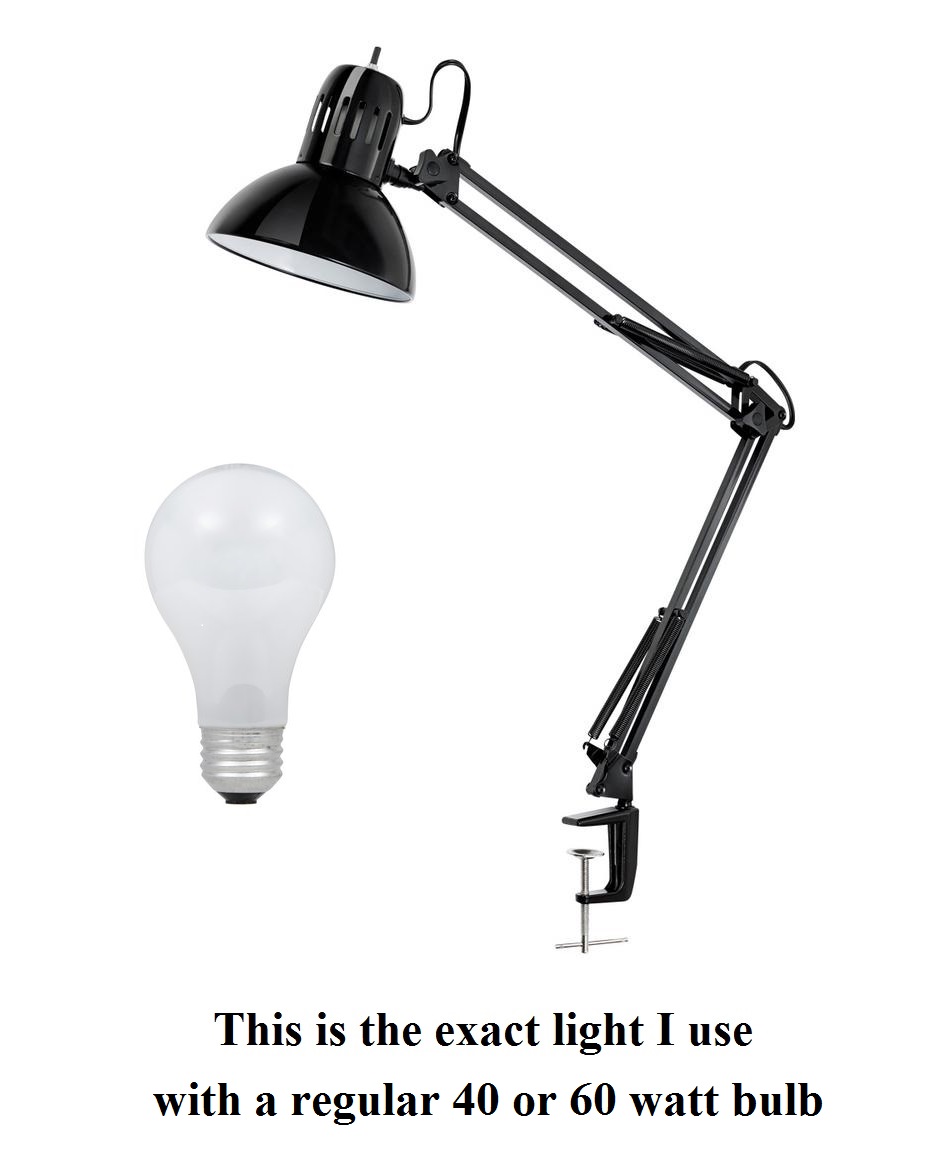 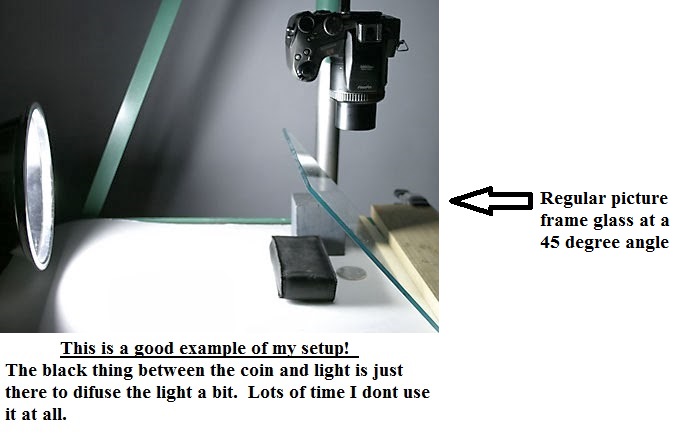 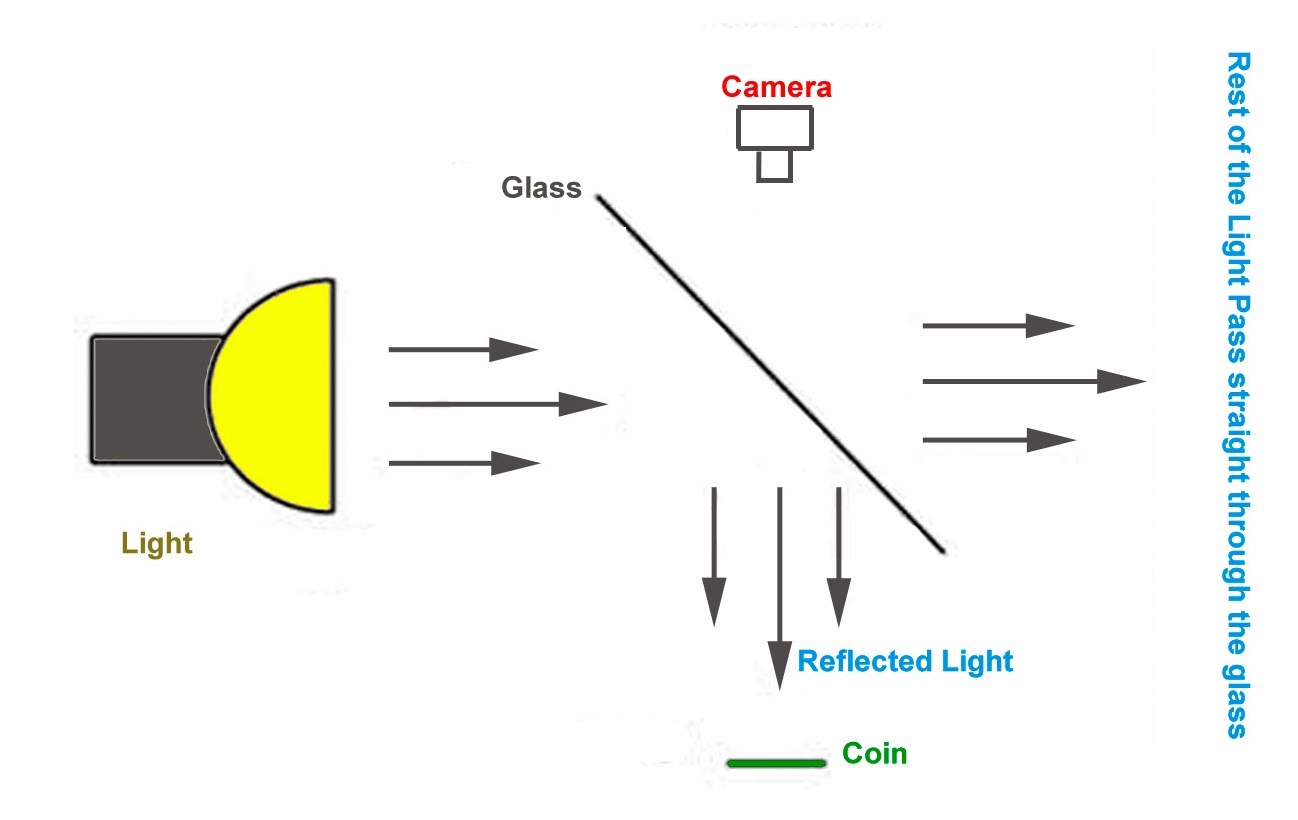 |
|
Pillar of the Community
Canada
9163 Posts |
I think you explained it very well, specially for use dummy's. |
|
Valued Member
United States
359 Posts |
Thanks for the tips so far Ray and Brent. I am using the <$400 setup with custom copy stand and manual focusing rail. Will still coat the inside of the cardboard with flat black... I have had better success with the axial lighting method vs the diffused Jansjo method. I have not had much time to shoot too much (Olympics fan..), but here are a few I took. All are only cropped, contrast added and resized. Still working on it... I tried to get the tilt right for you Ray  Axial Lighting with supplemental diffused Jansjo on the back side. See setup pic. Contrast at 20 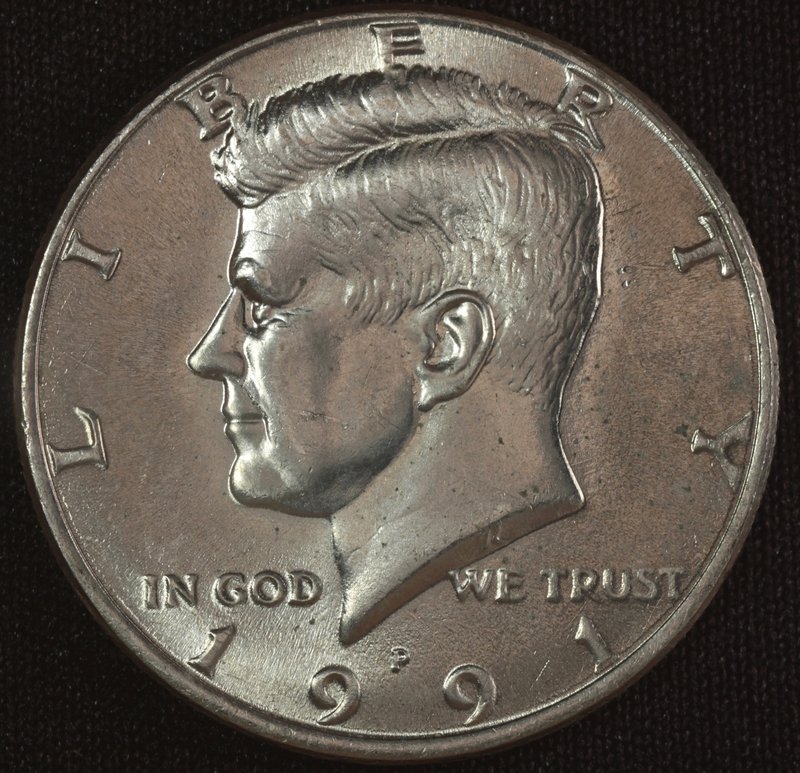 Contrast at 35 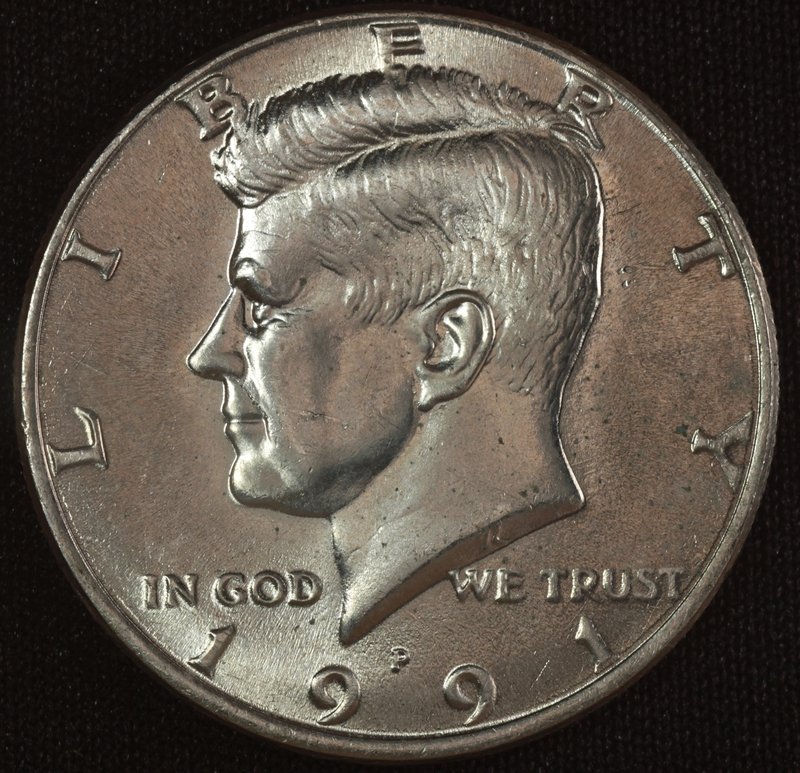 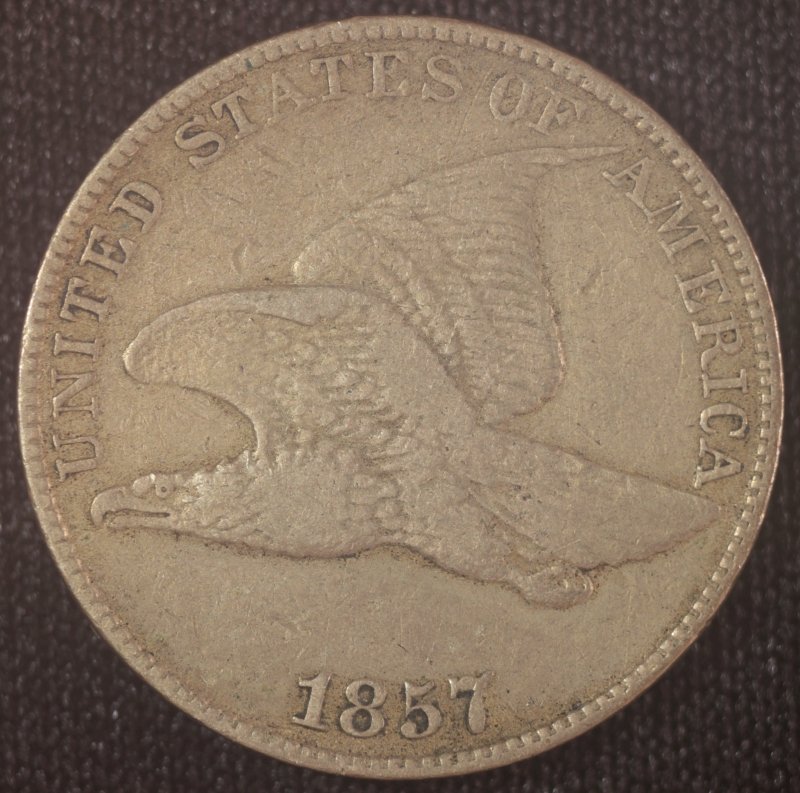 Diffused Jansjo lighting only: 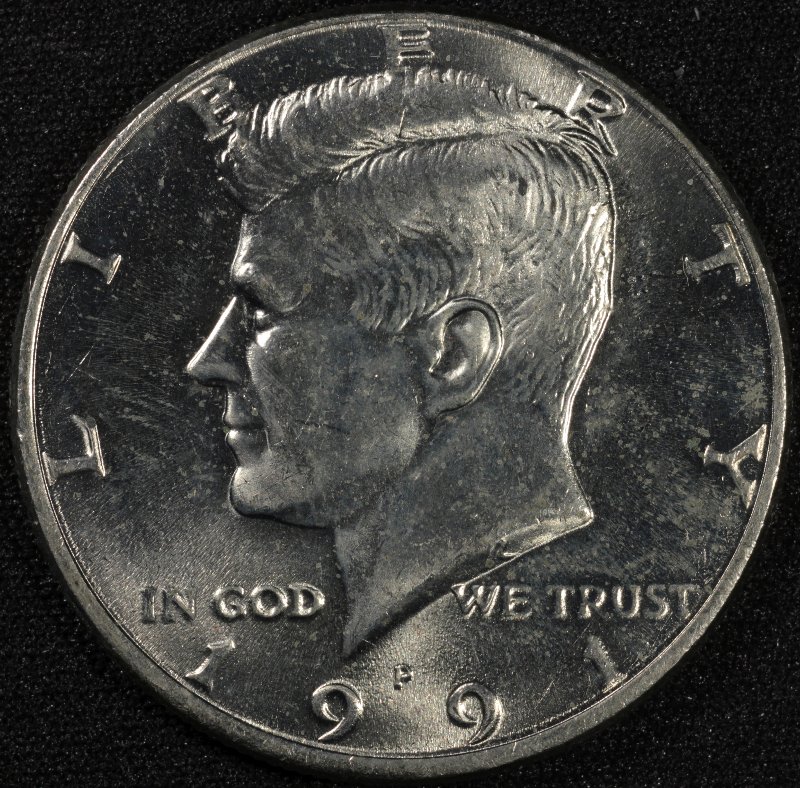 Axial Lighting Setup Pic: 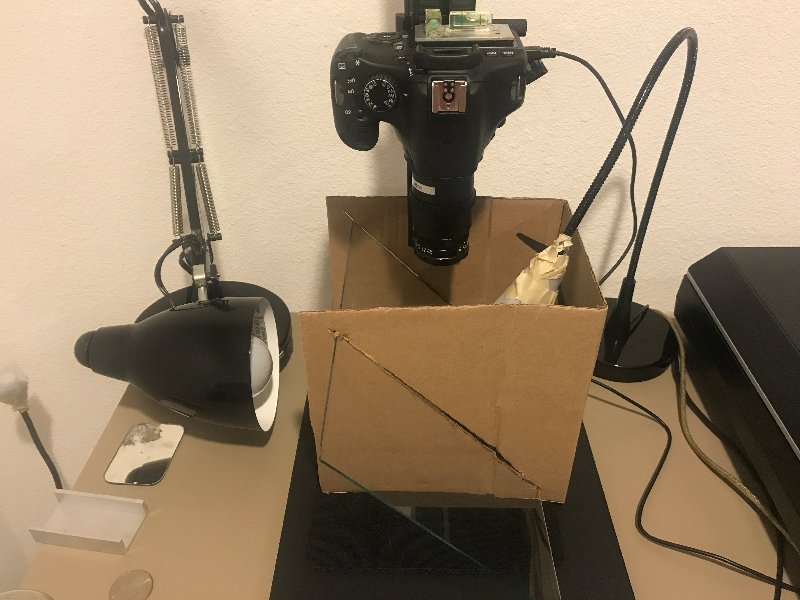 Edited by ngs428
02/24/2018 09:12 am
|
| |
Replies: 612 / Views: 111,707 |


