| Author |
 Replies: 32 / Views: 7,068 Replies: 32 / Views: 7,068 |
Page 3 of 3
|
|
|
|
Pillar of the Community
 United States
627 Posts |
Hi Ray, I think the lighting looks really great, but can you also take a photo of the slitted black diffusers attached to the Jansjos? I can't get a feel for the exact construction from the reflection photo. Thanks!
|
|
Pillar of the Community
 United States
4048 Posts |
Sure...here is one of them. Guess I'll call them "Smile Directors"...Ray  Contact me for photographic equipment or visit my home page at: http://macrocoins.com |
|
Bedrock of the Community
United States
10045 Posts |
The results are fantastic!
|
|
Pillar of the Community
United States
4048 Posts |
Forgot to mention I am back taking pics with the 75ARD1. Shipped the stand with the 75/4 EL Nikkor to its new happy home...Ray
Contact me for photographic equipment or visit my home page at: http://macrocoins.com |
|
Pillar of the Community
United States
627 Posts |
|
|
Pillar of the Community
United States
4048 Posts |
Here's a photo of 1953-S/S RPM#11 MS65 RD in ANACS slab using this technique:  Contact me for photographic equipment or visit my home page at: http://macrocoins.com |
|
Pillar of the Community
United States
627 Posts |
When I got home from work today I had a package waiting for me at the front door. Of course, it was around 10 degrees outside and so I was worried about being too anxious about opening the package and not letting it adjust to the inside temperature. Inside the package was my 75mm/4.0 APO-Rodagon-D 1:1 lens.  I let the lens adjust to the inside temperature for around 1.5 hours, just to be certain that it didn't fog up or condense any moisture on the lens. While it was warming up, I was messing around with my set-up and assuring that the camera lens plane was parallel with the object plane of the coins I had been photographing. Needless to say, it was off (as I suspected), so I engineered a little wooden wedge piece and taped it up in electrical table for grip. So, the process went: 1) Attach the 75ARD1 Lens to my bellows. 2) Assure that the planes were still parallel between my camera sensor and the copy stand using Ray's mirror method. 3) Adjust the white balance to the particular lens (I have found that not only can the light sources have a large effect on WB, but particular lenses can also have lesser but important effects -- my OCD forces me to reset the WB with each newly attached lens). 4) Find my trusty 1917 Wheatie, and shoot away. The results, direct from the camera and resized to 800px square (obverse and reverse) and full size zoomed in shots (Lincoln's face and the date) are below. I did NO post-processing for color, contrast, sharpening, etc. I shot at f/8. The images speak for themselves, and I have to say, this lens lives up to EVERYTHING that people have said. It's a gem, and I hope everyone can snag one of these for < $300 like I did.      |
|
Moderator
United States
23522 Posts |
Heh. You didn't think we were lyin', did ya?  Now you know what I meant when I said, "so sharp it hurts." I'm still searching for the lighting I like for lustrous Morgan-size coins, but out of the box and lighting-independent this 75ARD simply outclasses anything I've ever used on any other coin I've thrown at it. I would *dearly* love to subject the Rodenstock to Imatest, but I can't afford it. |
|
Pillar of the Community
United States
627 Posts |
I didn't think you were lying, but I'm worried people will think I'm doctoring my photos or something because the dang lens is so crazy good. I've never felt like I needed to "unsharpen" a photo before. |
|
Pillar of the Community
United States
627 Posts |
|
|
Pillar of the Community
United States
4048 Posts |
Looks like you got a good copy of the lens. Given the description it should have been, but you never know. I've purchased a couple of these I had to send back due to haze, scratch and coatings problems. And one of the ones I bought just did not produce the same quality of image for some reason. But yours looks to produce a super sharp image across the whole field so you did not get unlucky...Ray
PS, on subject of sharpening, unless I am doing a shootout to compare lenses, I always do a sharpening of "1" at the final published size. I will occasionally sharpen at "1" prior to downsizing, but in general that does almost nothing to the image. No matter how sharp the lens, the camera will leave a bit of sharpness on the table, as do all the jpg conversion algorithms I've used. That final sharpening of "1" seems to just compensate for the sharpness lost in the conversion process.
|
|
Pillar of the Community
United States
627 Posts |
OK, Ray, taking your advice, I just shot a prooflike dime that I have. I rescaled to 800px square, and then sharpened by 0.5 in Adobe Photoshop CS4. I could never get this coin to look good before, but now it looks crazy amazing! I'm on cloud nine with this lens! 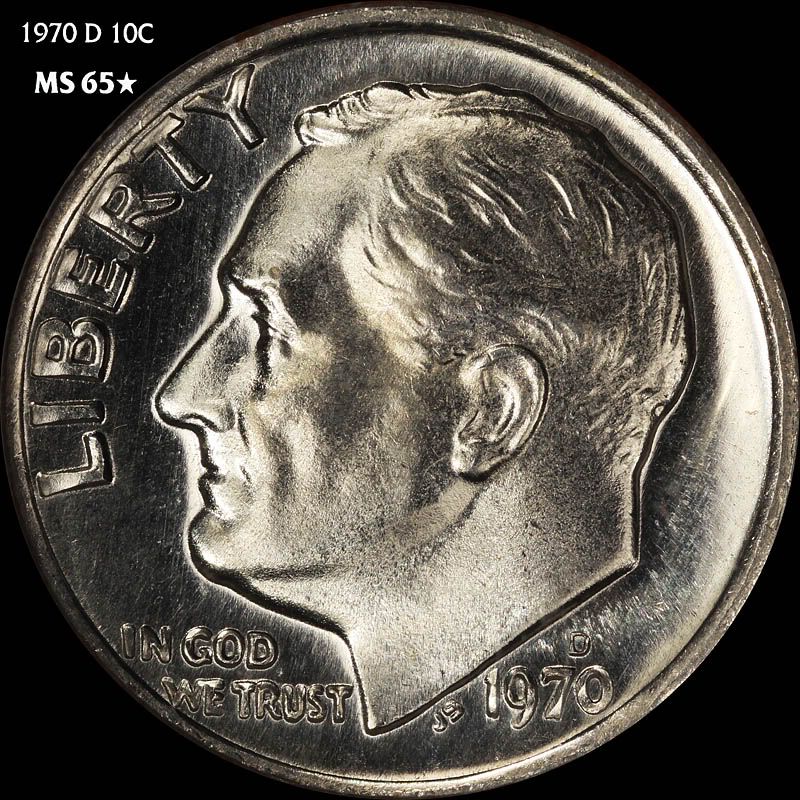 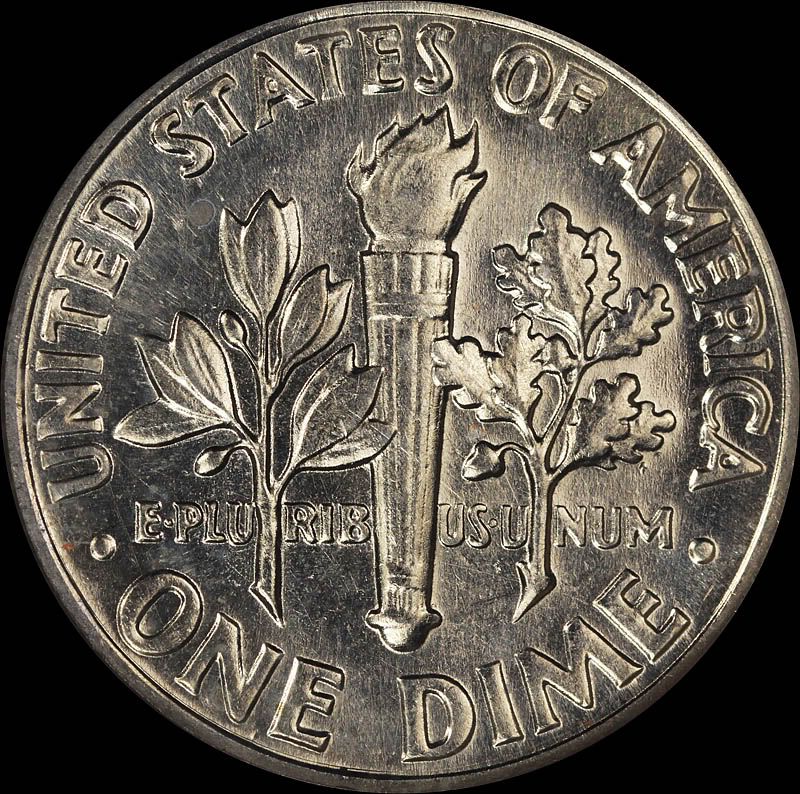 |
|
Pillar of the Community
United States
4048 Posts |
That's about as pretty as it gets...Ray
PS I do see about 1/2-degree tilt clockwise on your reverse. The EPU is not quite level ;-)
|
|
Moderator
United States
23522 Posts |
I've completely abandoned shooting jpg's for RAW with this lens. If any sharpening at all happens, it's in the RAW processing.
|
|
Pillar of the Community
United States
627 Posts |
Well I got an itch to try proper Axial lighting this weekend, not the make-shift CD Jewel case I used the last time. :) I went to Hobby Lobby and purchased two 8x10 frames, $7 for the two of them combined. I then bought some little brass hinges (<$2), and hinged the two frames together on the long side, thus creating a hinged sandwich of two frames. I cut little pieces of square dowel, and affixed "Sticky Tack" to one end, and I use that piece as my propping stick to adjust the angle of the glass when shooting. You can see a picture of the set-up here:  For lighting, I am using two OttLite bulbs in gooseneck lamps places behind a diffuser (paper tower) and I custom white balance the whole rig to those lights before I take any shots. I used the 75ARD1, stopped down to f/5.6. Because of the light loss (a lot because of the diffuser, and a lot that goes through the glass not reflected) the exposure was around 1.5 seconds. As such I used a remote shutter release, and a 2-second timer to avoid any shake. Here are the images of my most toned coin -- an 1898 Morgan dollar with crazy toning on the obverse, and some wild toning on the reverse along with some fingerprinting. All said and done, I'm pretty happy with these! They are adjusted for contrast and brightness in post-processing, and sharpened by 1 after being resized to 800px wide.   |
|
Page 3 of 3
|
Replies: 32 / Views: 7,068 |
Page 3 of 3
|







 First Page
 Previous Page

 Posted 01/17/2012 10:15 am





