| Author |
 Replies: 22 / Views: 4,937 Replies: 22 / Views: 4,937 |
Page 2 of 2
|
|
|
|
Moderator
 United States
23522 Posts |
I took the liberty of fixing the title; didn't notice it at first. Man, you don't demonstrate a steep learning curve much, do you? OK. Depending on the color of the background, I don't think your White Balance is perfect. Explore a Custom setting. And, you can get larger images through the CCF Optimizer these days. I don't know what you started with as far as processing at home, but the ideal is about 800 pixels in diameter from a lens this good. That diameter and about 200kb in filesize is a nice compromise. That's all I got for you. You done learned too fast for me to teach. Now, grab the shiniest new Nickel and Quarter from your pocket, and point the lens at them.  All seriousness aside, now you know why we harp so loudly about bespoke lenses, even relatively cheap ones like you're using. All you did was point the thing at a coin, used general parameters to help the camera get it right, and it tossed off a tremendous image of the first coin. Think about how much flexibility this will leave you, since you can change virtually everything through a broad range of adjustments. All the same, gold is fairly easy. The pocket change will be a challenge. |
|
Valued Member
 United States
430 Posts |
|
|
Valued Member
United States
430 Posts |
oh and step up rings from 52mm to 72mm. to attach a 4x and a 1x macro lens to the end of the 50mm lens.
|
|
Moderator
United States
23522 Posts |
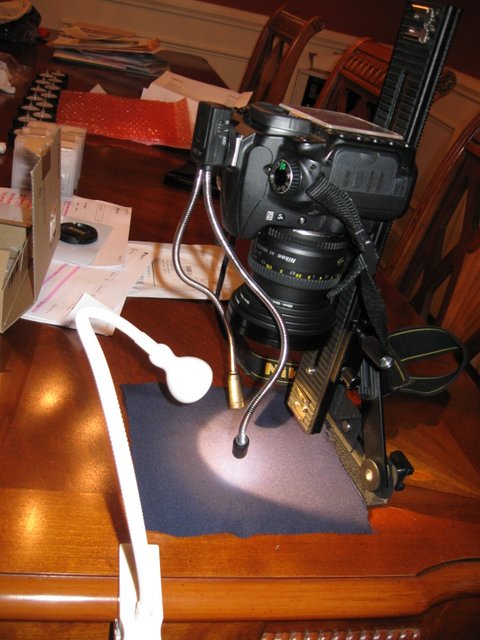
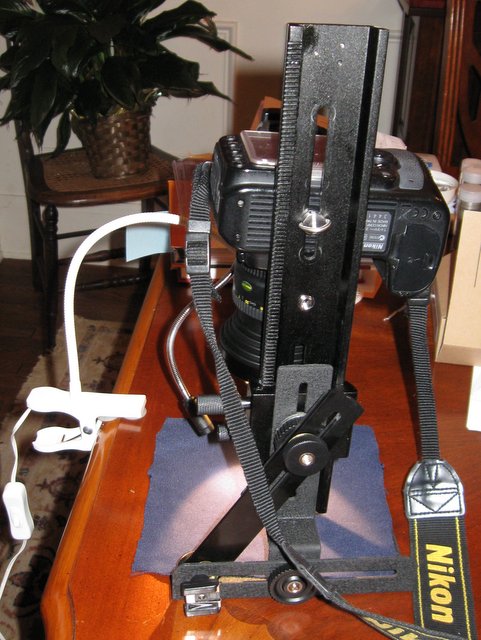
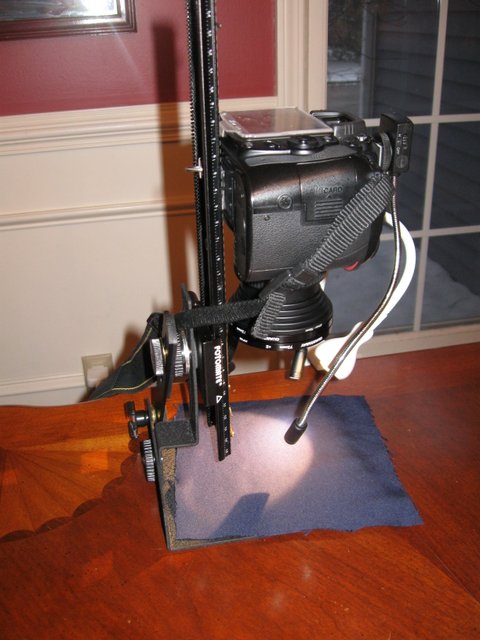
Ha! I love it. I may not be reading this right since I'm on my phone, but it looks like the vertical arm has enough downward travel - and the camera enough upward - so it could become a load-bearing element. That would stiffen things, and frankly you're now working in a realm where little gains like that are important.
So how large are your originals? Are you autofocusing?
|
|
Valued Member
United States
430 Posts |
Thanks again SDave. the right lens with the right lighting and settings, voila! I'm not sure what you mean about a load bearing element. Without the angled hot shoe bracket the camera bobbed like a flagpole in the wind. the originals are between 5-7MB each. I cropped them and compressed them with Picassa. Manual focus, I used the fine adjustment on the focus rail to focus then locked it in. copy stand http://www.amazon.com/dp/B003OAD3C0...s=copy+standfocus rail http://www.ebay.com/itm/20083602402...RK:MEBIDX:ITthere is a cheaper focus rail that is shorter. that probably would have worked. So to fine tune the white balance do I bracket or use the color grid? I just picked Flourescent 4 and it looked ok. The background is navy blue (old clothes about to be donated). I'm shooting on the fine setting so the files are large now. When everything is set and I start to shoot my collection I'll pick a lower quality setting. Here is a silver coin 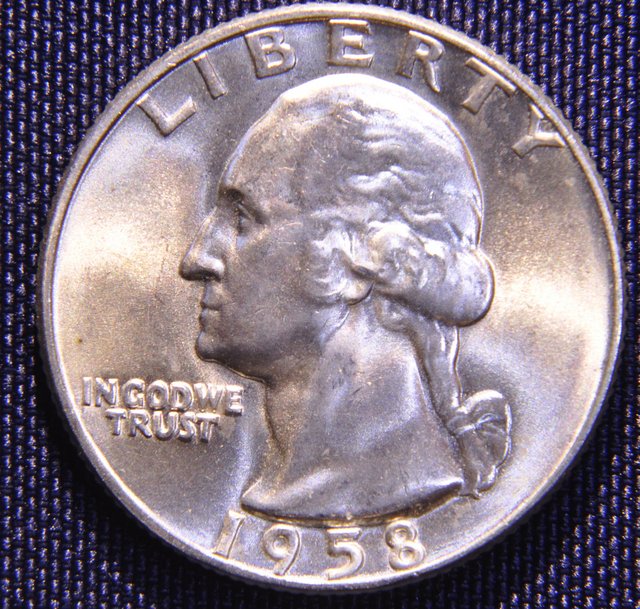 |
|
Moderator
United States
23522 Posts |
I'm thinking the focus rail can slide downward so the bottom actually touches the table and holds weight.
Custom white balance is a capability of all dSLR's. I don't know the specific steps for your camera, but it will involve setting white or gray paper (they make a bespoke 18% gray shaded card for the purpose) where the coin will be, with the lighting set as for the shot. You take a picture of the card and (via some setting) tell the camera that is "baseline." It is then able to correct color in-camera.
The tiny light position adjustments you make for each individual coin won't matter for this, as long as you're close to their final position to begin with.
My Canon is perfectly happy doing this with white printer paper. I don't know about your Nikon, but Ray (rmpsrpms) knows Nikons and will hopefully poke his nose in.
1) Always use the camera's maximum image size and quality. You're going to depend on postprocessing software to downsize the image later. In fact, if you want to go that far eventually, we'll teach you to use RAW files in your shooting. They're raw photographic data straight from the sensor, with no in-camera processing at all.
The reason for this is that cameras are very weak computers. It's preferable to do as much processing as possible on your much more capable desktop computer. Your goal is to do all processing at your computer, and directly upload a completed file.
2) Use only monochromatic shades for background. Preferably black or gray to minimize light reflected back into the lens. Reflected light is a problem in macro photography, moreso than other specialties. Work hard to minimize external light and surfaces that can reflect light back into the lens. Reflected light costs you contrast, and you are going to be adding a little contrast in most postprocessing operations anyway.
There isn't enough wrong with that Quarter image for me to offer any critique here. You're well ahead of the power curve in terms of quality - you seem to have the feel for how the coin needs to look which is a big help. That's teachable but difficult.
Find a well-worn and darker Lincoln - or something similar in your collection - and see what differences it requires for lighting and exposure.
|
|
Pillar of the Community
United States
4048 Posts |
Nice images! I have a few things to offer for improvement:
1) Use only one type of light. I like the little hotshoe guys but they are a lot more blue than the Jansjo, so they are messing up your white balance. You can see this clearly in the different color they reflect off the coin's luster bars. The Jansjos are showing yellowish, while the hotshoes are bluish.
2) Your lights are a little far out from the optical axis. You should bring them closer to the lens.
>>TIP...don't be afraid to put lights BETWEEN coin and lens. Open the lens to your shooting aperture, and move them until you see a little darkening at the rim, then back away til the darkening is gone. Make sure they don't shine any light up toward the lens directly (ie point lights straight down). Your hotshoe lights will have the advantage here.
3) Your Nikon has a white balance "WB" button. Press it and rotate the thumbwheel til you see pre (for preset). Hold down the WB button and when the display flashes shoot a picture of your gray card or whatever you want to use to call white.
>>TIP...shoot your gray card or index card or whatever OUT OF FOCUS. You'll get a more consistent WB setting.
Edited by rmpsrpms
03/24/2015 9:47 pm
|
|
Valued Member
United States
430 Posts |
so I tried the WB reading a out of focus white card, but had trouble. So I just took a series of photos with different K numbers with silver coins and pennies. I went with what I thought was the best 3450K. Here is an example 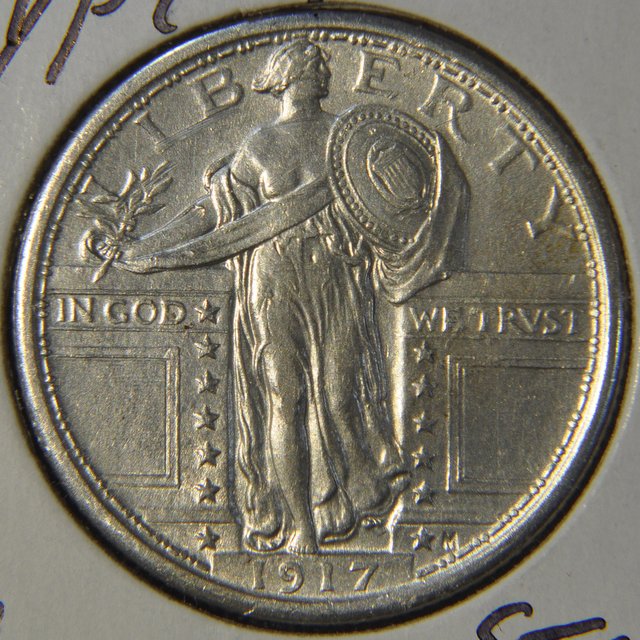 |
|
Moderator
United States
23522 Posts |
That looks close. What you're doing with that Kelvin setting is matching the Kelvin Temperature of the lighting - the same color scale as used in astronomy to describe star temperatures. This image, even if not color-perfect, is so close that adjustment in postprocessing is trivial.
|
|
Pillar of the Community
United States
4048 Posts |
Coin flips are very nearly perfectly white. The flip your coin is in reads (typically, depends on where you take it) 139,138,133 so it is pretty close to being a perfect setting. You might try just a little "cooler" at perhaps 3500-3600 or try skewing the WB a bit toward blue, maybe B1. Or just leave it alone since you are only off by -4% in Blue.
Contact me for photographic equipment or visit my home page at: http://macrocoins.com |
|
Valued Member
United States
430 Posts |
I have clicking away since you said I was close on the WB.
Rmpsrmps, what program did you use to check the whites on my coin flips?
So my reversal ring just arrived. I tried using it on my own but the results were terrible. very dark images and not as magnified as I thought. I obviously have to shoot full manual with this setup, any suggestions? I'll post the attempts if you want, but I don't thik they will help.
|
|
Moderator
United States
23522 Posts |
I don't know how Ray does it but I use this: http://instant-eyedropper.comThe reversing ring disconnected your electronic connection between lens and camera, preventing the camera from setting aperture. It has to be set at the lens now. In the absence of electronic signal some digital cameras default to aperture fully closed, and others are fully open. Makes setting the shot up a bit complex because you have to artificially reset some parameter - I use ISO - brighter to see what you're doing on the screen, and then back to snap the shot. |
|
Valued Member
United States
430 Posts |
So my 50mm lens with macro stack (1x,2x,and 4x) works great with half dollars, good with quarters, but is not close enough for smaller coins. The reversal ring while very inexpensive is very difficult to use.
So to get closer should I buy a old prime 85mm or more or go full monty and get a dedicated macro lens.
|
|
Valued Member
United States
430 Posts |
|
|
Moderator
United States
23522 Posts |
Off the top of my head - understanding I lack experience with them - I can't imagine a stack like you're using being insufficient with the smallest of coins. On the contrary, I expected there to be some which you couldn't fit completely into the frame. Have you satisfied yourself that you're at the minimum possible distance from the subject to achieve focus?
If that be the case, experiment with fewer lenses in the stack. They may be limiting the minimum-possible focusing distance themselves. Try each alone, just to see if they allow you to get physically closer. Let's exhaust all possible combinations of the equipment you've got before we start spending more of your money.
Further, Ray will see this bumped the next time he's here, and will almost certainly weigh in with his broader experimental experience.
|
|
Page 2 of 2
|
Replies: 22 / Views: 4,937 |
Page 2 of 2
|







 First Page


 Posted 03/23/2015 11:30 pm