| Author |
 Replies: 19 / Views: 4,086 Replies: 19 / Views: 4,086 |
Page 2 of 2
|
|
|
|
Pillar of the Community
2087 Posts |
|
|
Valued Member
 United States
441 Posts |
Yep, saw this. Only other one on ebay I saw a seller in China. My go with a different lens that's M39 or just order the adapter and wait....  |
|
Pillar of the Community
 United States
4038 Posts |
The M39-M42 adapter you show appears to be the correct one. If it doesn't thread on, then either the adapter or the bellows has a problem with the threads.
Best way to assemble these is to thread the adapter to the lens (with the notches facing away from the lens), tighten it down, then thread the adapted lens onto the bellows.
|
|
Valued Member
United States
441 Posts |
Ray,
That's the plan. The threads on the bellows appear OK; I think it's the adapter. Regardless, need to get the right adapter for the M32.5 lens I have. I have another lens coming that should be M39 threaded and I'll get another M42-M39 adapter as well. This process is turning into a fight.....all over adapters.
|
|
Pillar of the Community
Canada
9189 Posts |
Quote:
This process is turning into a fight.....all over adapters. This is why I got Ray to assemble all parts needed for my set up. The only thing I can't get Ray to do is take the pic of the coins for me.  |
|
Pillar of the Community
United States
9395 Posts |
There's a slight chance that your M39-M42 adapter is really a M39-T2 adapter (42mm x 0.75mm threads). Your adapter looks like a typical M39-M42 adapter, though. (I suppose this is all moot, since you actually need something with 32.5mm threads inside.)
|
|
Valued Member
United States
441 Posts |
Quote:
There's a slight chance that your M39-M42 adapter is really a M39-T2 adapter (42mm x 0.75mm threads). Your adapter looks like a typical M39-M42 adapter, though. (I suppose this is all moot, since you actually need something with 32.5mm threads inside.) No, pretty sure it's the correct adapter since the inner/outer threads are 1.0 pitch, not .75. I think the threads may be off just enough to not allow it to thread properly. Gonna get another adapter along with an M39 threaded enlarger. They're cheap. |
|
Valued Member
United States
441 Posts |
Quote:
Quote:
This process is turning into a fight.....all over adapters.
This is why I got Ray to assemble all parts needed for my set up.
The only thing I can't get Ray to do is take the pic of the coins for me. Probably should have done that from the get-go. I pestered Ray alot with emails, so I felt I wore out the welcome a bit. Some of us (me) are too hard-headed to take the logical route and want to learn some things the hard way. And I am... |
|
Pillar of the Community
United States
4038 Posts |
No worries, you did not wear out your welcome at all! It's not so bad to go it on your own, just takes a bit more time since you have to solve the problems yourself. But there are many helpful folks here that can offer assistance. It's a great forum!
|
|
Valued Member
United States
441 Posts |
I was finally able to get an enlarger lens attached to the bellows setup and took the attached photo. Using a canon rebel eos 1000d. Having some issues trying to get the white balance initially correct. Have to use software to tweak a bit. Also have issues with trying to get proofs to picture correctly with out alot of noise. Seems like they're so reflective that it causes graininess when shooting with the Jansjo lights. Will I have to use axial for proofs? Thoughts from anyone on this pic and what I could do to improve on taking shots of proof and proof like coins? Thanks in advance. 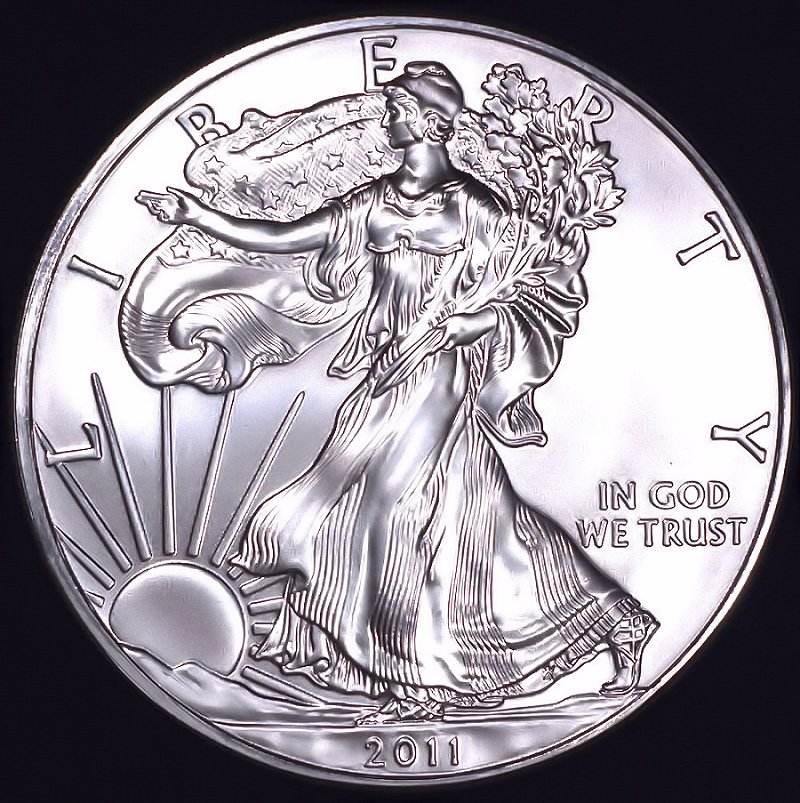 |
|
Pillar of the Community
2087 Posts |
Aesthetically it appeals to me. May be its a bit over exposed on the right hand field. What did you use for diffusion?
|
|
Valued Member
United States
441 Posts |
Diffused with a few layers of coffee filters...wierd huh? Here's the second attempt with no diffusion and quite a bit of processing. This appeals to me more than the first but I need to play with the lighting to prevent the doubling effect on the letters/numbers. Hope to improve more as time and practice goes on. I'm open to any and all advice. Thanks in advance. 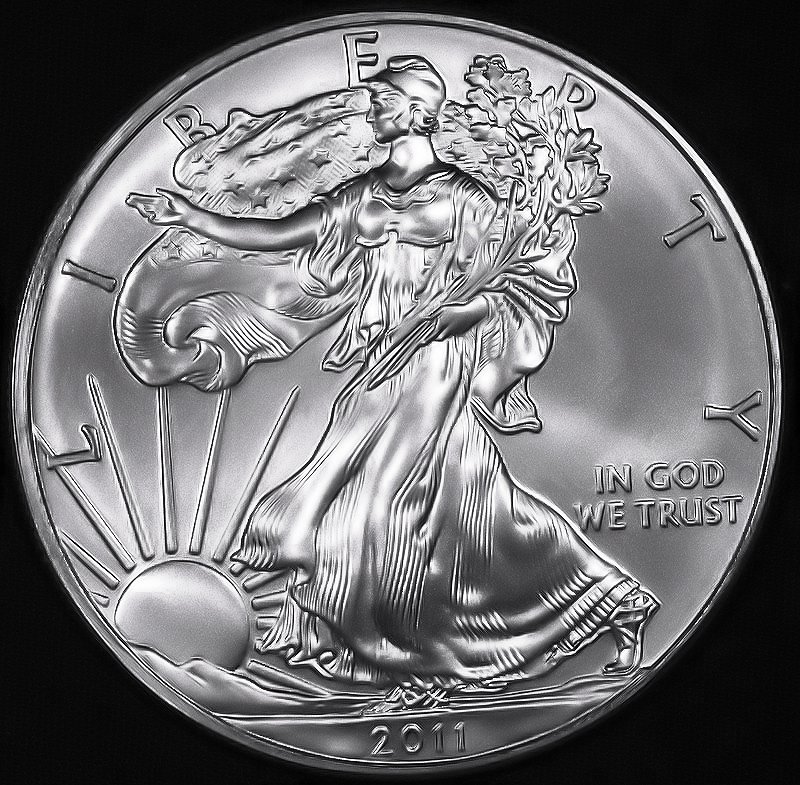 Edited by andywoj00
03/05/2016 7:44 pm
|
|
Valued Member
United States
441 Posts |
Here's a another. Any idea how to capture a darker brown vs. orangeish? What adjustments do I need to make with software. WB is correct based on the lighting I have. Thanks in advance. 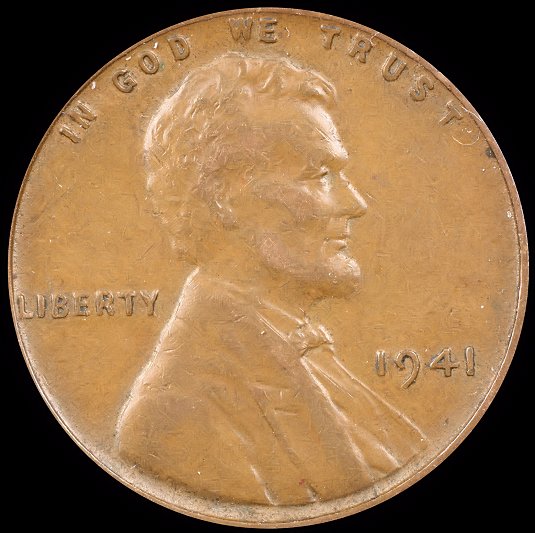 |
|
New Member
Greece
45 Posts |
What kind of software do you use? Start from your camera. What is your work color space in camera? I had the same problem. My camera used sRGB and my software Adobe, work color space. That made my coins more orange. Adobe work color space has more...colors. That is why you come out with orange. You just need to process the photo even more Now, I use Adobe in camera AND software. BUT when it comes for internet (internet uses ONLY sRGB) I change the work color space to sRGB in the end, and save both. In case you use photoshop, this link might help you http://www.photoshopessentials.com/...or-settings/ Here is a photo changed to sRGB for internet. 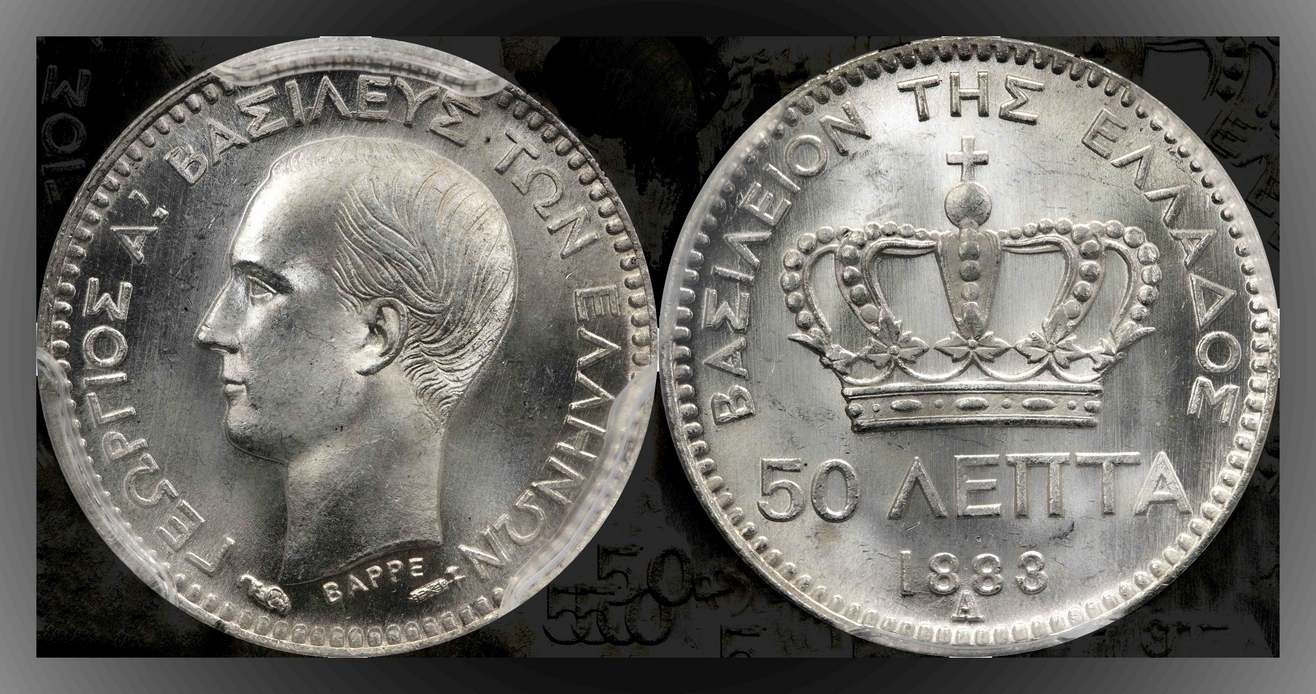 |
|
Valued Member
United States
441 Posts |
Quote:What kind of software do you use? Start from your camera. What is your work color space in camera? I had the same problem. My camera used sRGB and my software Adobe, work color space. That made my coins more orange. Adobe work color space has more...colors. That is why you come out with orange. You just need to process the photo even more Now, I use Adobe in camera AND software. BUT when it comes for internet (internet uses ONLY sRGB) I change the work color space to sRGB in the end, and save both. In case you use photoshop, this link might help you http://www.photoshopessentials.com/.or-settings/ Here is a photo changed to sRGB for internet. Nickos,
I'm using Corel Paintshop Pro X4.
I read the article at the link you posted. Very interesting.
I have two settings in the Canon 1000D I'm using, the sRGB and Adobe RGB. I can get the sRGB to work, but when I change it on the cam and in the software, the EXIFdata show the color space as "uncalibrated". Not sure what that means. Also, my pics that are converted from RAW to JPEG with the Canon software, when opening in X4, come out funky color-wise.
May just stick with the sRGB for now until I can get motivated to figure out how it all works. Also considering upgrading my software as well. No hurry, though. Thanks for the input. |
|
Page 2 of 2
|
Replies: 19 / Views: 4,086 |
Page 2 of 2
|


