With extension tubes, I always had a hard time getting sharp close-up shots. Here's an example, taken with a reversed Micro Nikkor 55mm f/2.8 lens on lots of flimsy improvised extension tubes, with the camera mounted on a tripod:
This is a scanned-in film print (taken decades ago), so you might do somewhat better with a DSLR on a rigid copy stand, etc.
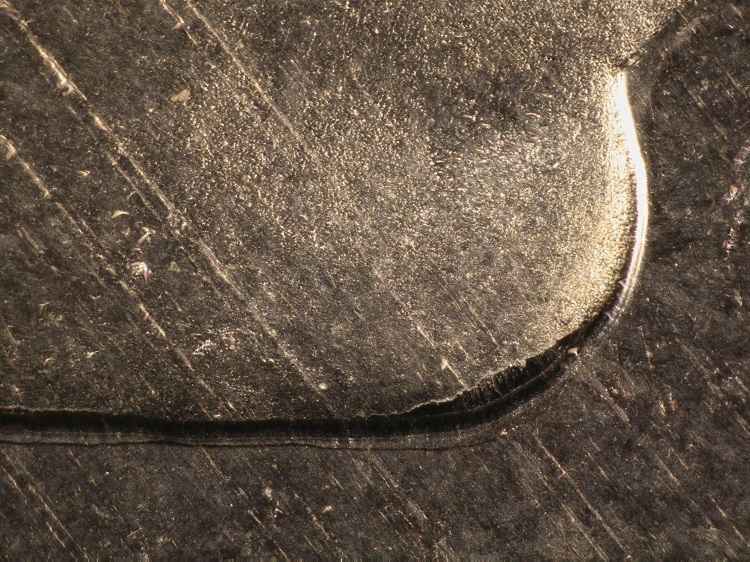
(This is an 1806 overdate half dollar.) I should probably mention that the uncropped photo covers the whole "1806" date.
That's not a bad image at all. Most folks would be perfectly happy with it, even today. It's similar to the best that can be produced by the USB "microscope" cameras. It's not sharp because the effective aperture is pretty small, so diffraction is making it blurry, yet the depth of field is good. This is the tradeoff today...if you want a sharp macro image, you must accept shallow depth of field, and solve that problem by stacking multiple photos. This was not really possible/practical in the days of film.
Contact me for photographic equipment or visit my home page at: http://macrocoins.com
Quote: It's not sharp because the effective aperture is pretty small, so diffraction is making it blurry
Another reason it's not sharp is due to focusing problems with old film SLRs. With the lens reversed and on long extension, the effective f ratio is small, so the central split-image rangefinder prism is completely blacked out, as is the surrounding ring of microprisms. This blackout starts around f/8, IIRC. The only way to focus is with the ground glass screen, which is pretty imprecise.
For coin imaging, modern DSLRs have so many advantages over the old film cameras. I wonder if anyone on this forum still uses film?
So Ray if I go with the 10x objective and the cone I will have to focus stack right. Will the camera stand that I got from you with the adjustable table work?
The Leica Z-stage is fairly precise, so you can do stacking at 10x with it. You won't be able to adjust it in precise steps, so the process will be to focus to the lowest in-focus plane and snap the shot, then move a little higher until the next features are in focus, and keep moving higher, snapping shots at each relevant point where key parts of the coin are in focus. Then use a program to render the stack.
Contact me for photographic equipment or visit my home page at: http://macrocoins.com
The table moves up or down with the side knobs, so where the table move and the support is stationary you could put some kind of marking system on each side, but what size measurement would you need,mm or some thing else.
You don't really need to make precise focus steps unless you plan to do 3D rendering. It's actually better for 2D rendering to focus on the key areas you want to be in focus in the final image. I often do 2-image or 3-image stacks where I focus on the field, on the top surface of the MM or other feature, and maybe one step in between (especially if the field is not flat). No measurements needed, just decide on the focal planes by eye.
Contact me for photographic equipment or visit my home page at: http://macrocoins.com
mcshilling I use Zerene stacker works very well for myself. here is a image of the queens chin stacked. see the doubling with shift. I will attach a link to youtube video it help me learn how to use zerene
ui35Q_BkDdw
zerene has a 30 day free trail. hope this helps
*** Edited by Staff to add YouTube tags. [youtube][/youtube] Please use them in the future. We prefer embedded video. ***
Disclaimer: While a tremendous amount of effort goes into ensuring the accuracy of the information contained in this site, Coin Community assumes no liability for errors. Copyright 2005 - 2026 Coin Community Family- all rights reserved worldwide. Use of any images or content on this website without prior written permission of Coin Community or the original lender is strictly prohibited. Contact Us | Advertise Here | Privacy Policy / Terms of Use