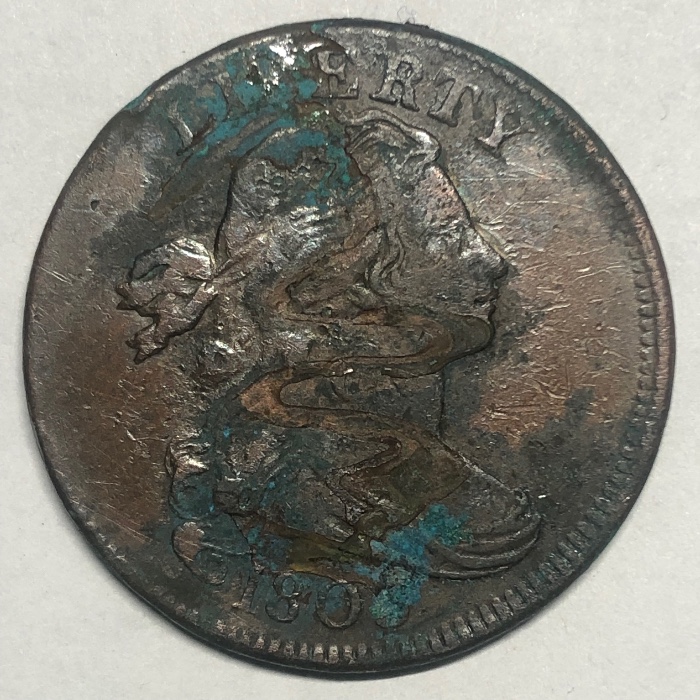
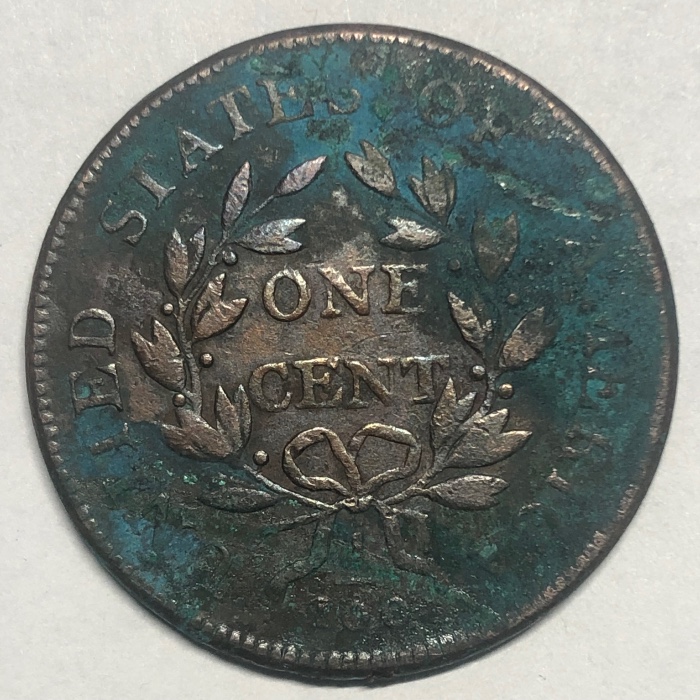
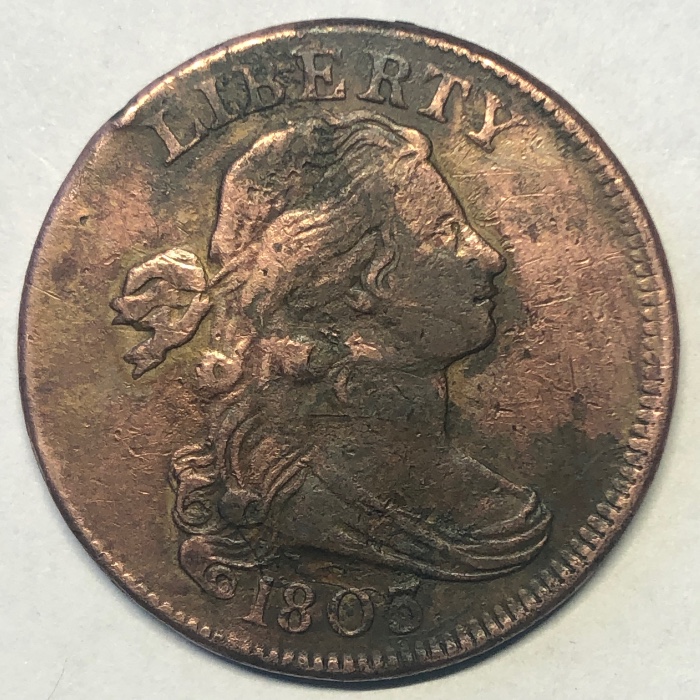
here are before and after pics of a night sitting outside. I did this because I wanted to demonstrate how reactive copper is. I also wanted to see how active out various problems are.
early on in learning to conserve coins I set about exploring how reactive parts of my home were. I put a bunch of mint red 1970s cents all over the place and watched what happened. the desk is different from the shelf in the kitchen which is different from the back porch. each can be useful and a better understanding of how copper oxidizes will help you to better store your coins long term.

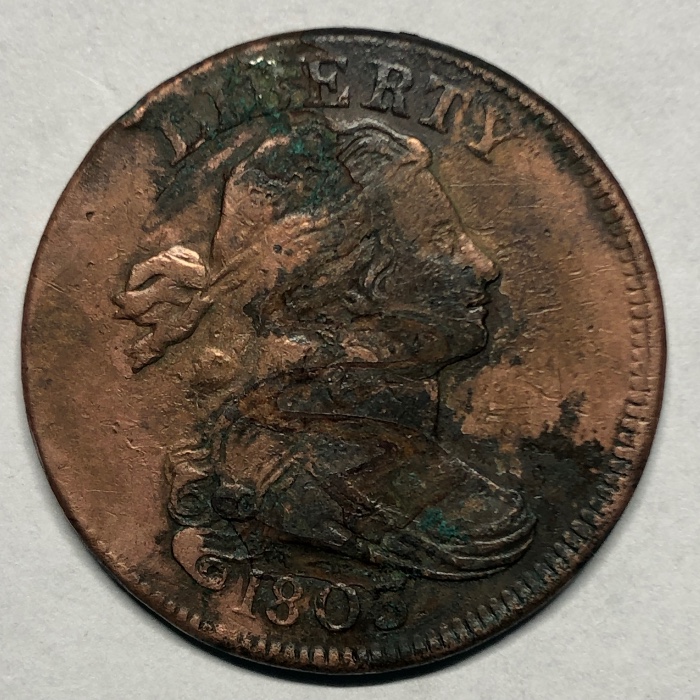
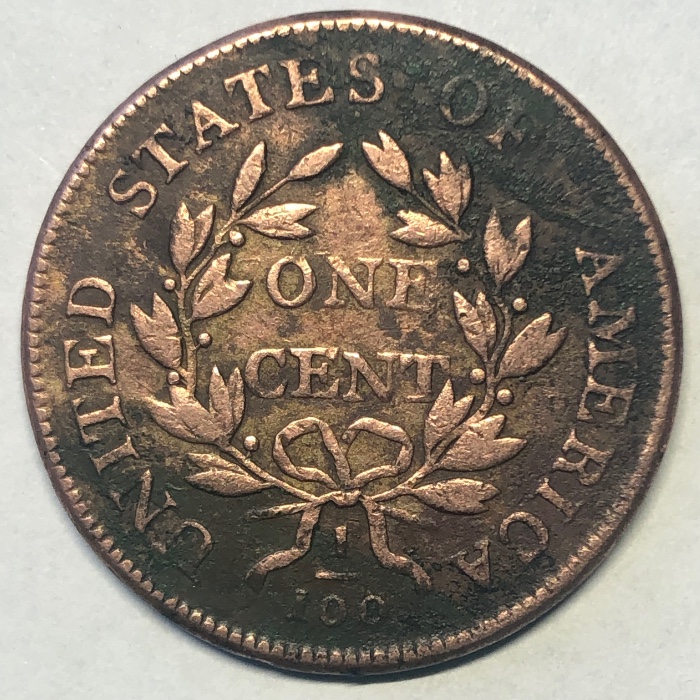
as you can see the copper is pretty raw and changes color quite rapidly. the reactions are active. you can see a bit of a greenish hue to the fields in front of libertys nose. we will need to neutralize that stuff before we are finished with this coin or the coin will revert to a problematic state.
one of the more common houshold methods of treating this stuff is sodium bicarbonate. baking soda is ideal for killing that reaction but it is also corse and abrasive. many wheat cents have been polished to a high shine by rubbing them with baking soda. we will eventually be soaking this coin in a weak sodium bicarb and water mixture. there are some other things to do first.
before I do that I want to get rid of the big chunks of debris on the surface. I'm going to pop it under the microscope and poke some of that stuff off the coin. this part requires a lot of patience and steady hands. its important to stay in the moment and only work if you can stay focused.
here are some of the tools and chemicals I have on hand.
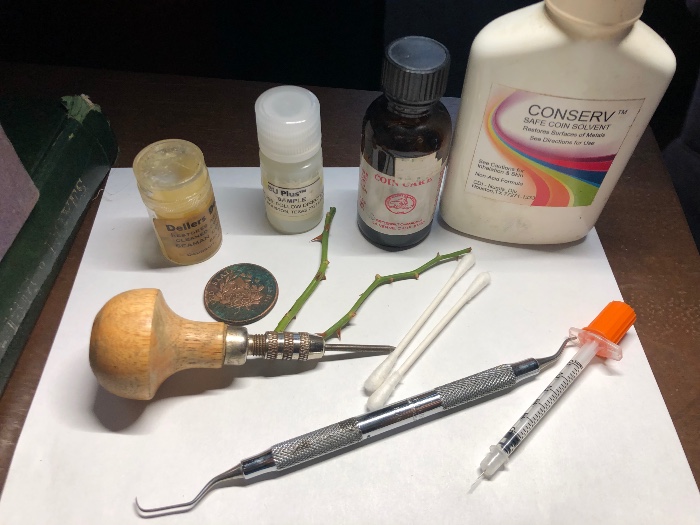
starting in the upper left corner and movong clockwise we have:
dellers darkener - for recoloring coins
bu plus - residue removal
care - a surface treatment similar to blue ribbon
conserv - a proprietary solvent mixture
hypodermic needle - great for getting into the really tiny spots like around the leaves - can scratch copper
dental tool - good for hard and large chunks. excellent grip. can scratch copper
engraving tool - comes with a variety of tips. good for large hard chunks - made specifically for moving metal and to be used with extreme caution
rose thorns - excellent for removal of all sorts of things. when fresh cut they are pliable and soft enough that they will not scratch copper. this is the place to start if you havent done manual crud removal before.
cotton swaps - good for applying chemicals. wont scratch copper on their own but can damage it by collecting pieces of debris.
the last picture is my stereo microscope. I do all of the work at 60X magnification. if it looks good at 60X its going to look great at 7x-10x (most loops) or in hand.

you'll notice that I have a bunch of the manual tools labeled as - can scratch copper - some of the things you run into are harder than copper and you need something hard to remove them. these are the tools that take the longest to master and are the most likely to ruin your coins. if this is a skill you wish to learn I highly recommend practicing on something cheap and common with a similar metal content to what you plan to work on. be confident you can address the issue without damaging the coin
before you start the project.
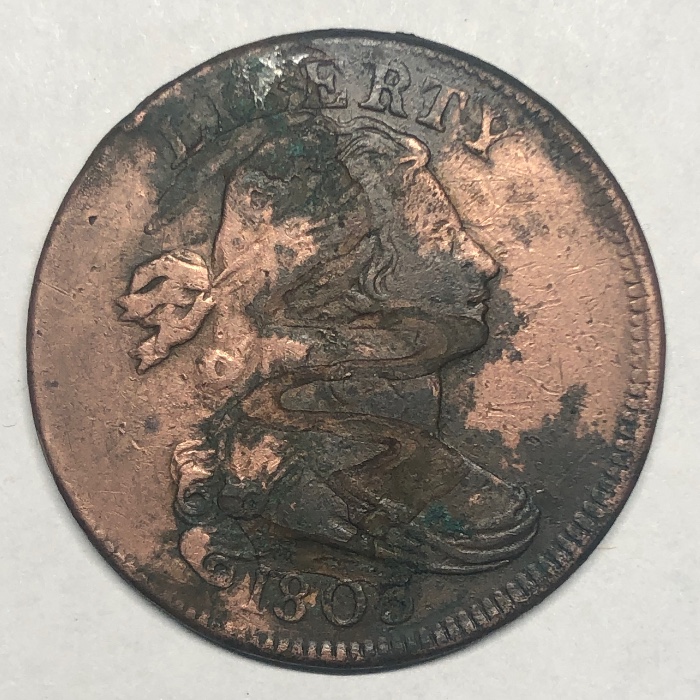
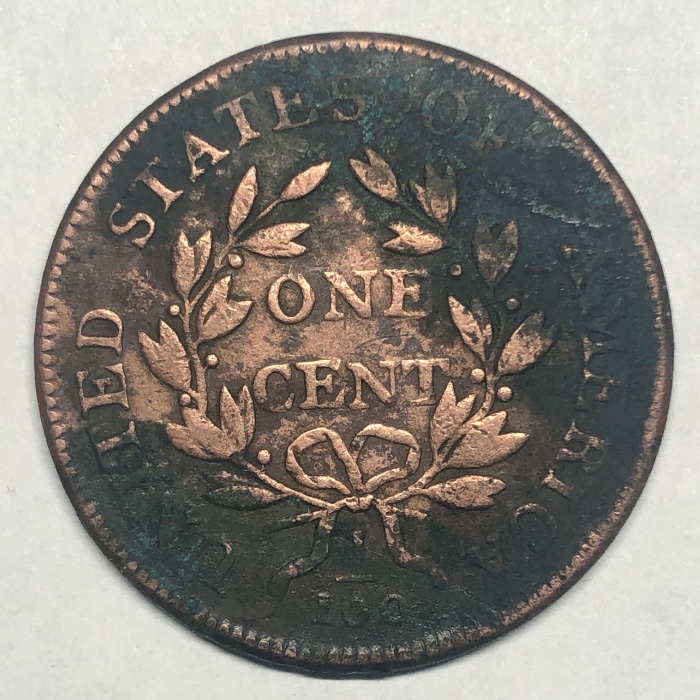
the goal is to remove the contaminants and neutralize the reactions without disturbing the original metal. if I do that correctly the coin will look better and be better preserved moving into the future.
not really any extra time here. sill ~15 minutes. the next part is where the time starts to add up.