Coin Community Family of Web Sites Join Thousands of Coin, Bullion, & Money Collectors
Coin, Banknote and Medal Collectors's Online Mall Royal Canadian Mint products, Canadian, Polish, American, and world coins and banknotes. 300,000 items to help build your collection! Specializing in Modern Numismatics Join Thousands of Coin, Bullion, & Money Collectors Royal Estate Auctions - $1 Coin AuctionsVancouvers #1 Coin and Paper Money Dealer


Username:
Password:
Save Password
Forgot your Password?


This page may contain links that result in small commissions to keep this free site up and running.

Welcome Guest! Registering and/or logging in will remove the anchor (bottom) ads. It's Free!

Advise Needed On Pics Please

To participate in the forum you must log in or register.
First Page  Showing last 15 replies.
Author Previous TopicReplies: 22 / Views: 4,375Next Topic Page 2 of 2
Valued Member
United States
168 Posts
 Posted 01/01/2015  4:01 pm  Show Profile   Bookmark this reply Add clary1265 to your friends list
I have the camera on a tripod and I use the timer to try to keep movement down. I kinda figured the lighting would differ big time in the 2 coins. I will play around with the EC and see what I can come up with. I have from +2 through -2 so maybe something will work.
Moderator
Learn More...
United States
23522 Posts
 Posted 01/01/2015  4:39 pm  Show Profile   Bookmark this reply Add SsuperDdave to your friends list
Go +1 to start on the darker stuff.
Valued Member
United States
168 Posts
 Posted 01/01/2015  9:55 pm  Show Profile   Bookmark this reply Add clary1265 to your friends list
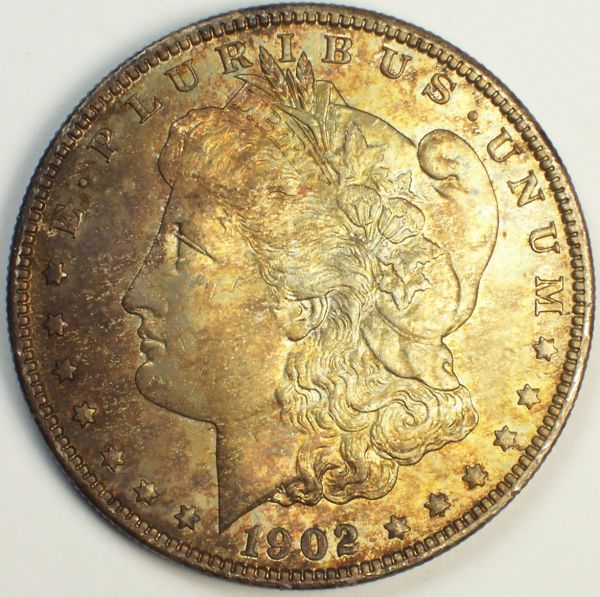
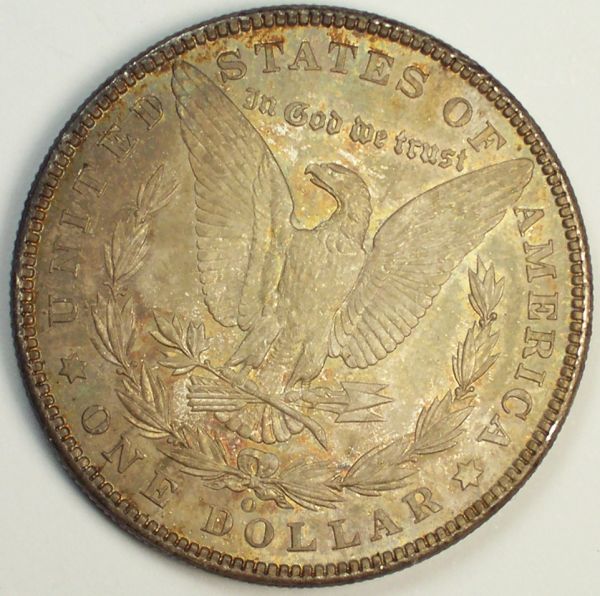
Keeping my fingers crossed. Set the EC at +1 and kept everything else the same as before. Oh, I didn't difuse lights. Didn't do any adjustments other than cropping. Still not getting the sharpness with camera alone.


Advise-Needed-On-Pics-Please

Advise-Needed-On-Pics-Please
Moderator
Learn More...
United States
23522 Posts
 Posted 01/01/2015  10:14 pm  Show Profile   Bookmark this reply Add SsuperDdave to your friends list
It still looks like all the light is coming from the right side, and I don't get that if you're using two bulbs. Otherwise you're steadily improving things, and there are no more big swings to take at problems, only little ones.
Valued Member
United States
168 Posts
 Posted 01/01/2015  10:20 pm  Show Profile   Bookmark this reply Add clary1265 to your friends list
Could the lighting look that way due to the coin being darkly toned on the left? The first pic I posted in this thread is very close to what the coin looks like in hand colorwise.
Valued Member
United States
168 Posts
 Posted 01/01/2015  10:33 pm  Show Profile   Bookmark this reply Add clary1265 to your friends list
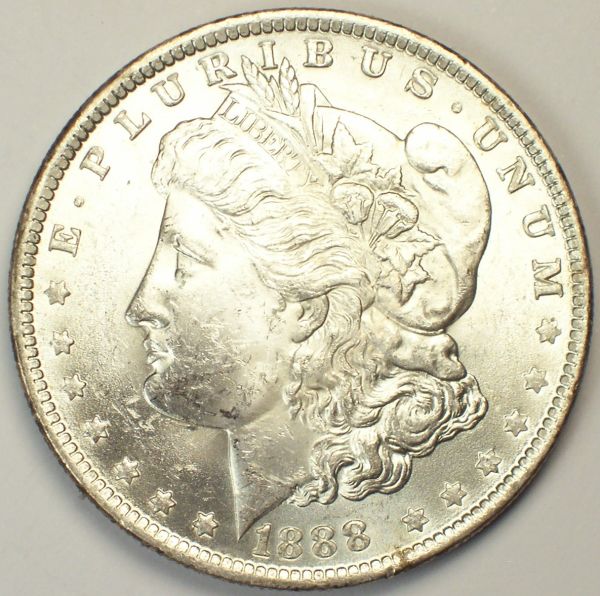
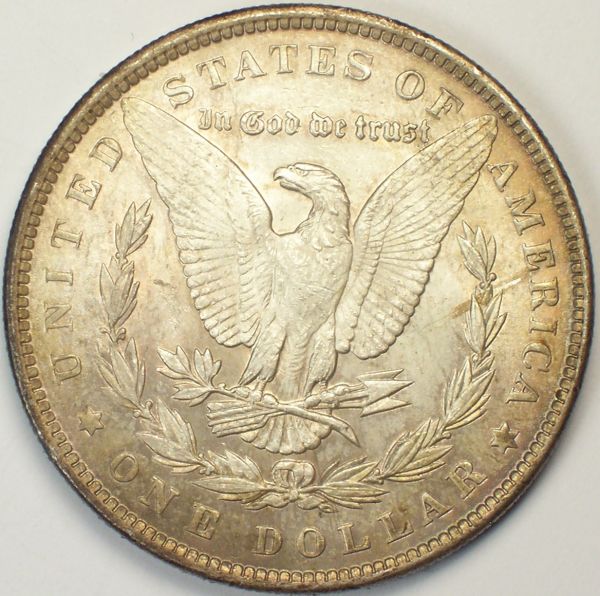
Here is the other coin with the same setup.

Advise-Needed-On-Pics-Please

Advise-Needed-On-Pics-Please
Moderator
Learn More...
United States
23522 Posts
 Posted 01/01/2015  11:18 pm  Show Profile   Bookmark this reply Add SsuperDdave to your friends list
OK, I'm buying the toning as the reason; you don't see them darker on one side like that often but it explains things.

Now. You're probably already seeing what will be your ongoing battles, same as we all face: the brighter areas wash out when the darker areas are bright enough. The light shining on the forehead side will always be worse because of the undetailed flat areas reflecting, and the reverse will usually be much easier. This tends to be true across lustrous issues. The solution is minor variances in placement and angle, and maybe a tiny bit of diffusion (one sheet of TP-ish). Too much diffusion, and you lose the luster. Too little and you wash out details.

I sometimes recommend two sets of images for grading, especially when using this type of equipment - one to show luster and one set with diffused lighting to better show detail. Use that method as an escape outlet if you can't quite tweak the lighting as you'd like. Try them identical except reduce the Exposure Comp to +0.5; these are a bit overexposed. We'll decide which set we like better for postprocessing, which will be your final learning item.

I like the sharpness, I like the contrast, the things you still see wrong won't be difficult to correct (aside the lighting), and I can't believe how far you've come in one day.

But your equipment is inexpensive and poorly suited to the task, so we need to round your skillset out with a little Gimp to keep from needing the camera for that last 5%. It's Open Source, free, and as powerful as Photoshop but you need very little of that power, just a couple of functions. Are you OK with downloading and installing it on my recommendation?
Valued Member
United States
168 Posts
 Posted 01/02/2015  09:31 am  Show Profile   Bookmark this reply Add clary1265 to your friends list
I was finally able to get Gimp downloaded this morning. Definitely a lot more to Gimp than there is in Photoscape.
Moderator
Learn More...
United States
23522 Posts
 Posted 01/02/2015  1:21 pm  Show Profile   Bookmark this reply Add SsuperDdave to your friends list
Yeah, but the functions I want to teach you are only a small part of Gimp functionality and we're going to approach it with that linearity - no need for me to overwhelm you (and everybody else reading) with a complete Care and Feeding the Gimp.

Here's all you need to be able to do with the Gimp, and why. I'm just going to outline what'll be offered here:

1) Cropping and resizing, so you have only the coin for the viewer to see and your processor to think about. A nice square no larger than the coin is the preferred way to present a coin, and all those excess pixels just unduly burden the computer when you perform later operations. So the very first thing you do with any image in postprocessing is crop to the coin. It speeds the whole rest of the process.

Sizing, on the other hand, is the last thing you will do with each image, and you'll do that on a case-by-case basis depending on where you're going to use it. There will always be one copy saved (always save as a copy; never alter the original) full size and processed. If you're lucky and getting images still larger than 800 pixels (the ideal minimum for grading-quality images), save a second set at around 800 or 1000 pixels in diameter to offer online. You can even change the "quality" of the final image to make the filesize smaller, and that step has the neat benefit of letting you then use the CCF Optimizer (the one everyone always complains about) to post grading size and quality images here.

2) Sharpening. It is my personal habit to do all sharpening that I plan on ever using with the image as the second step of processing. That way you're acting on the largest-possible image, so any downsizing you do later will only help (downsizing increases apparent sharpness; it's a cool thing). And any alteration you may later make in color or contrast might have its' effects overdone by a later sharpening step.

This is my personal workflow, and I think others might do it differently. Hopefully they'll weigh in and share.

The Gimp has a really nice, really granular Sharpening function. I feel it's a bunch smoother than Photoshop's. It's good enough, in fact, to not need to worry about learning Unsharp Mask to get truly effective sharpening. And you really don't want to play with Unsharp Mask anyway. There lies madness.

So that Sharpening is one of the reasons I'm such a big Gimp fan.

3) Color corrections. Gimp allows you to alter coloration by only affecting one "channel" of color, among six channels. That means removing the slight (or even heavy) yellow cast on your image (for instance) is trivial. This is why you haven't heard me talk about White Balance much; I know we can fix that later if necessary. You can also alter Saturation - "back off" the brightness of color - if need be, because some cameras get a little enthusiastic in their interpretation of color.

It should be mentioned that it is not a sin to do whatever the heck you want to a coin image in postprocessing in order to make the image on your monitor look closer to the coin in your hand.

3) Contrast. Getting contrast right is the goal, the Job One of producing grading-quality coin images. That's why you can pick out the details of the hair above the ear of a Morgan or the sharpness of Lincoln's beard - sufficient contrast lets those small details be seen. Gimp (like most capable postprocessing software) has a nice granular Contrast adjustment. Free contrast? Sign me up. I pretty much automatically increase Contrast by 10% with images intended to be posted online. Some folks' monitors are more washed-out or turned brighter than others, and I don't want them losing out.

4) Saving copies with Quality changes. As mentioned above. Most of the stuff I shoot ends up saved in Original, Processed Full Size, Processed Posting Size Large (about 2000px) and Small (about 1000px). Some photo hosts, and some forums, would really rather you don't throw around 2000-pixel pictures - they're not smart enough to realize that your huge pic is a small file, they just limit you because they see the pixel size even though it's the filesize they want to control.

That's it. There are other beneficial features, but nothing else vital to what you want to do.

Valued Member
United States
168 Posts
 Posted 01/02/2015  2:21 pm  Show Profile   Bookmark this reply Add clary1265 to your friends list
Ok. I'm off to try to learn Gimp. Its kicking my tail so far.

More pics to come.
Moderator
Learn More...
United States
23522 Posts
 Posted 01/03/2015  1:38 pm  Show Profile   Bookmark this reply Add SsuperDdave to your friends list
Bear with me a little bit. I just realized Gimp iterated to 2.8 from the 2.6 I've been using, so I want to install that and run it through to see any differences before I start teaching it.
Valued Member
United States
168 Posts
 Posted 01/09/2015  9:15 pm  Show Profile   Bookmark this reply Add clary1265 to your friends list
Thank You so much for all your help SsuperDdave! I will wait for advise on the Gimp 2.8. I tried working with the program and I seem to be making the pics too fake looking. I'm obviously not adjusting right at all.
Moderator
Learn More...
United States
23522 Posts
 Posted 01/10/2015  08:43 am  Show Profile   Bookmark this reply Add SsuperDdave to your friends list
I'm going to reach out to you via your registration email so you'll have mine. Send me one of your original, undoctored images and I'll use it for the demo. It may be your technique, or we may need to tweak the imaging process itself.

Doesn't matter either way. We're going to win this one.
Pillar of the Community
2087 Posts
 Posted 01/10/2015  11:48 am  Show Profile   Bookmark this reply Add austrokiwi to your friends list
I have two photo processing programmes. Adobe elements and Phase ones Capture One(8). I almost always revert back to elements for the simple reason it allows circular crops. Does Gimp have a circular crop facility?
Moderator
Learn More...
United States
23522 Posts
 Posted 01/10/2015  3:18 pm  Show Profile   Bookmark this reply Add SsuperDdave to your friends list
The Gimp is no less powerful than Photoshop - it's pro kit, just Open Source. Circular crops aren't difficult.
Page 2 of 2   Previous TopicReplies: 22 / Views: 4,375Next Topic Page 2 of 2
First Page  Showing last 15 replies.
To participate in the forum you must log in or register.


Disclaimer: While a tremendous amount of effort goes into ensuring the accuracy of the information contained in this site, Coin Community assumes no liability for errors. Copyright 2005 - 2026 Coin Community Family- all rights reserved worldwide. Use of any images or content on this website without prior written permission of Coin Community or the original lender is strictly prohibited.
Contact Us  |  Advertise Here  |  Privacy Policy / Terms of Use

Coin Community Forum © 2005 - 2026 Coin Community Forums
It took 0.34 seconds to rattle this change. Forums