Sure, Eng.
I'm using an old entry-level Canon DSLR, an EOS XS Rebel. One of these days I'll upgrade the body to one that supports live view on a laptop screen. Macro lens (Canon EFS 60mm).
I don't have a light tent, copy stand, or CloudDome so here's what I came up with on the cheap:
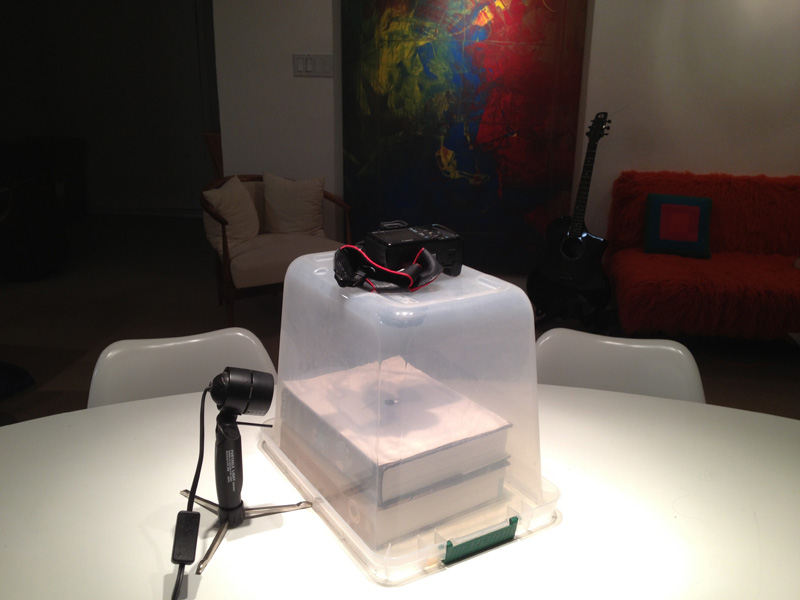
Upturned large translucent plastic storage bin with a hole cut out for the lens. This lets me support the camera somewhat steadily while shooting squarely down on the coin. I have one halogen spot. Usually shoot with a flash but also use a folded-over white dishtowel on top to reduce the harshness. Sometimes I drape the thin white towel in front of the secondary light too. I use thick books to bring the coin close so that it fills the frame.
Best pictures have been when it's daylight (it's a bright room, this picture was taken at night), but still using the accessory light and flash.
I've tried shooting on black matte paper. Until I make a fancier setup (a dowel to elevate the coin over a black background, a real copy stand, etc) I'm having the best luck shooting on white paper-- easier to turn it black.
YOC-- I used to use the paint bucket but too often the coin edges were such that doing so make the ednges jagged and indistinct. If your coin picture has any bright reflections near the edge it will find those and turn those parts of your coin black. Fiddling with the sensitivity was annoying.
So now, although it is a PITA, I just use the paintbrush. I've got it down to a pretty quick routine and have one piece of advice that really makes the difference (highlighted in blue)
It's hard to keep a steady hand while tracing on the touchpad. Set your brush to something large-- very large, and
make the brush edge softer (I set my slider to a hardness of 80). I'm shooting maximum resolution, not sure of the file size and that will affect your brush size choice. But FWIW, I first use a brush that is ~250 pixels in diameter to roughly get rid of the white, then change it to 85 pixels to carefully paint around the coin edge.
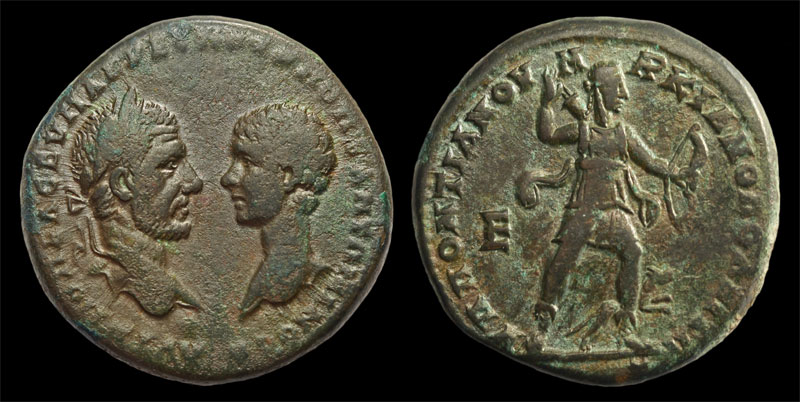
Here are the steps I take. I've done it so many times that it now only takes ~10-15 minutes max start to finish.
-crop the obverse and reverse to square
-large brush, paint quickly over the white, leaving just a little white around the coin
-change to smaller brush, paint carefully around each coin
-resize the canvas on the obverse, keeping the coin to the left side
-drag the reverse onto the obverse
-final touchups
-save as .psd
-resize to 800 pixels wide and use the "Save For Web" function so that I can easily see the file size (keeping it under 100k for CCF)
Taking good pictures is always a work in progress and I'm rarely completely happy with them. Lately I've been having trouble with focus.






 Posted 11/11/2013 1:52 pm





