| Author |
 Replies: 182 / Views: 49,045 Replies: 182 / Views: 49,045 |
|
|
|
Pillar of the Community
United States
3546 Posts |
Congrats on 4k CB  mdpmedia |
|
Pillar of the Community
Canada
4944 Posts |
|
|
Pillar of the Community
 United States
2815 Posts |
SD- I think I'm going to stick with the 18% gray background with this new lighting environment. Overall, I'm very satisfied with the results. Sure, my photos don't have the glossy appeal of TPG images, but they are still honest in that they portray the true colors and condition of the coin. That's all I'm after anyway. There may indeed be times when I discover something to help improve my images, and that will be great too. Out of curiosity, I'm still going to try a black background. Who knows? It might be better. I'll try to get a shot of the reverse and post it later tonight. CB- Congrats on 4000! Edited by Darth Morgan
03/11/2014 6:48 pm
|
|
Pillar of the Community
Canada
4944 Posts |
Quote:Overall, I'm very satisfied with the results. Sure, my photos don't have the glossy appeal of TPG images, but they are still honest in that they portray the true colors and condition of the coin. For smartphone images, they are great. The quality you're showing in these are better then most of the coin images on ebay. Quote:
CB- Congrats on 4000! Thanks  |
|
Pillar of the Community
United States
2815 Posts |
I re-shot my 1879 Morgan because I wasn't satisfied at all with the first photos I took. I thought this would be a good example for comparison as well. I'm not trying to  , but I just want to add as much experimentation tips as I can for future readers of this topic. Here it is when I shot it using a white background:  And here it is after using the 18% gray background. I adjusted the positions of the Jansjo lamps as well:  close-up:   I liked the results of this setup so much that I took a photo of the lamp positions for future reference:   Having a lot of fun learning about this aspect of the hobby. Edited by Darth Morgan
03/13/2014 01:24 am
|
|
Pillar of the Community
Canada
4944 Posts |
Looking Good Darth, I think think the pictures could use a touch of post processing. I adjusted the yellow and red channels, to hopefully show a more accurate colour.   |
|
Pillar of the Community
United States
2815 Posts |
Looks great CB. The only thing I did was sharpen and adjust the tone. It looks better after the adjustment you did. I don't usually mess with the "channels". Can you explain how you do this?
|
|
Pillar of the Community
United States
2815 Posts |
I re-shot the obverse of my 1881-S. I REALLY like how it turned out and how WHITE it looks! I got this coin from paleoguy45, and it is indeed a beautiful specimen!  Edited by Darth Morgan
03/13/2014 1:04 pm
|
|
Pillar of the Community
Canada
4944 Posts |
Quote:
Looks great CB. The only thing I did was sharpen and adjust the tone. It looks better after the adjustment you did. I don't usually mess with the "channels". Can you explain how you do this? Sure. I use a free program called GIMP. If you download GIMP, this is how you would adjust the channels. 1. Open your image 2. Go to the "Colors" menu, and select "Hue-Saturation" 3. Adjust the Yellow ( Y) and Red ( R) Saturation Channels. You can set it to what looks most accurate. For the images posted above, both were reduced by 50%.   |
|
Pillar of the Community
United States
2815 Posts |
CB- I use photoshop CS5, but I figured out how to do it. Thanks for the tip. I just assume that "everyone" uses photoshop.  I shot the reverse of my 1881-S. I think it matches pretty close to the obverse, but it was much more difficult to get a matching image of the reverse. The mirror-like fields were a challenge. The lighting isn't as even as I would like it to be. I was tired, so I gave up.  Overall, though, I'm satisfied.  And a comparison:  Edited by Darth Morgan
03/16/2014 3:11 pm
|
|
Pillar of the Community
United States
3546 Posts |
Quote:
Also, it is much easier to get pictures off the phone, compared to a memory card in an actual camera.
I just email the pictures to myself from my phone (iPhone 4S)
Just for the record in an attempt to avoid confusion I manually inserted '(iPhone 4S)' to the above quote since this comment originally referenced an iPhone 4s. I personally always search out ways to save time and money when doing large batches of iPhone 4S-generated photos whether they are coins or miscellaneous widgets. For those folks who are unaware of alternative transfer methods (non-USB cord-based re-locations) for moving the photos from the iPhone 4S to a PC laptop for subsequent GIMP manipulation, I have a few to consider. I personally do not prefer emailing my iPhone 4S-taken photos over to my Inspiron laptop since this requires more manual steps and is not done automatically. |
|
Pillar of the Community
United States
3546 Posts |
The following method streamlines the process a bit: Going on the assumption that one's PC already has iCloud installed on it, photos taken by the iPhone 4S, for example, will AUTOMATICALLY appear in about five (5) minutes after they are taken within the iCloud Photos folder under Favorites. In my case the transfer from iPhone to PC occurs over an already-established WiFi connection in my basement: 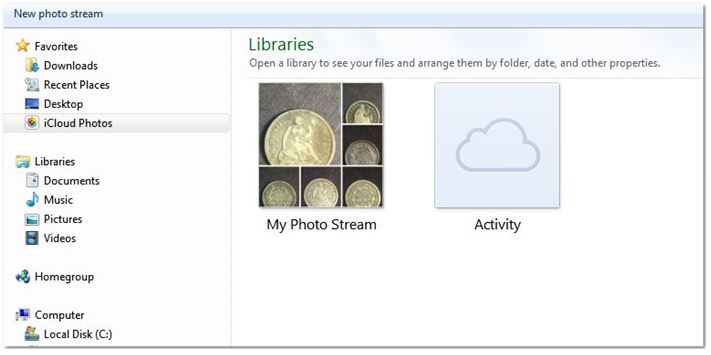 Once this feature is set up the user does not have to take the time to deal with adding attachments to multiple emails and waiting on a dismally slow upload speed(over shared technology such as residential cable or DSL) which only wastes a user's time. |
|
Pillar of the Community
United States
3546 Posts |
Remember that sending or receiving an email must always first traverse to the ISP when originating to or from any client computer.
And to enable this communication to/from one's ISP (Internet Service Provider) traditional email AND iCloud transfer mechanisms must BOTH use SMTP server settings for sending messages to the mail server and IMAP or POP3 designations for receiving messages to the individual computer client.
I mention this techy stuff only to emphasize that all of this client-server-ISP interaction usually happens over a typically severely retarded home-based upload speed (unless the connection is at a corporate environment possessing symmetrically-configured high speed up/down fiber connectivity) when transferring from an iPhone to a PC, for example.
These operations can instead be working in the background while the user continues to economize time and concentrate on iPhone focal distances and proper lighting intensities/angles for the upcoming shot: necessary maneuvers often requiring inordinate time expenditures etc.
|
|
Pillar of the Community
United States
3546 Posts |
Pardon me for the above technical digression but the next step is to simply click on the ‘My Photo Stream' file (not the ‘Activity' file) to open up the individual photos transferred over from the iPhone to the PC. iCloud has now arranged these photos spontaneously and chronologically in the order that the user took them along with the related convenient and automatically-marked date stamp to enable unconstrained cataloging:  |
|
Pillar of the Community
United States
3546 Posts |
I have exclusively set up ‘Windows Live Photo Gallery' software to open up whenever I double-click on an individual photo for subsequent rudimentary digital manipulations such as implementing a 90 degree rotation or adding a ‘Descriptive Tag'.
What's nice about the addition of a ‘Descriptive Tag' illustration to an individual photo within ‘Windows Live Photo Gallery' is that viewing a photo having a conjoined ‘Descriptive Tag' only requires that a user ‘hover' the cursor over the photo as opposed to always double-clicking and opening up the photo: another prolonged and unnecessary operation.
Using this method one can quickly identify ten photos in a group in only about 20 seconds, for instance, and then decide if a particular photo requires a ‘Snipping Tool' removal to be pasted in more-advanced program such as Gimp for a ‘Color Saturation' improvement earlier, most astutely demonstrated by Canadian-Banknotes.
|
| |
Replies: 182 / Views: 49,045 |


