| Author |
 Replies: 16 / Views: 5,640 Replies: 16 / Views: 5,640 |
Page 2 of 2
|
|
|
|
Moderator
 United States
14463 Posts |
I use a PC, so my steps many not translate.
I open freeware Picasa to edit my photographs for rotation, size, and white balance.
I then open one file with Paint. I double the work space width, then open the second file, and copy/paste to the original. I then adjust the heights to match, the adjust the size to get rid of the blank space.
|
|
Pillar of the Community
United States
4038 Posts |
I use a Windows95 version of PaintShopPro.
Contact me for photographic equipment or visit my home page at: http://macrocoins.com |
|
Valued Member
United States
383 Posts |
Photoshop elements 11 . I crop obv. and rev separately then let it try to make a panoramic automatically. When it fails I can place them side by side manually.  |
|
Valued Member
 United States
374 Posts |
How does this look? 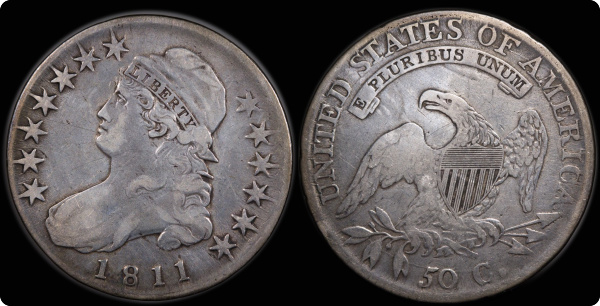 |
|
Moderator
United States
14463 Posts |
that looks very good  |
|
Valued Member
United States
374 Posts |
|
|
Pillar of the Community
United States
9792 Posts |
Looks great! I believe SsuperDdave did a tutorial here in the photography forum at CCF on this very subject. I could be wrong, but I'm pretty sure I remember seeing it not to long ago here.
"Buy the Book Before You Buy the Coin" - Aaron R. Feldman - "And read it" - Me 2013! ANA Life Member #3288 in good standing since 1981, ANS, Early American Coppers Member (EAC), Colonial Coin Collectors Club member (C4), Conder Token Collector Club member (CTCC), Civil War Token Society (CWTS) member, Liberty Seated Collectors Club (LSCC) & Numismatic Bibliomania Society member (NBS), USMex, Member in good standing, 2¢ variety collector. See my want page: http://goccf.com/t/140440 |
|
Pillar of the Community
United States
2661 Posts |
I use a freeware program called PhotoScape and it works great.Here are the major features it has.
Viewer: View photos in your folder, create a slideshow
Editor: resizing, brightness and color adjustment, white balance, backlight correction, frames, balloons, mosaic mode, adding text, drawing pictures, cropping, filters, red eye removal, blooming, paint brush, clone stamp, effect brush
Batch editor: Batch edit multiple photos
Page: Merge multiple photos on the page frame to create one final photo
Combine: Attach multiple photos vertically or horizontally to create one final photo
Animated GIF: Use multiple photos to create a final animated photo
Print: Print portrait shots, carte de visites(CDV), passport photos
Splitter: Slice a photo into several pieces
Screen Capture: Capture your screenshot and save it
Color Picker: Zoom in on images, search and pick a color
Rename: Change photo file names in batch mode
Raw Converter: Convert RAW to JPG
Paper Print: Print lined, graph, music and calendar paper
Face Search: Find similar faces on the Internet
|
|
New Member
United States
13 Posts |
Open up two files in the standard Paint that comes with every windows PC. Then change the size of the background my dragging the bottom right corner to create white space. Then paste the other image to the right. Very, very easy.
|
|
Pillar of the Community
United States
1158 Posts |
I can whip one up in Photoshop, but I use Picasa to sort my photos and it has a collage function. If you crop the coins square and make a 2:1 collage, it works beautifully and takes seconds. Just pin two photos to tray, click collage, select 2:1 ratio, and done!. You can use the white frame like I did below or not. example (not the best coin, but quick example): 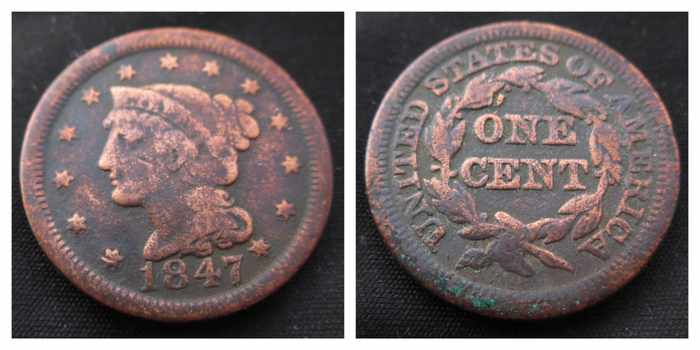 Edited by tkbslc
08/31/2014 01:32 am
|
|
Valued Member
440 Posts |
tkbsic thank you for sharing that technique. Also found a great way to do overlays in that program. Test Pic:  |
|
Valued Member
United States
234 Posts |
I use GIMP, which is basically a free version of photoshop (though I'm sure there are many differences). Here's my method:
1.) Open the obverse and reverse image files in GIMP
2.) Determine the size of the coin (in pixels) wither by cropping the picture or using one of the select tools.
3.) Create a new image with a black background, sized such that the width is 2x the coin diameter and the height is 1x the coin diameter.
4.) Using the ellipse selection tool, select the coin in the obverse pic, copy the selection, and paste it into the new black image as a new layer.
5.) Do the same with the coin reverse
6.) Move the obverse to the left, move the reverse to the right.
7.) Save your new composite image.
|
|
Valued Member
United States
374 Posts |
ALP,
That what I ended up doing and it seems to work fine. It is a bit more complicated than I thought!
|
|
Valued Member
United States
234 Posts |
It is quite a few steps, but it gets faster as you do it more and more. Plus, it makes a really nice looking image. Yours looks great!
|
|
Pillar of the Community
 United States
4592 Posts |
I use the (also free) Paint.Net. Basic flow:
Crop and size down to say 800x880.
Open the Obverse, resize the canvas to 800h 1600w
Copy the reverse 800x800 image and paste as new layer
Move the selection to the right margin
Merge down.
-----Burton 50+ year / Life / Emeritus ANA member (joined 12/1/1973) Life member: Numismatics International, CONECA Member: TNA, FtWCC, NETCC, EveryCountry (online) coin club Owned by three cats and a wife of 40+ years (joined 1983) Author: 3rd Edition of the Sample Slabs book, https://www.sampleslabs.info/ |
|
Page 2 of 2
|
Replies: 16 / Views: 5,640 |
Page 2 of 2
|


