Coin Community Family of Web Sites Join Thousands of Coin, Bullion, & Money Collectors
Join Thousands of Coin, Bullion, & Money Collectors Royal Estate Auctions - $1 Coin AuctionsSpecializing in Modern Numismatics 300,000 items to help build your collection! Vancouvers #1 Coin and Paper Money Dealer Coin, Banknote and Medal Collectors's Online Mall Royal Canadian Mint products, Canadian, Polish, American, and world coins and banknotes.


Username:
Password:
Save Password
Forgot your Password?


This page may contain links that result in small commissions to keep this free site up and running.

Welcome Guest! Registering and/or logging in will remove the anchor (bottom) ads. It's Free!

1968-D DDR1 Verify/Grade

To participate in the forum you must log in or register.
Author Previous TopicReplies: 7 / Views: 1,220Next Topic  
Valued Member
joey's Avatar
United States
282 Posts
 Posted 10/17/2014  3:52 pm Show Profile   Bookmark this topic Add joey to your friends list Get a Link to this Message Number of Subscribers
1968 D DDR1

Better example. And better pics. ?

Thoughts? Grade?

1968-D--DDR1-Verify/Grade

1968-D--DDR1-Verify/Grade

1968-D--DDR1-Verify/Grade

1968-D--DDR1-Verify/Grade

1968-D--DDR1-Verify/Grade

1968-D--DDR1-Verify/Grade
Pillar of the Community
Rackster's Avatar
United States
4809 Posts
 Posted 10/17/2014  4:58 pm  Show Profile   Bookmark this reply Add Rackster to your friends list Get a Link to this Reply
Sorry Joey - still too tough to see anything. How are you setting up your picture taking? Are you using a phone camera, scanning device, or regular digital camera? Are you taking pictures through a loupe?
Valued Member
joey's Avatar
United States
282 Posts
 Posted 10/17/2014  8:41 pm  Show Profile   Bookmark this reply Add joey to your friends list Get a Link to this Reply
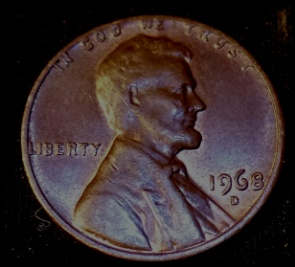
Thanks for response. Actually I finally got a new Camera. A Samsung WB350 16MP 21X ZOOM & 1080i HD.

I am using it for first time. This is my first post with. And I am going through the figure all out to zero in an get familiar with it.

Here I am going about it in a few directions. Trying to cover as many angles and exposure possibilities. In hope to make sure the devices and its attributes are able to be seen.

In this process I figured it will help me to see what works the best.

There are straight up pics edited and in this update there are a few pics through a magnifier and edited a few different ways


In united showing the "E" and its devices
Wanted to see how it came across to you. I feel what needs to be seen is there. At least well enough. Improvement to come as I go along.

Also the S on states and America details I've pointed out.

I really this goes through. As I am certain I got this one. And. Can finally move forward with the many, many more I need to get on with.

1968-D--DDR1-Verify/Grade

1968-D--DDR1-Verify/Grade

1968-D--DDR1-Verify/Grade

1968-D--DDR1-Verify/Grade

1968-D--DDR1-Verify/Grade

1968-D--DDR1-Verify/Grade

1968-D--DDR1-Verify/Grade

1968-D--DDR1-Verify/Grade
Valued Member
joey's Avatar
United States
282 Posts
 Posted 10/17/2014  8:45 pm  Show Profile   Bookmark this reply Add joey to your friends list Get a Link to this Reply
PS
Please advise me on direction to go as in lighter, darker, closer etc... And help improve pics. I don't give up!
Pillar of the Community
Rackster's Avatar
United States
4809 Posts
 Posted 10/17/2014  9:20 pm  Show Profile   Bookmark this reply Add Rackster to your friends list Get a Link to this Reply
That's the spirit Joey!

I take pictures two ways: using my iPhone with a 30X/60X jewelers magnifier or with my Nikon D3000 with Vivitar macrolenses attached to my 55mm lens. The key to a good picture when zooming in so close is keeping a very steady hand. Also, lighting-lighting-lighting. Too much: glare. To little: dark spots. Wrong angle(s): annoying shadows. There are lots of tricks you can learn from members here in the photography section (and in general comments made).

When taking shots with the iPhone and magnifier, close shots are difficult sometimes because of the lighting angle. You need to angle it so the light gets under the lenses, but not so flat an angle that you cast long shadows off the devices you are trying to take a picture of. You might take a handful of shots in succession in order to get one reasonably good picture to post here. I can spend an hour or more to get the picture I need to post here for CCF member help. But taking the picture is half the challenge of IDing a coin. So I do it with a smile...most of the time! Lighting from different sides of the coin can reduce shadowing but it can also add glare in spots you don't want. Mastery of lighting is my challenge of late. I also have an LED strip that I wrap in a circular fashion around a plastic storage container for radial lighting. I'm not overly happy with it yet, but again...it's the challenge.

Steady shots - I use an inexpensive tripod from Walmart ($14) to steady the camera. For the iPhone/magnifier, I set the shot up close to an edge of the table/desk so I can rest the phone/magnifier and my hand to take out some shaking. This is important on the kinds of close shots we are taking: any motion is multiplied several times over. Some times I will use an old card deck to stack the deck as high as I need to be to achieve a proper focal length for the shot. I might have to stack and restack a few time until I have a still and focused shot...again...it's the challenge.

Coop's tip on using a white plastic bag from the store to diffuse the light and make it softer is a good trick. It takes the direct light of a gooseneck desk light and softens it on the object coin. Be careful though as lights tend to be hot and thin plastic melts readily. Just be safe!!

Angle the subject coin to capture the 'right' light and eliminate potential for shadows. 90% of the time, I have the coin on a 45-60 degree angle with lighting directly above. I pull the coin on a stage (normally the mouse pad) towards the edge of the desk where I have the phone/magnifier pressed up against the desk to keep it and my hand steady.

So, hopefully a tip or two there to help you develop your mastery at taking macroshots of your specimens. We'll do our best to help you out!!
Valued Member
joey's Avatar
United States
282 Posts
 Posted 10/18/2014  03:01 am  Show Profile   Bookmark this reply Add joey to your friends list Get a Link to this Reply
I am defusimg like this. and use a tripod. working with total light and direction. distance and camera saettings. I wi;; take a few more through loop. and get rid of shadows.
Pillar of the Community
Rackster's Avatar
United States
4809 Posts
 Posted 10/18/2014  08:42 am  Show Profile   Bookmark this reply Add Rackster to your friends list Get a Link to this Reply
Sounds good Joey - good luck.
Bedrock of the Community
coop's Avatar
United States
62064 Posts
 Posted 10/18/2014  4:35 pm  Show Profile   Bookmark this reply Add coop to your friends list Get a Link to this Reply
Tip of the day:

If you are getting more light on one side of a coin and less on the other side, the try adjusting the coin to the light is spread evenly across the coin face. Just try to make the lighting even as possible. That way you avoid having too much light in one area and too little in another.

Still a lot of glare, so you might try more diffusing to remove the glare. Try bond paper, rice paper or tissue wrapping paper. This will cut down glare.
  Previous TopicReplies: 7 / Views: 1,220Next Topic  

To participate in the forum you must log in or register.


Disclaimer: While a tremendous amount of effort goes into ensuring the accuracy of the information contained in this site, Coin Community assumes no liability for errors. Copyright 2005 - 2026 Coin Community Family- all rights reserved worldwide. Use of any images or content on this website without prior written permission of Coin Community or the original lender is strictly prohibited.
Contact Us  |  Advertise Here  |  Privacy Policy / Terms of Use

Coin Community Forum © 2005 - 2026 Coin Community Forums
It took 0.26 seconds to rattle this change. Forums