As an FYI and in the spirit of the wonderful sharing on this forum, here is an update on my entry into coin photography. (Let me know if this would be better posted elsewhere. I'll delete and re-post if needed).
Disclaimer: I am not nor ever have been a collector. My hobby/passion is photography. I'm helping a close friend who is a world-class collector. This has become an incredibly fun and educational experience and has sharpened my skills for other macro-photography.
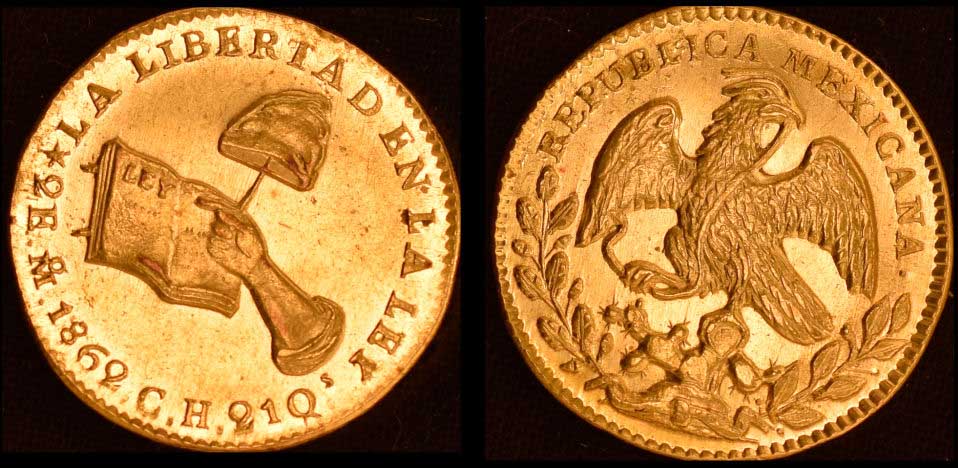
Project: photograph a coin collection - over 2000 coins from the 1800s. 200 photographed thus far.
Setup:
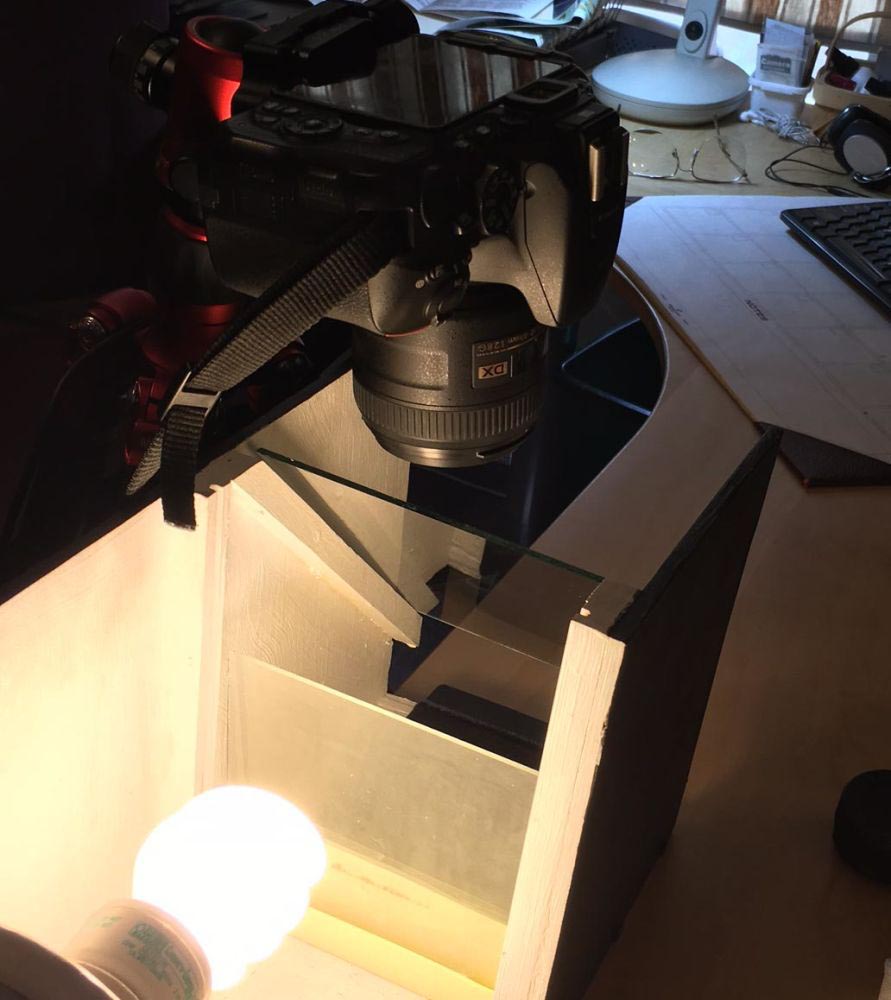
Nikon D5500
Nikor Micro 40mm 1:2.8
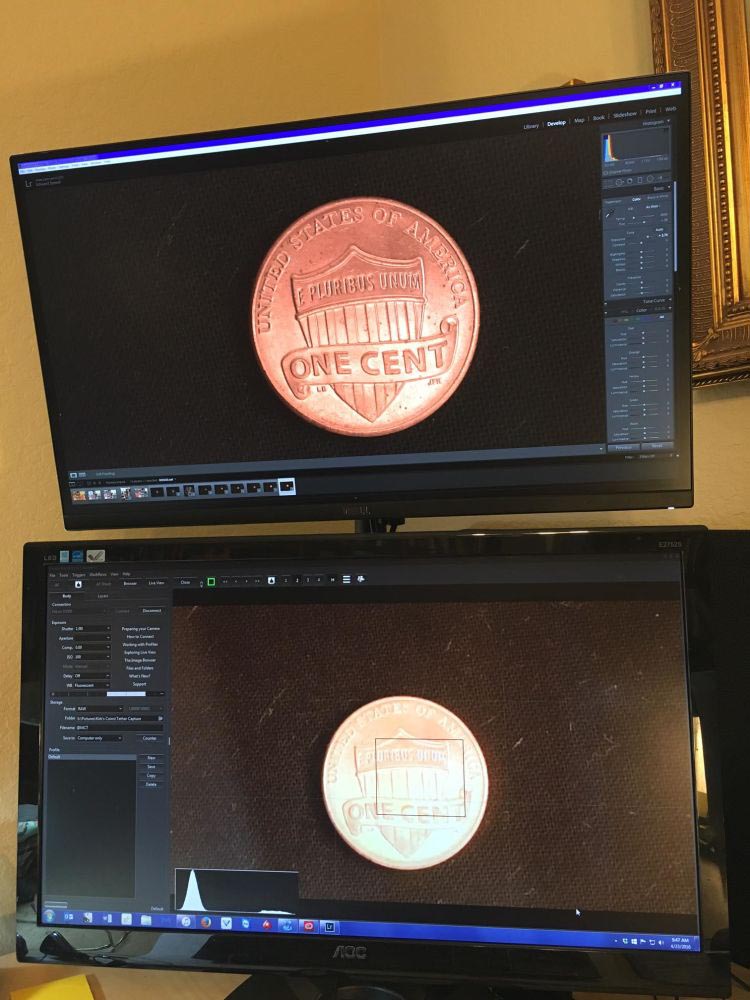
Tether Capture using ControlMyNikon 5.2
Direct Capture Into Lightroom CC
Tripod
Settings (Generally):
RAW
1/100
f/5.6
ISO 100
Lighting:
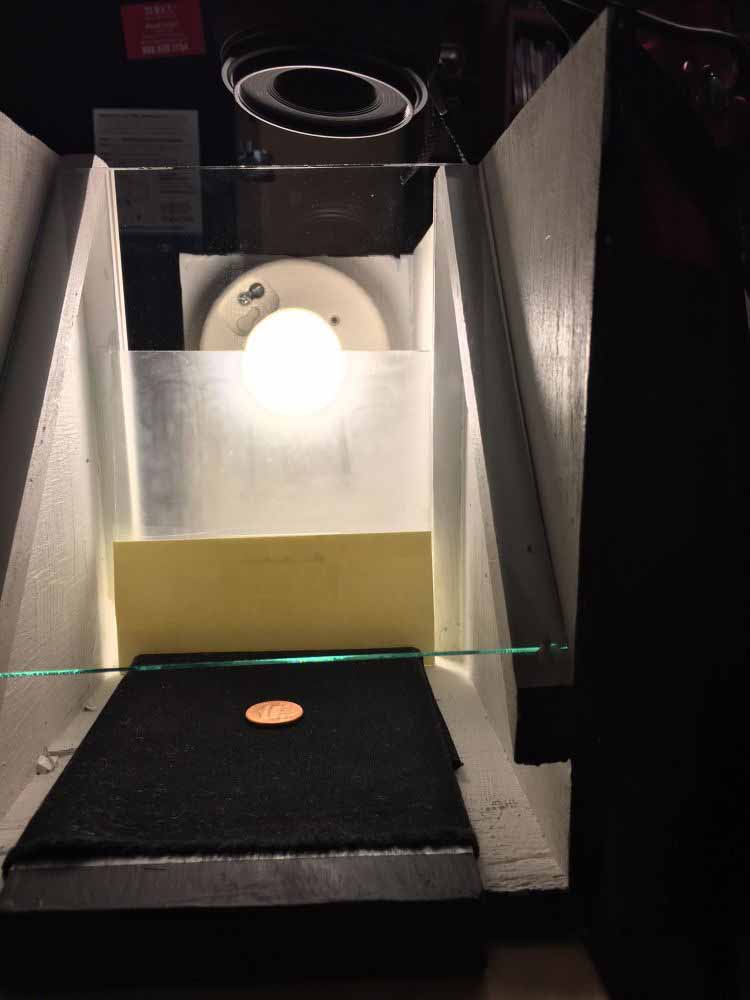
Custom light box
Axial Lighting using a glass plate at a 45 degree angle
13 Watt Florescent Bulb (we tried just about every other kind - OTT, LED, Incandescent, etc.)
Software:
Lightroom CC Subscription
ControlMyNikon 5.2
X-Rite ColorMunki Display Calibration (both monitors)
X-Rite Colorchecker Passport
Workflow:
For me the key to getting really good photos has been the custom light box and the axial lighting. The camera shoots down through the glass. The light comes from the side at 90 degrees to the camera/lens to refract off of the glass plate down to the coin surface. Thus, the camera is shooting with/through the light
I use the
ControlMyNikon software to tether capture each coin. It works with and integrates with so smoothly with Lightroom.
Each coin is placed (using cotton gloves) on the black velvet "tray." This is positioned in the light box. Because there is a grid overlay on the Live View screen of the ControlMyNikon (CMN) display, the person placing the coin can get each coin in exactly the same position every time by looking at the monitor displaying CMN. Each coin must then be turned over and captured again. When I see it is in position I click the capture button, the auto-focus engages and the captures are made. (This is much easier with two people.) White-balance and exposure are preset on CMN.
Prior to having the second monitor we had to minimize CMN and maximize Lightroom - back and forth and back and forth. We tried side-by-side windows but that was too small to see the detail we wanted to see to make sure we got the coin captured properly. With the second monitor (on top - 27" Dell U2715 Ultra Sharp LED) we can immediately see the coin in all of its beauty and detail. With seconds of clicking the button in CMN, the image appears in the top monitor in LR - and its new, proper file name. If all is good, we slip in the next coin and continue capturing.
The CMN software when in Live View has a feature that is absolutely necessary for quantity-level production and that is each capture can be given a new file name "on the fly." In our case each coin has a 4-digit inventory number. So when a coin comes up, I just type in xxxx followed by either an "O" for the Obverse (front) or "R" for the Reverse. Without this feature we would have to go back and re-label or keyword each image. Now the owner can simply search by his inventory number.
About the only post-processing we have to do is the cropping. That is fairly easy because each coin has been positioned using the Live View grid in the CMN software. Just do the first one and SYNC.
Any and all advice, feedback, suggestions or questions very much appreciated.