| Author |
 Replies: 9 / Views: 2,067 Replies: 9 / Views: 2,067 |
|
|
Valued Member
United States
441 Posts |
Per a suggestion from Ray (rmpsrpms), I tried diffusing light with Opalux at the lens vs on the Jansjo's directly. I used this setup at Ray's sight as an example: http://www.macrocoins.com/example-system-2.htmlSee pics below on a lustrous Jefferson I shot. Still getting some hotspotting. Not sure if I need to still diffuse the lights a bit, though. Could probably tweak a bit in post. The lights are about as high as I can go unless I actual put the base of the lights on something. Right now, they are actually above the camera pointing down at the Opalux. The distance that the Opalux is above the coin is 6" with the lights being another ~ 6" above the Opalux. To be honest, I don't mind a few light hotspots...appears to show off the luster. I guess it's all dependent on the coin itself. However, I'm open to any/all suggestions on how to improve. Thanks in advance. 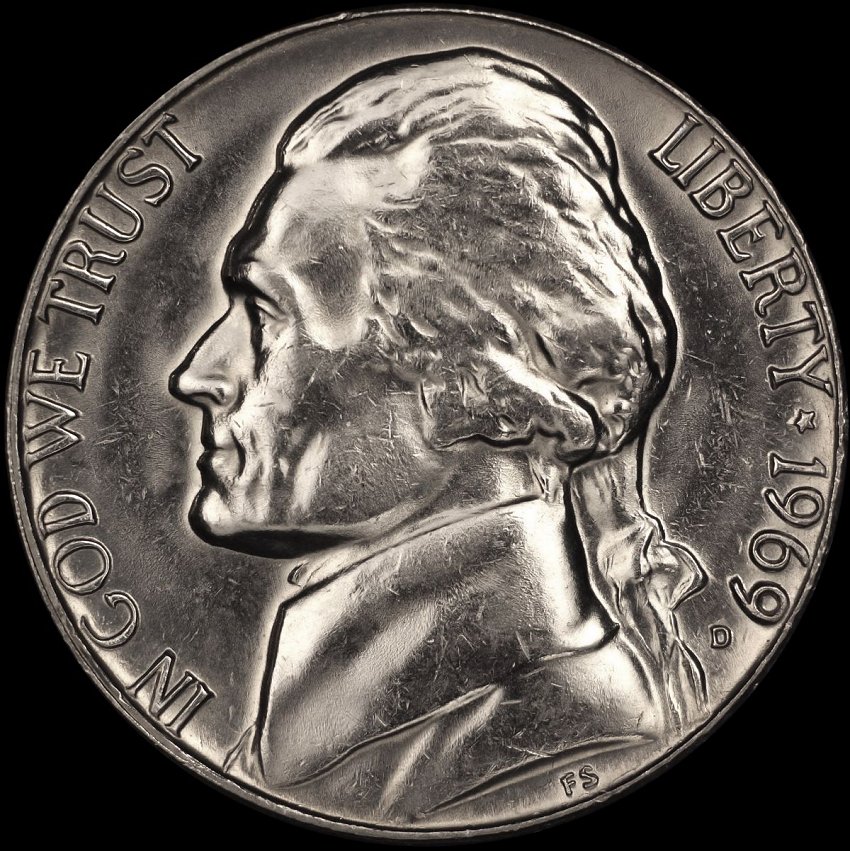 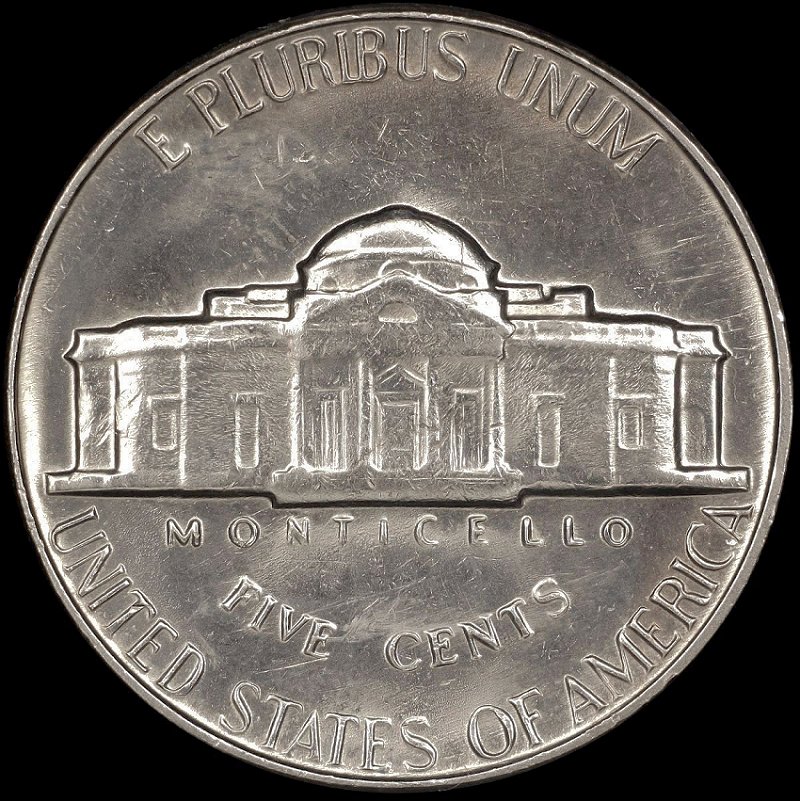 |
|
|
|
Pillar of the Community
United States
949 Posts |
Have you considered plugging the lights into a rheostat so you can vary their intensity? I am assuming LED lights, and they do not change color temperature much when you drop the voltage amperage. Any change could be WB corrected for super critical work.
Edited by lrbguy
04/21/2016 10:55 pm
|
|
Valued Member
 United States
441 Posts |
 That's a good idea. I may have to look into that..... |
|
Pillar of the Community
United States
949 Posts |
After looking into it a bit more, my first suggestion is not the easiest thing to try out. It is not easy to find devices that will let you control the flow of electricity to an outlet in a simple, basic way. You have to build it yourself.
Something to try that will cost no money and is far simpler: change the angle of incidence for the beams from the Jansjo lights. That is, see what happens as you move the beams away from shining directly at the Opalux. I expect that you will begin to lose your hotspots. If so, then you can control it by angling the Jansjo's a bit.
What I think is happening:
By placing the Opalux between the beams from the Jansjo lights and the subjects in the visual field, the diffuser becomes the effective light source. The intensity of the light will be reduced or increased depending on how much light from the Janjos hits it directly. A high intensity beam shining straight-on will create a hotspot on the Opalux, and that will carry over to the subject coin.
|
|
Valued Member
United States
441 Posts |
 Discovered this as well. Light height/angle are key. As far as dimmers go, they do make plug in rigs that'll work. I don't think I'll have to use them. Edited by andywoj00
04/22/2016 09:55 am
|
|
Pillar of the Community
 United States
4038 Posts |
Quote:
What I think is happening:
By placing the Opalux between the beams from the Jansjo lights and the subjects in the visual field, the diffuser becomes the effective light source. The intensity of the light will be reduced or increased depending on how much light from the Janjos hits it directly. A high intensity beam shining straight-on will create a hotspot on the Opalux, and that will carry over to the subject coin. This is correct. However, overall light intensity does not affect exposure directly, since the camera compensates by adjusting shutter speed. To compensate hotspots, make sure you are metering on the brightest highlights by moving the white "zoom" box in Live View over the highlight. This will force the camera metering to keep the overall area from being over-exposed. The camera will still push the brightest areas to saturation, so you will still have some hotspots even if you meter properly. This is just how the camera metering works, ie it drives maximum dynamic range and accepts some hotspots as a matter of course to achieve it, but you can force the camera to not over-expose by using the EV adjustment feature. Set EV to -1/3, -2/3, and -1EV and shoot at each level, then check to make sure there are minimal hotspots. Having a few pixels over-exposed is the goal, just not large patches of pixels. By turning down the EV, you will darken the overall image. You can minimize the impact of this by reducing the contrast. If you're trying to get a perfect picture out of camera, you'll need to adjust contrast so that the darkest shadows go to black. If you're willing to do just a little post-processing, then I suggest reducing contrast to -4, so that the dynamic range is maximized, and then do levels adjustments in post. The goal in the end is to have just the edges of the devices showing lost shadows. If you want to go through this methodically, we can work it out in this thread. Just post the pics at -1/3, -2/3, and -1EV (after putting the white box over the brightest highlights) with Picture Style Neutral, sub-settings of 0,-4,0,0. I'll do the postprocessing and let you know what changes I made so you can reproduce them. Edited by rmpsrpms
04/22/2016 11:44 am
|
|
Valued Member
United States
441 Posts |
Quote:
If you want to go through this methodically, we can work it out in this thread. Just post the pics at -1/3, -2/3, and -1EV (after putting the white box over the brightest highlights) with Picture Style Neutral, sub-settings of 0,-4,0,0. I'll do the postprocessing and let you know what changes I made so you can reproduce them. Here are the pics as requested. White box was on the upper part of Jeff's head as that was the brightest point, but not too hot. Only processing was to crop the RAW images, convert to JPG, then resize to upload here. No other post processing was done. I'm pretty satisfied with the images as they sit relevant to overall lighting, but am looking forward to what Ray can do with them to make them better with more processing.  -1/3 EV shot 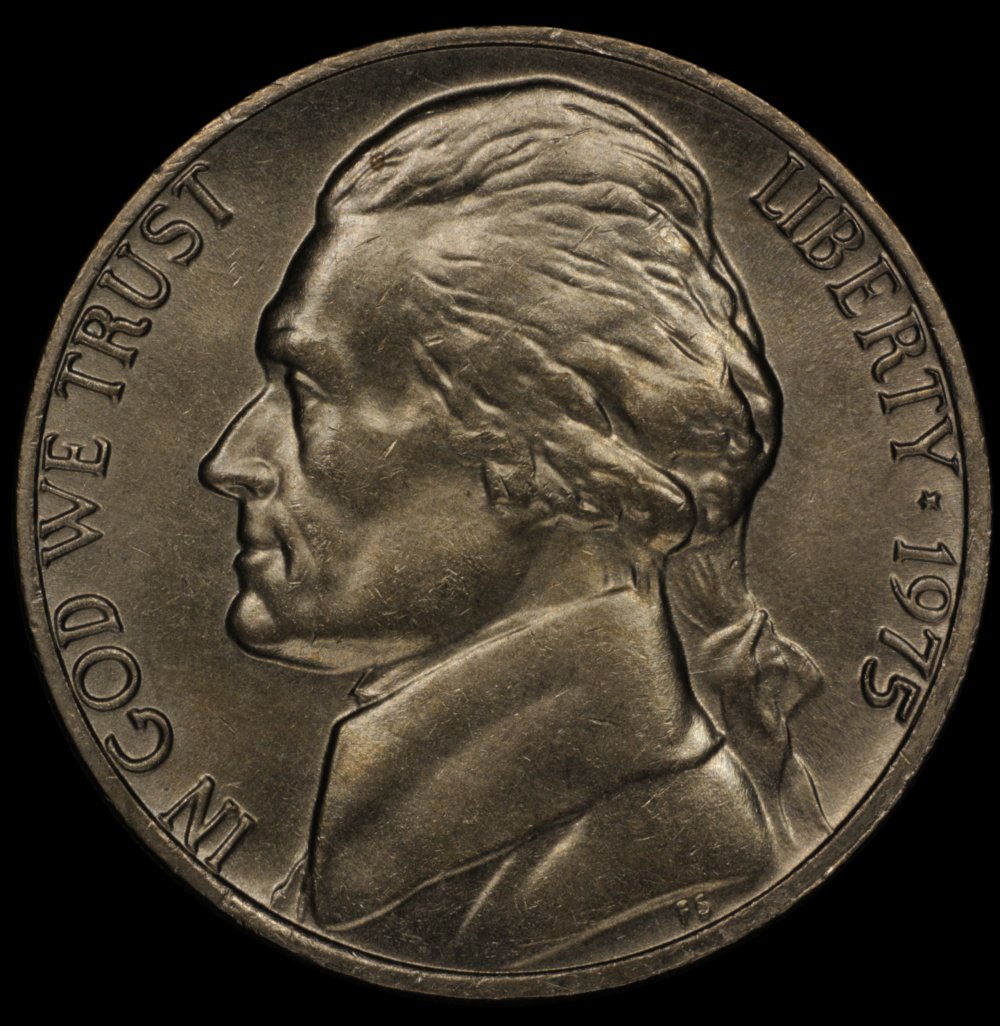 -2/3 EV shot 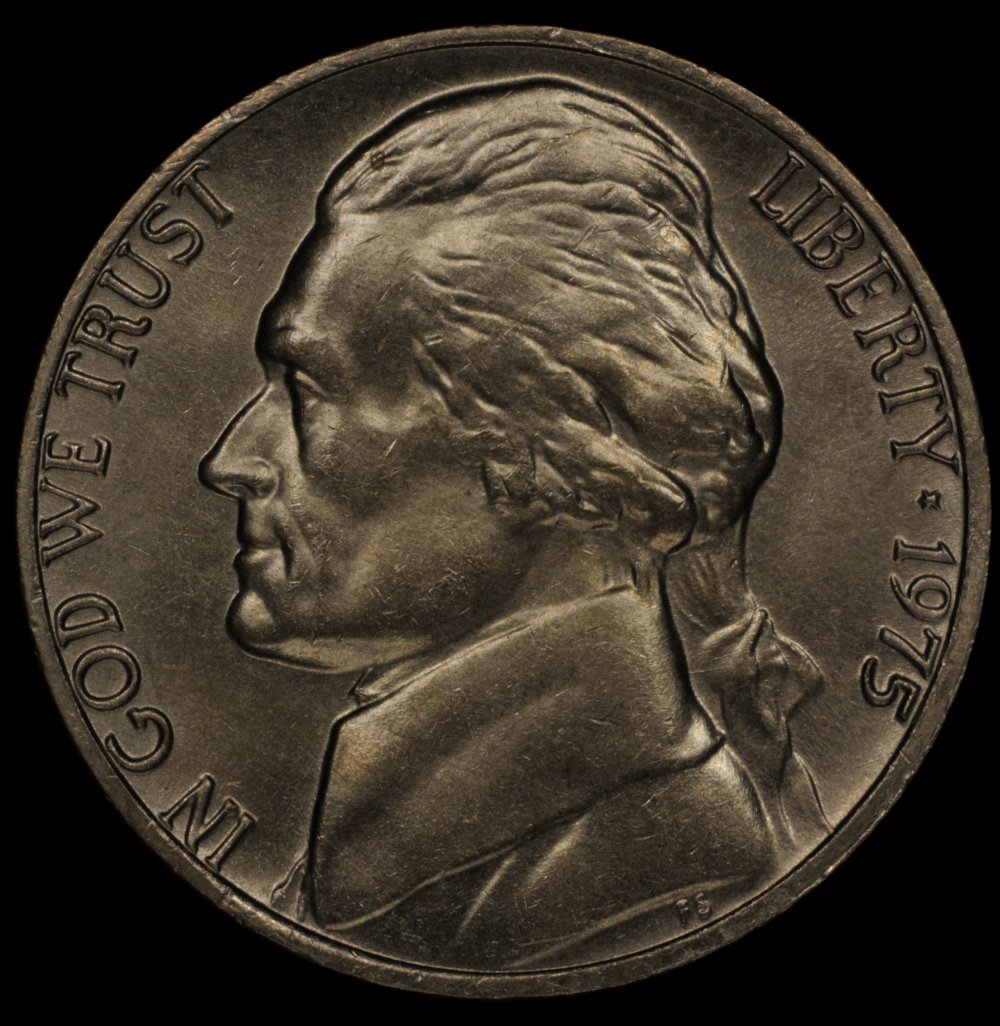 -1 EV shot 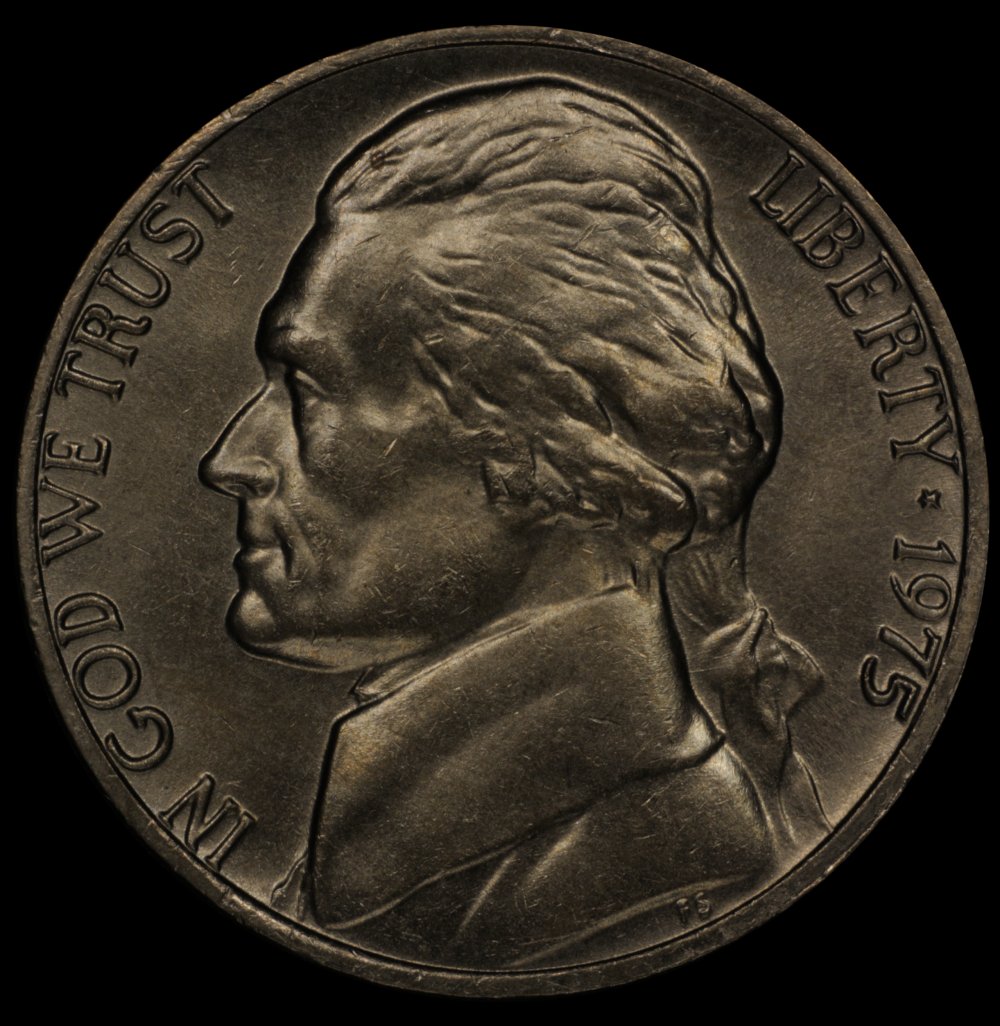 |
|
Pillar of the Community
United States
4038 Posts |
Not sure how much "better" this is but it's more technically correct. By the way, howb did you arrive at the size 1000x1026?  |
|
Valued Member
United States
441 Posts |
Ray,
That looks really good. What exactly did you change? Or what can I use to look at the numbers? DPP doesn't show anything nor does EXIF info in PSP x4.
As far as the overall size, when I re-sized it, I picked a number that would get me close to the 200k file size restriction. 1000px in the height block and let the computer assign the locked aspect ratio number in the width block. I think it resulted in a 219k pic, which would upload.
How do you do your re-sizing to upload?
|
|
Pillar of the Community
United States
4038 Posts |
Andy...DPP wouldn't show the changes since the info is not saved with the file.
I just simply used the Tone + adjust button to bring up the mid-tones, then scaled the black level to 8 to push the blacks down a bit. Also did a sharpening of 200 (may be too much, perhaps 100 would have been better) and saturation of 140 (this was a swag based on knowing how Neutral Style adjusts saturation) but you would need to adjust saturation yourself to match the look of the coin.
|
| |
Replies: 9 / Views: 2,067 |
|


