| Author |
 Replies: 103 / Views: 10,366 Replies: 103 / Views: 10,366 |
|
|
|
Moderator
 United States
23522 Posts |
Now you see why we push this stuff so hard.  I don't think you can stop the picture popup; I just leave it up the first time (minimized) and close it once at the end of the session. A twoshot of both faces at once is nice for presentation, but no good for grading. You have to halve the size of the individual coins and still probably have to host offsite for an image of any real size. For grading purposes, what you posted here is perfect. To create that in the Gimp, you'll be opening both faces in individual windows. Change the Canvas Size to double the size of one single shot you have open. You can then copy/paste the second face of the coin into that window. |
|
Pillar of the Community
 United States
717 Posts |
I think I will stick to separate photos of each face. Minimizing the first time sounds like a good solution, if it doesn't pop up again. Rookie question here, I was setting up for a dollar shot, and struggled to find the right combination of extension tubes and lens distance to fill the sensor. So a basic explanation of how adding extension affects focusing distance would be helpful. I just couldn't wrap my head around it this morning, maybe too early. Here is the results though. Any suggestions on settings or lighting would be appreciated. I am going to shoot a silver eagle next. 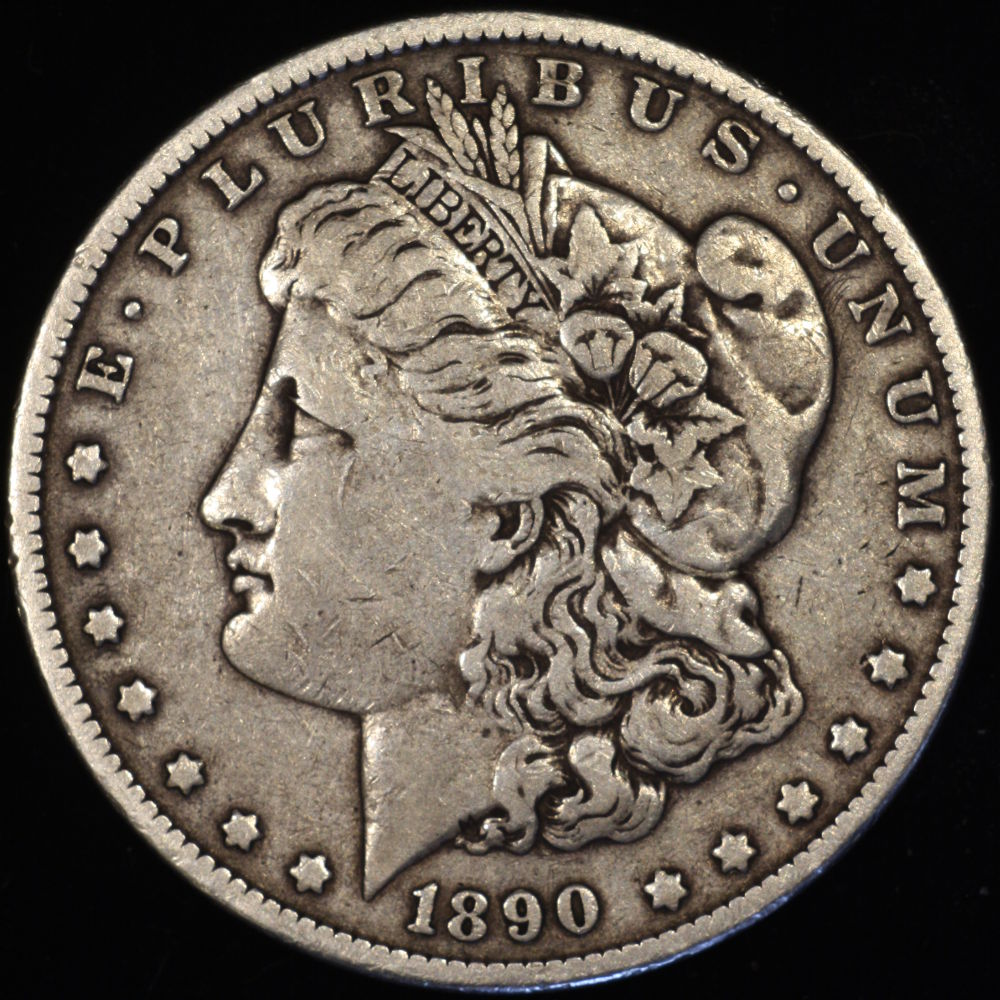 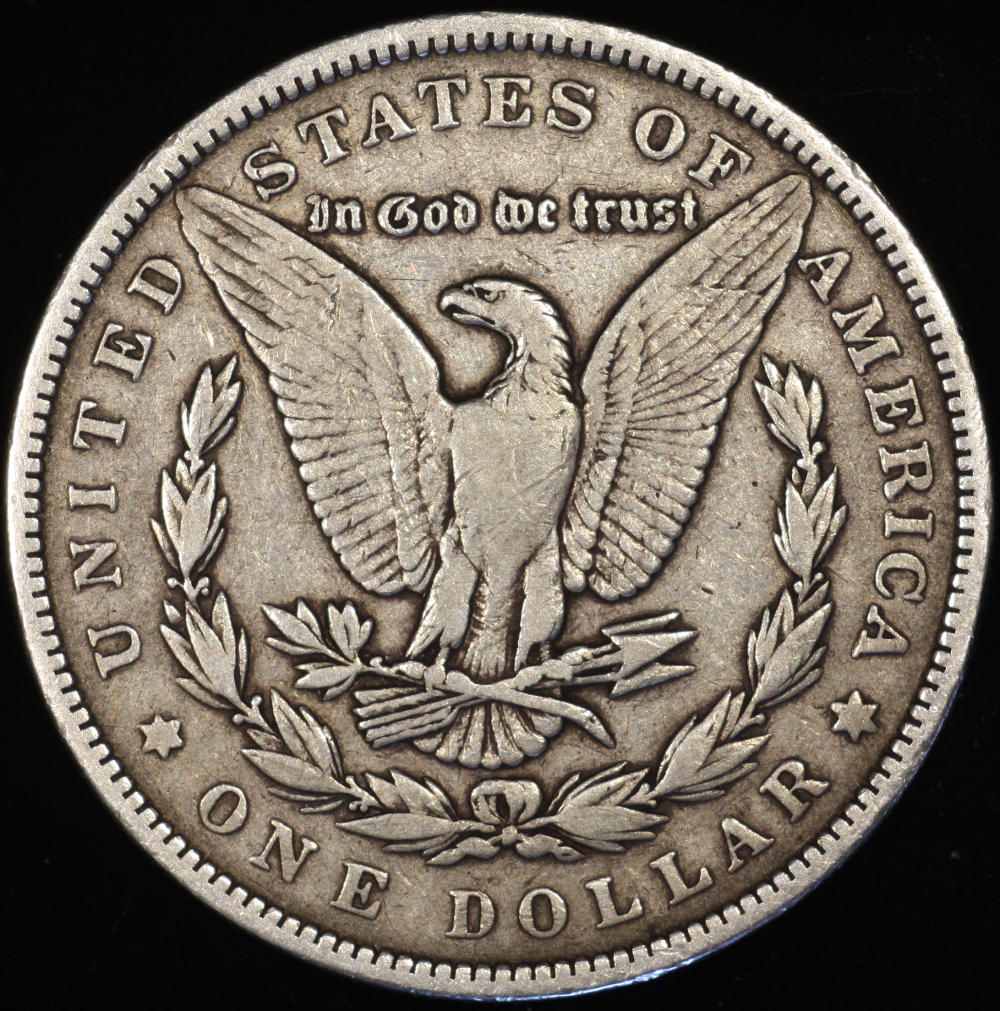 |
|
Pillar of the Community
United States
4038 Posts |
The farther you extend the lens from the camera, the higher the magnification. If the total extension equals the FL of the lens, magnification is "0", ie you focus at infinity. If the extension equals twice the FL of the lens, then magnification is 1, ie you get lifesize images on the sensor. The equation is: M = (EXT - FL)/FL. Solving this for EXT you get: EXT = FL*(M + 1). If you want to frame a Dollar, which is 38mm diameter, on a 15mm APS-C sensor, you need a magnification of 15/38=0.39. Your total extension, for a 75mm lens, would need to be 75*(0.39 + 1) = 104.25mm. Note that magnification changes rapidly in this range as extension is varied. If you are at 102mm your magnification is 0.36, while for 106mm magnification is 0.41. Mag of 0.41 will over-fill your sensor with the dollar, while 0.36 will only fill 91% of the sensor, so it's important to get this set precisely. This is where the fine focus helicoid comes in for the <$400 setup, or a bellows in other setups. IMPORTANT...total extension includes the camera "register" distance, ie distance from lens mounting plane to the sensor. For Canon this is an extra 44mm.
Working distance is sort of inverted from extension. As magnification increases, working distance decreases. For example, when M = 1, working distance equals twice the FL of the lens, which is the same as the extension. So when you're at M = 1, the lens is exactly centered between the sensor and the coin. When M = 0, by definition working distance is infinity! On the other end of the scale, WD never becomes shorter than the FL of the lens. This is not strictly true, because these distances we are calculating assume the lens is very thin, but it's generally close enough for what we're doing. If you know your magnification you can calculate the working distance: WD = FL * (1 + 1/M). So for the Dollar example, WD = 75 * (1 + 1/0.39) = 267mm or about 10.5". Again though, WD is very sensitive in this range. When M=0.36, WD is 283mm, while when M=0.41, WD is 258mm. So a couple mm of extension plus or minus makes a much bigger change in WD.
So...Magnification is proportional to extension, and working distance is inversely proportional to magnification. Longer Extension --> Higher Magnification --> Shorter Working Distance.
|
|
Pillar of the Community
United States
717 Posts |
I'm gonna read that three more times. And I am glad I have a bellows unit on order. #128516; you have mail
|
|
Pillar of the Community
United States
717 Posts |
Here are my ASE pictures, any comments on the quality, what I can do better or try, would be appreciated. The 87 was pretty reflective, and the 95 has more of a matte finish. 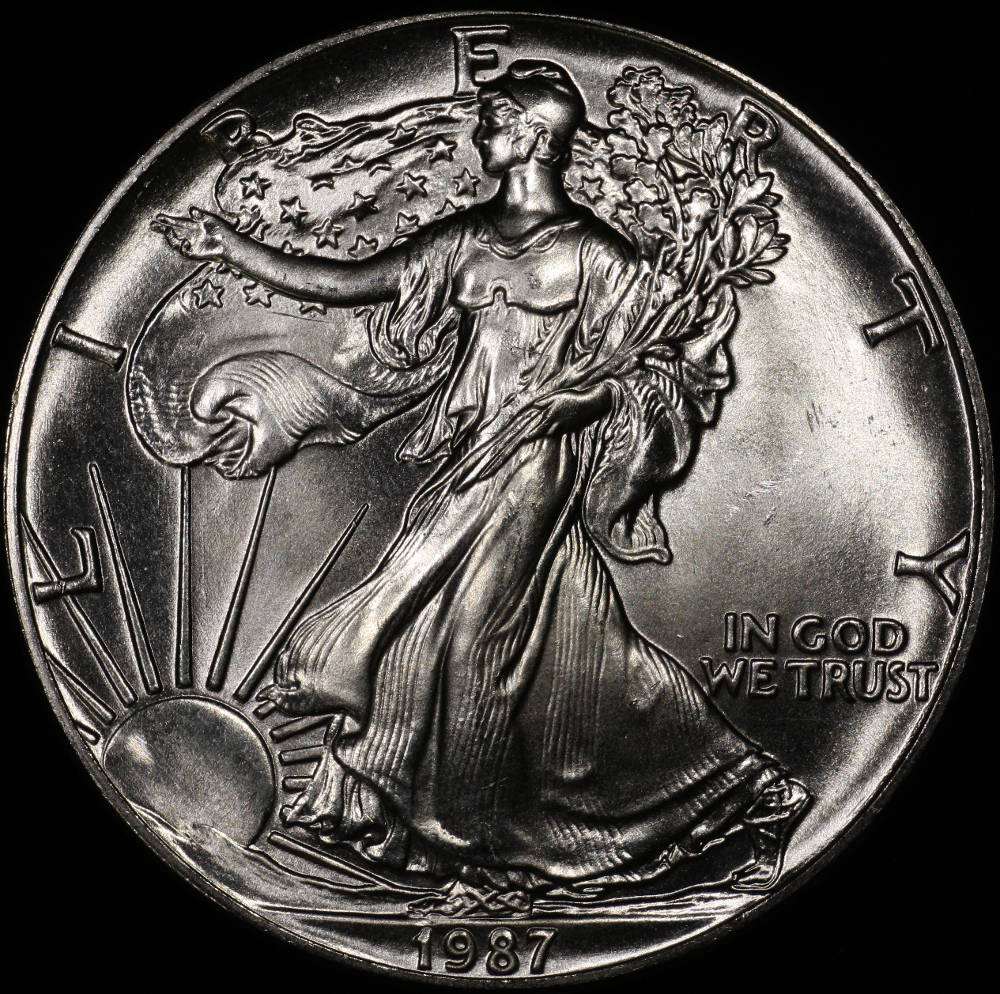 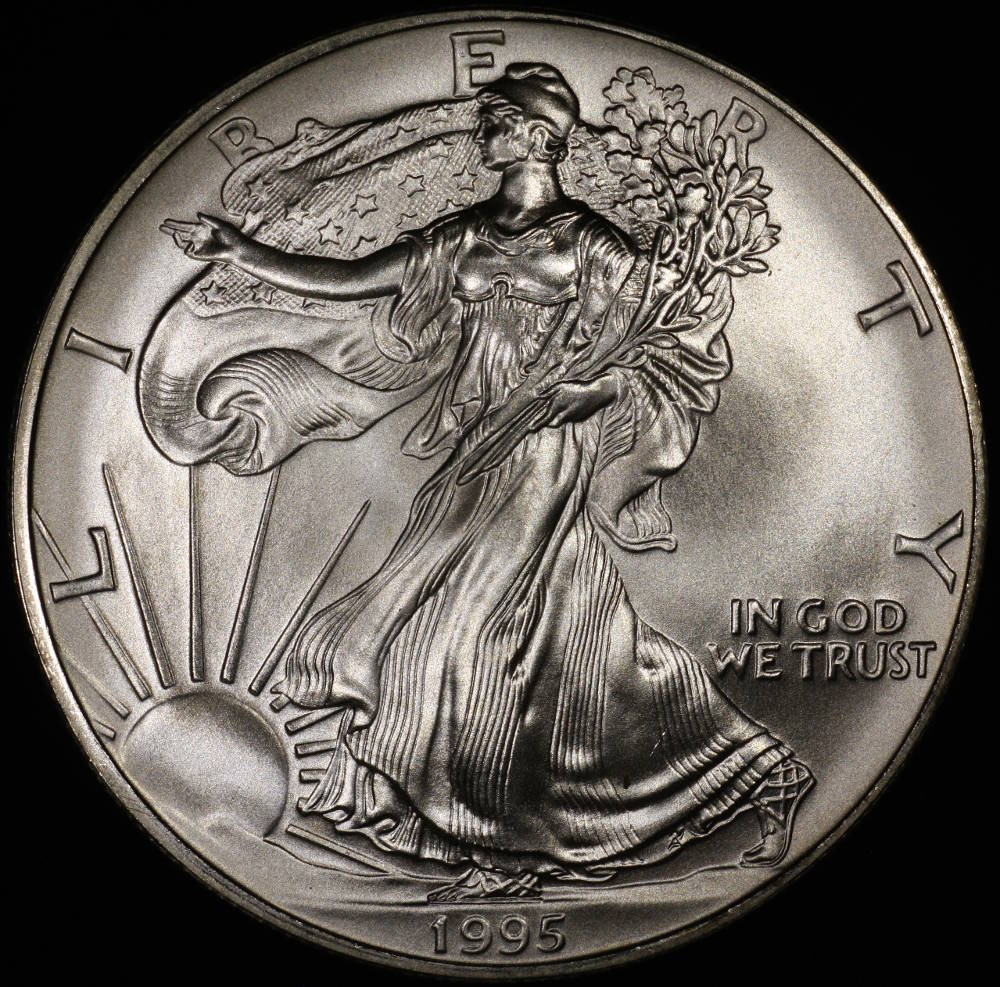 |
|
Pillar of the Community
United States
4038 Posts |
How are you lighting the coins? The images look almost axially-lit. You may be in the zone where you're just a bit too high an angle. Put a mirror where the coin is and snap a picture to show where your lights are reflecting. Too high (axial or near axial) and you get too much direct reflection, no luster, and too high contrast. That's what the '87 looks like to me. I find that pulling the lights down so they are just outside direct reflection gives the best compromise between color and luster. You will see what I mean when you put a mirror where the coin is...
edited to add: You may also try simply diffusing the lights more, if you prefer keeping them at a high angle. Diffusion spreads the light over a wider angle.
Contact me for photographic equipment or visit my home page at: http://macrocoins.comEdited by rmpsrpms
05/25/2015 12:37 am
|
|
Pillar of the Community
United States
717 Posts |
Thanks, the lights were near the lens, I will try moving them out. More of an angle to the coin, instead of directly down, correct?
|
|
Pillar of the Community
United States
4038 Posts |
Correct, and possibly closer to the coin to make them look "bigger". Try moving the lights from about 4" away from the coin up to near the lens. You will probably find you like a certain distance best. Keep the same angle vs horizontal for apples-apples comparison.
Contact me for photographic equipment or visit my home page at: http://macrocoins.com |
|
Pillar of the Community
United States
717 Posts |
I had to grab the coin and look at those scratches, didn't notice them until I took this picture. 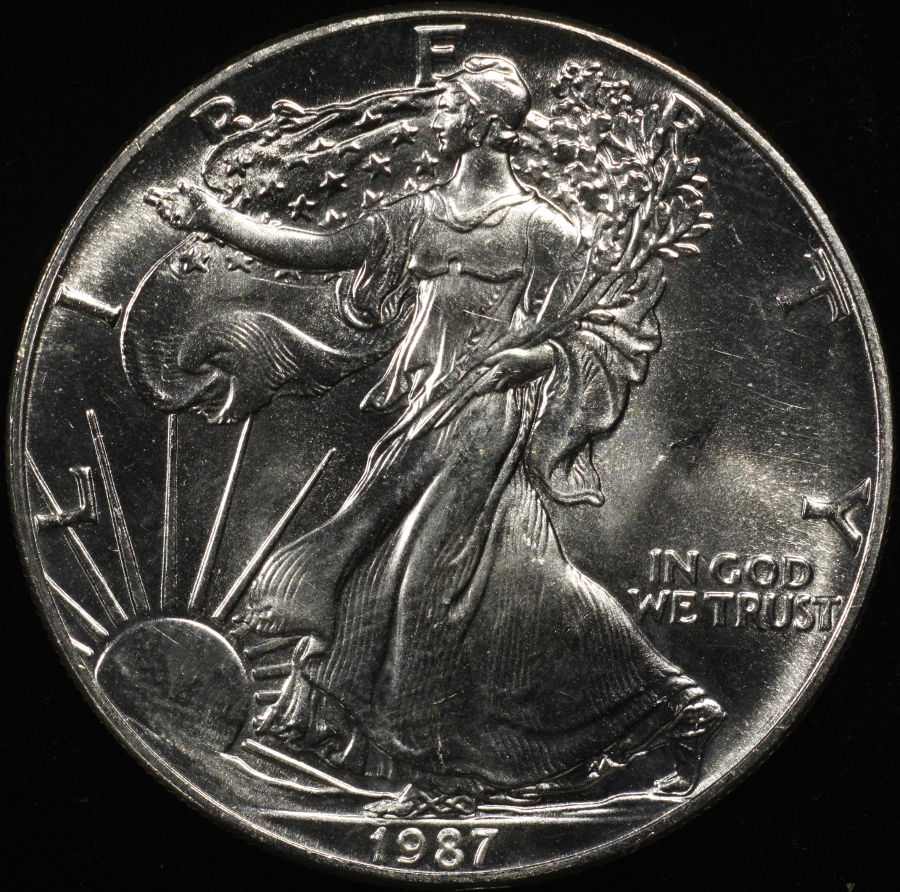 |
|
Pillar of the Community
United States
4038 Posts |
Lower-angle lighting is more revealing of surface issues.
IMO you probably went too low on the last shot but now you know the range you have to work with. The contrast is also still too high, with the highlights blown-out a bit. You probably need more diffusion, and to move the lights back up a bit toward the lens. I'd also suggest reducing the contrast a notch or two, and dropping the EV a notch or two. Shiny coins are the toughest.
Contact me for photographic equipment or visit my home page at: http://macrocoins.com |
|
Pillar of the Community
United States
717 Posts |
Yes, I think my pictures of my wheat cents (brown) look really good, so I tried the same settings on a 2013 straight out of a mint set. Not happy at all. Same hotspot problems, and the color was not representative. I am having fun learning though. Anyone have a picture of a new cent they are happy with? That would give me a goal to shoot for.
|
|
Pillar of the Community
United States
717 Posts |
A package from ray arrived today, and I am the proud owner of Santoku #2. I'm not sure what that means, but I believe Dave has the original! After some tweaking to get the lens parallel to the base, here is my first pic. This happens to be a cent that caught my eye today while at the LCS looking for UNC Franklin halves. 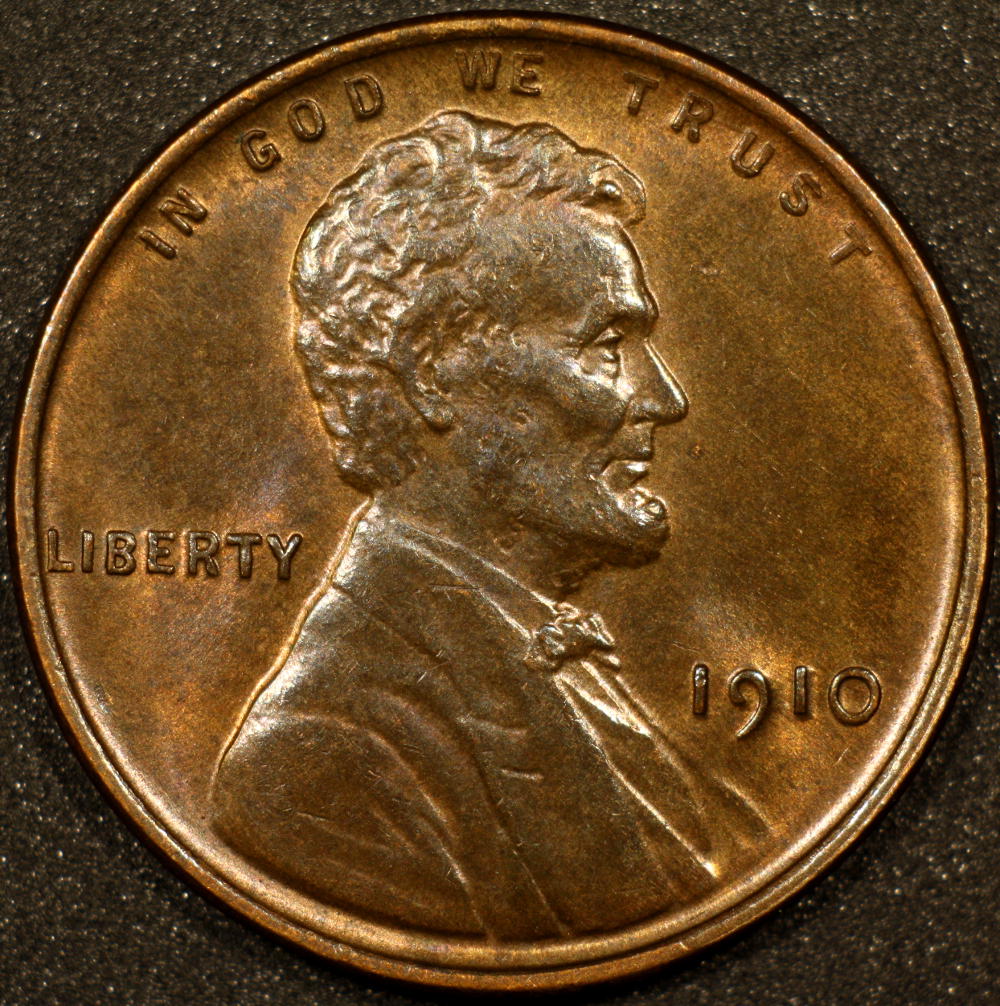 nice, huh |
|
Pillar of the Community
United States
9395 Posts |
Quote:
nice, huh It's better than any Lincoln Cent shot I've done, so far. |
|
Pillar of the Community
Canada
9163 Posts |
I think you have it Don.  |
|
Pillar of the Community
United States
4038 Posts |
Looks pretty good. I'd recommend reducing exposure by 0.5EV to eliminate the hotspot highlights.
And also...rotate the coin a little CCW to make LIBERTY horizontal...Ray
|
| |
Replies: 103 / Views: 10,366 |


