|
This page may contain links that result in small commissions to keep this free site up and running.

Welcome Guest! Registering and/or logging in will remove the anchor (bottom) ads. It's Free!
To participate in the forum you must log in or register. | Author |
 Replies: 12 / Views: 3,744 Replies: 12 / Views: 3,744 |
|
|
Pillar of the Community

United States
4038 Posts |
I decided to explore the "pseudo-axial" lighting concept a bit more and see if I can get a superior image from it. I had to make a new arrangement for the setup, and ended up with an interesting mix of factors I am finding useful... I put a small mirror on the microscope stand base, and then put the reversible stage plate on top of the mirror. The mirror is useful for calibrating flatness when doing flat imaging. For angled imaging I hinged the mirror by taping it down to the stand on one edge. For the comparisons, let's start with a sort of reference photo, single light, un-diffused, at 12:00, 90mm above the coin, 80-deg from horizontal: 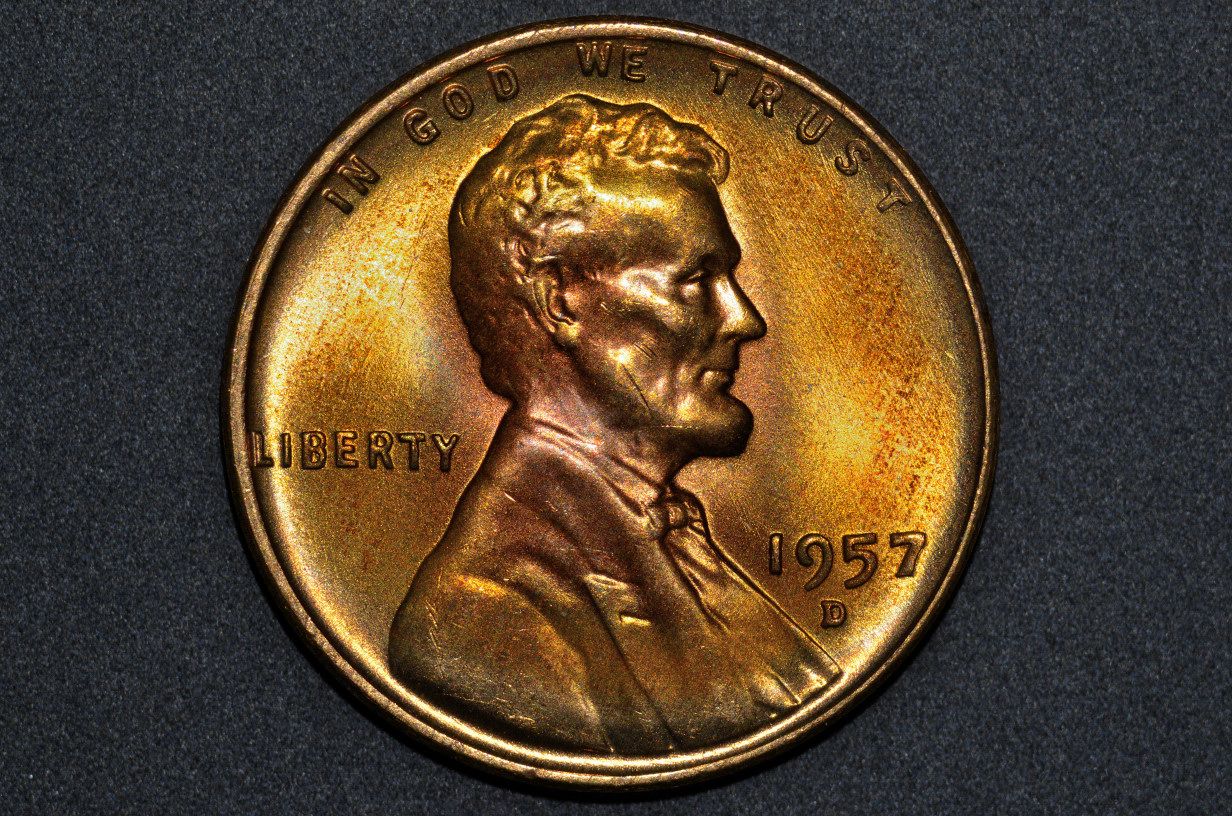 As a second reference, here is my "normal-direct" lighting arrangement with 2 lights, un-diffused, at 10:30 and 1:30, about 90mm from the coin, and 75-deg from horizontal. The resulting coin photo is shown below the setup:   As final reference, here is my "normal-diffused" setup using the "Directors" I built for minimizing hotspots, again with coin photo below: 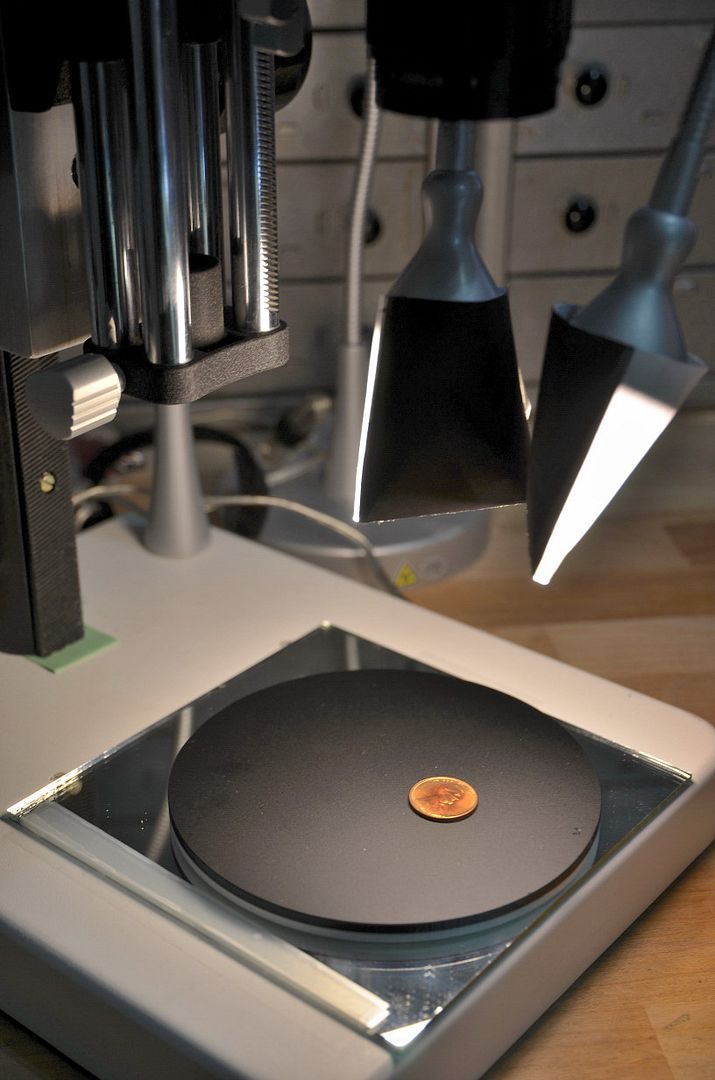 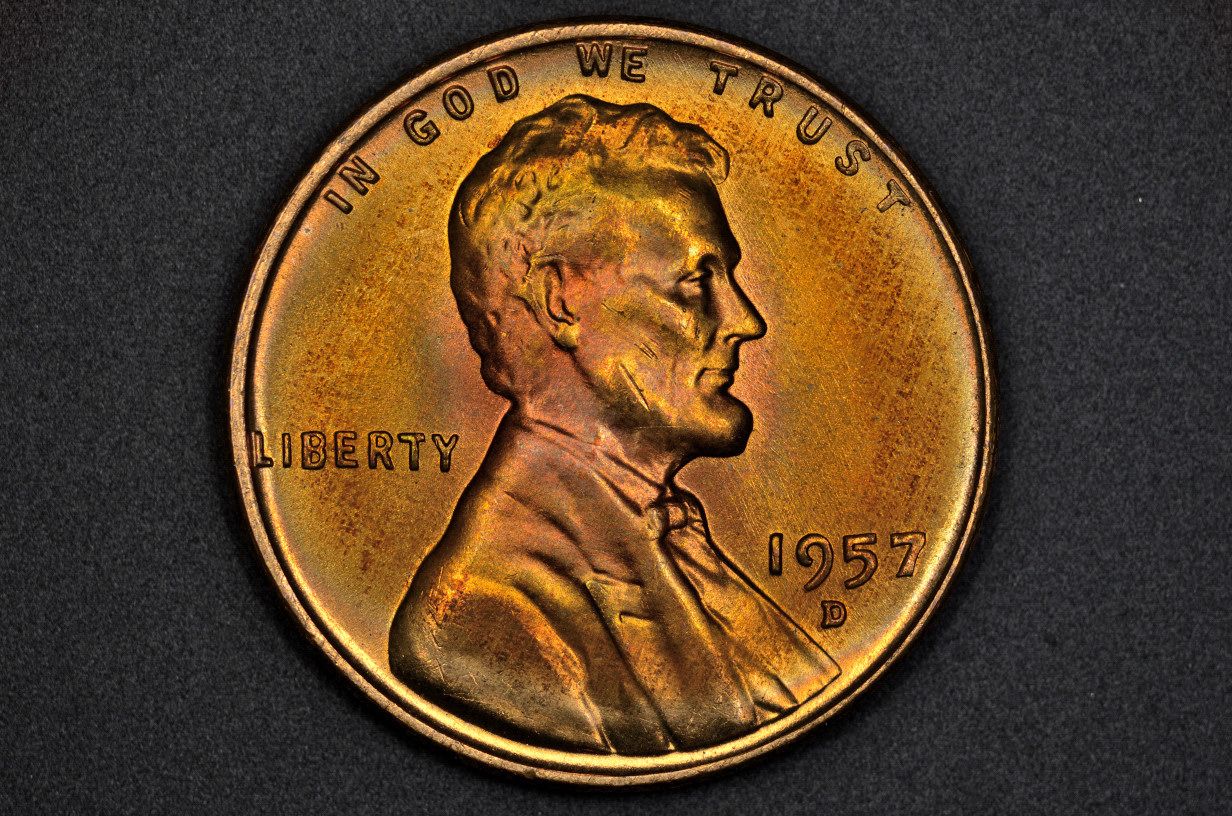 Here is the first experiment..."direct pseudo-axial". The setup uses a single light, un-diffused, shining directly off the coin to the camera. First pic is of the setup. Second pic is of the lighting calibration showing the reflection of the light off the mirror in center of image. Third pic is of the coin: 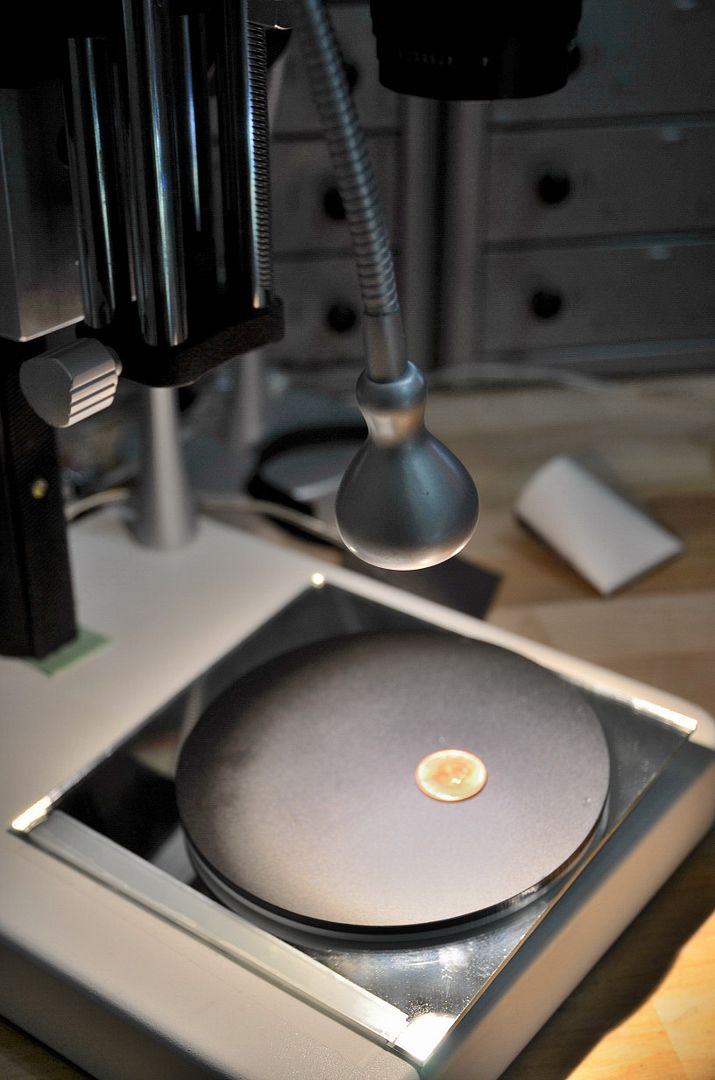 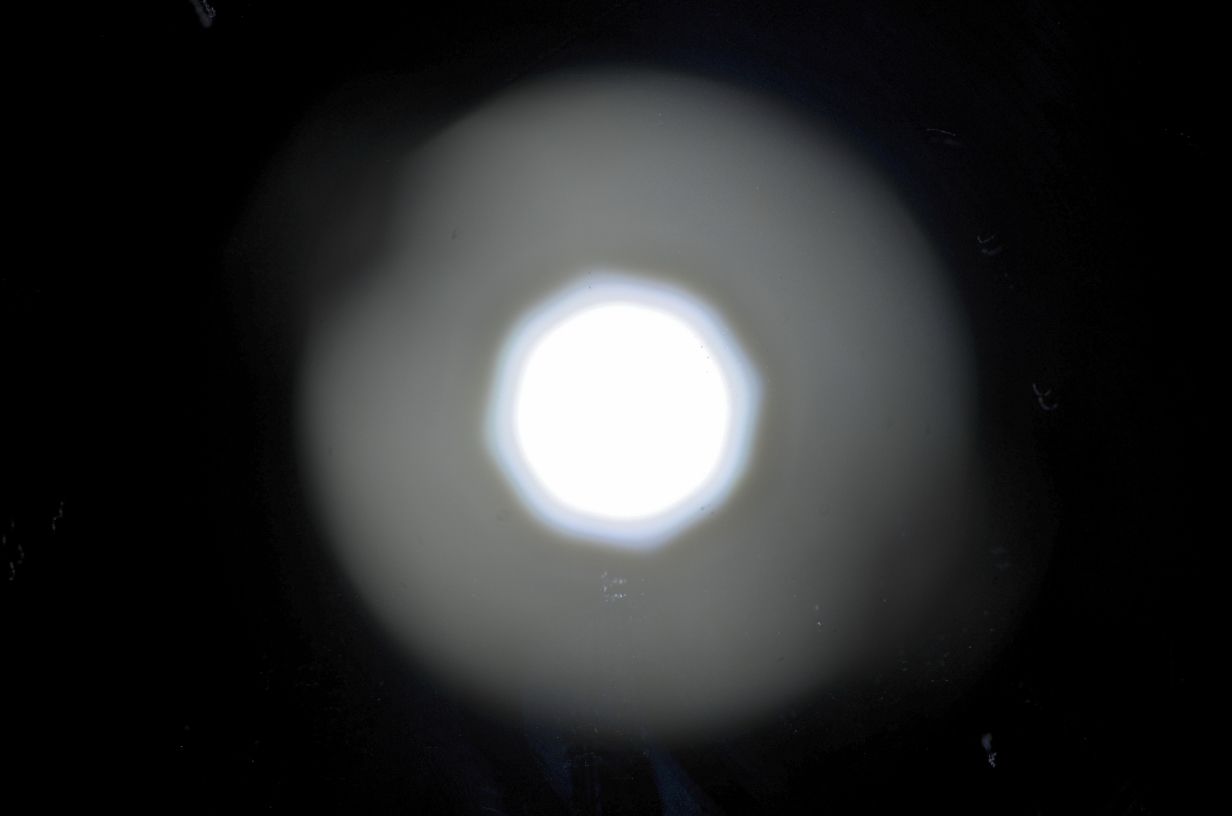 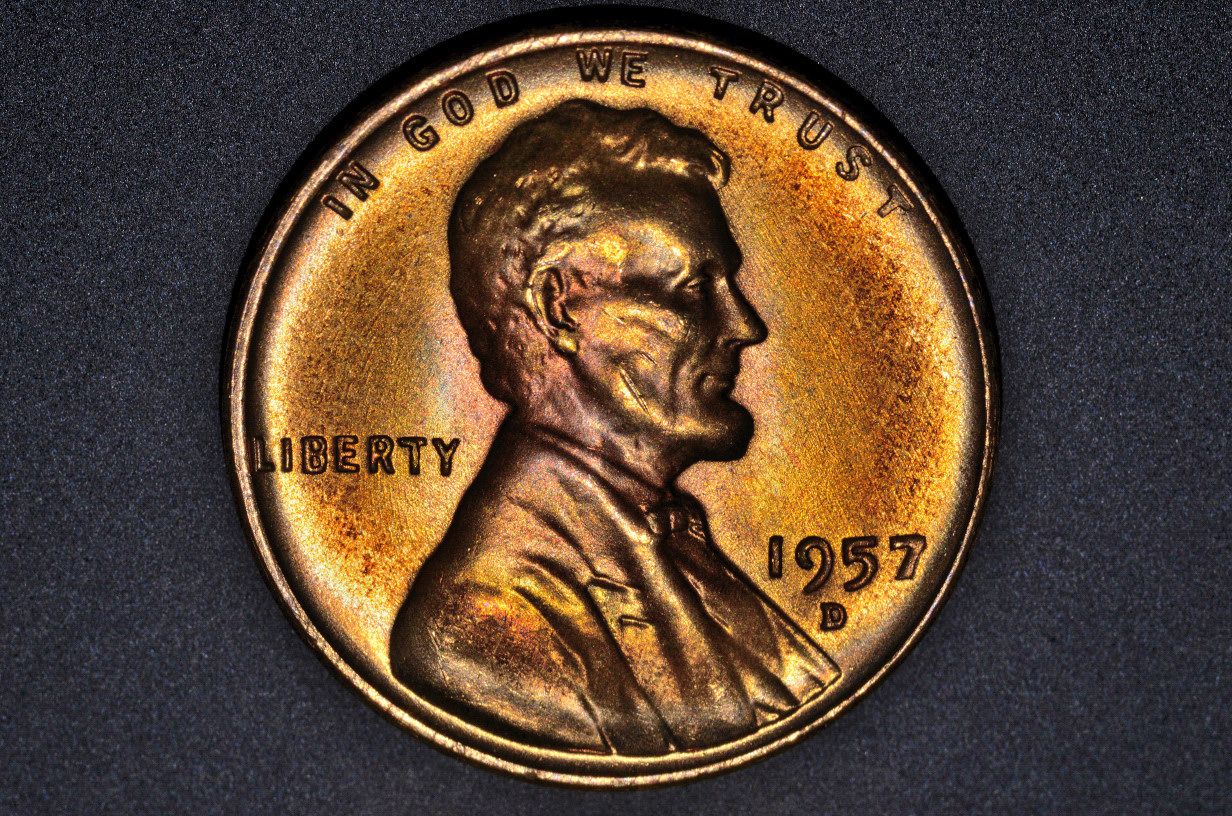 And finally here is the setup similar to above, but with a new Director that directs the light more evenly across the image. First pic is of the setup, second of the calibration, third of the Director used, and fourth pic is of the coin: 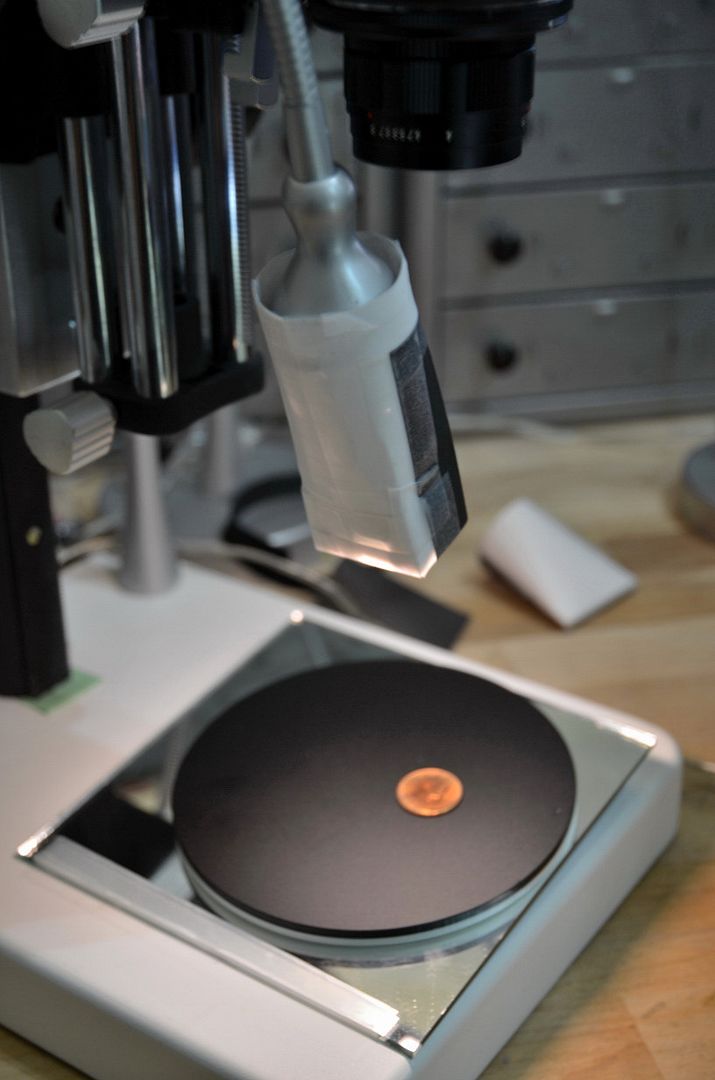 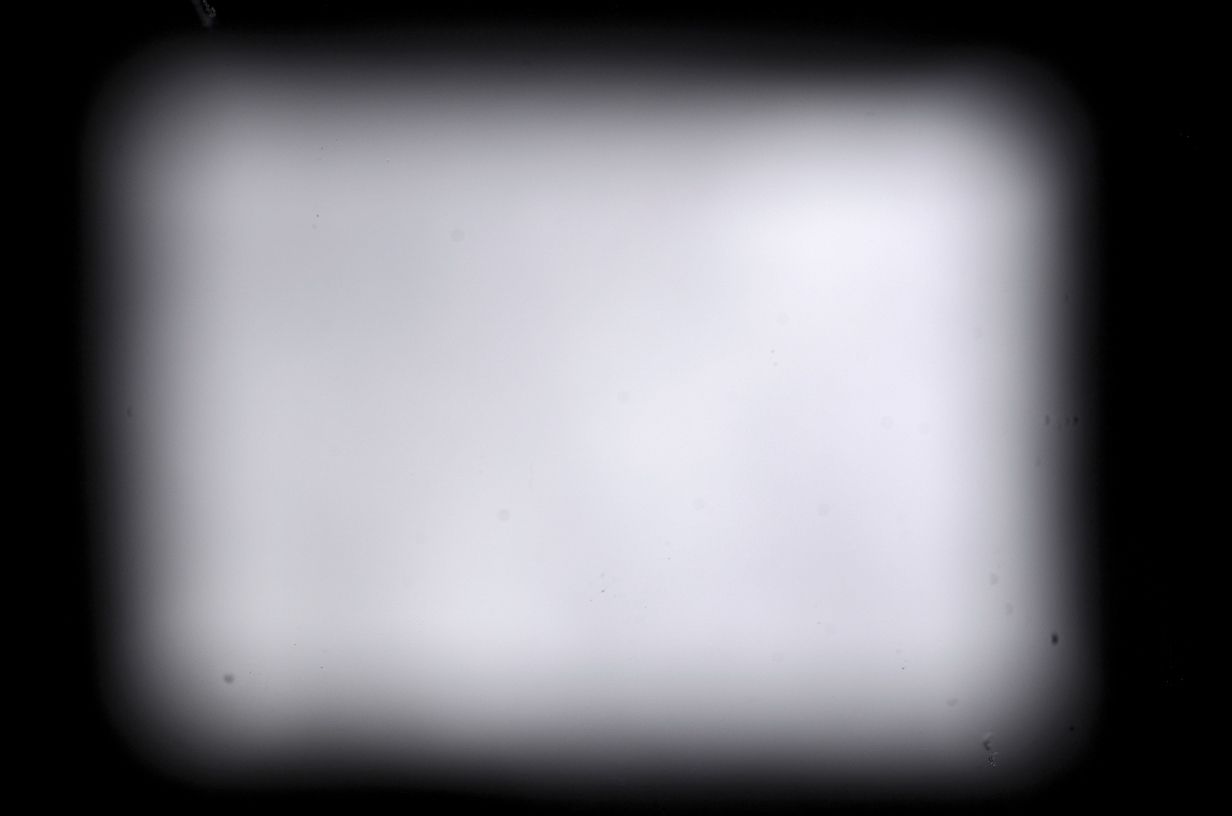 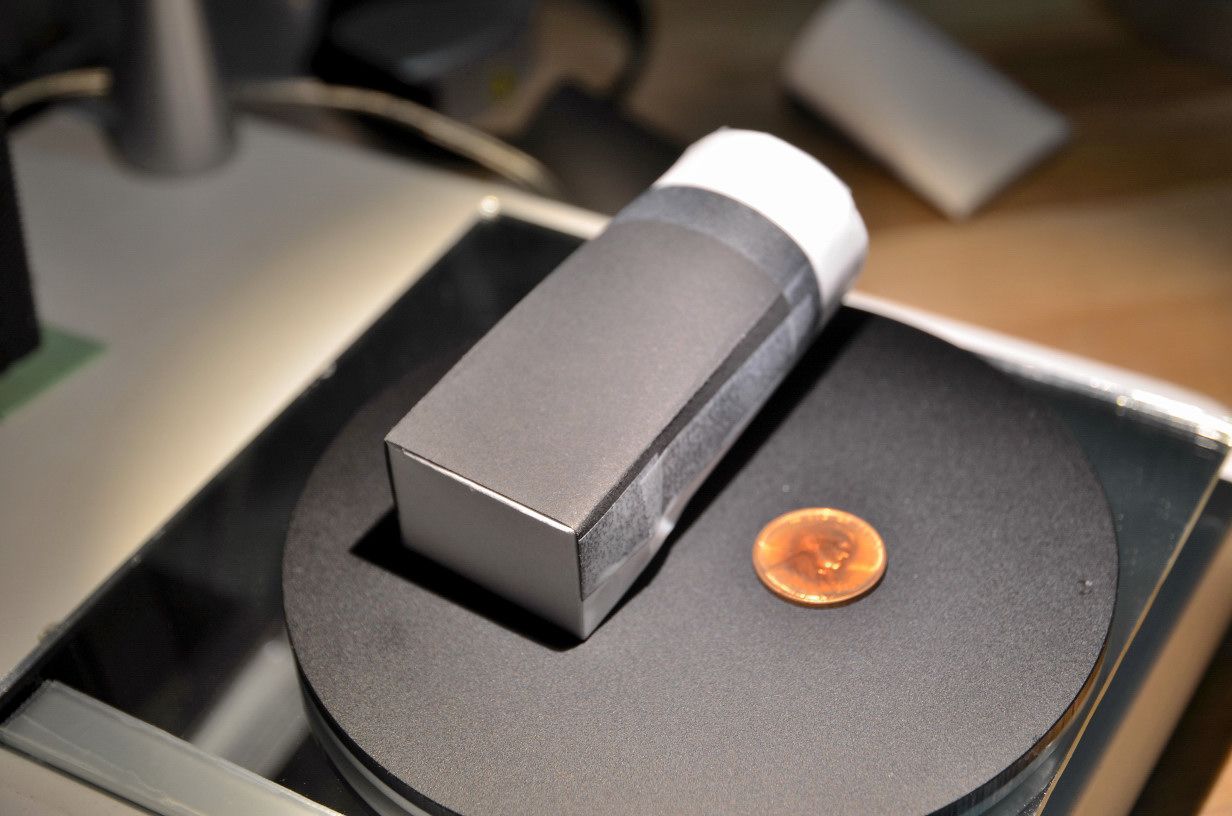 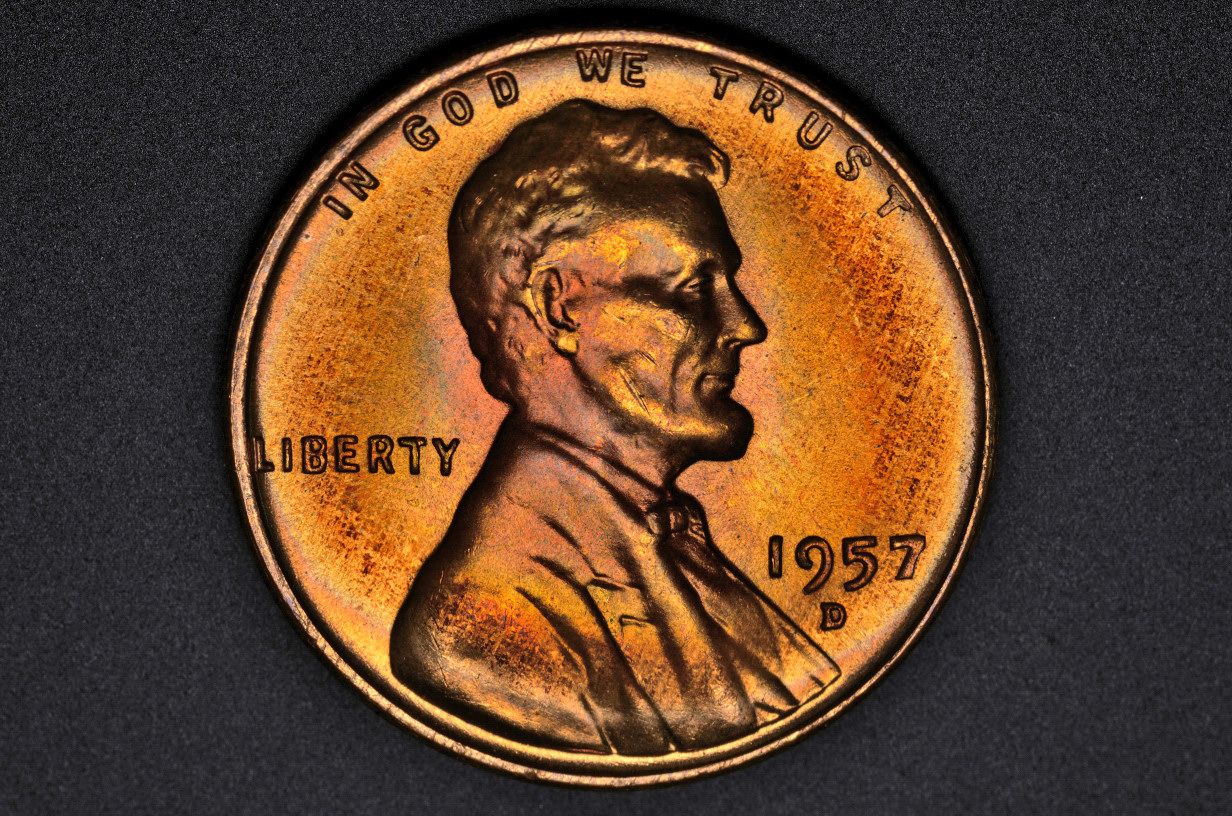 Even with the diffused source, axial lighting results in fairly extreme shadowing. I decided to try combining my regular RSD Directors with the pseudo-axial technique. Here is the result:  I like this result, but is it enough better to warrant the extra work with the setup and such? The pseudo-axial technique is fairly exacting, and hard to set up correctly. Also, since it is angled, DOF is a problem. Anyway, comments welcome...Ray |
|
|
|
Pillar of the Community
United States
507 Posts |
Of all of the lighting options you show, I think the RSD is the most appealing.
I would think the tilting would produce DOF and out-of-roundness problems so I am surprised to see you trying it.
Forgive me if you have covered this before, but please refresh my memory: What is the downside or problem with 'true axial' lighting as I often see described using a perpendicular light source and an angled pane of glass? Have you performed experiments with this and found them lacking?
Thanks,
-wheatiefan
|
|
Pillar of the Community
 United States
4038 Posts |
Tilting does produce DOF issues. In fact I took the tilted photos at f8, higher than I usually like, to compensate. You can still see some focus weakness even at f8 but the lens I was using only stopped-down to f8.
The out of roundness issue is also there, though it is fairly benign.
I was thinking of using the PB4 bellows to compensate for these issues but figured that was not fair since very few folks have tilt/shift setups and I wanted to see if a general method was practical.
Regarding "true axial" setups, I've tried them a few times and have never seen any better result than shown here. I was hoping to create a method that avoids the potentially degrading effects of the reflector, though the setup I ended up with is also pretty complex. The biggest difference I suppose is you have infinite flexibility in setting the coin angle to get the right combination of axial content, adding auxiliary lights, etc where you are more constrained with true axial. Of course now that I've said that the folks who swear by true axial will be offended...Ray
Contact me for photographic equipment or visit my home page at: http://macrocoins.com |
|
Moderator
United States
23522 Posts |
So far, the Directors remain the best all-around compromise you've posted here, Ray. I'd thought a little judicious shadowing to be a good thing in coin photography before you first demonstrated them.
Wheatiefan, axial lighting is more of a specialty system than an every-day lighting rig. The initial setup and operation is difficult, requiring a pretty specialized mount if you don't want to hold and angle the glass manually when you're shooting. Glass placement is exacting. You lose a whole lot of photons - the light only reflects about half of what it gets from the source, so you have to adjust your photographic parameters or provide more light. True luster is difficult to show, by comparison to "regular" lighting methods.
You need more relief from the coin than with other forms of lighting - my current setup using the APO Rodagon probably doesn't provide enough relief to use it, so I'm looking at acquiring another 100mm+ lens. I think, realistically, that one would want 200mm+ of relief to do an axial setup.
But with the right coin, and the right technique....a nicely-executed axial shot will make you feel like a King.
Edit to address Ray's comments: True axial lighting has a very narrow "sweet spot" of application - wild toners, and possibly DMPL coins & Proofs. For anything else, it's more trouble than it's worth.
|
|
Pillar of the Community
United States
4038 Posts |
SuperDave...with the RSD setup, the shadows are still there, just reduced. In fact the way I try to optimize images taken with RSD or any setup is to make sure there are shadows evenly around all the features, and simultaneously minimize hotspots. Another factor is how "deep" the shadows are. I try for pushing shadows to black only near the vertical edges of the features. The Directors so far are the only method I've found that gives that combo, but unfortunately falls short on luster representation. Note also that as with any setup, height of the lighting above the coin will determine shadowing. I've settled on ~90mm with the Directors (and around 75mm for bare Jansjos) as being optimum for a Lincoln Cent. Higher and the lights appear smaller and thus more shadows appear. Lower and they look bigger and the shadows reduce. BTW if you're looking for a longer lens, I still have a 105mm Printing-Nikkor available :) ...Ray Contact me for photographic equipment or visit my home page at: http://macrocoins.com |
|
Pillar of the Community
United States
4038 Posts |
Forgot to mention what lens I am using for these......T86. I'm finding these to be very nice lenses indeed. They are not quite on par with the 75ARD1, but from a value perspective they can't be beat. The 75ARD1 will cost you ~$200, while I've been picking up the Tominons for $30-$50 each. I now have quite a collection...T58, T63, T86, T94, plus a T86C with fixed aperture and a T80C on the way.
I still have an open question if anyone has any info regarding these lenses, what system they were built for, etc? All the ones I've purchased are in like new condition, especially the C versions, so I assume they are being surplussed out by someone.
One interesting tidbit is even the adjustable-aperture versions have a narrow aperture range of f4...f8. This points toward a high resolution application...Ray
|
|
Pillar of the Community
United States
4038 Posts |
Sorry if this post is looking more like a blog, but there is a reason...I'm home sick with flu last couple days...Ray
Contact me for photographic equipment or visit my home page at: http://macrocoins.com |
|
Moderator
United States
23522 Posts |
Heh. If I bought a Printing-Nikkor, it'd be the only thing I purchased for myself in 2012.  An experiment I've considered, which I'll throw at you since I'm having trouble finding time to do everything I want to anyways - an asymmetrical pair of Directors, one of your original design, and one straight-up vellum in a conical shape, with the point aimed at the center of the coin from the "forehead" side. I'm guessing there'll be a weak spot in the center of the conical's pattern, potentially relieving the washout of the high points and allowing slightly longer exposures for greater perimeter detail....maybe even no Director at all on the second light. ....and you can blog here all you like, my friend. Edit: What kind of relief does the 105mm require? |
|
Pillar of the Community
United States
4038 Posts |
Yeah, the 105PN is pretty expensive. But I'll give you a good deal if you ever decide to buy one...Working distance is more like 250mm for a Dollar. I tried the Conical Director concept and found it lacking. Problem is most of the light goes to the sides rather than toward the coin. My original Directors had an extra "ridge" of material down the center to achieve the same effect, but to have any effect I had to move the lights very close to the coin. This is because diffused light is just that, diffused, and seems to come from all over the source. It's hard to limit the dispersion. But using direct lighting you can do it. A simple method is to use a very thin strip of opaque material (a few layers of masking tape perhaps 1/32" wide will work) attached to the Jansjos. Since the Jansjos are very directional, this will block the direct light from hitting the coin where it is blocked and has fairly good focus ability. Here are pics without and with the central masking strip: Without masking strip  With masking strip  edited to clarify order of photos Contact me for photographic equipment or visit my home page at: http://macrocoins.comEdited by rmpsrpms
01/13/2012 02:27 am
|
|
Moderator
United States
23522 Posts |
Assuming the second is the "without," I like it better that way. Trouble is, though, this and other things (um, the ARD) have forced a fundamental reevaluation of what I consider "good" coin photography, and have reinforced my impression that the divide between differing coin compositions and degrees of luster is large indeed.
Having "been there, done that" through the process of illustrating a coin's detail in excruciating clarity, I find myself more interested in creating images that come closer to what that coin looks like in one's hand, under the conditions you actually use to look at a coin. I'm sure very few of us throw huge amounts of light and insane magnification at a coin we're holding in-hand - what we're doing here amounts to trying to visualize an entire coin at once under something like 10x magnification and hundreds of watts of light, at least before we shrink it to postable size - and I can't help but be curious about the forest we may be missing for the trees.
Is is necessary, maybe, to rethink what we want from a picture of a coin?
Ray: It's almost certain that a Printing-Nikkor is beyond my most extreme budget. All the same, please, if you would, shoot me a number via email.
|
|
Pillar of the Community
United States
4038 Posts |
SuperDave...nope, I had them in wrong order. Fixed the text. Bottom is with the tape. You can actually see the shadow vertically across the image.
Getting something that represents the so-called "in-hand look" was the genesis of this thread, so we've come full-circle. But let me remind you of what I've published many times...hold a coin "in-hand" under normal viewing conditions, and then imagine instead that you are looking at the coin on a computer monitor. Use one eye, not both. And don't let yourself be fooled by moving the coin around to see the luster and color and axial reflections and such, just find one "in-hand" view that you are happy with. My expectation is that you will not look upon it favorably when compared with a well-composed image. If you do, then set up the coin under a camera with lighting identical to what you liked "in-hand" and snap those photos! ...Ray
Contact me for photographic equipment or visit my home page at: http://macrocoins.com |
|
Pillar of the Community
United States
9792 Posts |
Are you using your flat field images for calibration of the final ones posted (subtraction)?
"Buy the Book Before You Buy the Coin" - Aaron R. Feldman - "And read it" - Me 2013! ANA Life Member #3288 in good standing since 1981, ANS, Early American Coppers Member (EAC), Colonial Coin Collectors Club member (C4), Conder Token Collector Club member (CTCC), Civil War Token Society (CWTS) member, Liberty Seated Collectors Club (LSCC) & Numismatic Bibliomania Society member (NBS), USMex, Member in good standing, 2¢ variety collector. See my want page: http://goccf.com/t/140440 |
|
Pillar of the Community
United States
4038 Posts |
Quote:
Are you using your flat field images for calibration of the final ones posted (subtraction)? No, nothing that sophisticated West! These are all just simple single images with minimal post-processing. I SHOULD do focus stacking on the tilted images, but my aim was to compare the effects of various lighting arrangements not produce a finished product. With the mirror permanently mounted on the stage, I now have another way of viewing my lighting setups for quick calibration. I ended up "rediscovering" my original method of setting up the Directors to simulate axial lighting. The original concept of the Directors was to bring the lights as high as possible without tilting the coin, while keeping any light from shining directly to the lens and potentially causing flare. Here is the reflection pattern of the Directors set up this way:  And here is the Toner Cent in "normal" orientation, ie with the lights converging near the Head:  And here is the same coin rotated 180-deg, with lights converging near the Shoulder:  When the lights converge near the Shoulder, they diverge near the Head so the lighting there becomes less axial and more diffused. This all helps explain why the Directors, when set up this way, produce no luster, since axial lighting produces little or no true luster. Contact me for photographic equipment or visit my home page at: http://macrocoins.comEdited by rmpsrpms
01/13/2012 12:58 pm
|
| |
Replies: 12 / Views: 3,744 |
|
To participate in the forum you must log in or register.
Disclaimer: While a tremendous amount of effort goes into ensuring the accuracy of the information contained in this site, Coin Community assumes no liability for errors. Copyright 2005 - 2026 Coin Community Family- all rights reserved worldwide. Use of any images or content on this website without prior written permission of Coin Community or the original lender is strictly prohibited.
Contact Us | Advertise Here | Privacy Policy / Terms of Use
|
| Coin Community Forum |
© 2005 - 2026 Coin Community Forums |
| It took 0.51 seconds to rattle this change. |
 |
|
| |
| |


