| Author |
 Replies: 11 / Views: 10,658 Replies: 11 / Views: 10,658 |
|
|
Pillar of the Community
United States
557 Posts |
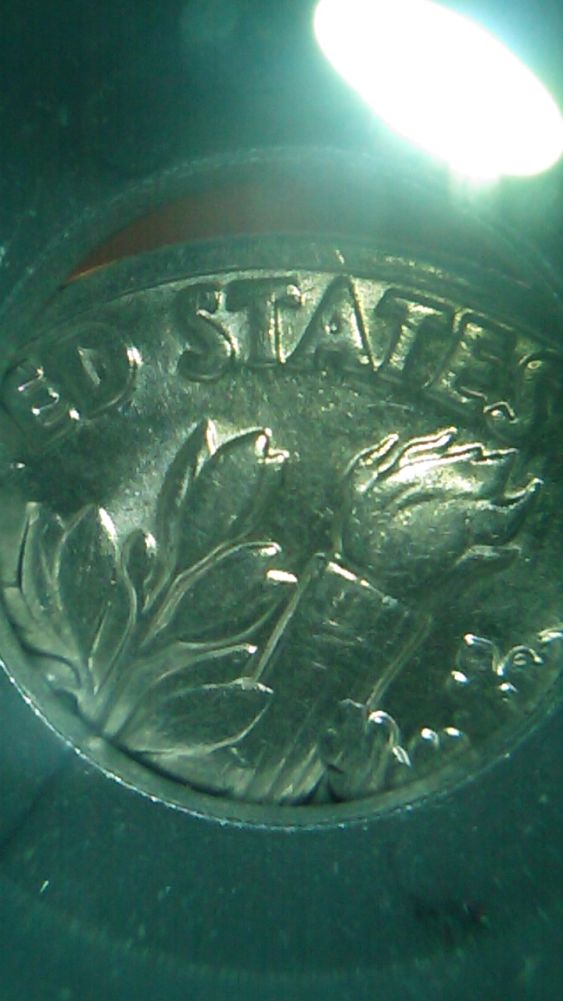
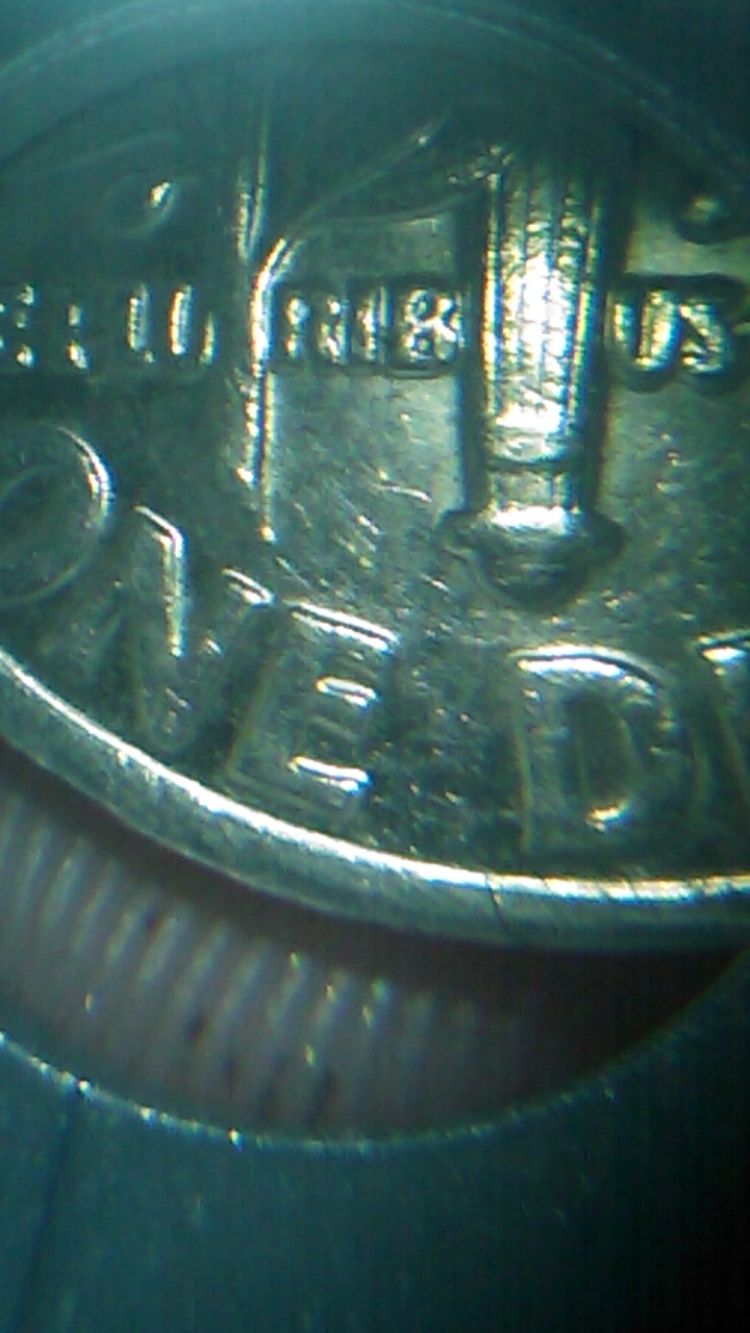
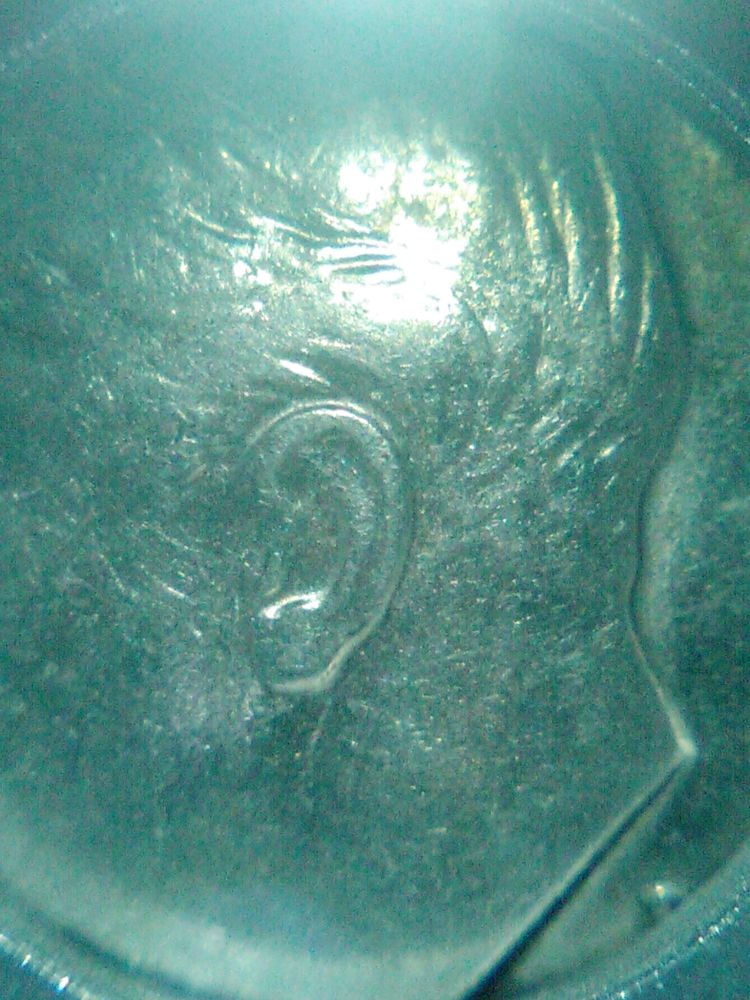
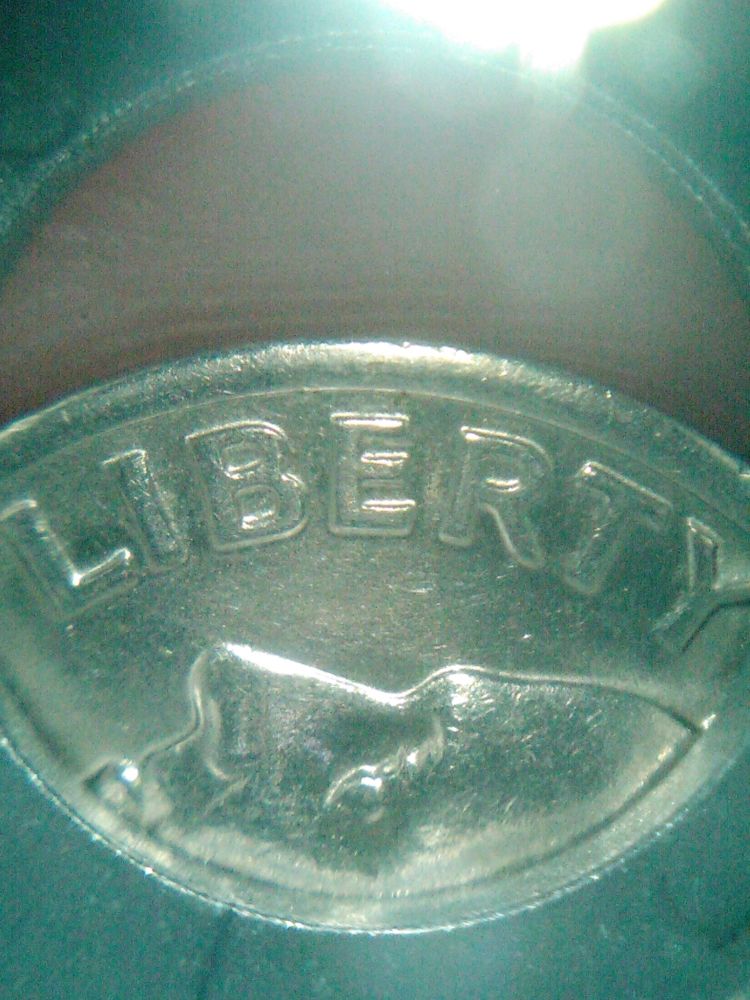
Curious of any opinions , Poked it with a stick and the metal chunk didnt wana budge ... Noticed alot of Lines all over this one as well ,i know I've seen them , just not to this extent and I'm not sure what causes that .. Is it a Die problems ? or what I was thinking is its moreless something to do with the Planchet ? .. Any thoughts are greatly appreciated , I'm still learning the ropes with all of the terms/and error types so bare with me gang  .. Thanks for anyones time - Here it is - 1984-p Roosevelt dime Obverse *notice the Cud by the neck/date area  Reverse of the 1984-p Shows alot of the lines and I cant tell its its doubling ? or what is going on to be honest Reverse of the 1984-p Shows alot of the lines and I cant tell its its doubling ? or what is going on to be honest 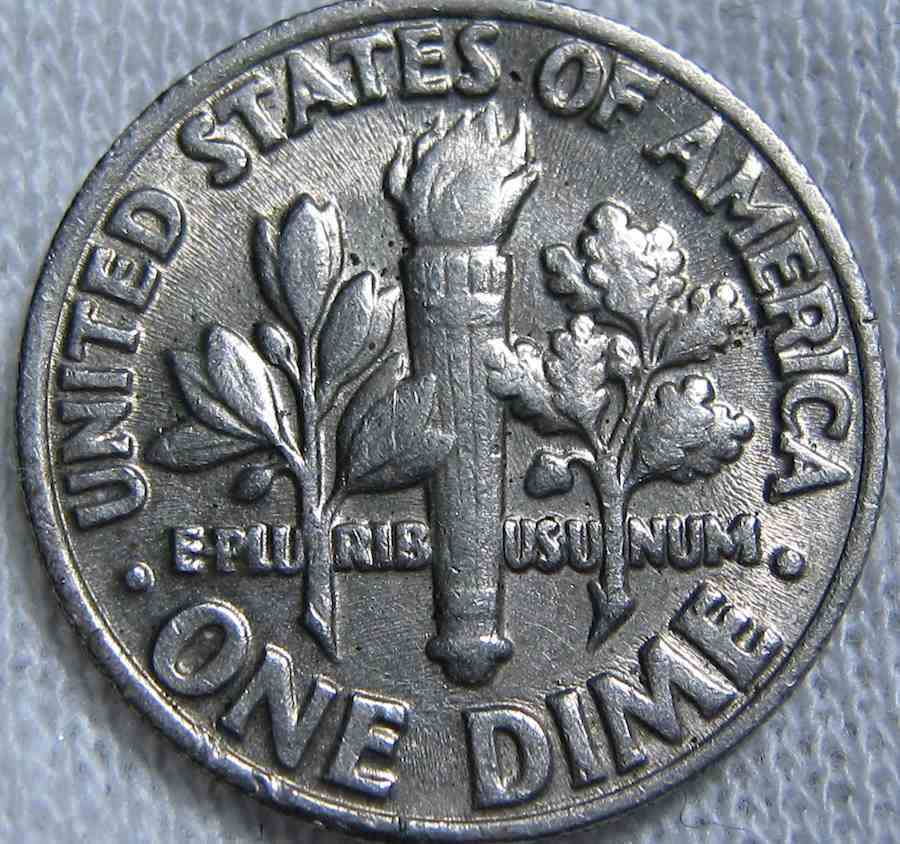 Got a few photos of some of the Lines Got a few photos of some of the Lines 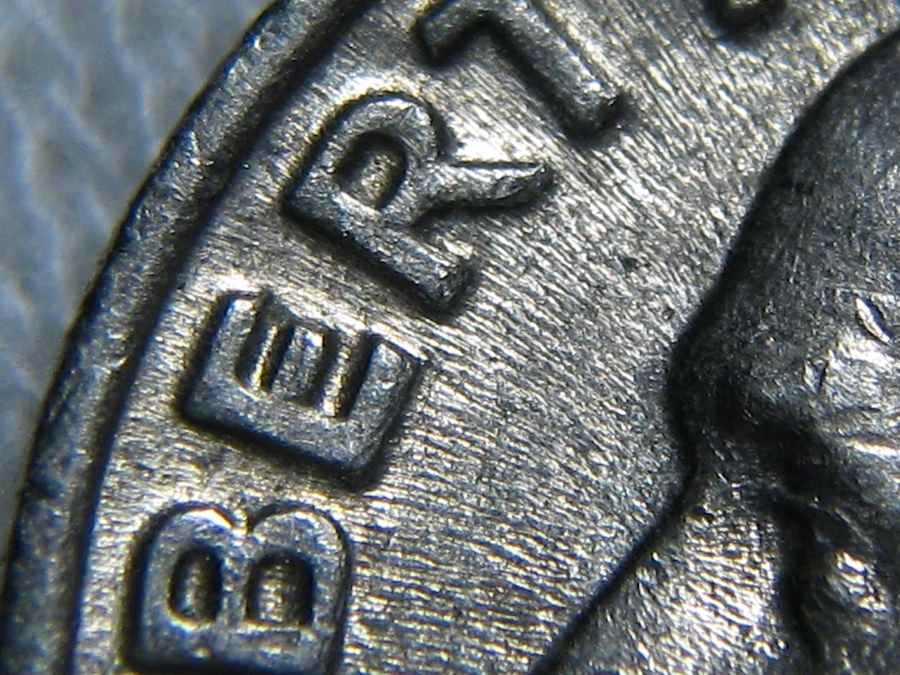 Here's a Full Photo Of The Date - You can clearly see the Cud and seems alil something around the right side of the "9" Here's a Full Photo Of The Date - You can clearly see the Cud and seems alil something around the right side of the "9" 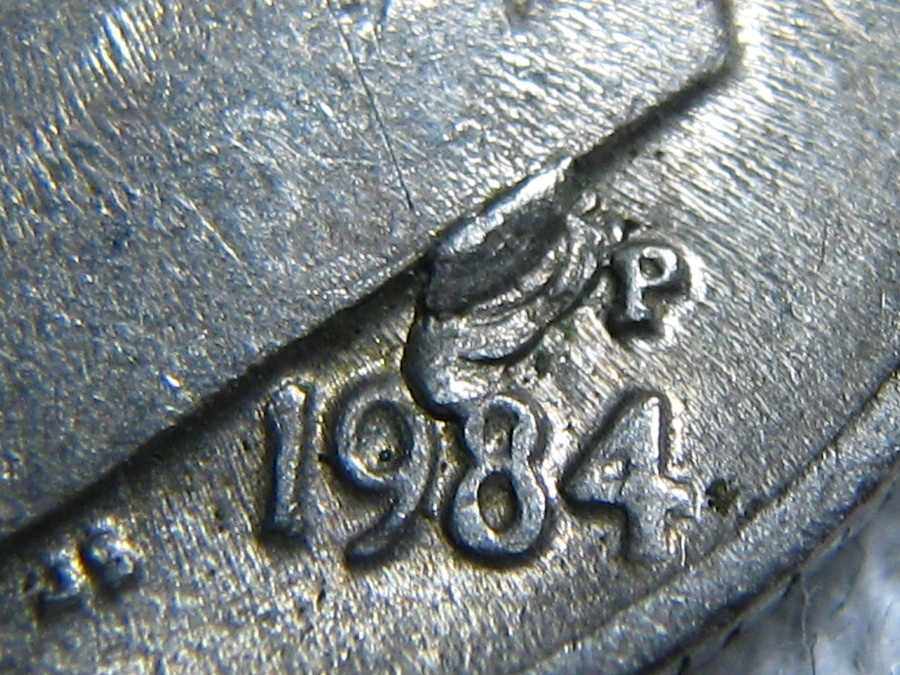  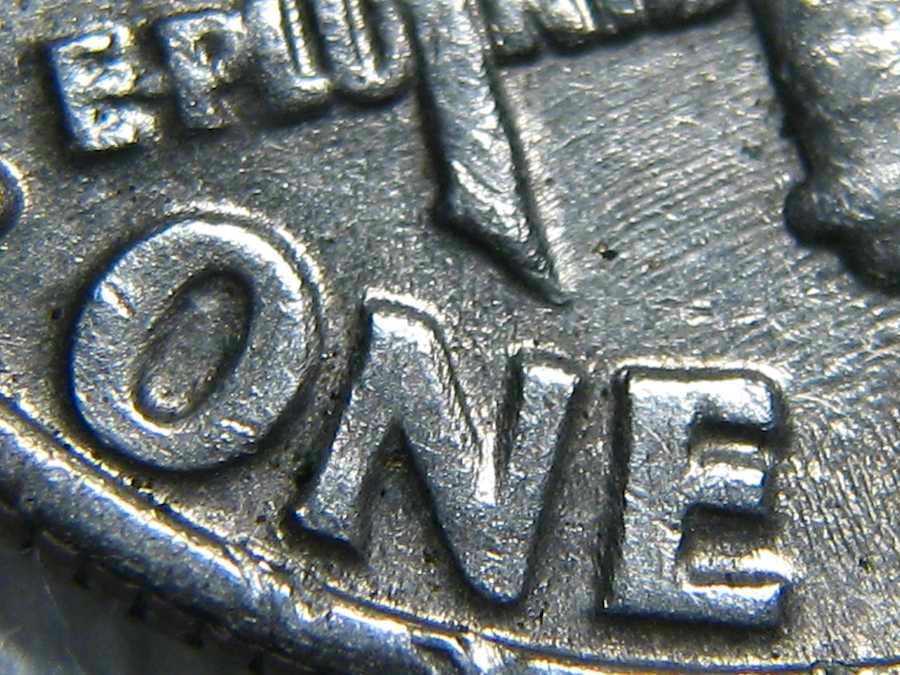 Again , I'm new to collecting Dime's and never came acrossed one quite like this .. Unsure if its Planchet / or / a die issue . Again , I'm new to collecting Dime's and never came acrossed one quite like this .. Unsure if its Planchet / or / a die issue .
I really appreciate the input anyone can share -
Phil |
|
|
|
Pillar of the Community
United States
4132 Posts |
It's a very worn out die, which is common for that era. That's also a common location for die chips. It's a pretty nice example of radial die wear, and the die chip is pretty big, so I'd might hang on to it, but it's not really something that would qualify as an error or has any extra value. Also, it's just a die chip - it's not a Cud. A Cud is on the rim where a part of the edge of the die has broken away. Edited by CaptainFwiffo
04/14/2012 01:17 am
|
|
Bedrock of the Community
United States
12437 Posts |
There is a progressive chip next to the date and the lines are caused by excessive die wear called flow lines. Radial flow lines are an indicator that a die has struck many coins and is nearing the end of its life. The flow lines are caused by the cold flow process that occurs when a planchet is struck into a coin. The planchet spreads out to fill the coining chamber when struck and this radial expansion erodes the die. The first flow lines are microscopic in nature and are responsible for a coin's luster and cartwheel effect. With successive strikes, the flow lines become more pronounced as the die sustains more wear from planchet expansion.
|
|
Pillar of the Community
 United States
557 Posts |
Ahh Nice thanks fella's . Didnt think about the Die ware aspect :-) .. Always learning something , Really makes sense now after your explanation BLOKEMIST6 - Fits in with some of the morgan Cuds I have lol .. Pretty cool lil piece of learning material to find in your pocket .. Really appreciate your Time Guys * CaptainFwifo- Blokemist6 * always a good day when you learn alil something about a aspect of the coin making process ... Giving me an idea of reading up about Die wear and Cuds just to get a better grasp .. (now knowing what it looks like, would be good to see how other coins are affected and other forms of wear .ect....) Again thanks guys , Its something I can apply to all coins I search through now . I have some pennies aside from awhile ago ill have to go through them and see the story they tell.. But , On to do some ReSearching .. Phil \m/ Edited by tatt2ed13
04/14/2012 01:34 am
|
|
Rest in Peace
United States
4078 Posts |
Phil, nice detail photo's. What did you use?
|
|
Rest in Peace
United States
10625 Posts |
Nice find Phil. I've never seen a dime struck from a die pair that worn out. As already mentioned, nice photos.
|
|
Pillar of the Community
United States
557 Posts |
Hey Bpoc1- I use a handheld cam with a "Super Macro" Adjustment . It also has a White Balance "Evaluation" feature that lets the camara adjust the incoming light for a proper clear shoot ... ( For some of the closer photos, I use the digital zoom about 3x or 4x magnified along with a eye loop believe it or not :-) ... Most of the time its a 10x loop but with Morgan dollars I use the 7x for some areas then the 10x for cracks/clashes ) ... Here the cam I use its pretty old and sure on ebay you maybe able to find one under or around 100$ .. Canon PowerShot - A470 7.1 mega pixels .(im sure there may be a newer model but this has worked well for me and just havnt updated Yet! lol). Combined with the adjustable Table , And the nonslip surface I added to it I can get the proper tilt for lighting and gives me a "bracing" area to rest my arms to steady everything .. For having nerve damage in my right arm and pretty well shaky this did the trick for me (sometimes I can just rest my arms on the "arms" of my desk chair but when getting close ups I need to steady on the table) -Hey Dave700x - Yea its a keeper for sure , tells a story with these dies here lol .. Neat lil find outa pocket change ... Thanks for checking it out :) .. Phil |
|
Rest in Peace
United States
10625 Posts |
I'm right there with you Phil. I'm using a Canon A620 Power shot mounted on a home-made copy stand and a couple of Jansjo lamps. I'm using the remote shoot option in the Canon zoom browser program. Still looking for the sweet spot...
|
|
Rest in Peace
United States
4078 Posts |
Thanks Phil, I'm still in " Picture Taking for Dummies".
|
|
Pillar of the Community
United States
1193 Posts |
I'm looking at these pictures, and I can't even focus on anything but how great they are! INCREDIBLE!
|
|
New Member
United States
17 Posts |
|
|
Bedrock of the Community
United States
62064 Posts |
Tip of the day:
When taking images of coins through a microscope, focus on the fields, not the tops of the devices. When this is not followed, the clarity of the focus of the shot suffers. IE: Taking an image of a RPM? Focus on the field inside the mint mark. Not on the top edge of the MM. You will love your images better if you do this.
|
| |
Replies: 11 / Views: 10,658 |
|