| Author |
 Replies: 10 / Views: 2,627 Replies: 10 / Views: 2,627 |
|
|
Pillar of the Community
United States
3546 Posts |
Hello, I have been experimenting with a new camera and setup producing a couple of shots for your review. When I look at this coin while holding a red colored scissors handle, for example, over it I can see that exact same red color reflecting back off of the Morgan's surface. Firstly, I want to get opinions on how this camera is functioning in terms of this original obverse shot in pre-Gimp manipulation mode:  Gimp is a relatively new program to me and I wanted to know what could be done to this obverse side to make it appear more reflective without causing white hot spots producing distracting glare. Thanks |
|
|
|
Pillar of the Community
 United States
3546 Posts |
Once I have exhausted all means of natural color enhancements I want to move these obverse and reverse shots below over to the VAM queue to obtain opinions there... mdpmedia  |
|
Pillar of the Community
 United States
4038 Posts |
Well, the color looks "off", and the image is not as sharp as it could be. Are you using any white balance compensation? I can't tell if the lack of sharpness is due to slight focusing issue or perhaps too small aperture. What was your aperture setting? Looks like a nice coin!
Contact me for photographic equipment or visit my home page at: http://macrocoins.com |
|
Pillar of the Community
United States
3546 Posts |
I took these initial set of photos above outdoors with the sun serving as the light source at post time. That is to say post time for the 140th Kentucky Derby is 6:24 p.m. EST. I live in Louisville, Ky. I just thought that the best possible lighting would have to be natural sunlight. Anyway, I have no way to my knowledge on how to adjust the white balance or aperture setting being that my new camera is an iPhone 4S. Any assistance on this piece would be appreciated. Therefore, I went back to my trusted 5000 K non-diffused CFL bulb in an attempt to accentuate the mirroring and details etc. Please check this reverse shot using this single point non-diffused CFL lighting source: 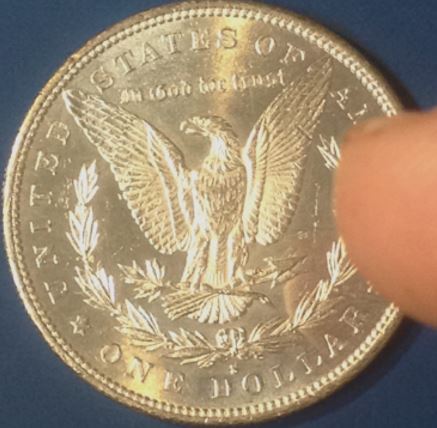 Is this coin a proof coin? This shot surprising more closely resembles the coin's actual appearance. |
|
Pillar of the Community
United States
3546 Posts |
Here's the obverse photo using the non diffused single source CFL bulb: 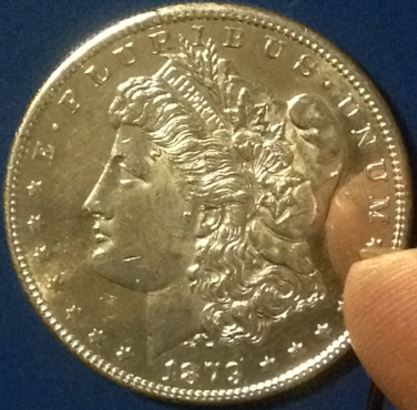 That black wire in the photo is the headset having the +/- volume control that serves a dual purpose as a remote method to take the photo with. This prevents shaking of the camera at the time of the exposure... How do these two most recent photos appear compared to the first two? |
|
Valued Member
United States
114 Posts |
I have used gimp for many years, and it has a steep learning curve most uses. I've taken your first photo and done the following. I applied "filters->enhance->wavelet de-noise" twice with values of threshold .84 and softness .04. You will have to download wavelet de-noise from the Gimp Plug-In Registry http://registry.gimp.org/Then I applied filters->enhance->wavelet sharpen with values of amount=1.2 and radius .54. Download the plug-in from the same registry. The wavelet routines are fantastic for making bad photos look better in most situations. This brings the coin's photo to looking like a very realistic looking silver dollar, but not with the shine yet that I think you are looking for. I'm looking for a way to insert photos, but haven't found it while I'm writing this. Then I applied filters->G'MIC. This is a very complex plug-in. Select "Lights&Shadows->Light Glow" with values of density 28.51, amplitude .3, and leave the rest default. Note: all of these plug-in settings will need adjustment for values for each photo, unless you are incredibly consistent. G'MIC is also available from the gimp registry. Also, I use Linux, but almost all plug-ins are either written in one of a few interpreted languages that are platform independent (you may need to install a Python interpreter) or are compiled programs, and most compiled programs are available with Windows installation packages. Given time, I'm sure I could come up with more. There are basic techniques that you should use to remove the bag marks from the coin that would greatly enhance the effect. |
|
Valued Member
United States
114 Posts |
I thought that maybe the submitting process would allow a photo to be included. I have two edited versions of your original photo that show the results, but I don't see any way to include them. If anyone can point me in the right direction, I'd be happy to post them.
|
|
Valued Member
United States
114 Posts |
OK, I added one more step with G'MIC and put the 3 step photos on my PBase site. Obviously other things can be done, but this is my first crack at making your coin look like a proof. I also did some smudging to cover over the bag marks, and then G'MIC again with the Light Patch function which has an enormous range of possible results depending on how you set the parameters. You'd have to play with them. There is a preview window that shows the results as you adjust the parameters. The photos are at: http://www.pbase.com/jsabatke/temp_stuff |
|
Valued Member
440 Posts |
If it were me I would take great pains to ensure that:
- focus was sharp
- white balance adjusted correctly
- lighting was "perfect"
By lighting being perfect: I have found that trying to get correct color with toned coins or coins with highly reflective surfaces is difficult at best. I have gotten better results shooting through glass and reflecting the light source off of the glass (similiar to axial lighting technique but allowing some light to hit the coin directly). By playing with the angle of the light you can get the "correct" look of the coin. Recently I have been playing with "stacking"; and yes I finally got it to work. With highly reflective coins you can take several photos from different angles; getting some nice reflectivity but it puts some areas slightly out of focus (different areas out of focus on subsequent shots). Then utilizing the stacking program (which combines the pics) produces a final result with a nicely focused pic showing the reflectivity of the coin. It is a bit of work but the results are worth it.
|
|
Valued Member
United States
114 Posts |
By the way, I didn't even consider this when posting how to manipulate the photo to make it look like a proof. I hope no one takes that as how to misrepresent a coin. I took it really as instruction on how to use gimp software.
|
|
Pillar of the Community
United States
3546 Posts |
Quote:
...one takes that as how to misrepresent a coin...how to manipulate the photo to make it look like a proof. No, I personally do not feel that the user's Gimp-related comments on altering a coin's digital appearance to appear more like a proof were an attempt to promote a distortion of the coin's original appearance. Any physical or software maneuver implemented to more closely present the authentic appearance of a proof coin could prove to be invaluable to both the seller and buyer of any proof coin transaction. This obviously assumes that a seller's first attempts to photograph a coin yielded pictures comparatively distinct compared to the actual appearance of the coin in question. On-line buyers ordinarily appreciate physically receiving by mail a purchased coin that closely resembles the most influential photo that prompted them to pull the trigger to purchase the item in the first place... And I would surmise that any further pertinent software, hardware, or procedural tips on this particular subject would always be welcomed by all interested parties. mdpmedia |
| |
Replies: 10 / Views: 2,627 |
|


