Coin Community Family of Web Sites Join Thousands of Coin, Bullion, & Money Collectors
Specializing in Modern Numismatics Royal Canadian Mint products, Canadian, Polish, American, and world coins and banknotes. Vancouvers #1 Coin and Paper Money Dealer Join Thousands of Coin, Bullion, & Money Collectors Coin, Banknote and Medal Collectors's Online Mall Royal Estate Auctions - $1 Coin Auctions300,000 items to help build your collection!


Username:
Password:
Save Password
Forgot your Password?


This page may contain links that result in small commissions to keep this free site up and running.

Welcome Guest! Registering and/or logging in will remove the anchor (bottom) ads. It's Free!

Using A Converted Enlarger Stand

To participate in the forum you must log in or register.
Author Previous TopicReplies: 10 / Views: 9,666Next Topic  
Pillar of the Community
austrokiwi's Avatar
2087 Posts
 Posted 09/03/2014  04:37 am Show Profile   Bookmark this topic Add austrokiwi to your friends list Get a Link to this Message Number of Subscribers
Rather than take some one elses thread in a different direction I am opening this new thread. This thread is,I hope complimentary to this one:

https://goccf.com/t/185817

I converted an old colour enlarger stand simply because with my budget the available copy stands were just not good enough. This is my copy stand with out the camera and focusing rail attached The riser provides a full meter of movement:


Using-A-Converted-Enlarger-Stand

The mounting point is a ball head with quick release plate. {The second smaller quick release mount is one I use for the focusing rail or bellows.}


Using-A-Converted-Enlarger-Stand

NOw I have developed a preference for old manual focus lenses. For photographing coins I find the modern lenses do not have enough markings on them. HAve a look at the two lenses in the next photo: The "Modern" lens has the different magnification markings only but they aren't that accurate and seem to be there just for a guide at best and decoration at worst. The lens next to it is a minolta MD 3.5 macro with 1-1 adapter. The markings on that lens are highly accurate and are certainly not just decoration


Using-A-Converted-Enlarger-Stand

The Sigma 105 MM is attached to an e mount adapter. IN front of the minolta is the reversing ring that came with the lens and a modified rear lens cap. I am terrified of damaging the lens when its reversed so to reduce possible causes of damage I purchased a rear lens cap and cut a hole in the top. When I reverse the lens the cap goes on. Heres a close up of that minolta 50mm and the markings...I even end up using the exposure compensation markings on the lens when I get stuck on the exposure settings...

Using-A-Converted-Enlarger-Stand


I use my copy stand and lenses in a manner that I believe is the most usual. I set the magnification on the lens. Then mount the camera to the focusing rail which does all the focusing work. The key advantage to this is I know what the magnification is { A reminder 1:2 magnification means 10mm on the subject becomes 5mm on the sensor, 1:1 means 10mm on the subject is 10mm on the sensor.}
Heres the focusing rail I use
{ I would much prefer the stackshot rail seen in this thread https://goccf.com/t/185807 )


Using-A-Converted-Enlarger-Stand

Heres the camera, focusing rail,and 50mm macro on the stand:


Using-A-Converted-Enlarger-Stand


Its easy to just throw on an AF lens and rely on Autofocus but that technique limits the quality of the shots and at some point most collectors will want to do more. At that point Manual focusing becomes the norm. One of the most useful things I got with the Minolta 50mm macro was the instruction book; of which the most used page is this one. The table relates to the markings on the lens:


Using-A-Converted-Enlarger-Stand


With my limited experience a copy stand with an angled riser is useful when starting out but as you become more experienced it becomes a limiter on what you can do. I am currently getting the gear together to use a microscope objective for high magnification shots....I suspect an angled riser would drive me nuts

Edited by austrokiwi
09/03/2014 04:43 am
Pillar of the Community
aladinslamp's Avatar
United States
3076 Posts
 Posted 09/03/2014  09:15 am  Show Profile   Bookmark this reply Add aladinslamp to your friends list Get a Link to this Reply
I converted an old Durst enlarger does great and cost arould $40-60 bucks much cheaper than the new stuff.
Pillar of the Community
austrokiwi's Avatar
2087 Posts
 Posted 09/03/2014  09:35 am  Show Profile   Bookmark this reply Add austrokiwi to your friends list Get a Link to this Reply
Aladinslamp: can you post a picture?
Bedrock of the Community
DVCollector's Avatar
United States
10045 Posts
 Posted 09/03/2014  6:41 pm  Show Profile   Bookmark this reply Add DVCollector to your friends list Get a Link to this Reply
That looks like a good conversion you've done, and the vertical beam looks sturdy! Was the adaption of a ball head an easy upgrade?
Pillar of the Community
austrokiwi's Avatar
2087 Posts
 Posted 09/04/2014  12:48 am  Show Profile   Bookmark this reply Add austrokiwi to your friends list Get a Link to this Reply
Adding the ball head was very easy. and was the most expensive item( until I purchased the focusing rail). I noticed that here many of the currently available €800+ copy stands are very close matches to the enlarger stands that those companies produced in film days.
Pillar of the Community
aladinslamp's Avatar
United States
3076 Posts
 Posted 09/04/2014  02:26 am  Show Profile   Bookmark this reply Add aladinslamp to your friends list Get a Link to this Reply
I'll have to wait until I get back to send some pics...But your right the old enlarging stands basically come in two types....
1) a slanted pole and 2) a vertacle pole that is perpendicular to the platform so when going up or down with your camera installed the camera is always true to the coin at any height....Mine is not gear driven like yours and the better types but at the cost I paid around $50 w/shipping for the enlarger, the stand, 2 Rodenstock lenses 50 and 75mm El-Omegar's and a bunch of developing stuff that I through away as I have no need, Was a very cheap way to get started...It comes with a 3/8ths knob and screw to mount to the older bellows, which have both 1/4 and 3/8ths holes to mount either size you have, but I went to Lowes and got a rubber bushing and a new 1/4 inch to directly mount the (Canon T2i)camera, directly to the pole for like 2 bucks...
Hey I found one very similar and some of the other series I have, the same pole BUT the head is the difference and other models are not usable or much too expensive....
ebay up Durst F30.........19.95 with 21.95 SH...
Mine is about 24 inches tall (the Pole)...
Keep your eyes open for the pole type as its a direct adaptation to a bellows and minor adaptation to 1/4 inch knob to mount the cameras base plate for a tripod....
Check it out, they come up often just ebay at the main page not in business or photo...PEOPLE GET LOST in figuring out where to place there adds a lot of the time....
Gene
Pillar of the Community
aladinslamp's Avatar
United States
3076 Posts
 Posted 09/11/2014  12:47 am  Show Profile   Bookmark this reply Add aladinslamp to your friends list Get a Link to this Reply
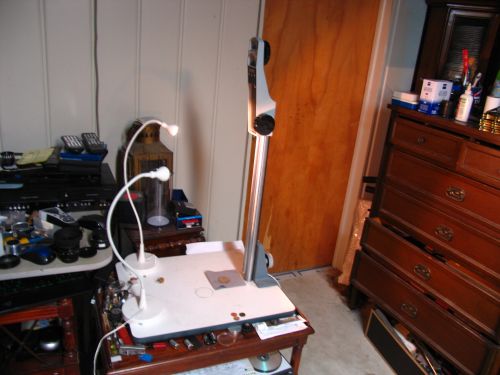
Just got back into town so I thought I would post some pics of my cheap Enlarger to copy stand conversion...I believe It was a Durst F30 or 60, many types have the basic pole with perhaps a better enlarging head system for the difference in the numbering as well as some have a different pole assemble which do not look like a simple conversion..Mine is as follows...

Using-A-Converted-Enlarger-Stand 
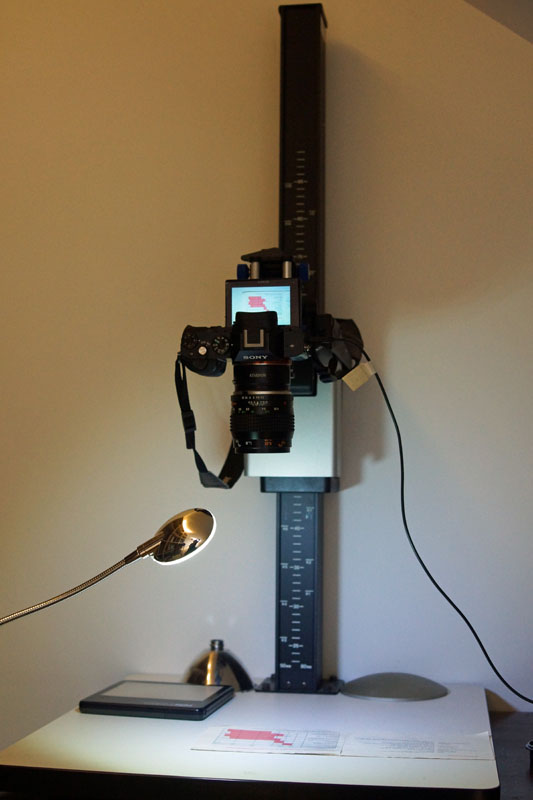
This is the basic pole and base with the enlarging head not attached ..its about 29 inches tall to the mounting knob hole with an effective camera mount distance of 23 1/2 inches to the edge of the mounted lens, and the closest the camera lens rim to the plate is 4 1/2 inches and this is with no extension rings...


Using-A-Converted-Enlarger-Stand 
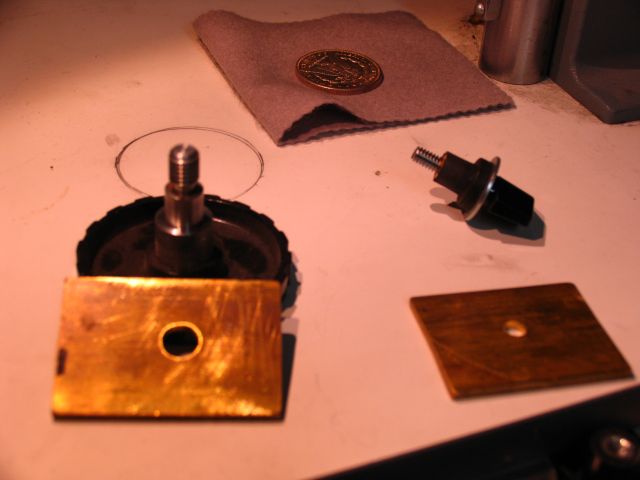
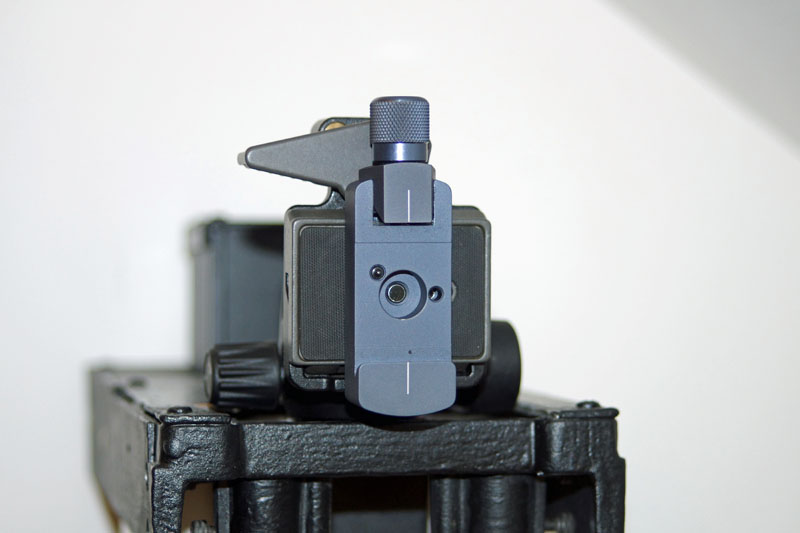
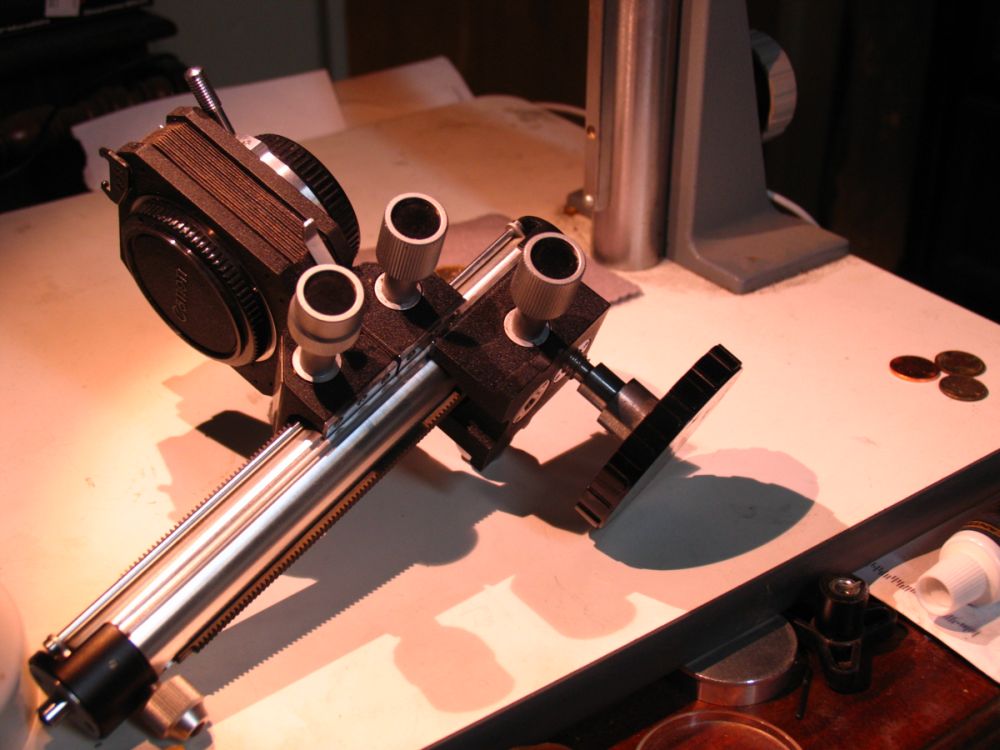
this picture shows the big knob that mounted the enlarger..its a 3/8th's thread, which happens to mount my canon FD bellows, and the other smaller knob is a 1/4 inch thread that will also work with my bellows as well as the usual 1/4 inch standard camera tripod adapters to mount the camera to what ever...
This 1/4 inch threaded knob is the first part of the conversion......it was purchased at Lowe.s in there bins of odds and ends near the nuts and bolts..its basically a 1/2 inch rubber bushing that has a metal center that is threaded to 1/4 inch. the Durst BIG knob has a 1/2 inch shaft and the end is a 3/8th's thread so the knob conversion to 1/4 inch uses the 1/2 inch rubber bushing and a basic knob that has a straight 1/4 inch threaded shaft that can mount any 1/4 inch camera to tripod type mounts....
Notice the brass squares, I mad 2 that are wider that the Durst frame...as it is not flat,, and is slightly wider than the tripod or bellows mounting surface, so they are basically a backing plate so the camera mounts can be flush with the frame head, the holes are 1/4 and 3/8ths respectively

Using-A-Converted-Enlarger-Stand this pic simply shows the stock 3/8th's threaded knob that mounts directly to my canon FD bellows..direct bolt on with no conversion, I don't know when every thing went to 1/4 inch.. but apparently for old school stuff I believe 3/8ths was common...

Using-A-Converted-Enlarger-Stand 
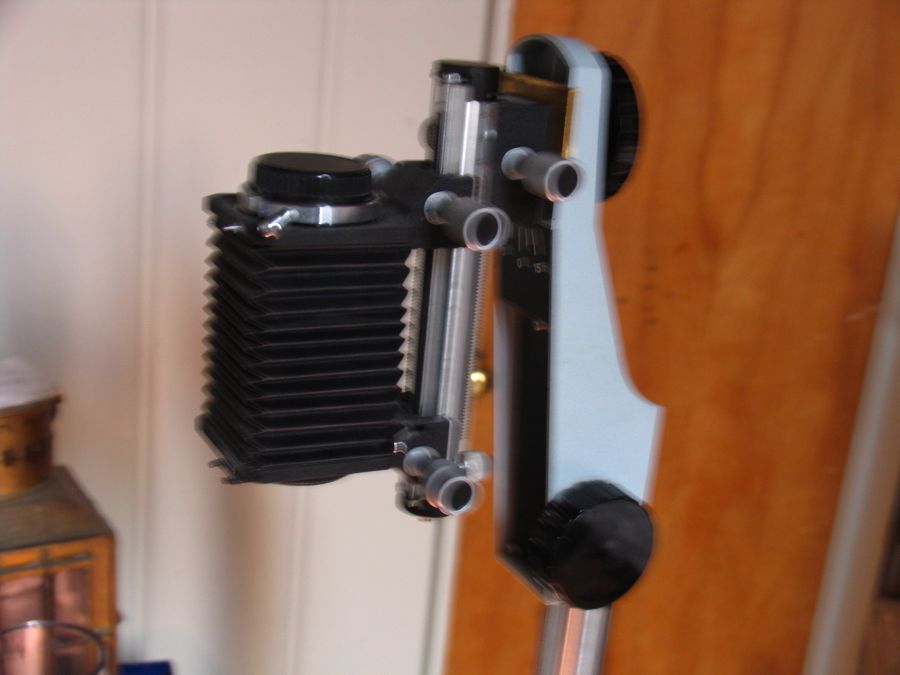
this is just a photo of the mounted bellows ....

Using-A-Converted-Enlarger-Stand 
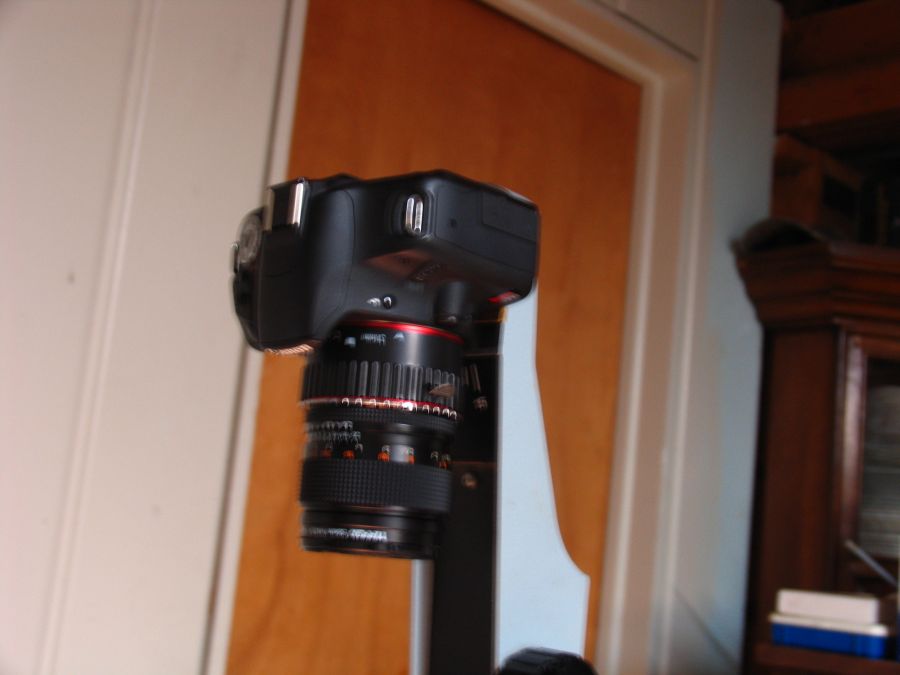
this now is the last photo using the 1/4 inch small knob with the bushing to mount the camera to this stand......Note the POLE is completely perpendicular to the floor plate, it is NOT ANGLED...
These are very strong, solid mounts, the oly thing I would like is if it was gear driven rather than friction drive( the method by which it raises or lowers the camera)
on the shaft, but really either system allows you to come into t ball park distance by which you use the lenses to get to the optimum focus......I think I paid about $50 with shipping which is around 20 bucks, due to all the weight..
but its 100 bucks cheaper for a stable "copy stand" which do not look all that great...I passed on the whole system recently for 40 bucks price and shipping as I don't need a second one....The basic CHEAP idea is to get something very solid as a stand/POLE, that one can mount a camera to, have enough height, depending on the lenses you are trying to use
they are well worth the money.......
Valued Member
ALP's Avatar
United States
234 Posts
 Posted 09/16/2014  09:19 am  Show Profile   Bookmark this reply Add ALP to your friends list Get a Link to this Reply
Hopefully this will be a quick question, but for those of us knew to the photography world, what is the difference in a copy stand vs. an enlarger stand?
Pillar of the Community
austrokiwi's Avatar
2087 Posts
 Posted 09/16/2014  09:34 am  Show Profile   Bookmark this reply Add austrokiwi to your friends list Get a Link to this Reply

Quote:
what is the difference in a copy stand vs. an enlarger stand?


Theres a huge difference an enlarger stand was a crucial piece of dark room equipment back in the days of pre-digital photography. An enlarger was effectively a projector. The negatives would be placed in a tray and an image would be projected on to the base board where the photography paper was placed. This was how large photographic prints were made. The two stands shown in this thread have had the enlarger parts removed I had to use cutting discs to remove the negative tray and projection equipment.


For some reason I couldn't find a photo of my copy stand before I converted it......Heres one for sale on ebay:

http://www.ebay.com/itm/Durst-nevon...em4adc441a71


Its better to find one in a local shop as the postage costs can be punitive
Edited by austrokiwi
09/16/2014 09:45 am
New Member
United Kingdom
8 Posts
 Posted 02/27/2020  10:34 am  Show Profile   Bookmark this reply Add claudius 11 to your friends list Get a Link to this Reply
First of all I must say I like this thread, myself I have just bought an old Russian YHA5 portable enlarger with parts missing but the parts I want are there and will obviously need to modify it. I think the lighting will be the challenge. As for macro look for an old broken camera and use the front lens but you must reverse it did this years ago photographing moths and it worked a treat.
Pillar of the Community
Learn More...
United States
4038 Posts
 Posted 02/27/2020  9:34 pm  Show Profile   Bookmark this reply Add rmpsrpms to your friends list Get a Link to this Reply
Yes, good thread. I wish Austrokiwi would post here again. I'm particularly interested in his experiences stitching images taken by panning an APS-C or FF sensor across a wide format lens image. I plan to use this method but have not yet built the system, so would be interested in his observations.
Contact me for photographic equipment or visit my home page at:
http://macrocoins.com
  Previous TopicReplies: 10 / Views: 9,666Next Topic  

To participate in the forum you must log in or register.


Disclaimer: While a tremendous amount of effort goes into ensuring the accuracy of the information contained in this site, Coin Community assumes no liability for errors. Copyright 2005 - 2026 Coin Community Family- all rights reserved worldwide. Use of any images or content on this website without prior written permission of Coin Community or the original lender is strictly prohibited.
Contact Us  |  Advertise Here  |  Privacy Policy / Terms of Use

Coin Community Forum © 2005 - 2026 Coin Community Forums
It took 0.35 seconds to rattle this change. Forums