| Author |
 Replies: 15 / Views: 5,925 Replies: 15 / Views: 5,925 |
|
|
Pillar of the Community
2087 Posts |
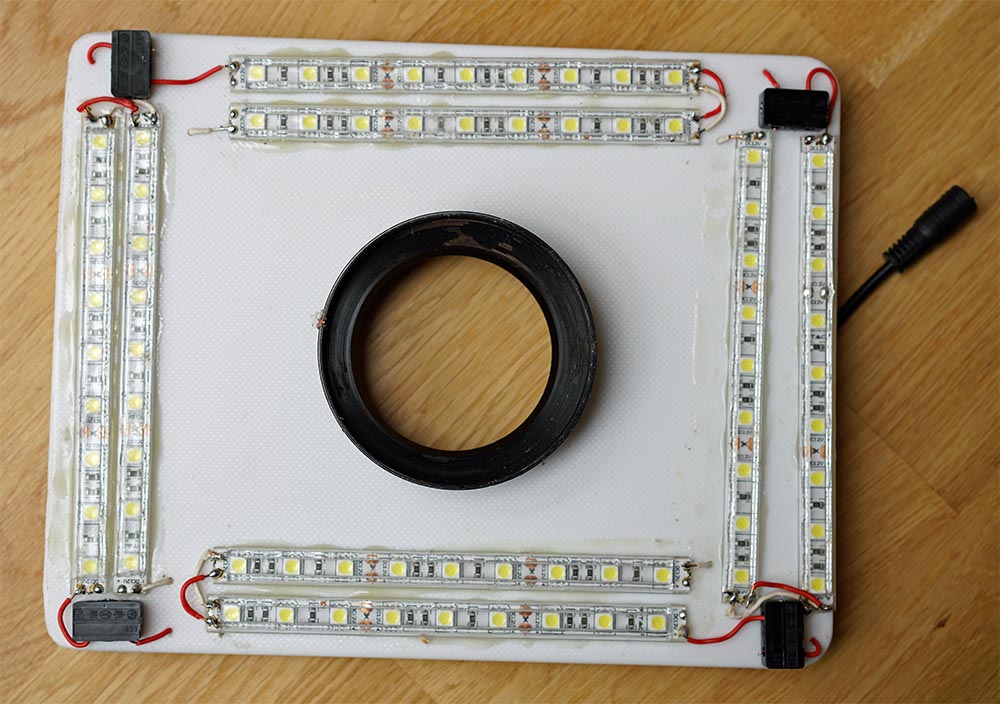
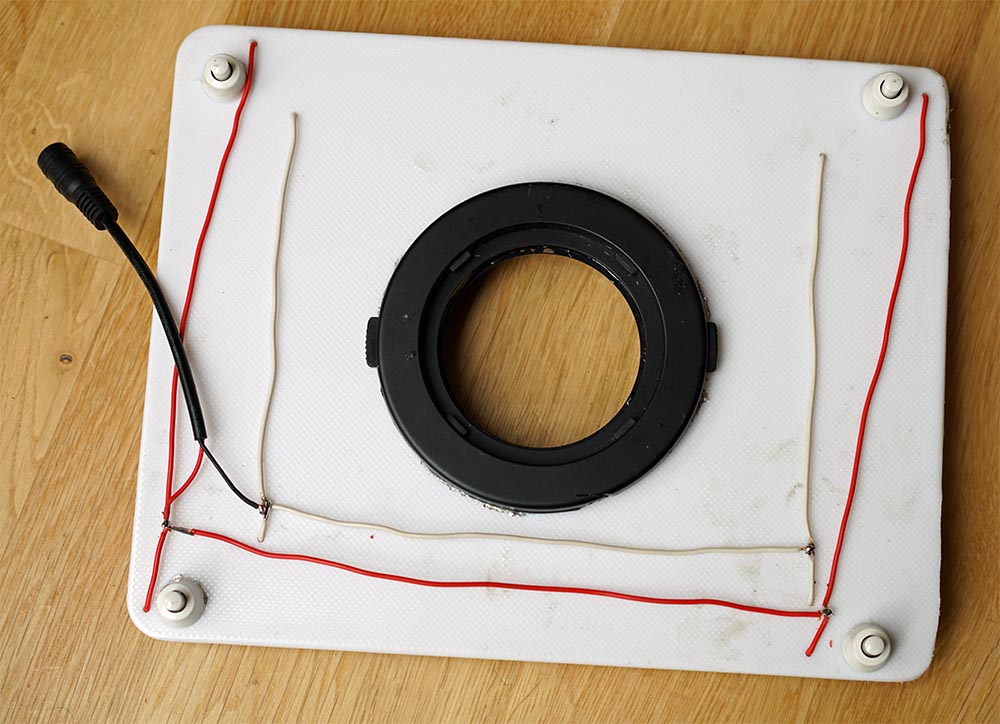
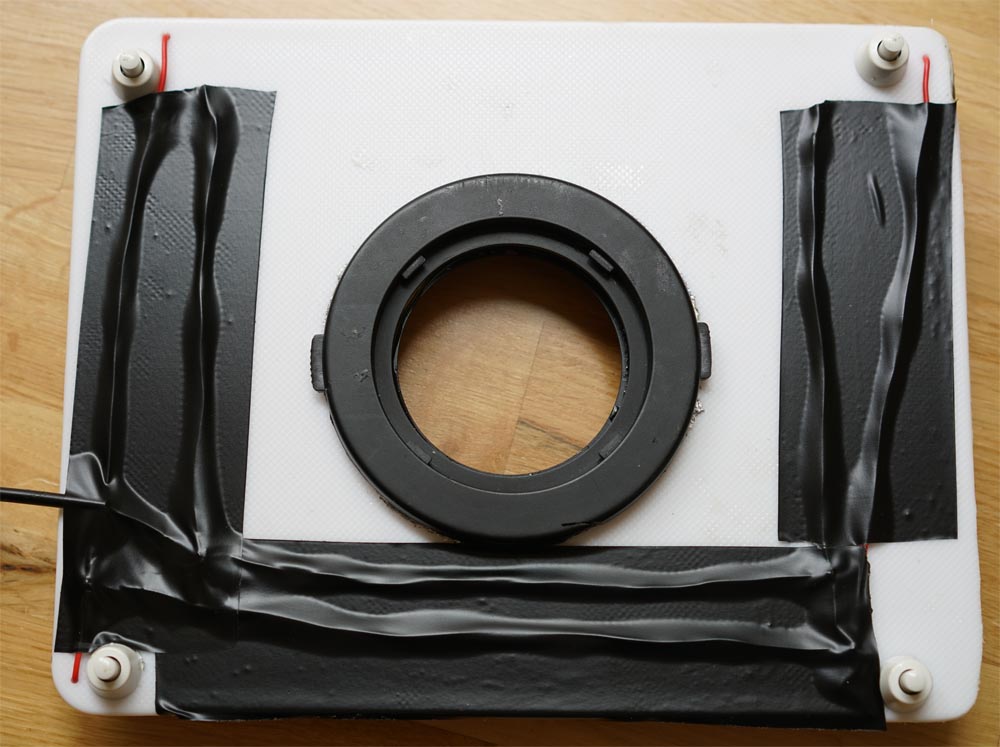
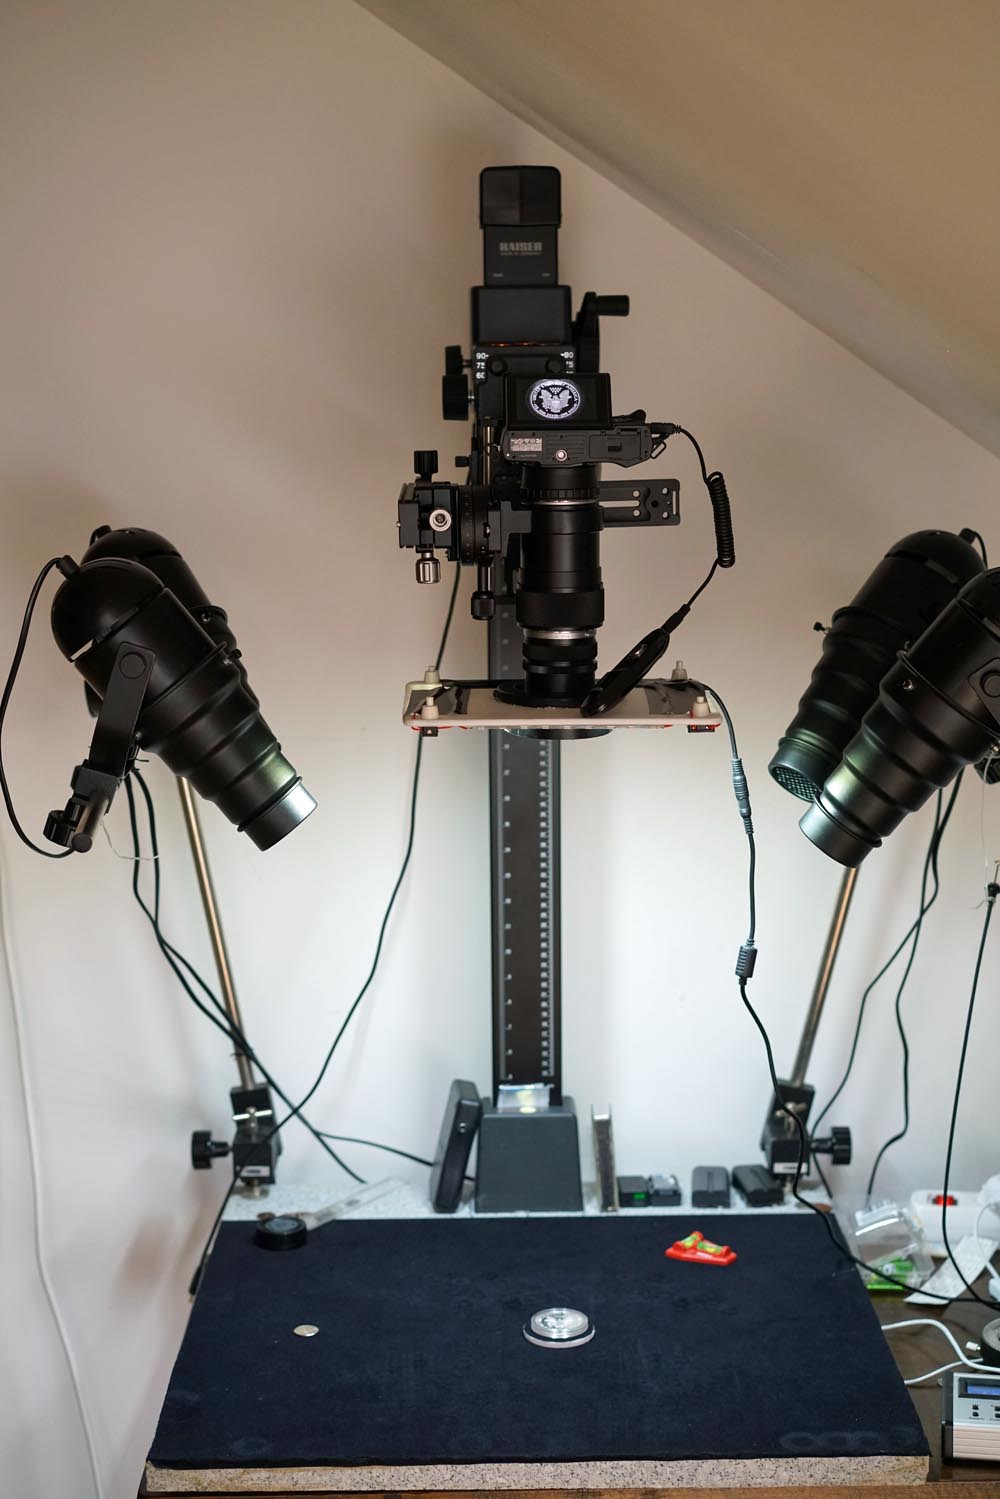
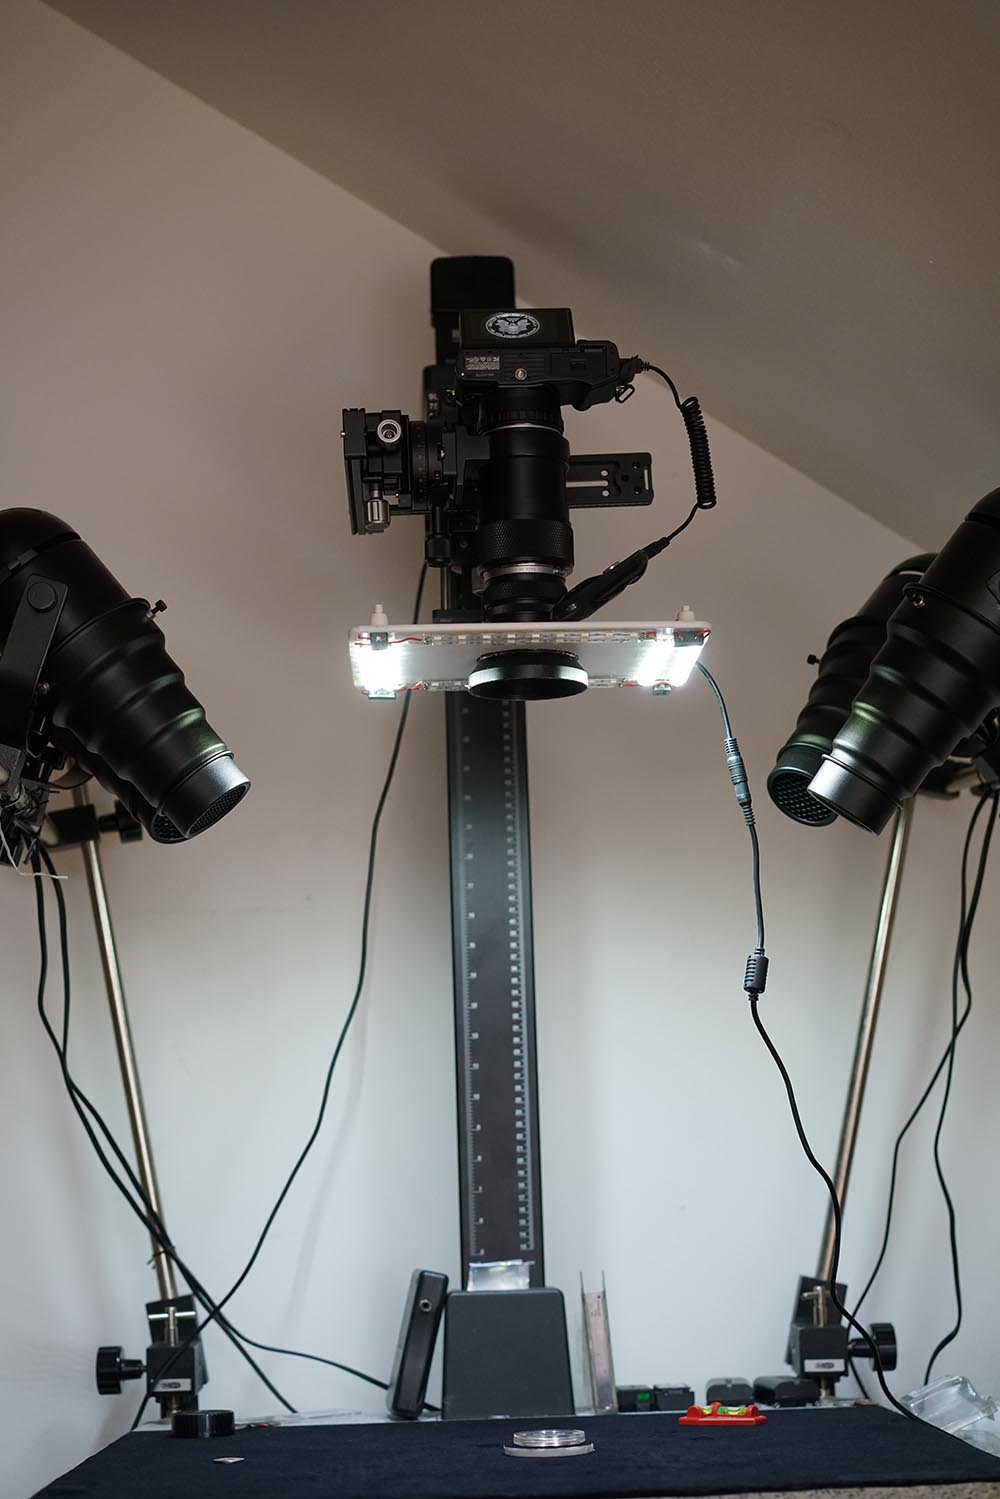
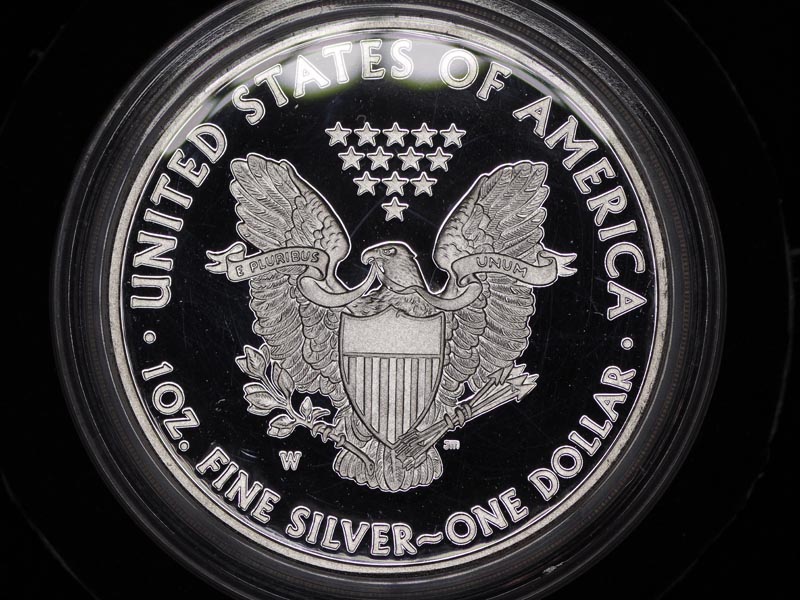
I find photographing coins in plastic prisons extremely hard to do. Late last year I found a solution, by accident, that matches my techniques. I understand that one successful technique of photographing slabbed coins is to tilt the slab slightly. I would imagine that would work very well with a deep depth of field However with my camera I am usually working with very shallow depths of field. The absolute minimum aperture I go to is F8 and that is really pushing the diffraction limit. More normally I am using an aperture in the range of F2.8- F6. This makes tilting the slab unworkable unless I use stacking and sometimes I just can't be bothered focus stacking. My serendipitous solution arose because I was trying to make a portable light source. I have used ring lights in the past but I have found them limiting as the light source is just too close to vertical. I fitted the lens mount section from an un-serviceable ring light( purchased for less than US$5.00) to a polypropylene board of 9.5 inches by 8 inches. I then attached a cold white LED lighting strip to the board. This produced a very successful lighting system that was very portable and was mains powered. I would note that I probably added one extra row of LEDs unnecessarily( just the two outer rows are adequate) By chance I tried it on an encapsulated coin( the last photo) and I was stunned by the result. I subsequently tried it on other slabs with similar results. I still have to finish the light panel off. So far one very useful modification was to fit a lens hood to the homemade panel light. Note I took the self adhesive tape off the LED strips and used epoxy resin instead The coin photo shows the result that can be obtained. There was just no sign of any glare from the slab. Cost was about US$50.00. As I noted I was looking at producing an easily portable Mains operated lighting system. It is successful as a portable lighting rig the panel just slips nicely into the Lap top section of my camera bag The photos should be self explanatory.. Those photos don't show the ring-light mount( on the other side... I just screw the correct mounting ring to the lens filter and the panel just clips on to that ring( as a ring light does). It is optimized for a lens of 90mm-105mm and it does work on a 135 mm lens ( but not as well) and it is useless on a lens less than 60mm ( the lighting angle becomes to acute 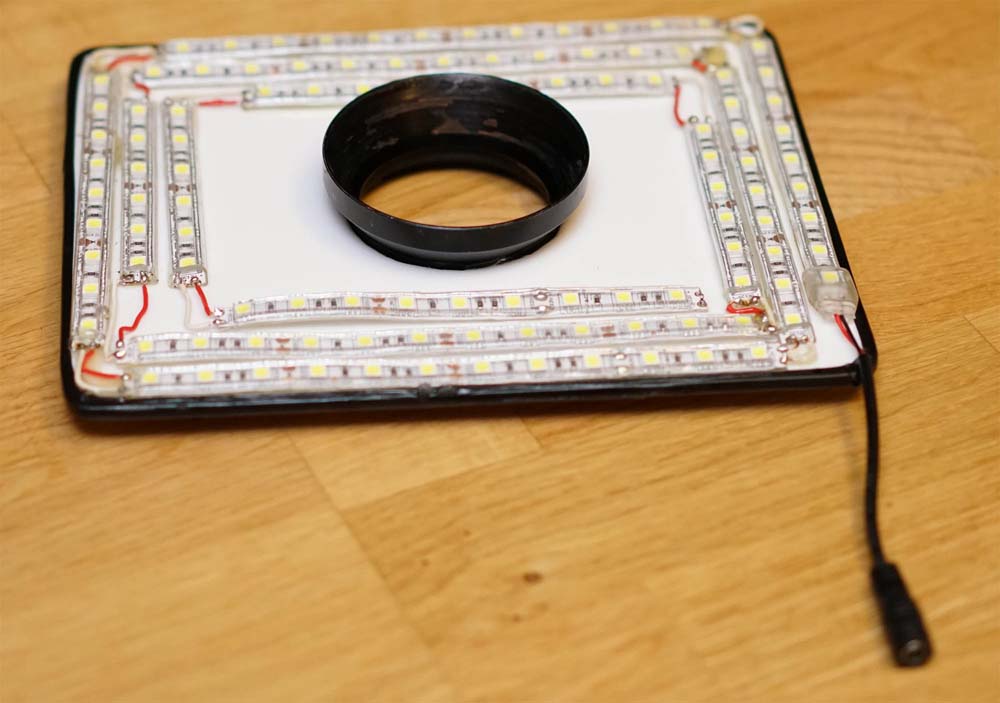 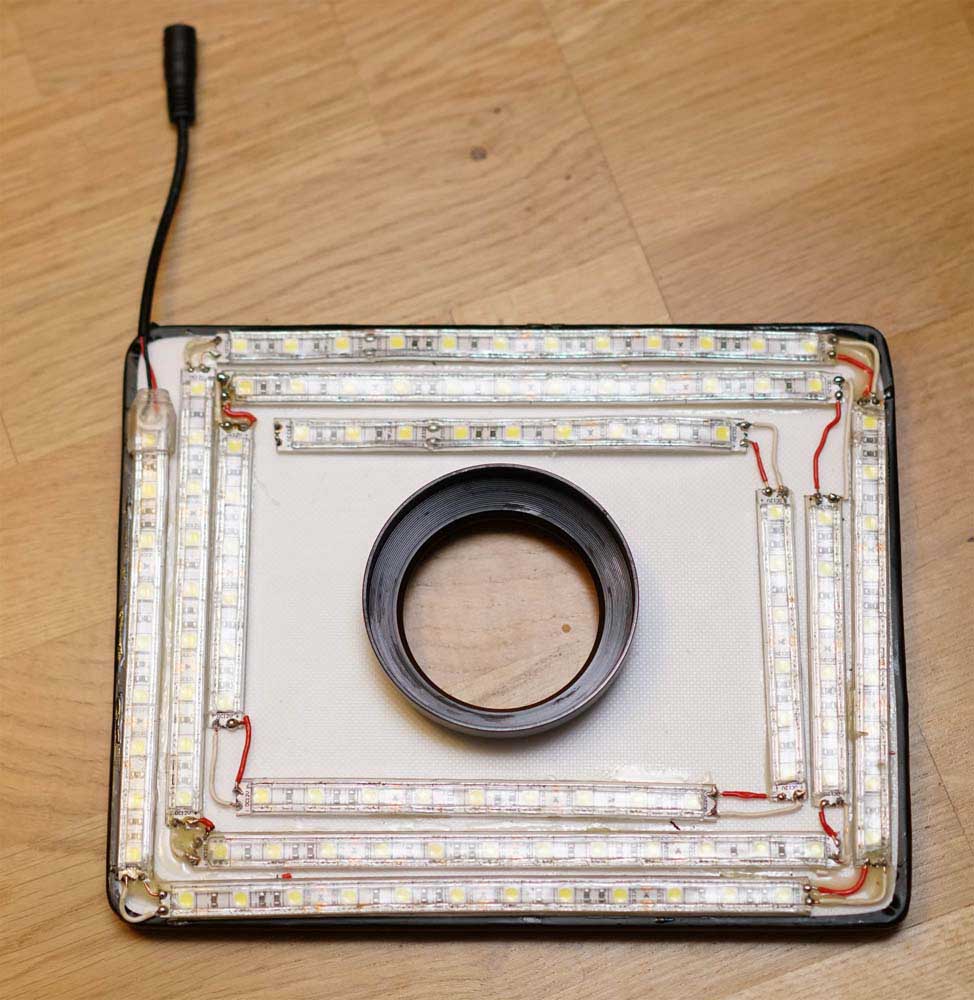 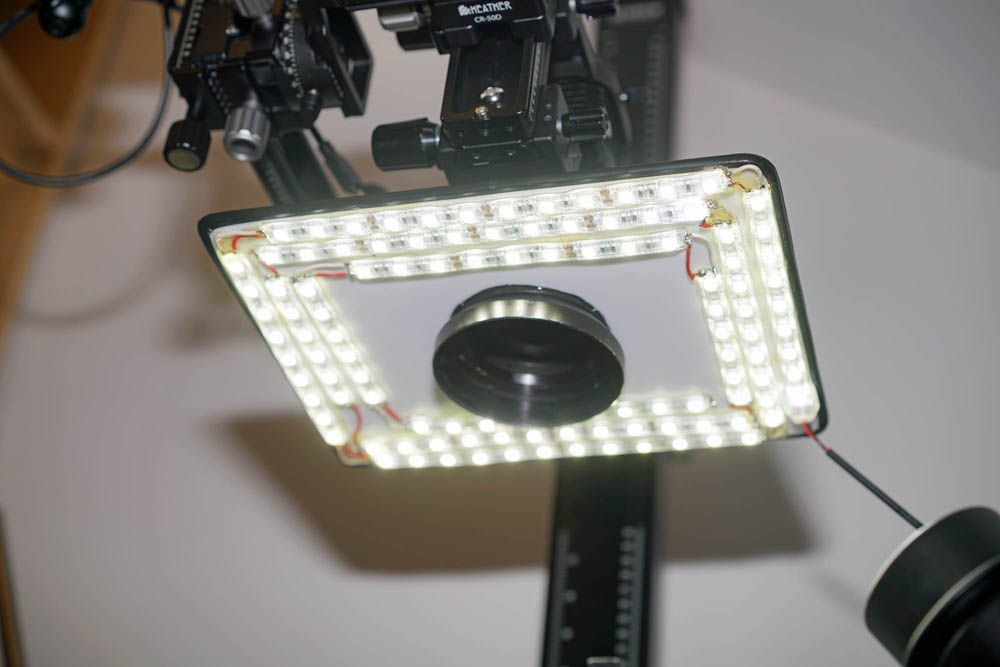  Obviously it is only one possible technique but it works well for me (with my gear and techniques) You will see in the second photo one of the faults of a camera that doesn't have a anti aliasing filter( low by pass filter) Inside the lens hood(at 12 O'Clock) you can see the moire pattern ( much reduced in that picture; In the full sized picture picture it is much more dramatic) Edited by austrokiwi
01/22/2016 10:46 am
|
|
|
|
Pillar of the Community
 United States
4038 Posts |
Nice! I'd like to see the same thing but with the ability to turn on/off each row to adjust intensities or turn on/off entire banks of lights to give more directionality to the light.
I don't know how this helps with slabs, though. Is your goal just to get even lighting? You mention tilting, but this is to get more axial type lighting, and is not very successful with slabs since the light shines off the surface and causes glare.
I'd be curious to see the reflection pattern created by your lights. Best way to see the pattern is just to put a mirror on the surface where the coin goes.
|
|
Pillar of the Community
 2087 Posts |
Quote:
I'd like to see the same thing but with the ability to turn on/off each row to adjust intensities or turn on/off entire banks of lights to give more directionality to the light I hadn't thought of that... I just wired up the LED strip segments in series. It wouldn't take much to re wire it in parallel and add switches to control which strips are on. It will also tolerate a dimmer switch. In building this I was only looking at a completely even light source Quote:
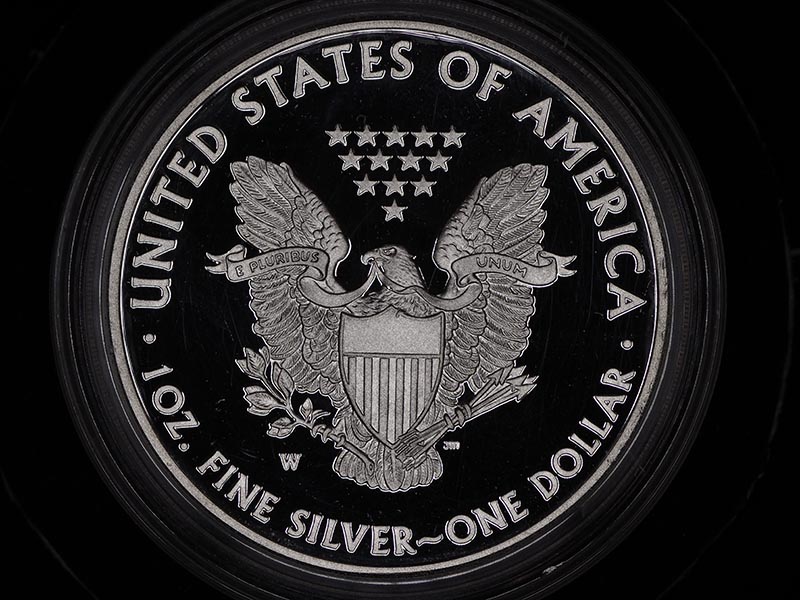
I'd be curious to see the reflection pattern created by your lights. Best way to see the pattern is just to put a mirror on the surface where the coin goes These two photographs were taken using the APO rodagon 90mm using a half stop between 5.6 and 8. All my good slabs are back in the bank so this was a grotty example: I also did not fill the sensor with the coins image... so we can see there is some glare but it is away from the coin. the following picture is my wife's compact mirror placed on top of the slab. You can see on the right the mirrors "silver frame". With the 90 mm the led lights are at 70 -80 degrees. with the 135 they are getting closer to 85 degrees( near axial) 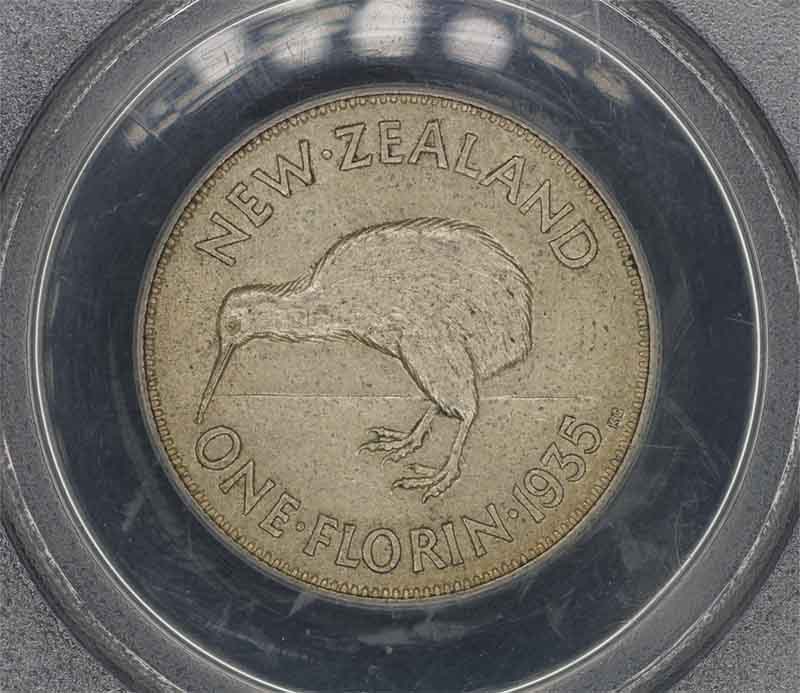  Edited by austrokiwi
01/22/2016 1:36 pm
|
|
Pillar of the Community
United States
4038 Posts |
They're still well outside the radius of the coin, so no glare if the subject is flat. For the slab shot, I'd bet the areas that are showing glare are slightly tilted. Looks good!
edited to add: with the 135, at higher angle, I'd bet the lights start to show some glare. This is also where being able to turn off the inner groups might help, ie to eliminate the glare if it indeed shows up.
I like this idea. Maybe I will try to build something similar.
Edited by rmpsrpms
01/22/2016 9:16 pm
|
|
Pillar of the Community
United States
9395 Posts |
Quote:
edited to add: with the 135, at higher angle, I'd bet the lights start to show some glare. This is also where being able to turn off the inner groups might help, ie to eliminate the glare if it indeed shows up.
If the bottom side of that round thing is threaded, perhaps you can attach step-up rings to it. With the proper size step-up ring(s), you can block out the subset of LEDs that are reflecting off the coin (rather than switching them off). This is what I use to avoid reflections off a coin, and especially a slab -- note: I don't have LEDs, but Jansjos shine down from above through a diffusing paper, and sometimes blocking is needed below the diffuser to avoid glare. |
|
Pillar of the Community
Canada
2784 Posts |
austrokiwi great idea. I like it I see you wired this as one continuous light good idea. I like it. austrokiwi yes I am keeping the Sony for sure. I really like this camera. the canon I will shoot coins and my walk around camera. I like the Sony very much. I like what you have done I am going to build one of these. thank you
|
|
Pillar of the Community
2087 Posts |
Quote:
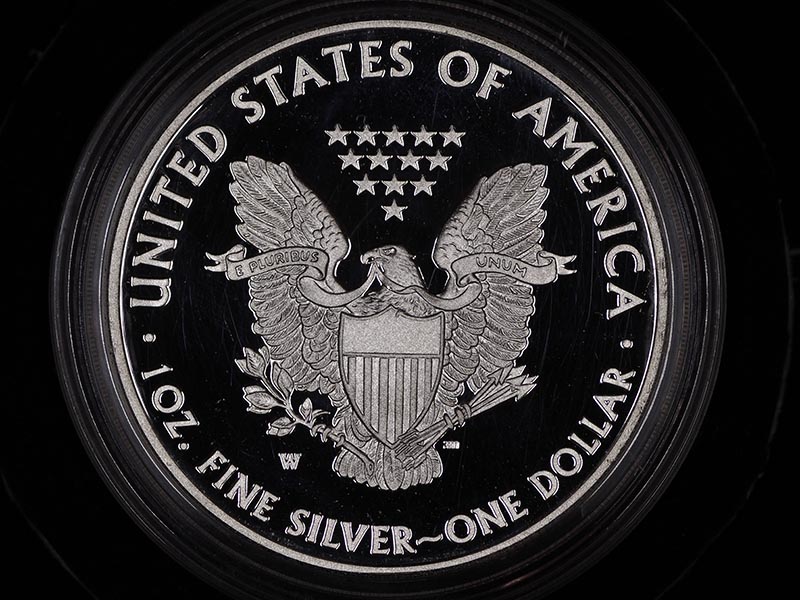
For the slab shot, I'd bet the areas that are showing glare are slightly tilted Thats the answer! I was very surprised to see the glare. As I noted at the outset when I tried it on other slabs( this is the first time I photographed this old slab) there was no sigh of glare. Checking the slab; at the point of the glare the slab is curved. Quote:
with the 135, at higher angle, I'd bet the lights start to show some glare Yep. And with less than 60 mm light stops getting to the slab My focusing stage is a cut down Microscope stand so With a close working distance the LEDs shine past the the coin stage. Quote:
If the bottom side of that round thing is threaded, perhaps you can attach step-up rings to it. With the proper size step-up ring(s), you can block out the subset of LEDs that are reflecting off the coin (rather than switching them off). Good idea for now. However the panel was built with simplicity in mind The aim was just a set and forget light. So In a few months I will build another( I have another kaput ring light) working in some switching ... I will also look sourcing a battery pack for it Quote:
the canon I will shoot coins and my walk around camera Rocky I made the huge mistake of passing my second camera( Sony A65) on to my daughter. Now I don't have it I really miss having a second camera. My plan is to get a OLYMPUS OM-D M10 Mark II but not until much later in the year. I want a MFT camera With 5 axis IBIS as many of the legacy lenses I use on the sony will also be very useable on the Oly. I discovered that having IBIS with legacy lenses is very useful. Also It would be nice to be able to take smaller MP coin shots for posting online and ebay. Edited by austrokiwi
01/23/2016 12:43 am
|
|
Pillar of the Community
Canada
2784 Posts |
yesterday I had to go and get a procedure done at the hospital. they pumped me fun of these drugs. I told them the last time you did this. could not sleep for 24 hrs. guest what same thing again. so austrokiwi I been playing around with a Nikon micro lens. plus a small little camera. if I can get it to work right. I will show away to check coins. you wont believe and guest what very cheap. one can watch the monitor. just move the lens over the coins. I have purchased the pieces from China and the USA. if it works I show you have a great one
|
|
Pillar of the Community
Canada
2784 Posts |
austrokiwi question so these leds are 12v. cool wrm is 2700k. are you taken your power from your laptop. if you are then that would mean your laptop has a built in invertor. I am wondering does all lap tops have built in invertors. or do you have a invertor in line to change the ac to dc . could you tell me
|
|
Pillar of the Community
2087 Posts |
Quote:
12v. cool wrm is 2700k. are you taken your power from your laptop. Power is from mains though an invertor which outputs 12 V @ 5 amps I purchased a 5 meter( way too long) internal (non-water proof Lighting strip and the invertor from the local hardware store I did a bit of research before I purchased. the LED lighting strips come in two types 4 pin and two pin. I picked 2 pin as that made the soldering easier. The strips are easily cut into sections( the cut points are marked on the strip) a 3 meter roll is more than enough for a single panel. |
|
Pillar of the Community
2087 Posts |
Edited by austrokiwi
04/06/2016 10:53 am
|
|
Pillar of the Community
Canada
2784 Posts |
austrokiwi I like it. you have done a good job. the switches are a great idea. austrokiwi I have purchased a very odd lens. the whole lens works based on DC power. I have seen some images. produced with this type of lens. we use to use these in airpatrol. the lens has a gyros stablelizer built in. have you ever built a pipe camera. just wondering. I am going to try to put one together. if I can do this right. this lens can produce out standing macro images. the tec in the company I worked for has retired and moved. he built these for us in airpatrol. just wondering if you have ever heard tell of one of these. have a great one. I like how you like to build stuff. I am like this also
|
|
Pillar of the Community
Canada
2784 Posts |
I like the images great job well done
|
|
Pillar of the Community
United States
3141 Posts |
Full slabs can be difficult, you've done a nice job with yours. I like it a lot. I'm working on a similar project for all of my coins. Here's my first two examples. My process is different but hopefully the results are satisfactory..   |
|
Pillar of the Community
Canada
2784 Posts |
srs77 nice photos good focus. these coin in the holders. they are definitely not easy to photography. good photos have a great one
|
|
Pillar of the Community
2087 Posts |
The the panel works well with raw coins as well. Which was my original intention  |
| |
Replies: 15 / Views: 5,925 |
|