| Author |
 Replies: 11 / Views: 904 Replies: 11 / Views: 904 |
|
|
Bedrock of the Community
United States
62064 Posts |
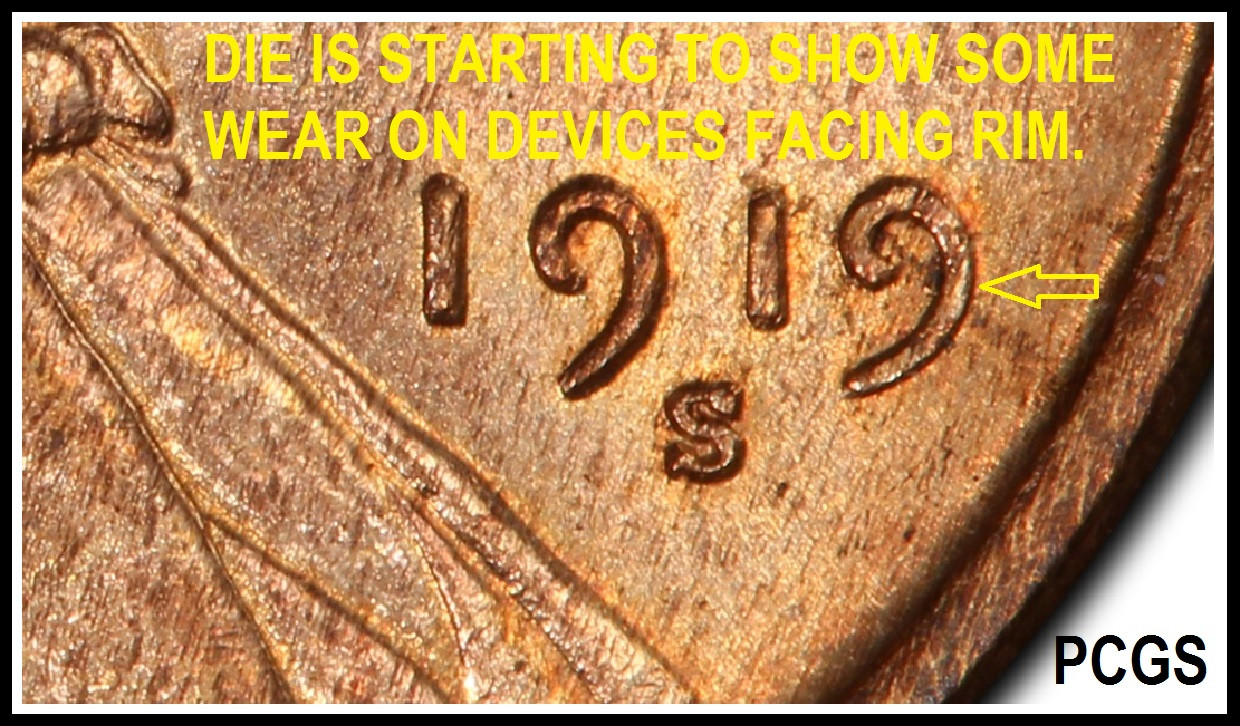
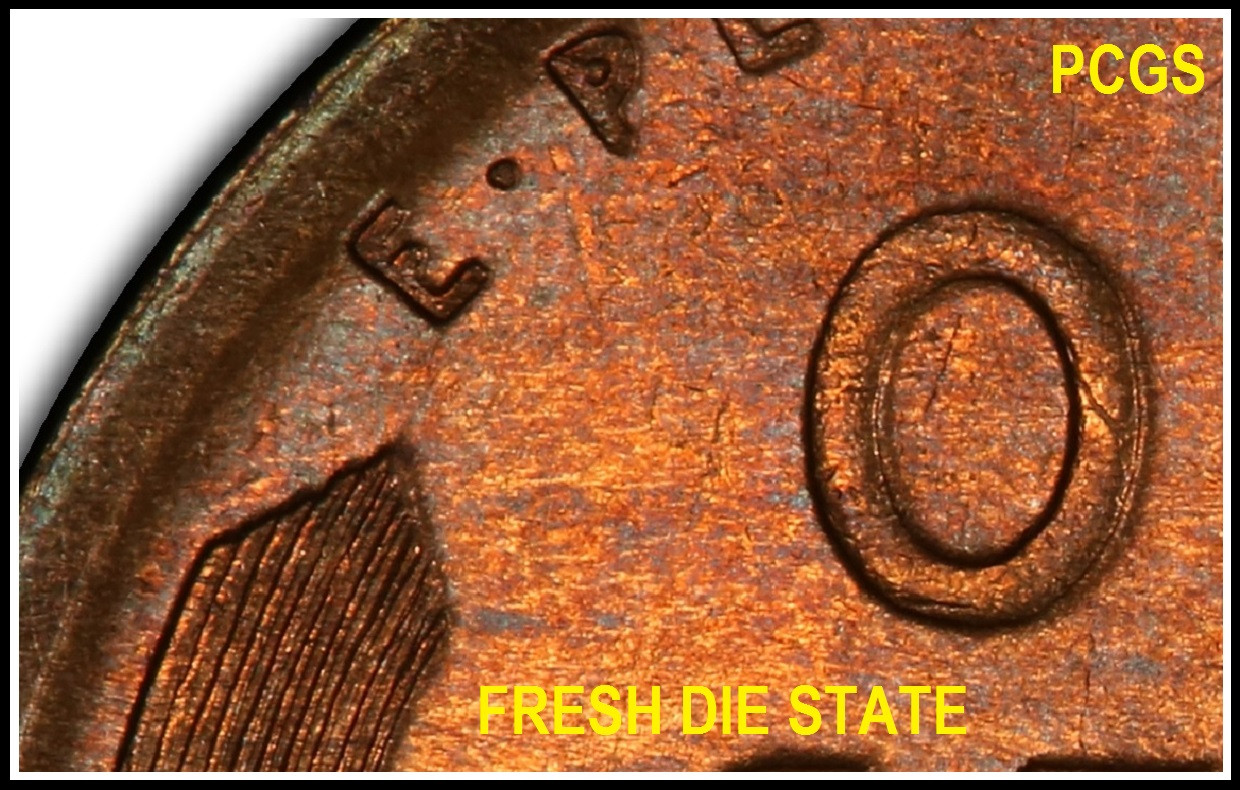
Die wear on wheat cents.Die wear is something that is a bit hard to notice, but when you use images side by side you can see the devices weaken, the die flow starting, the dies aging. But this takes patience to know where to look. What to examine. So I found some nice images on PCGS of different die states. What cause my eye was the worst die state and the best, so I decided to use these images for a die wear comparison to see how a wheat die wear is noticed. The first area we are looking at the rim area under the bust. This area didn't change a lot, but just slightly 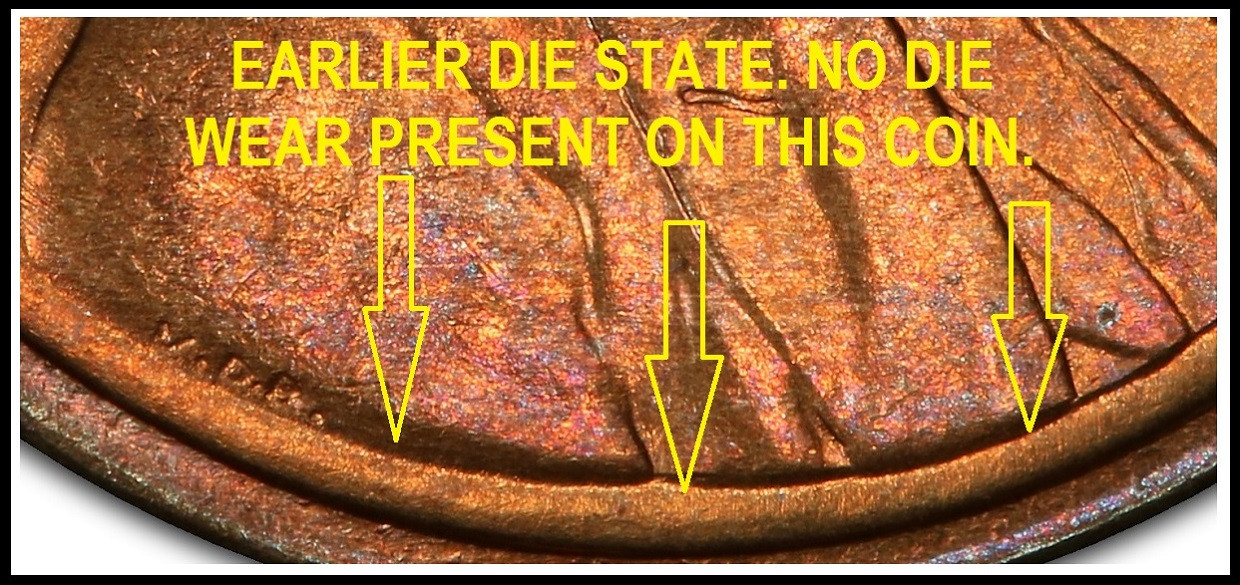 Note the texture change of this field area. Note the texture change of this field area.
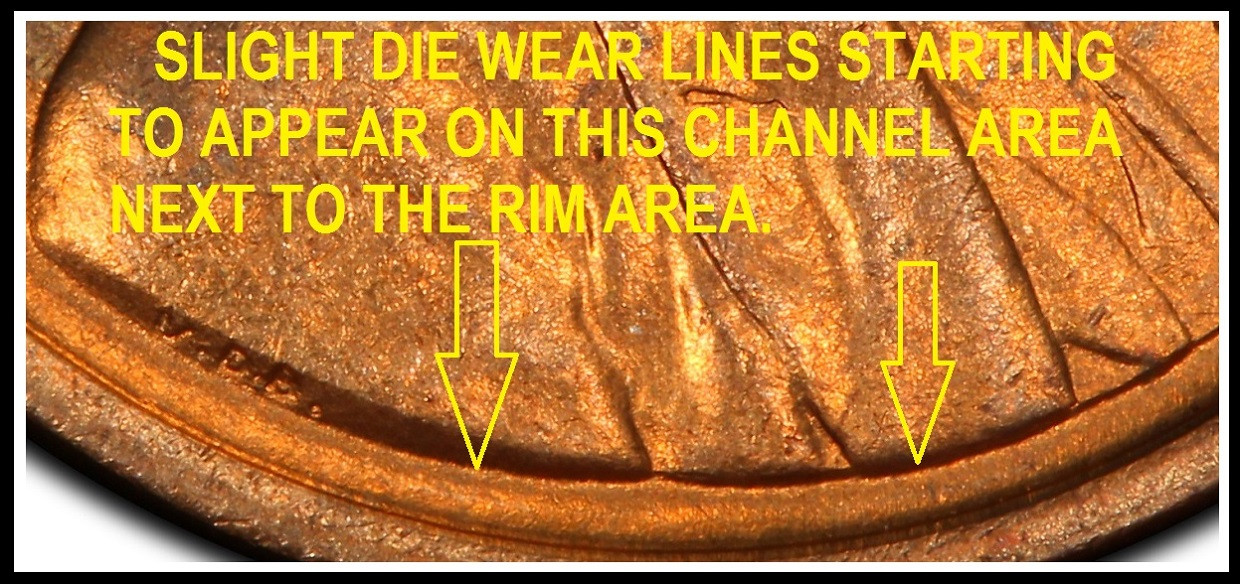
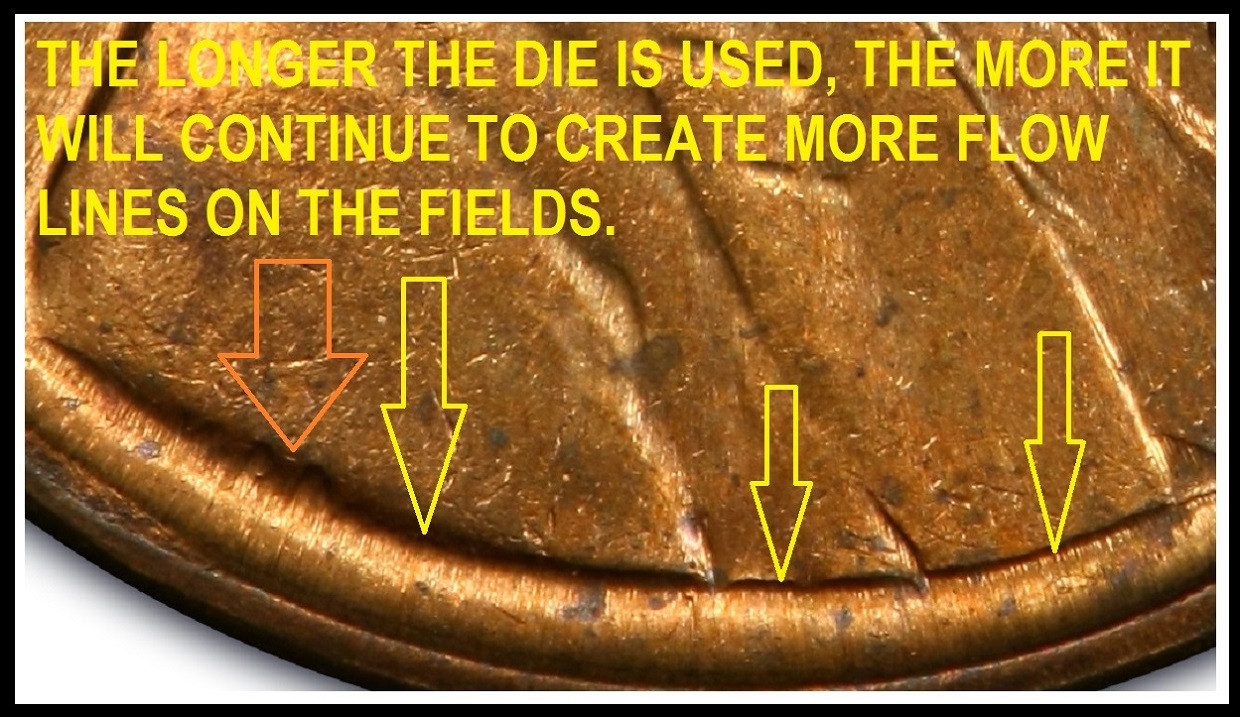
Note lines starting to form on this area?
They progress stronger as the die ages.
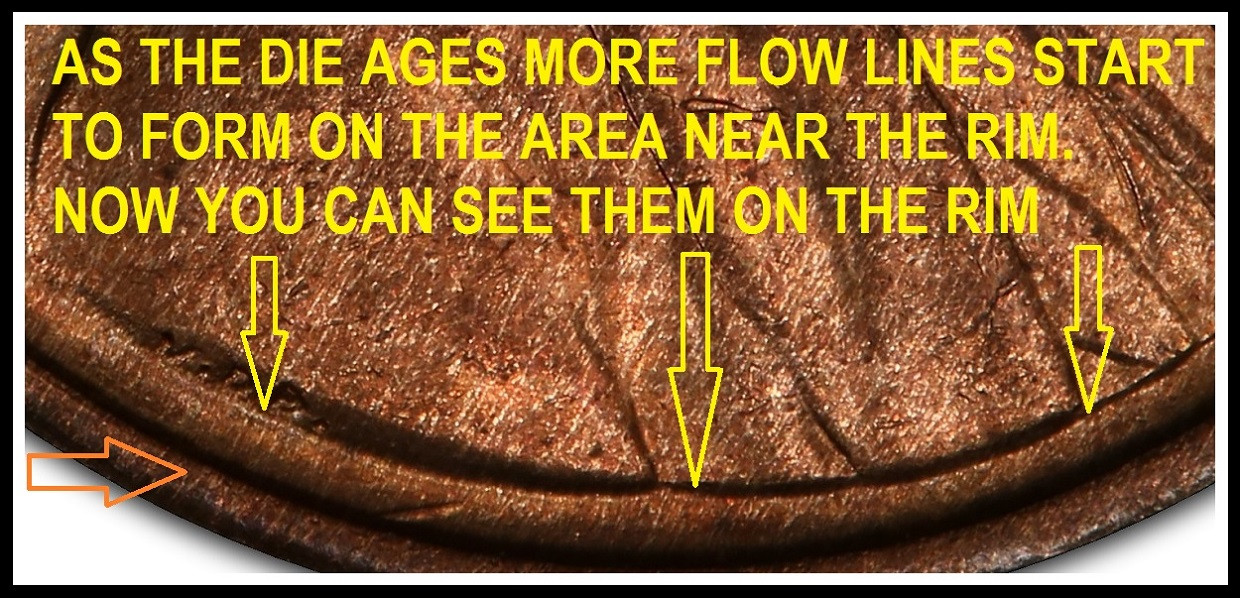
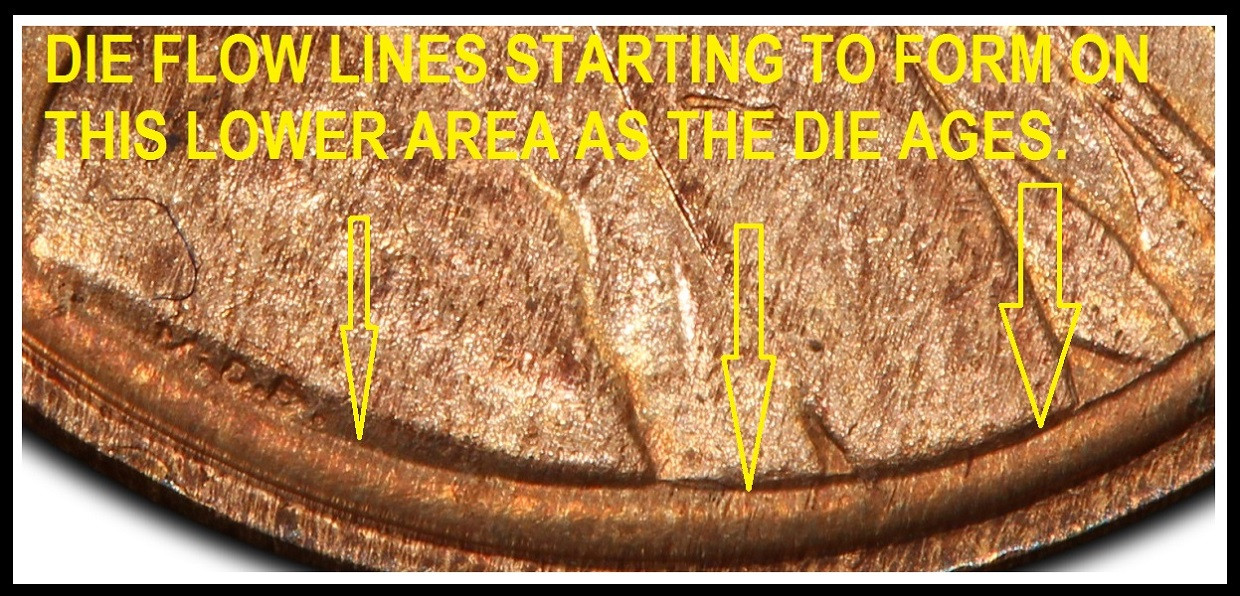
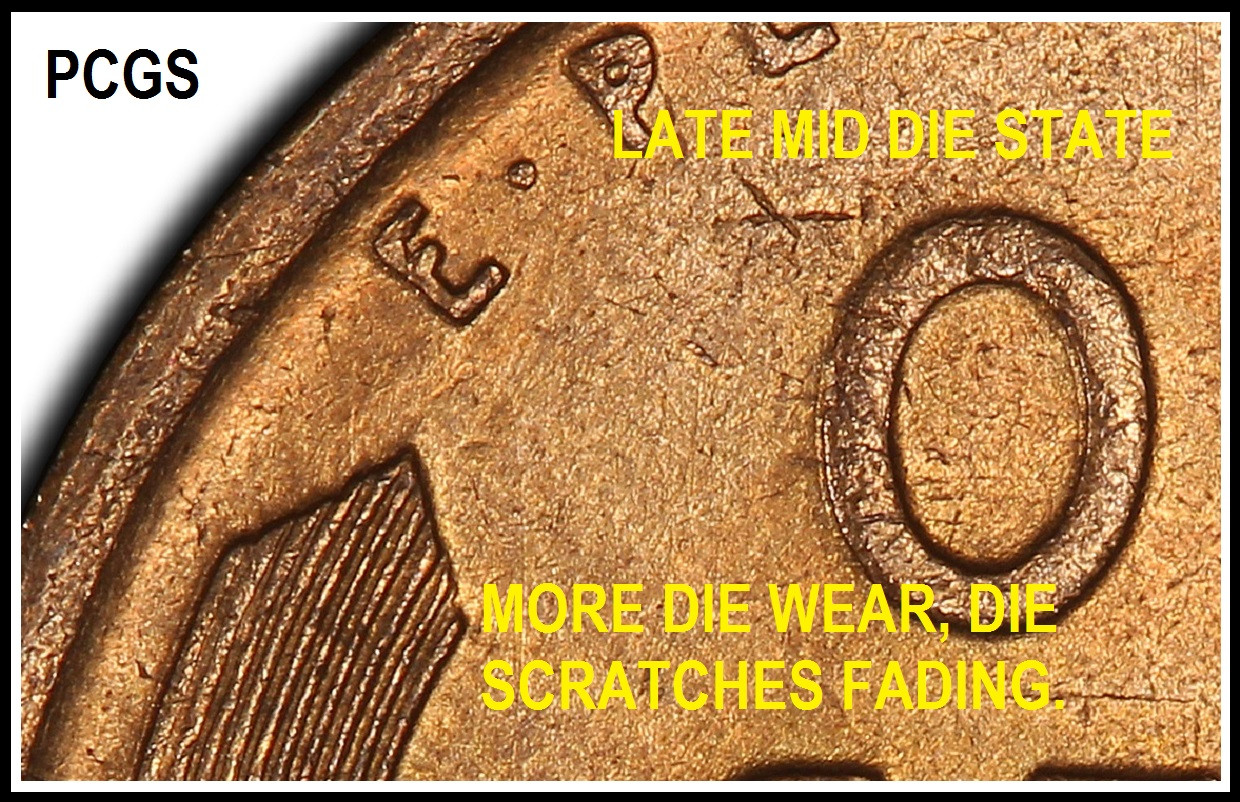
These lines develop because if the dies pushing the planchet material outwards to the rim to fit into the dies devices. After tens of thousands of coins, the same motion over and over create these flow lines, but cause the metal is flowing towards the rims to form the devices to what the die is designed to form.
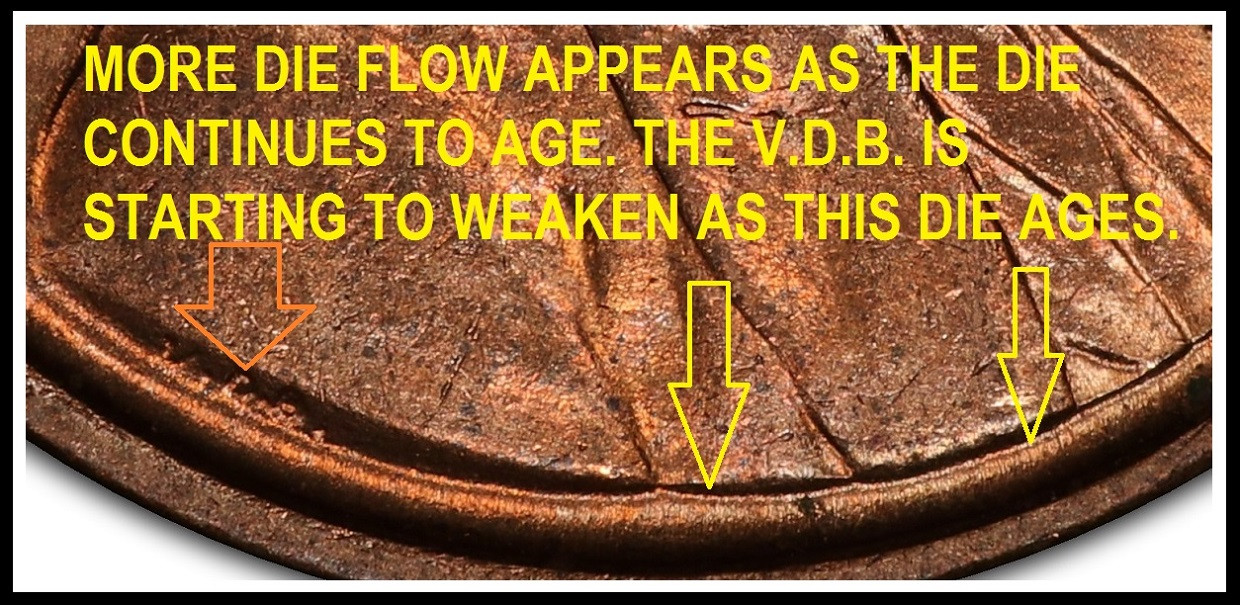
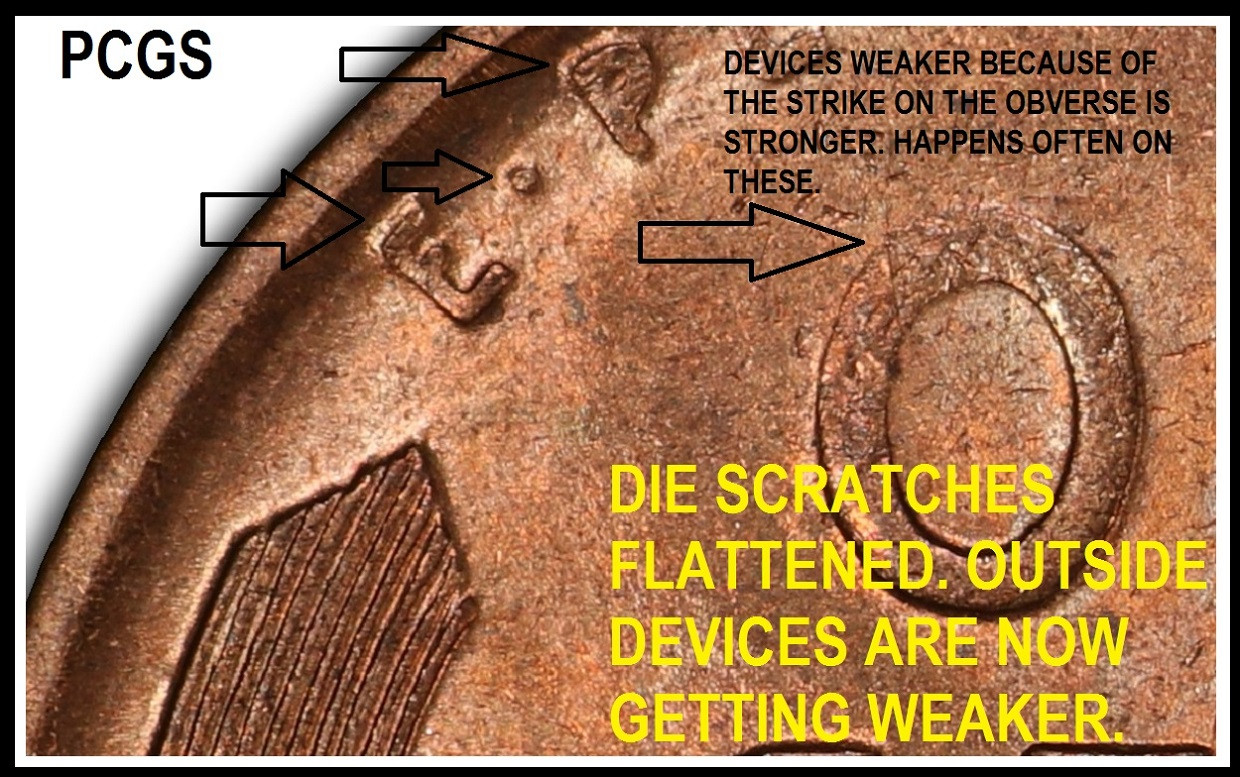
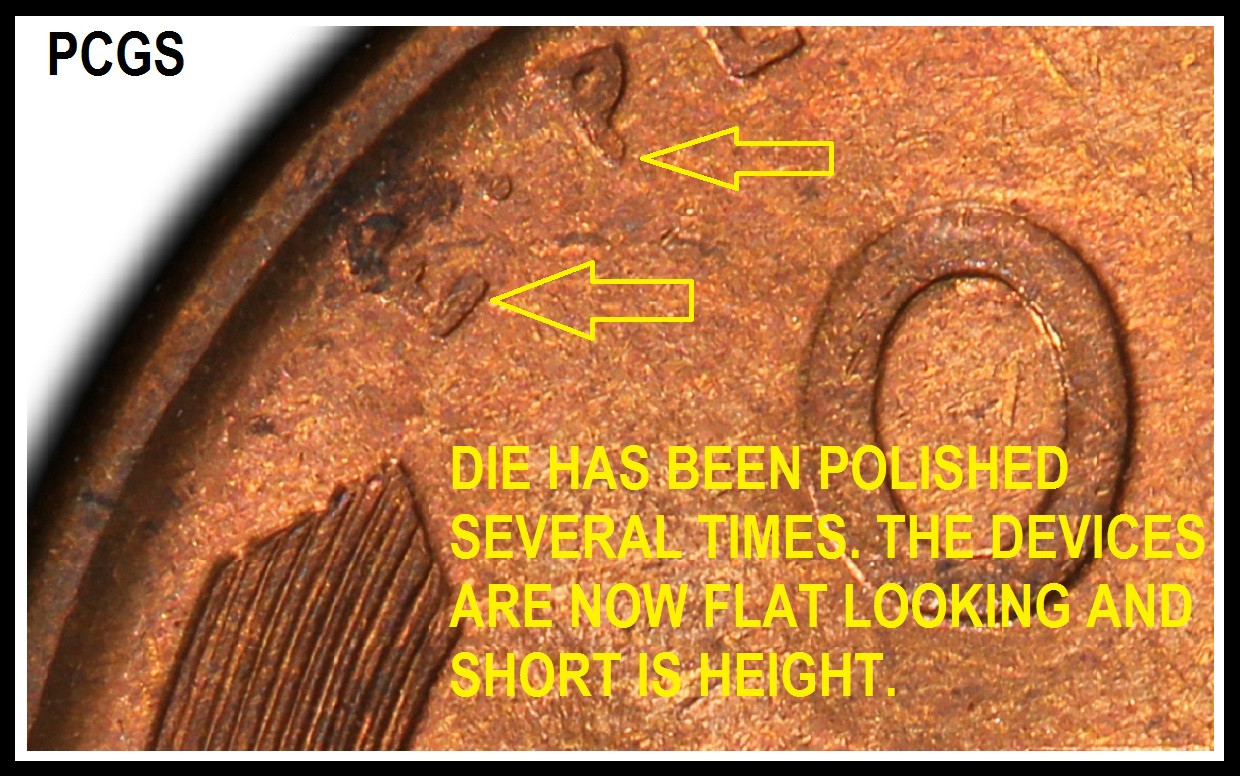
Now the raised devices on the die to make the incuse devices on VDB are now wearing away and it is fading. Also when die polishing happens, that area also suffers because they are raised on the die.
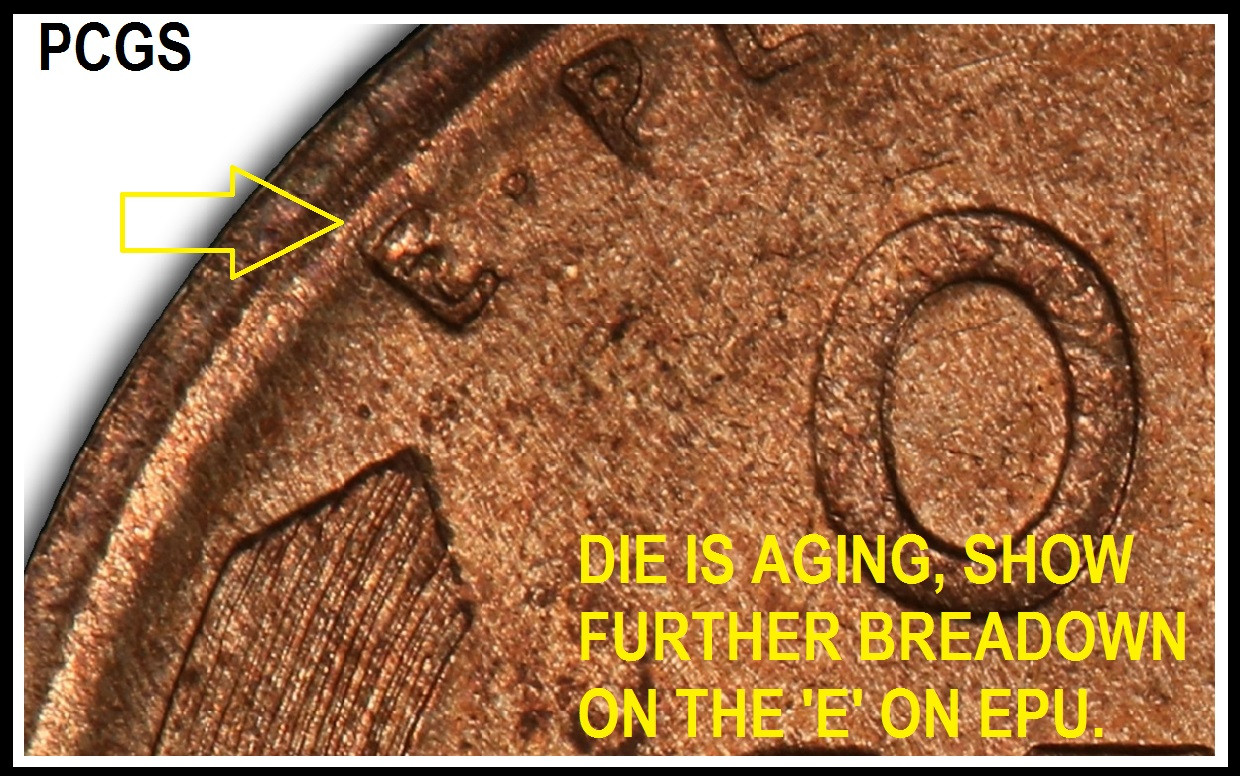
Note them now? They are loosing all shape of the raised devices to look like letters.
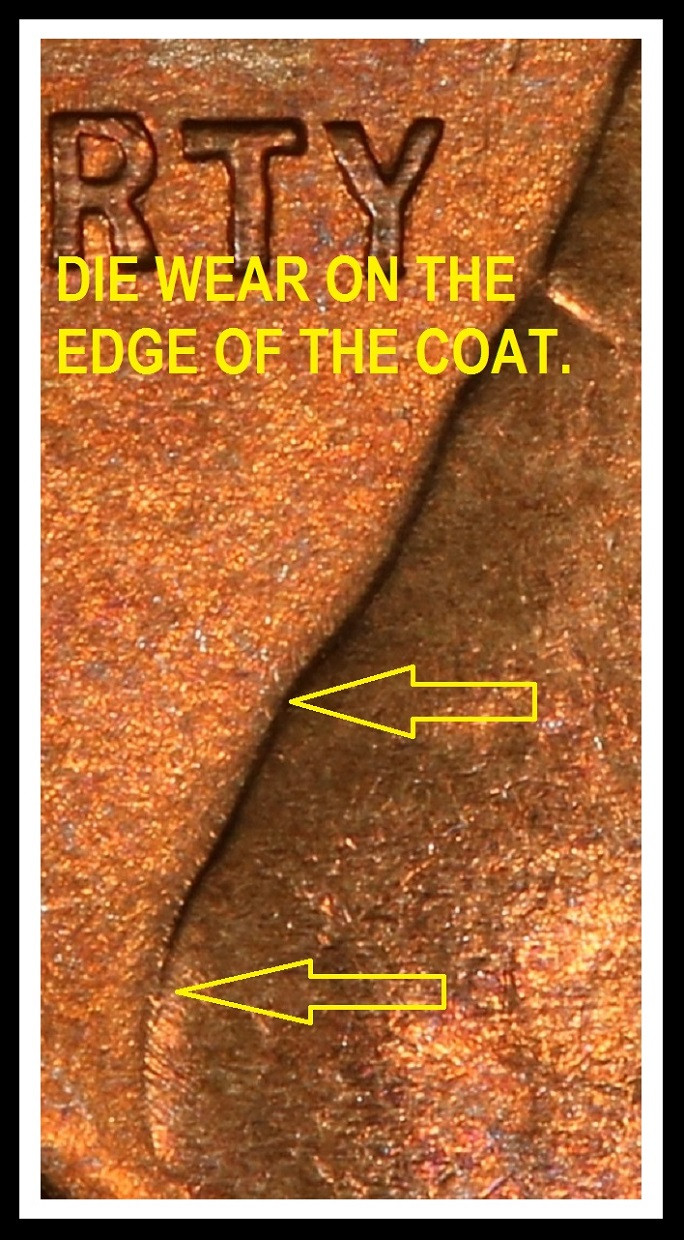
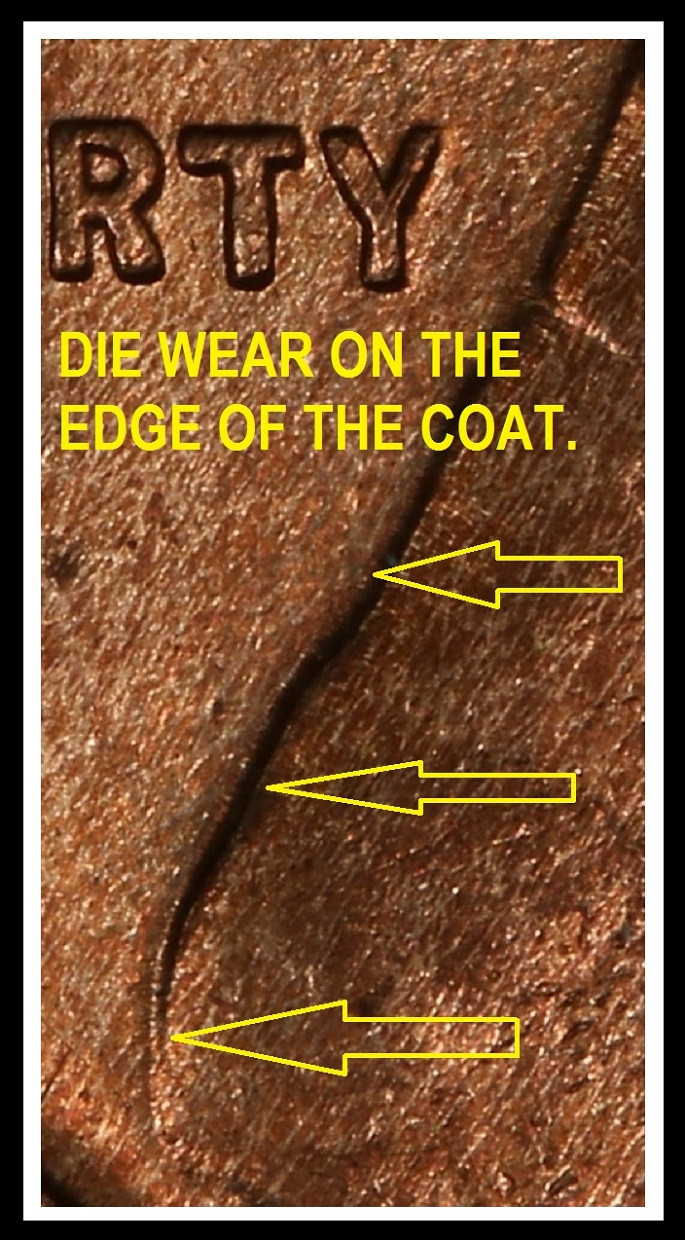
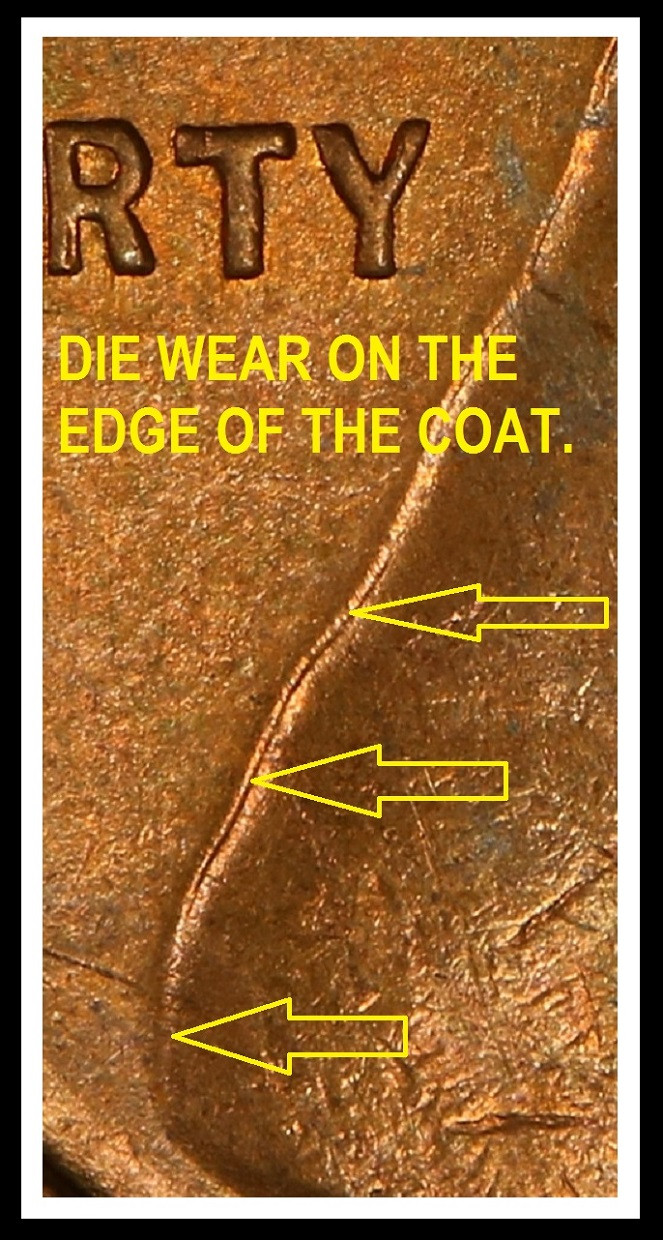
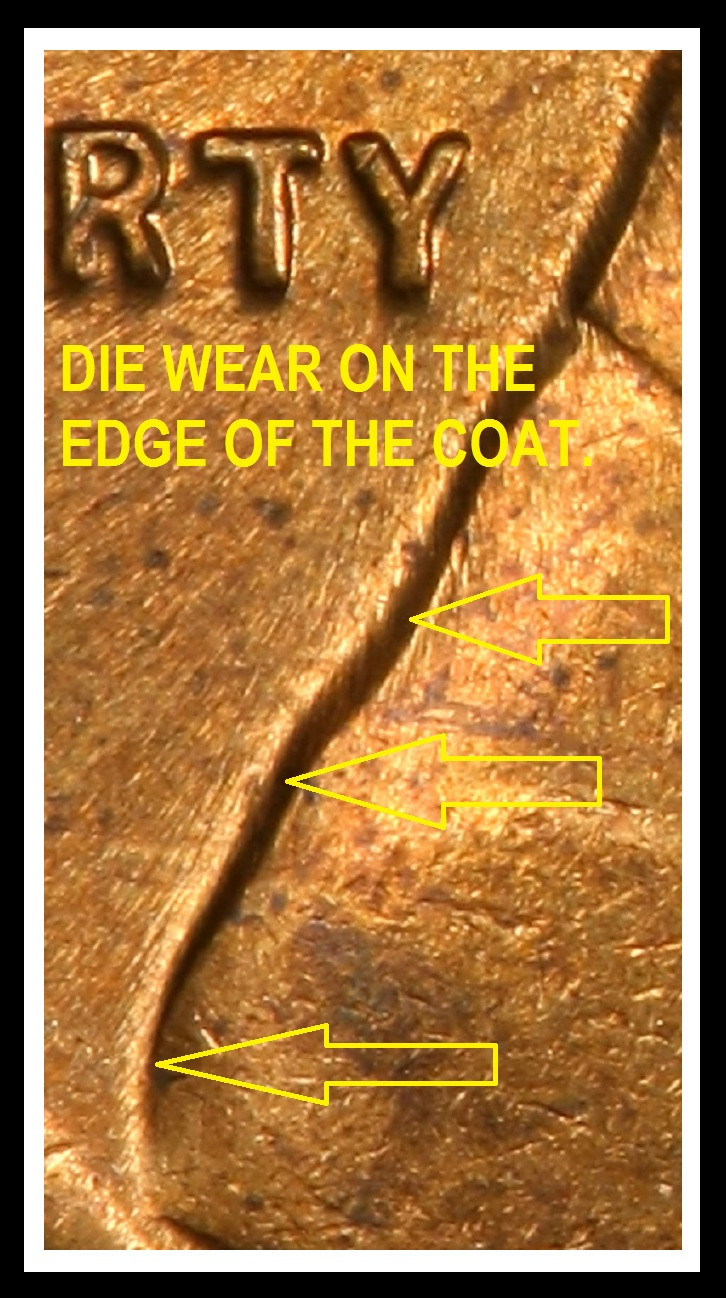
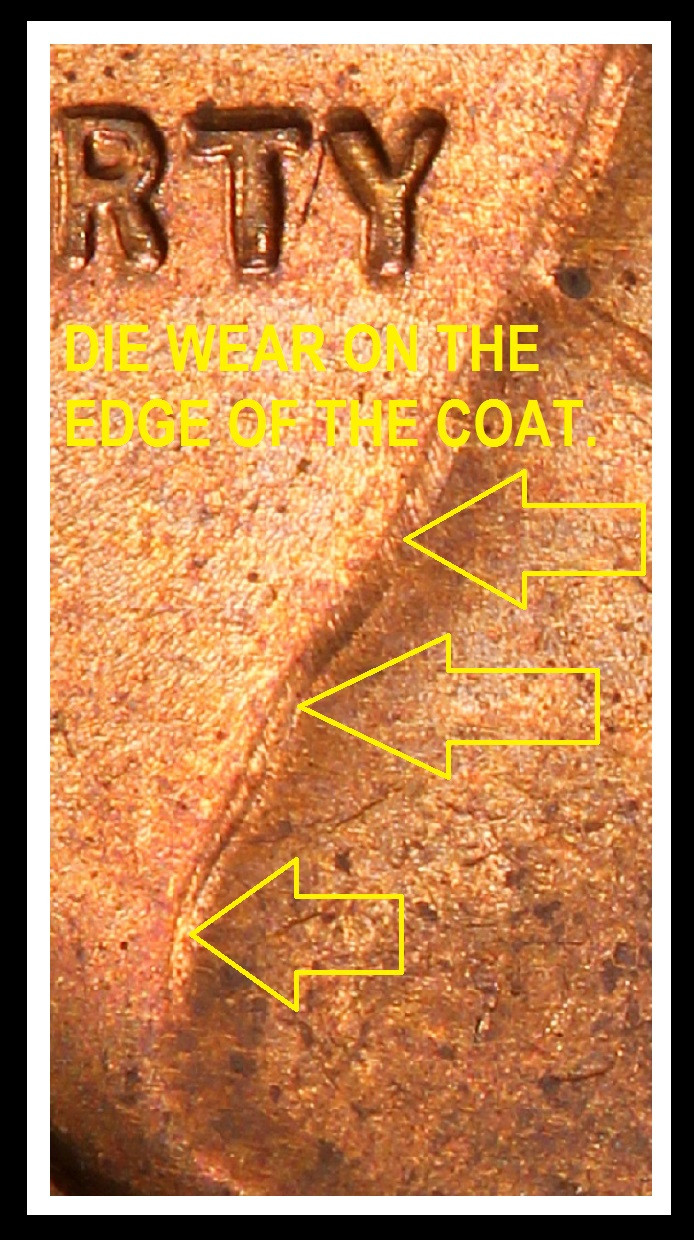
Now moving upwards from that area, we are going to look at the west side of the bust. As the die ages, this area can develop horizontal lines on this area. It will progress as you look through the images. Small marks but progress with age.

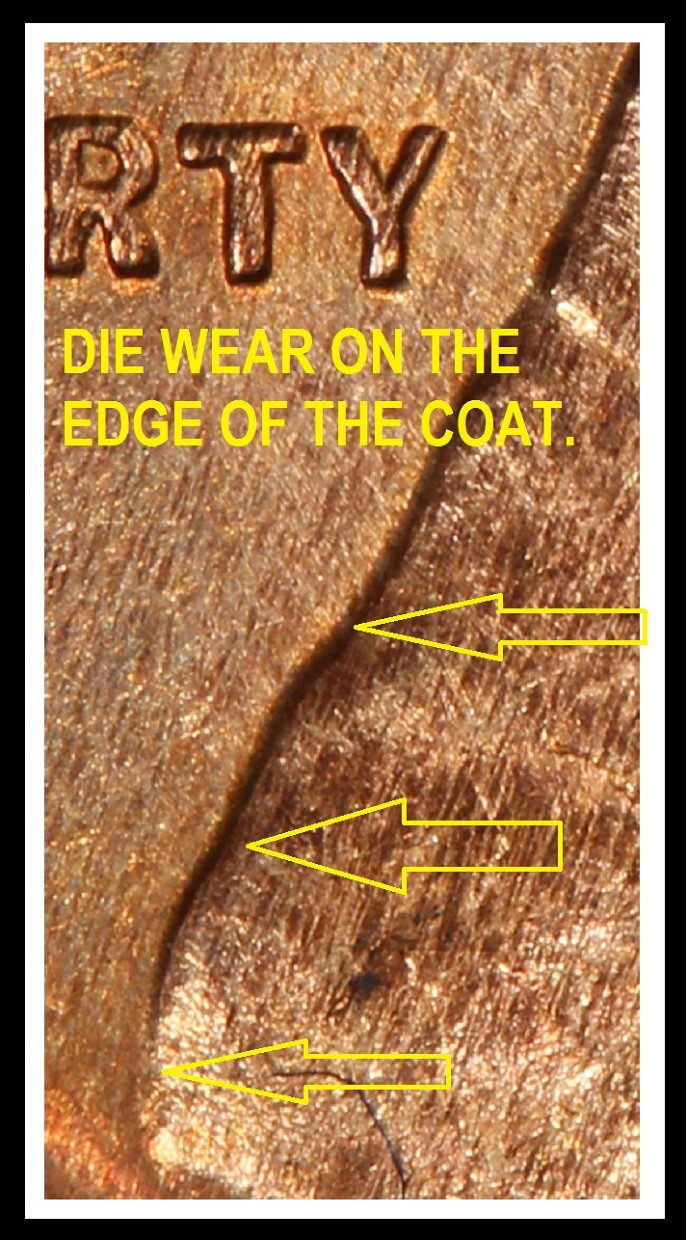
Now were are progressing to the LIBERTY area.


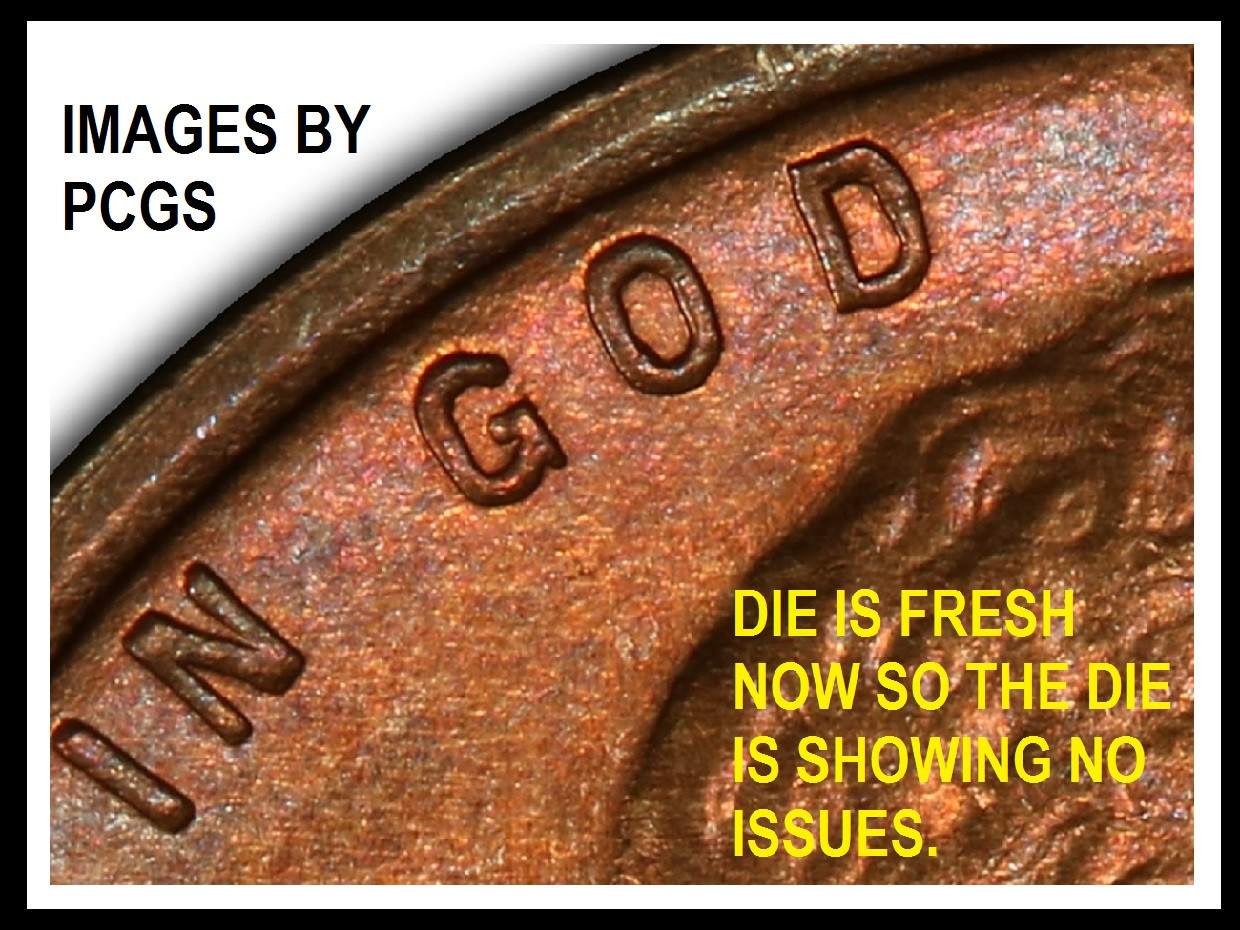
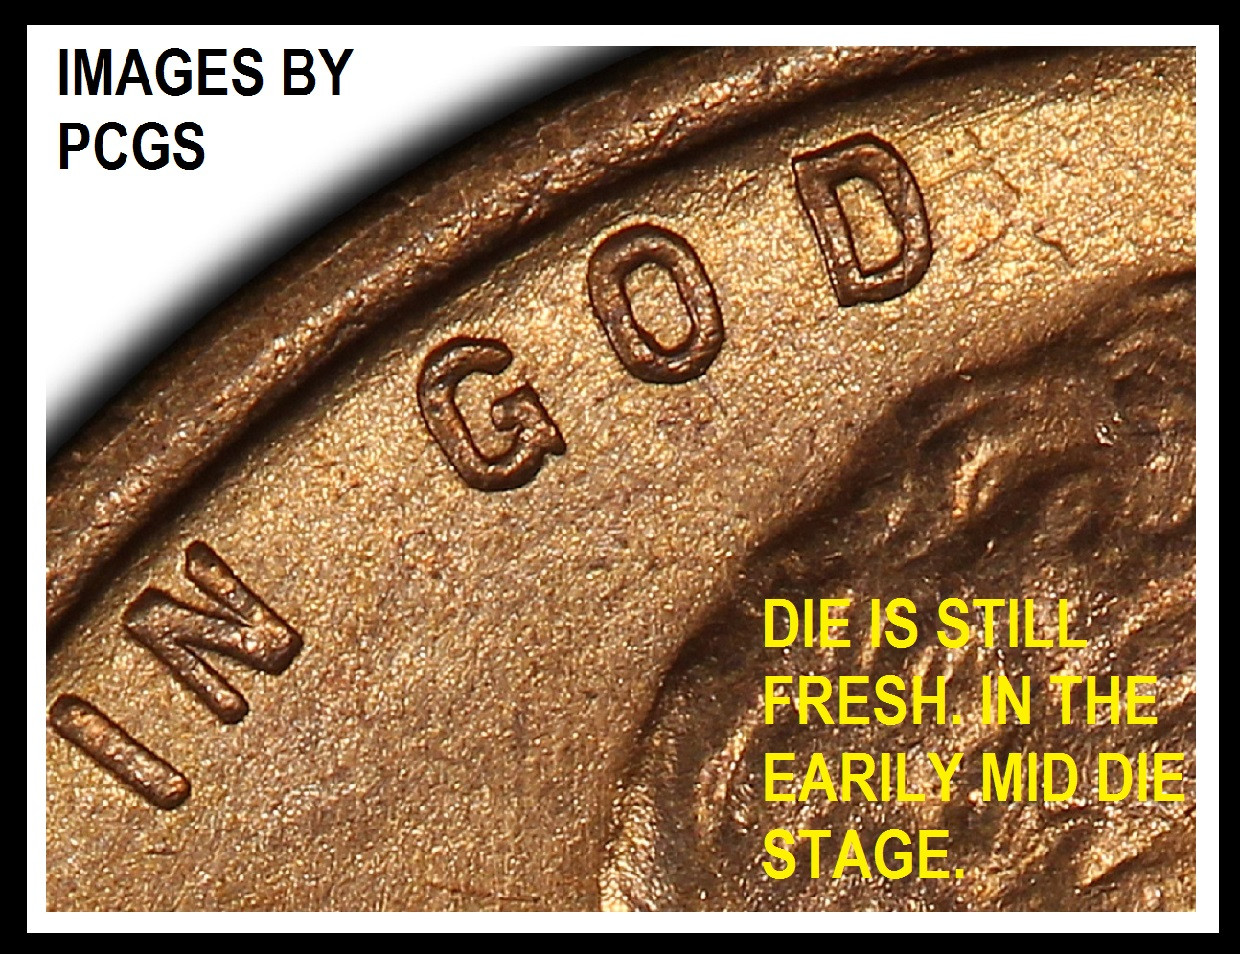
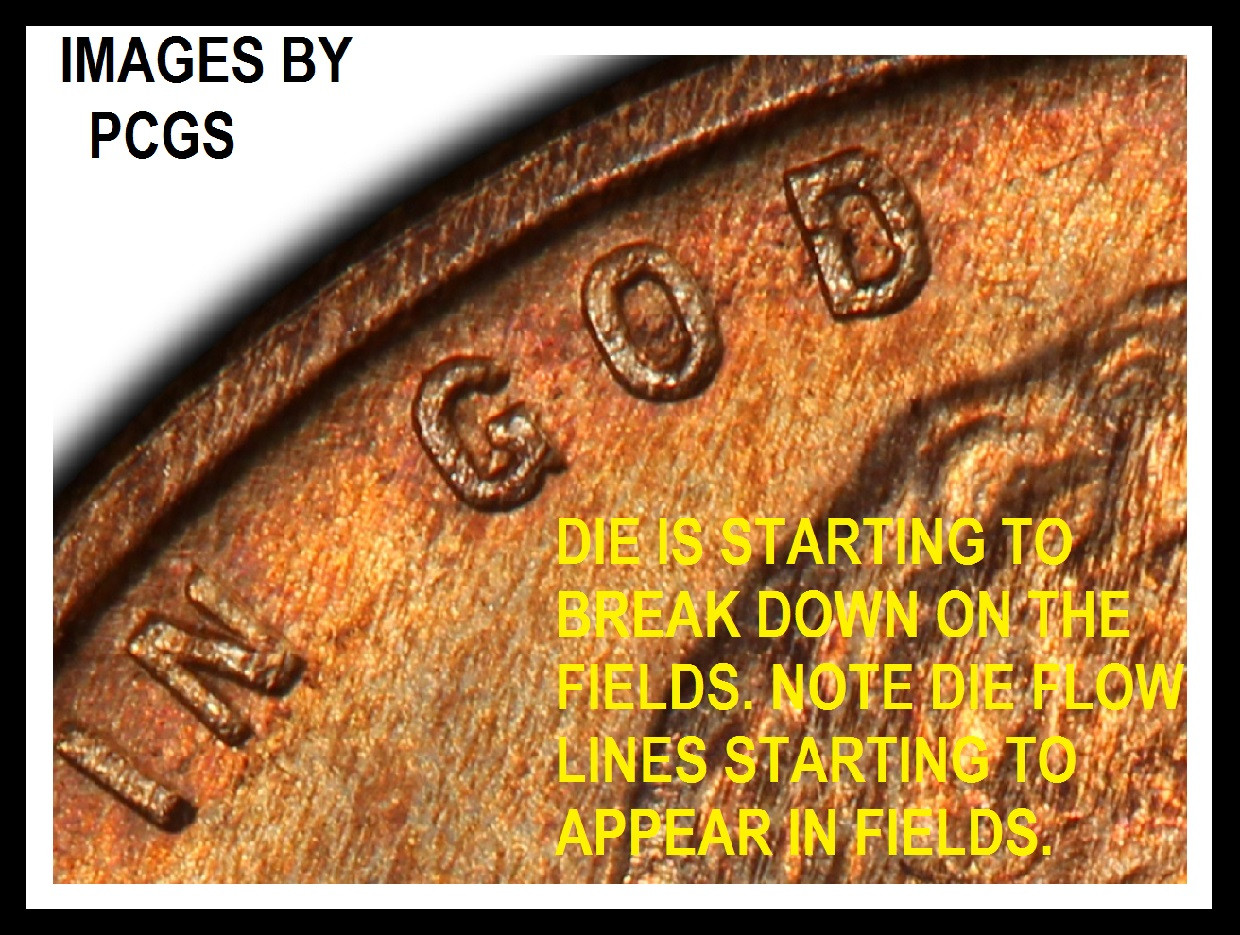
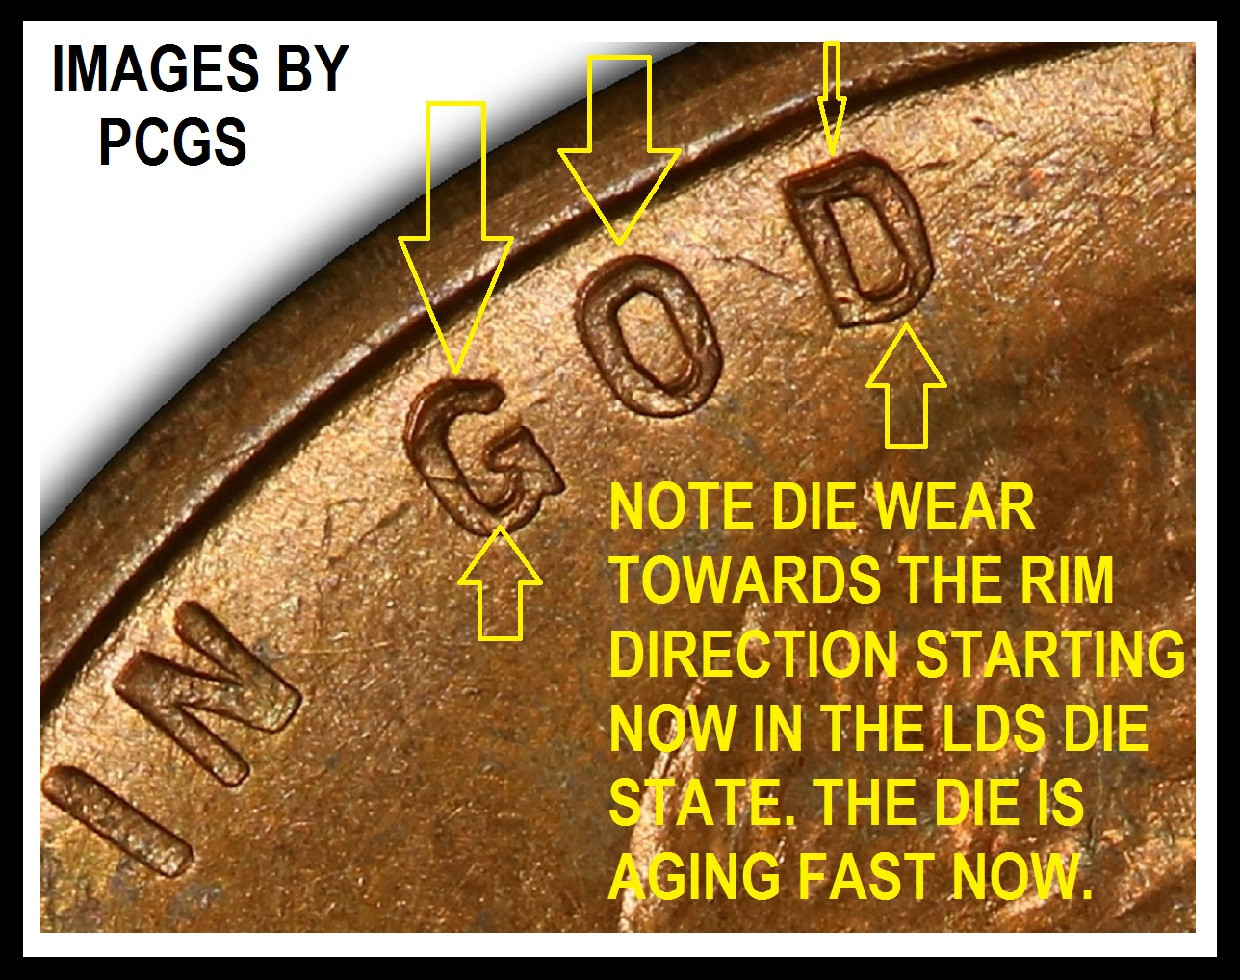
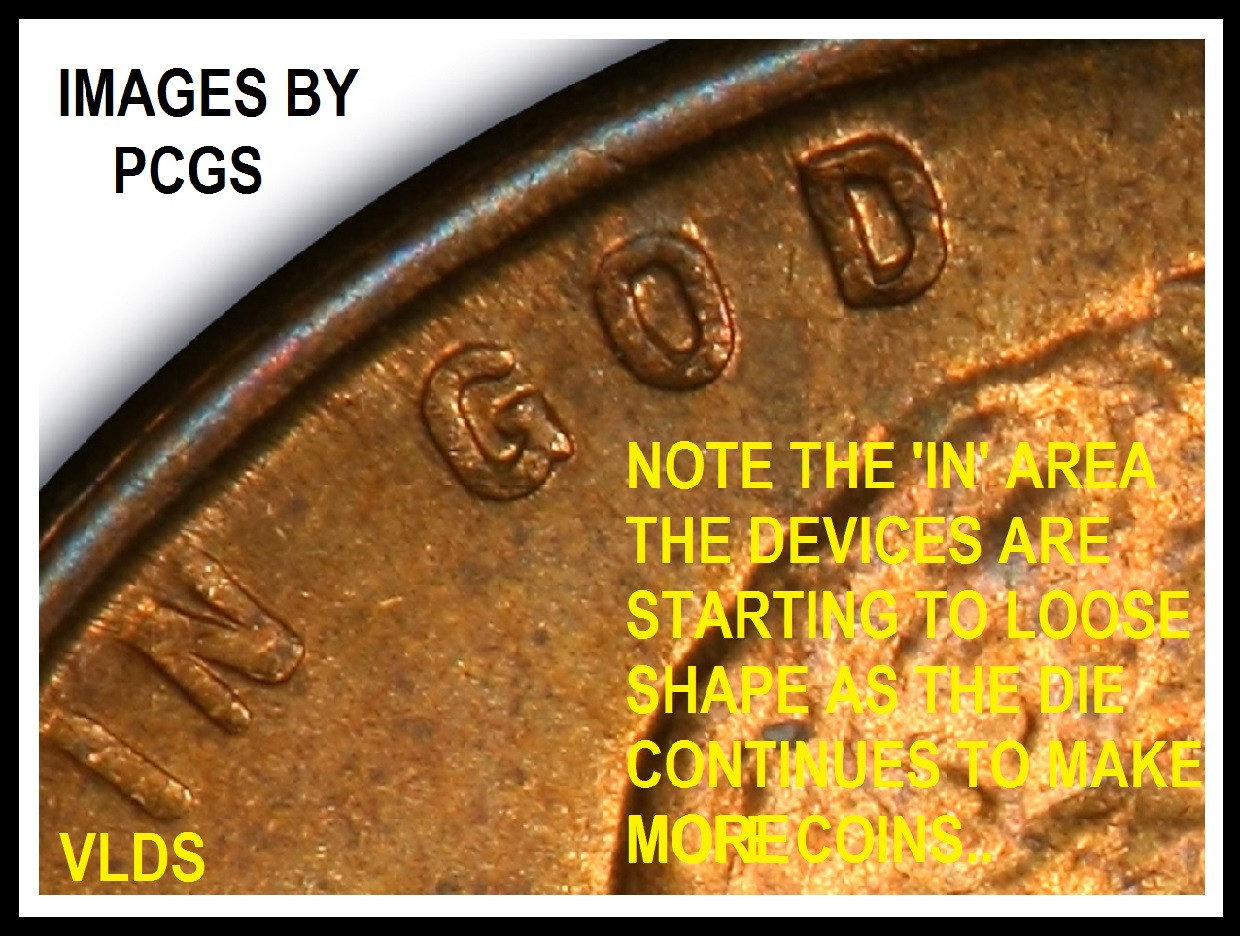
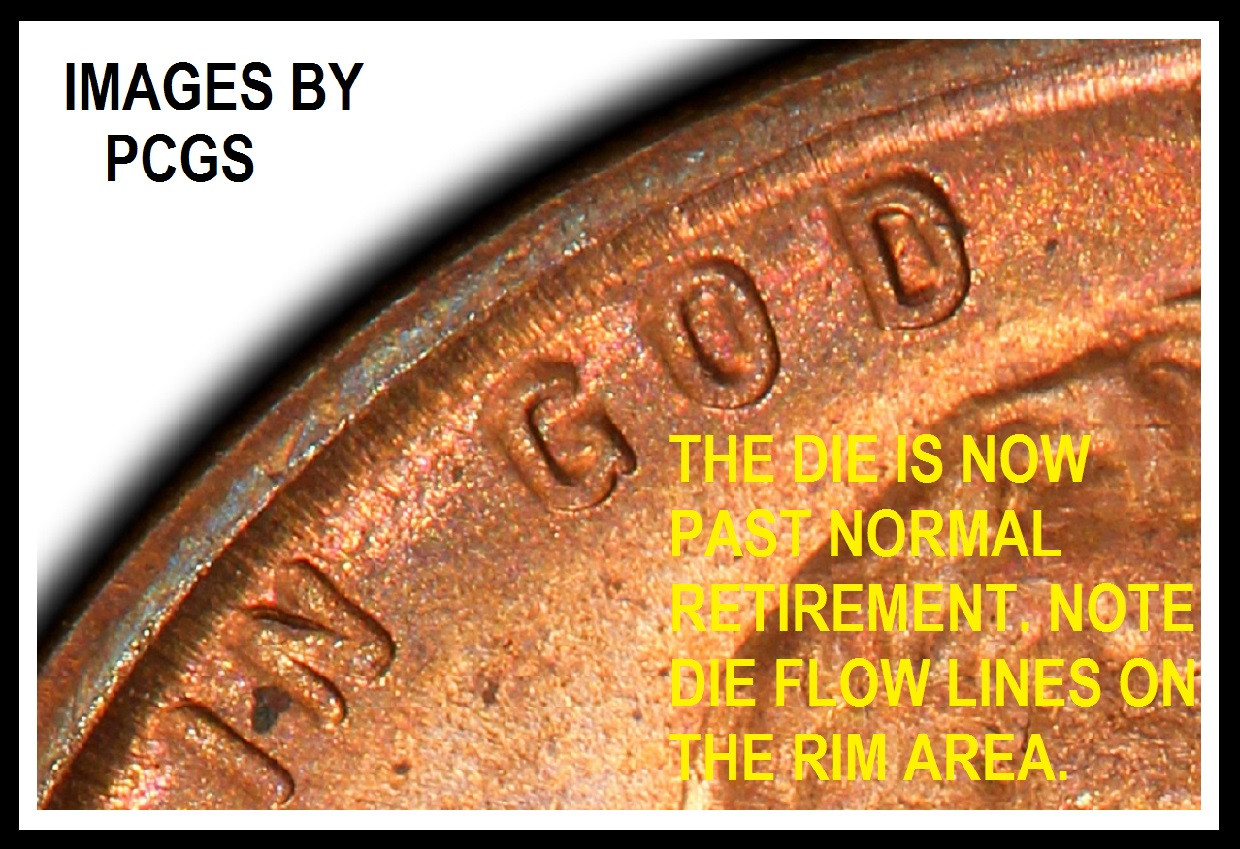
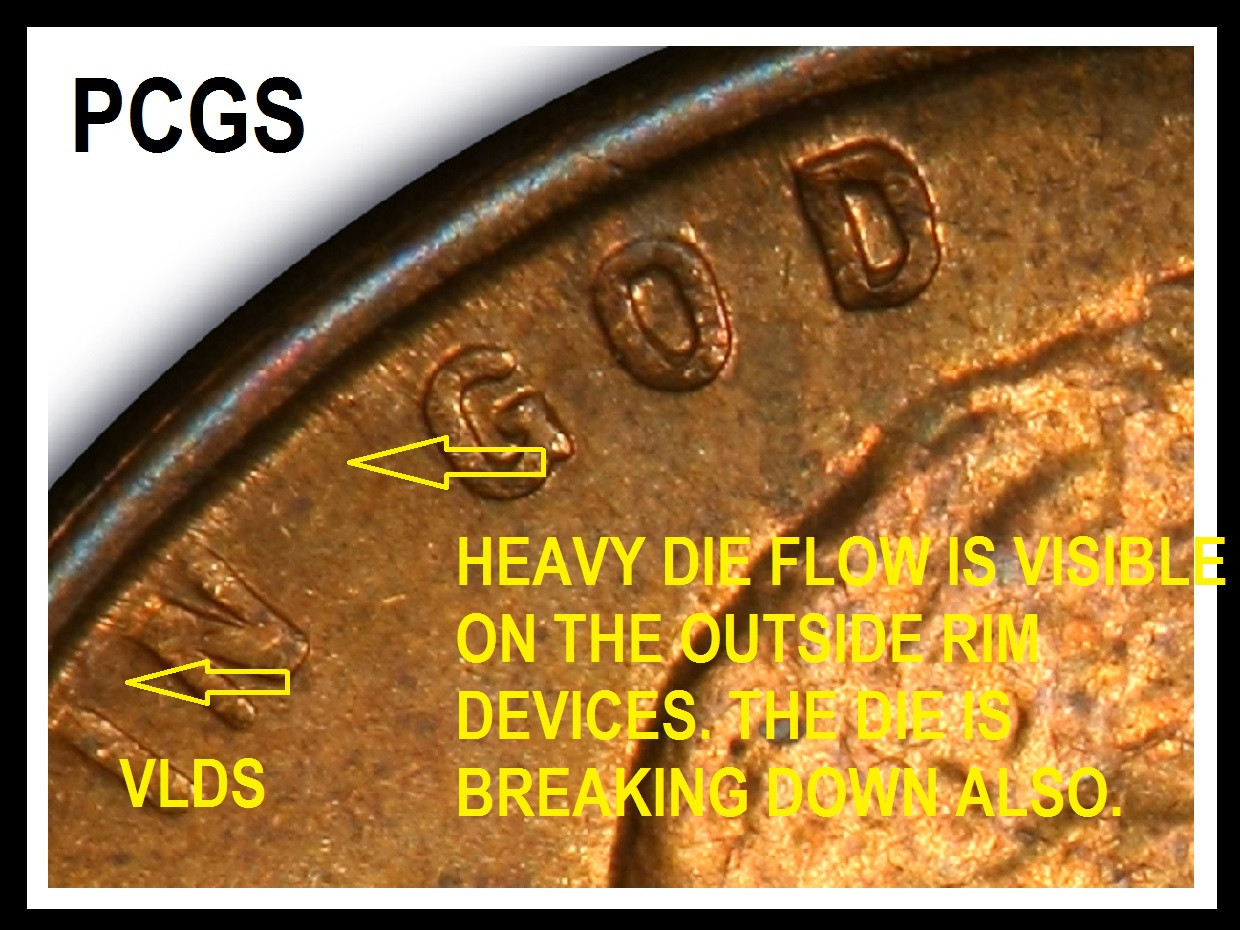
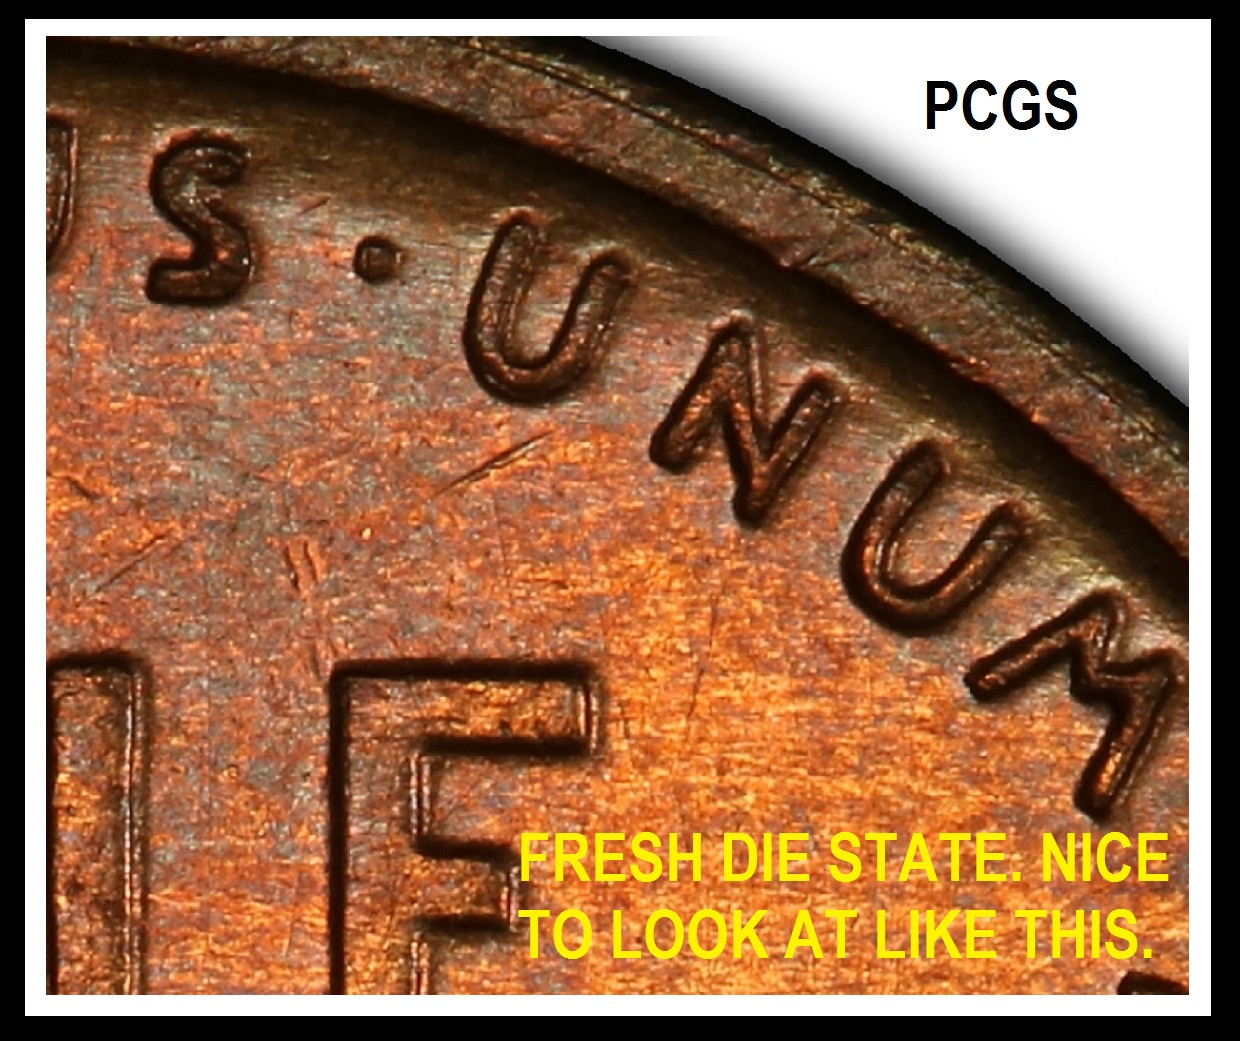
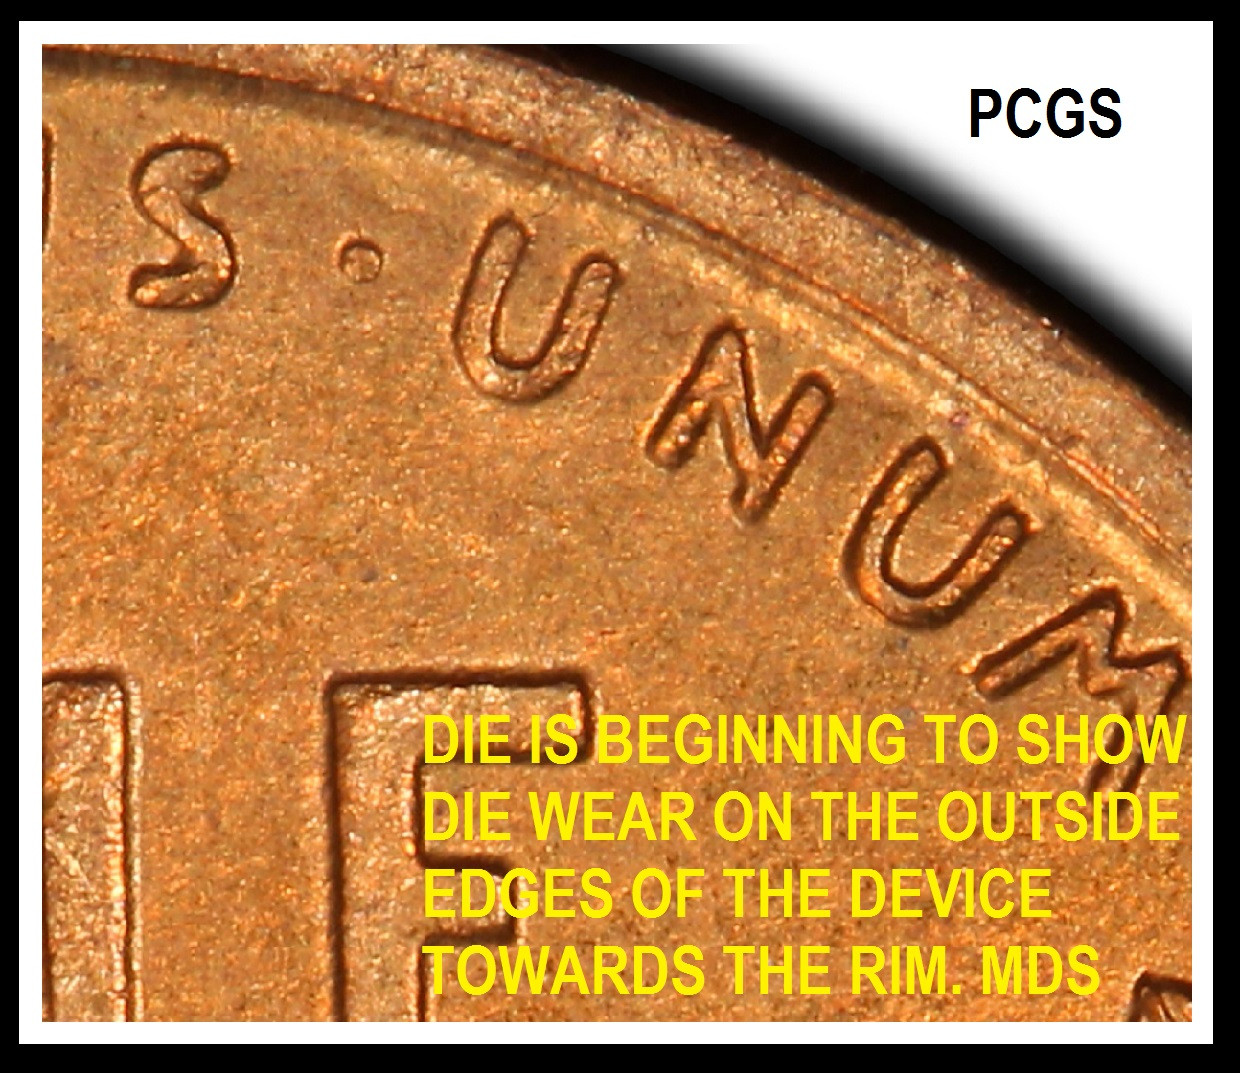
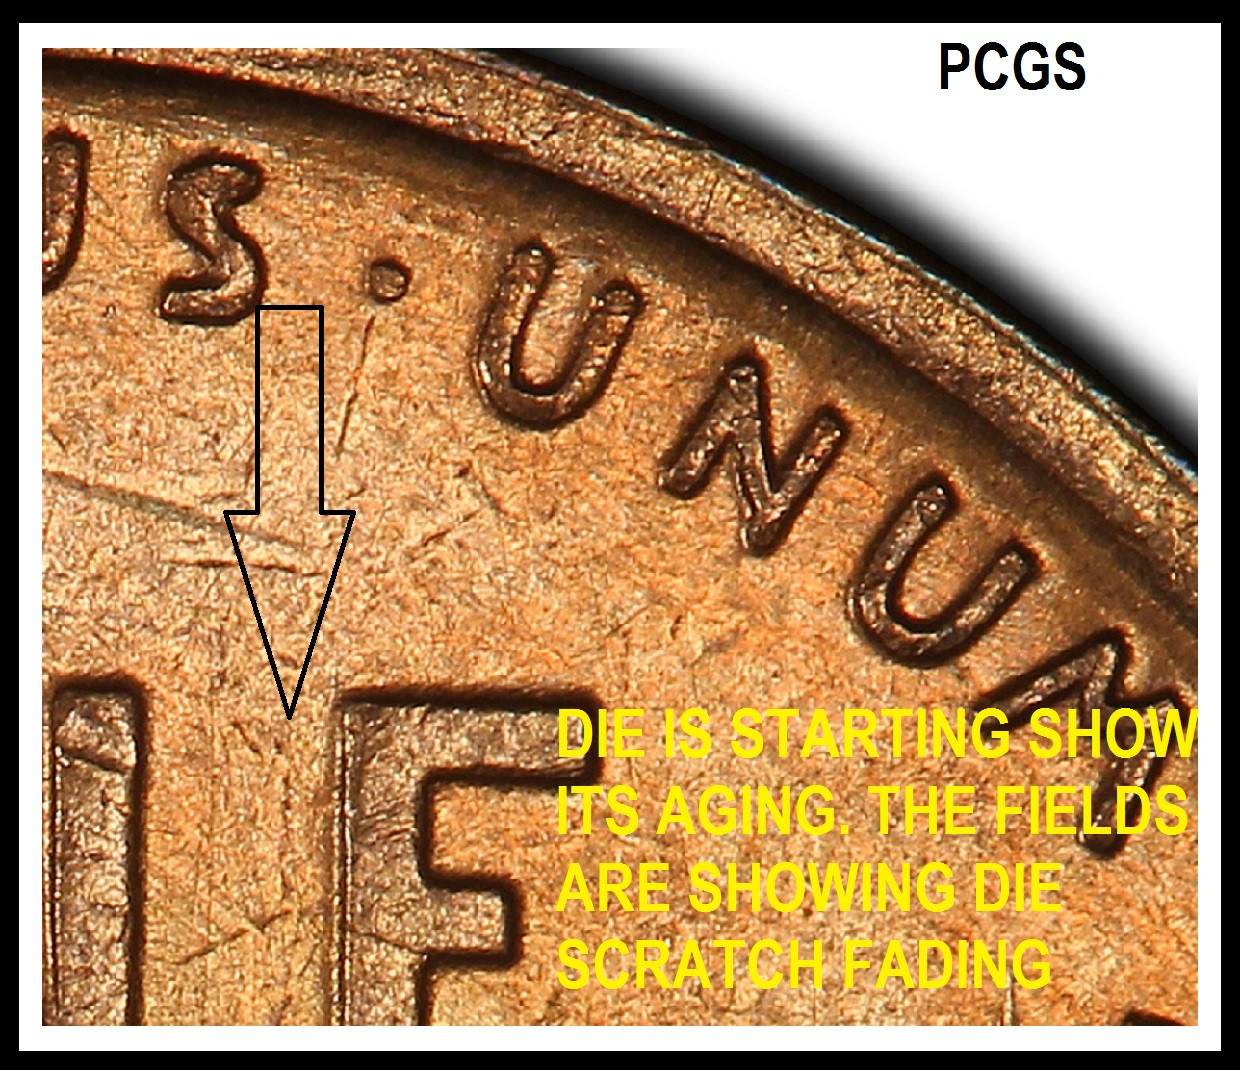
Now moving up to the motto areas, we are only going to look at the 'IN GOD' area on this set of images. You will note how the devices look when they are normal and then as the die flow, die scratches appear, then disappear and the die flow happens, then die polishing affects these areas.

Now the area near the 'WE' on the motto.


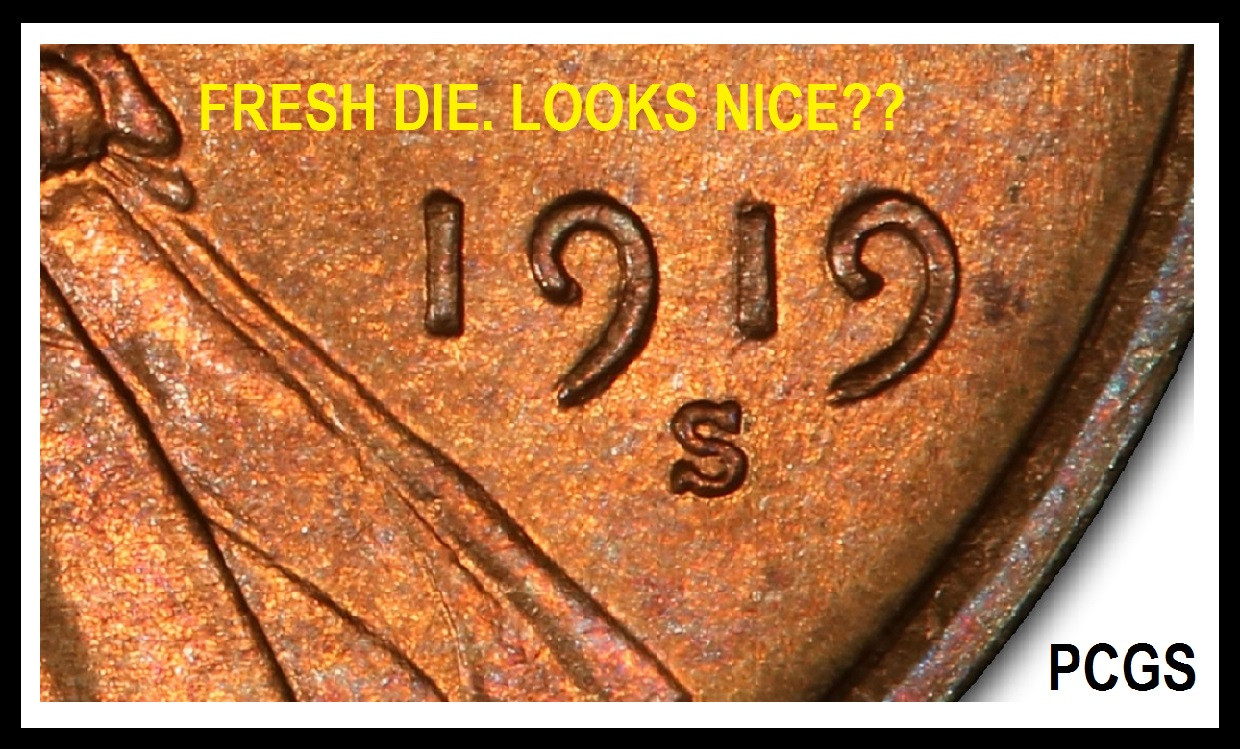
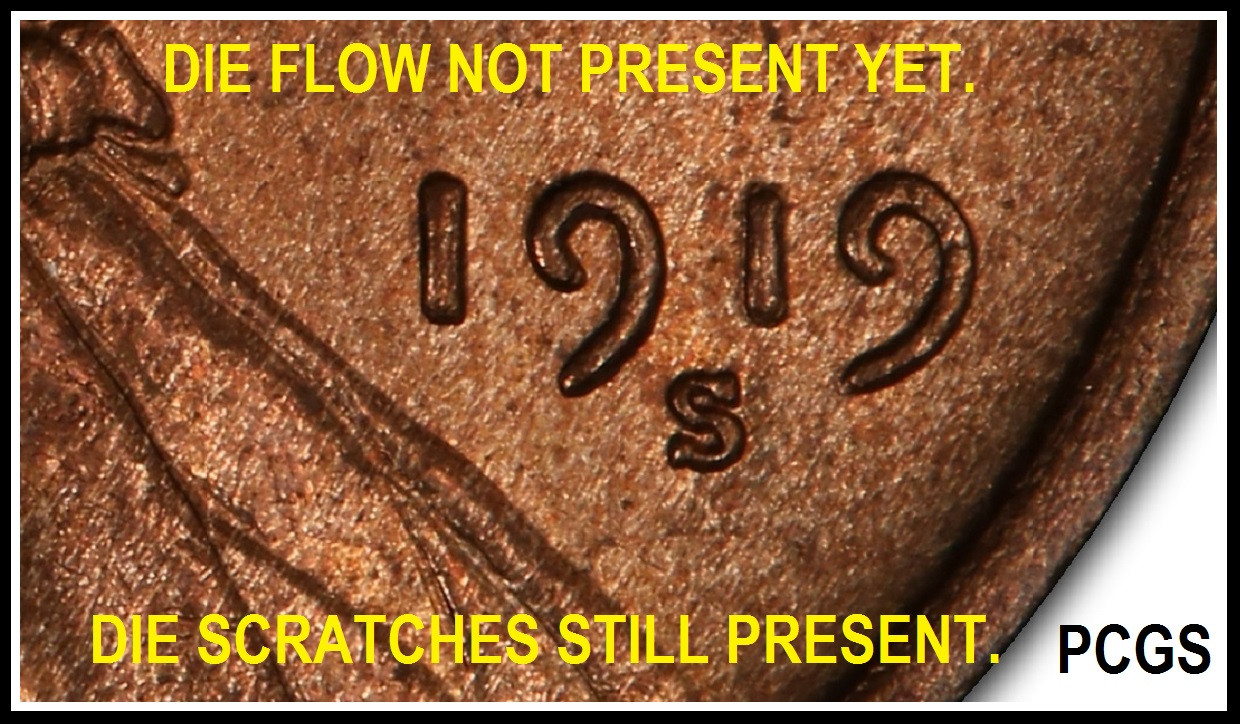
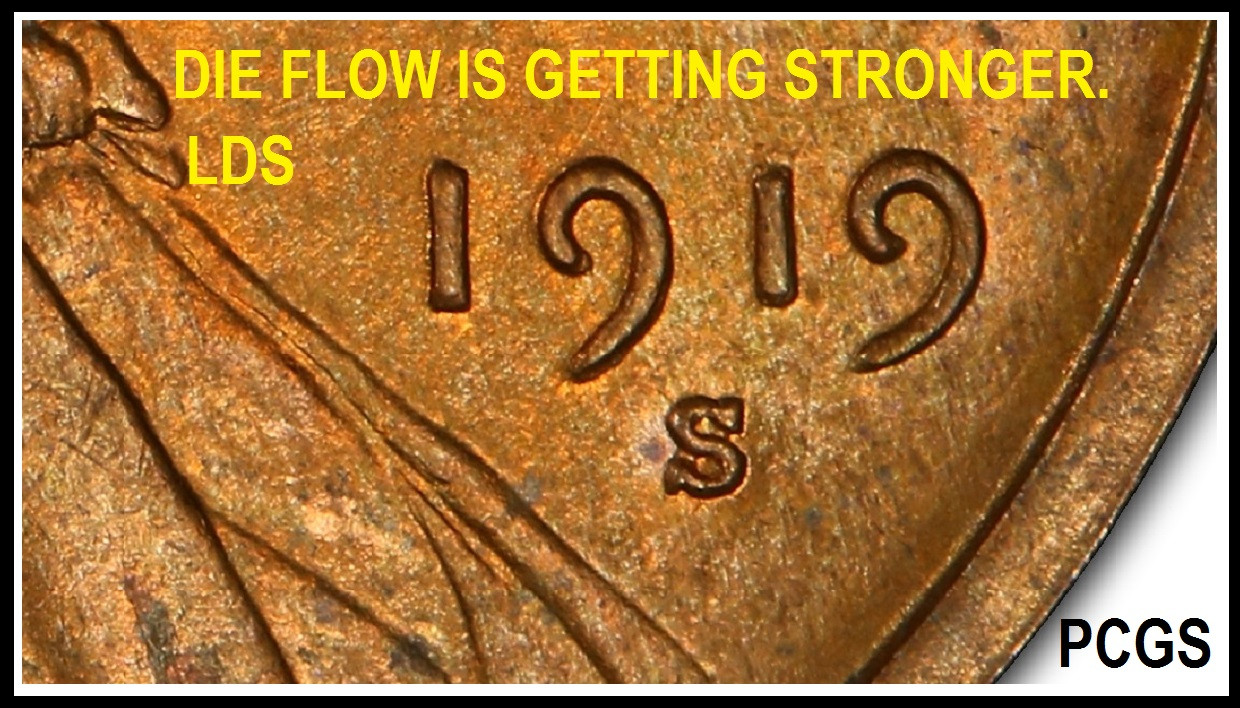
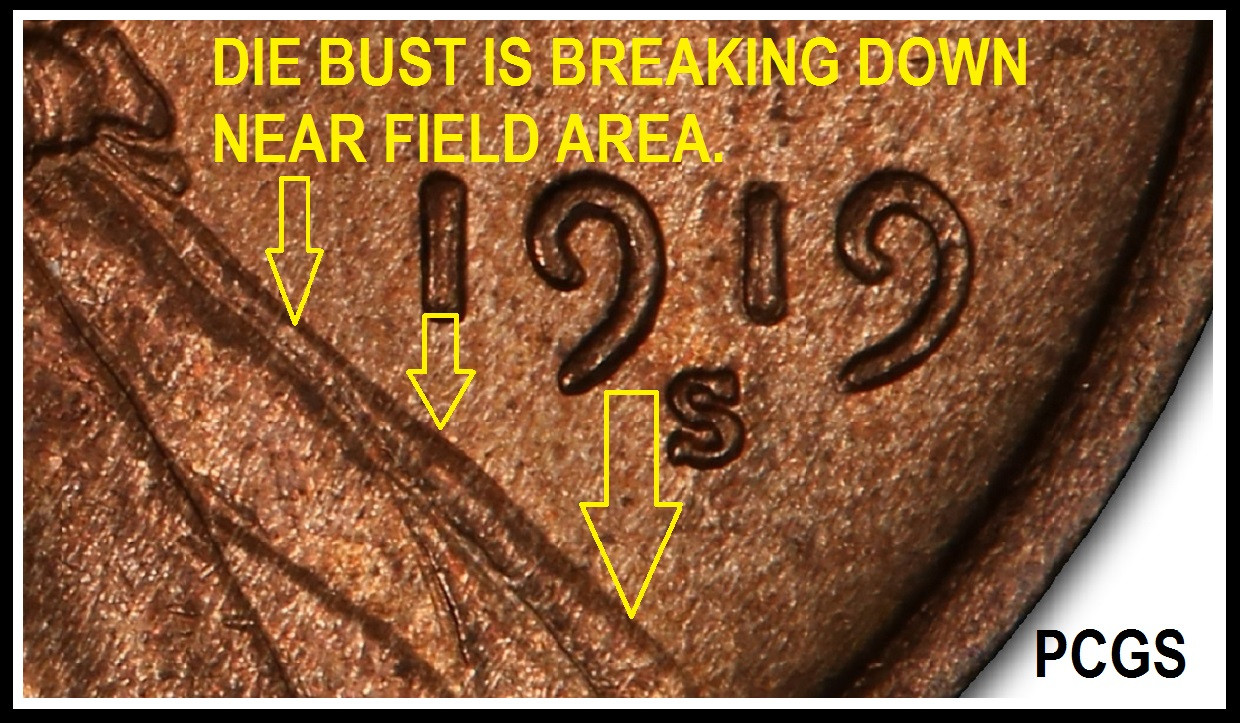
Now we will look at the date and see what die wear looks like on this area.

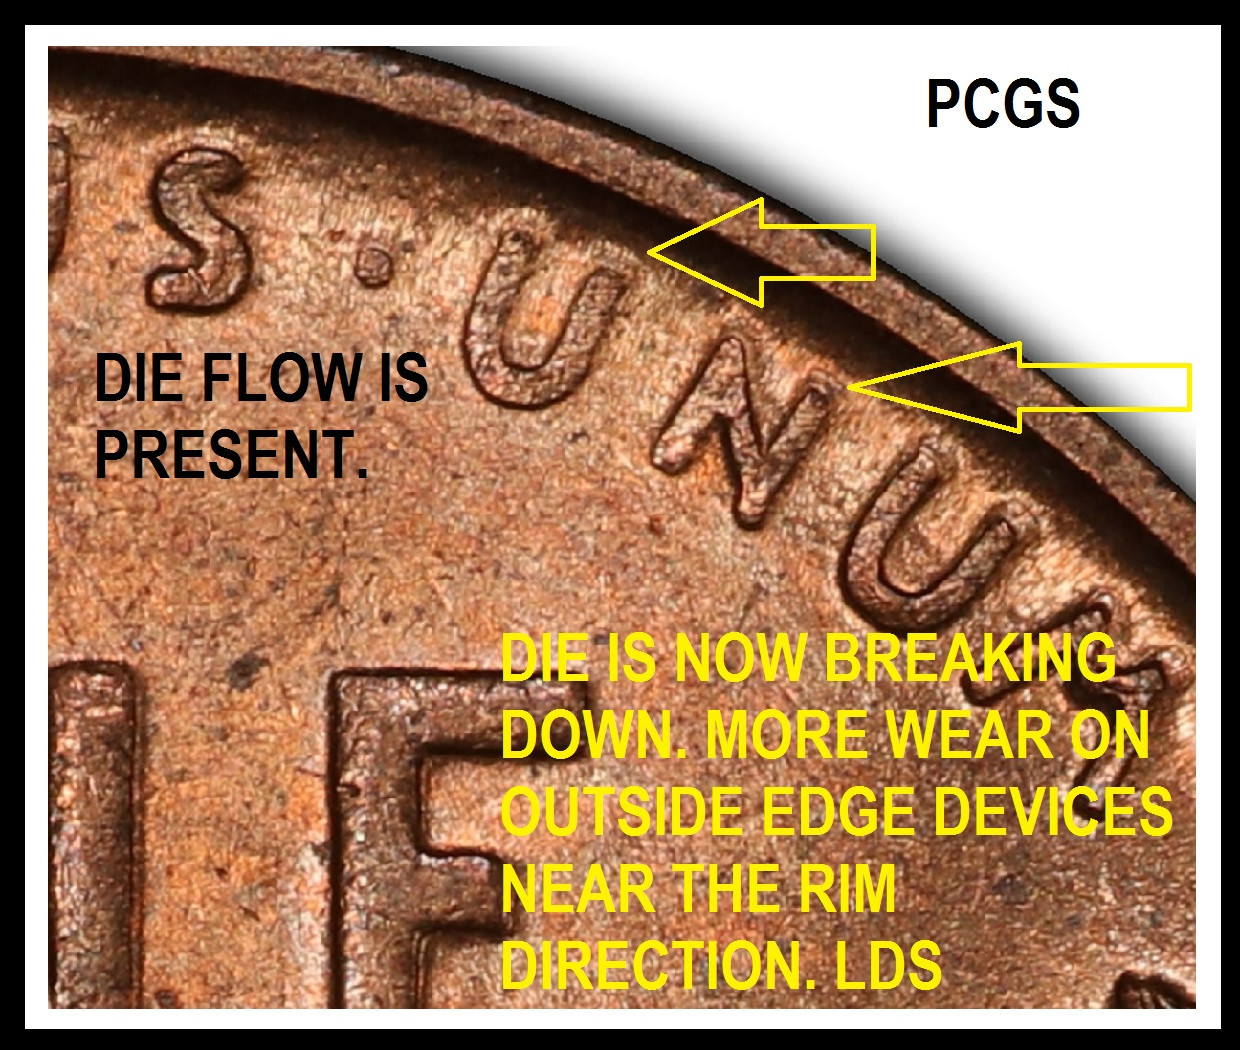
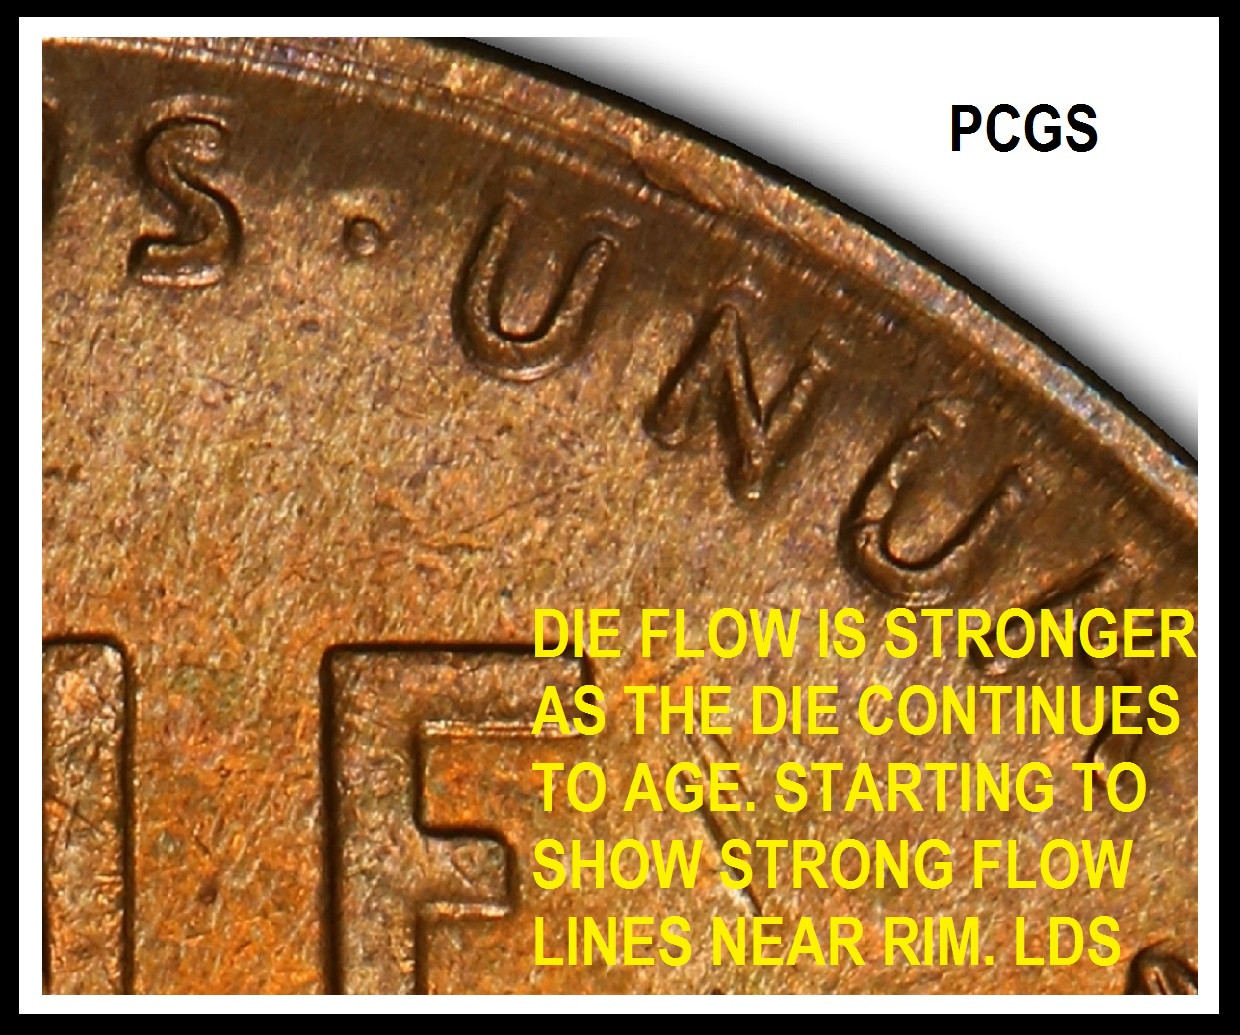
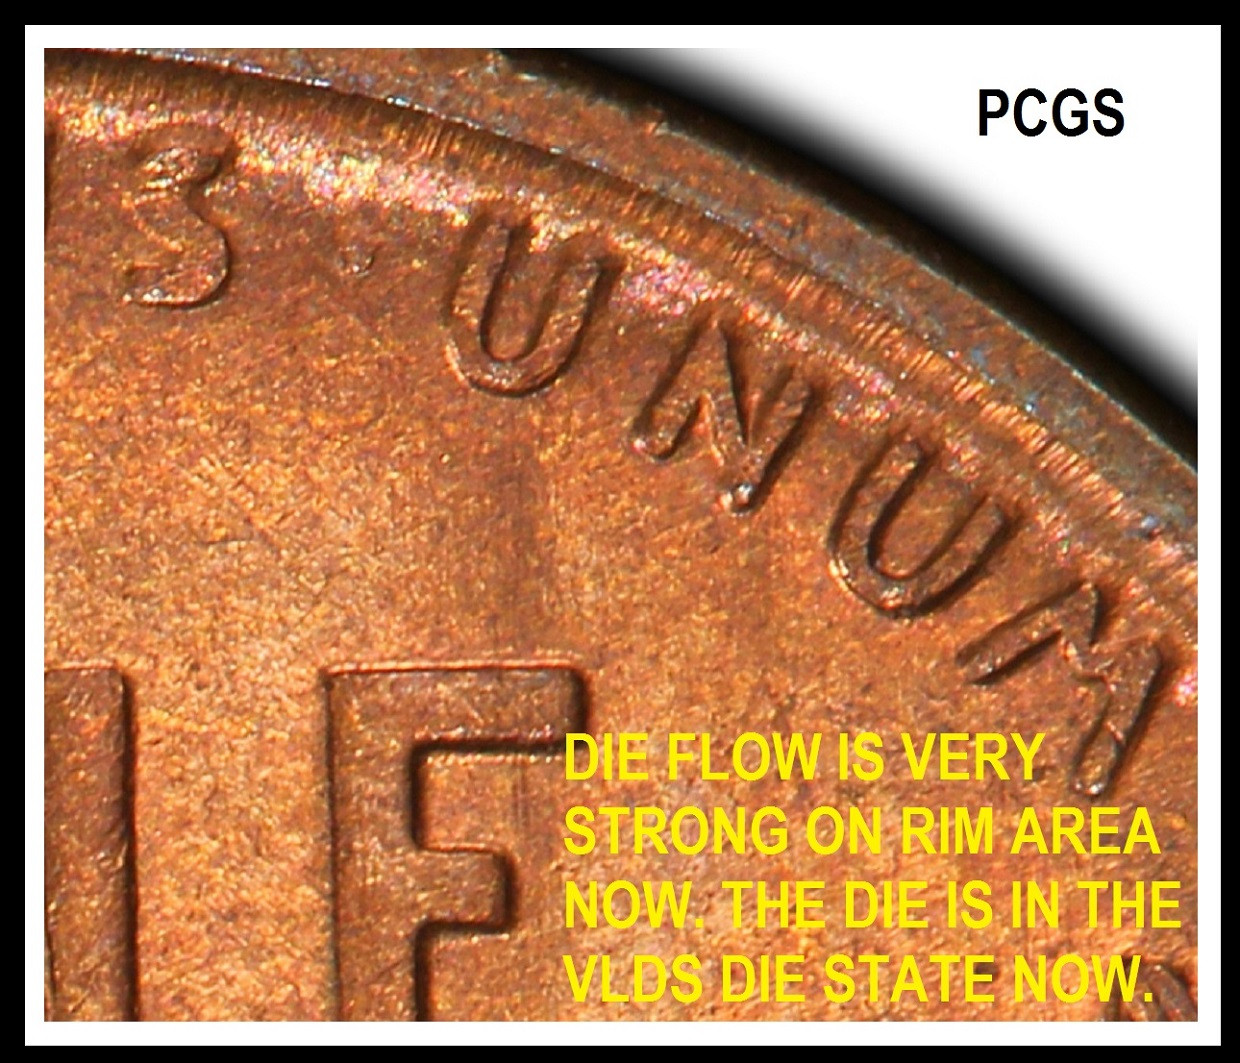
Now we will look over a couple of areas on the reverse of the coin that seems to be affected the most. The are EPU areas:


On the UNUM area it also shows a lot of wear as the die get older:
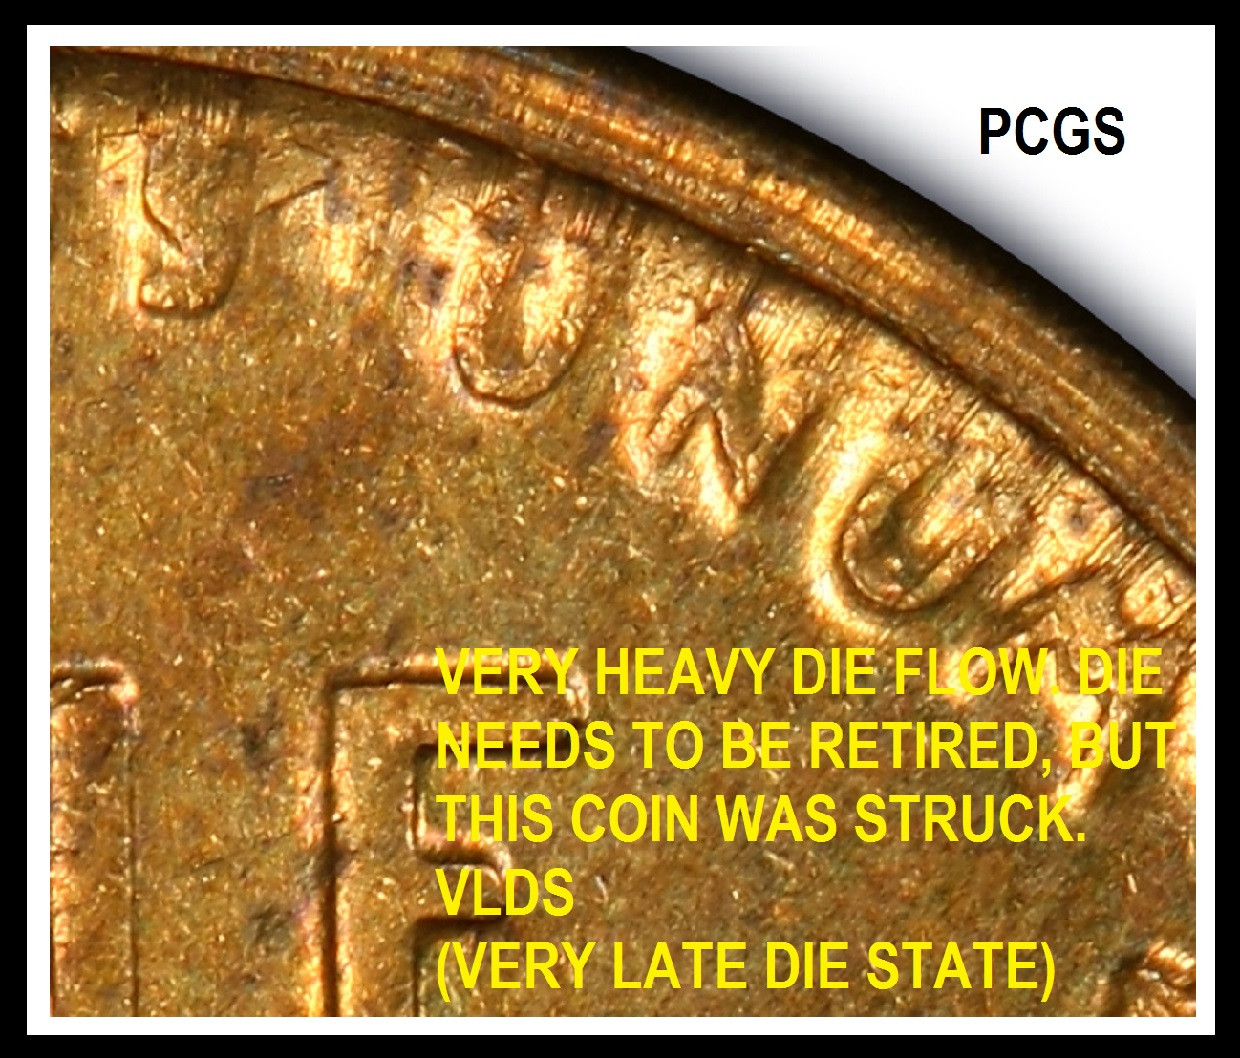 I know this was a lot of images, but by seeing them side by side you can see how the die wears. This was a challenge, but, I like a challenge. Thanks Edited by coop
03/03/2018 2:41 pm
|
|
|
|
Moderator
 United States
34410 Posts |
Quote:
This was a challenge, but, I like a challenge. Well worth the effort and really appreciated. Thanks!  "If you climb a good tree, you get a push."
-----Ghanaian proverb
"The danger we all now face is distinguishing between what is authentic and what is performed."
-----King Adz
|
|
Bedrock of the Community
United States
74188 Posts |
Great presentation Coop! This is very interesting. I like how it describes every Die State and how much stronger the die flow gets as the die ages. This would be a good thread for new members to look at. It will help them to understand the Minting process more easily.
Errers and Varietys.
|
|
Bedrock of the Community
 United States
62064 Posts |
|
|
Rest in Peace
10197 Posts |
Thanks Coop, looks like you got your computer figured out, or your phone! Another tutorial in the bookmarks. You ought to put a few of these together in a PDF format like mine, offer it as a free reference here on CCF.  |
|
Bedrock of the Community
United States
74188 Posts |
 I think if you threw a free downloadable PDF for reference material, that would be awesome. Errers and Varietys.
|
|
Valued Member
United States
262 Posts |
That was awesome Coop. Thank you.  |
|
Pillar of the Community
United States
5964 Posts |
Nice stuff Coop, Thank you. I guess some of the people at the mint figure it's time to retire dies when they can't make out what's left on them.
|
|
Bedrock of the Community
United States
62064 Posts |
The worst example was on PCGS and the best as well. So It came to me to make this. Quite a few images to edit. I sorted them when I down loaded them. Then edited the images from the coins images. Then edited them to put them together. It took a while, but "got er dun". What next? Let see what turns up for images.
|
|
Pillar of the Community
United States
7510 Posts |
No doubt it was a long process for you to put this tutorial and edited photos together, but rest assured it will be cherished and well appreciated by many enthusiasts, once again you went above and beyond. Thank you Coop!
|
|
Pillar of the Community
Canada
9160 Posts |
Very interesting read, thanks for all the work you do.
|
|
Bedrock of the Community
United States
94367 Posts |
Most informative as always!
|
| |
Replies: 11 / Views: 904 |
|