Great to hear. It takes time to understand how the process of the die creation. A simple way to understand the positive hubs and the negative dies, that create positive coins.
1. Take a small piece of aluminum foil.
2. Note that one side is shiny and the other side is dull?
3. Place the shiny side on the top of the coin.
4. With your fingers press the shiny side of the foil onto the coin. The more the devices show on the shiny side, then you have captured that side of the coin.
5. Pull the foil off the coin. Note the shiny side is the positive side, All coins/working hub and master hubs look like that.
6. Then turn over the see the dull size. This is what all working dies and master dies look like, they are negatives.
7. But on the dies and hubs, there are a difference. Note the rim on the foil? Raised on the positive side and incuse on the dull side. Dies and hubs don't have that as part of the dies design. It is a different feature that creates this:

Note the #2 on the die. That gutter and the collar work to create the rim on the coins. If the coin has reeds, then the planchet presses the reeds into the edge of the coin.
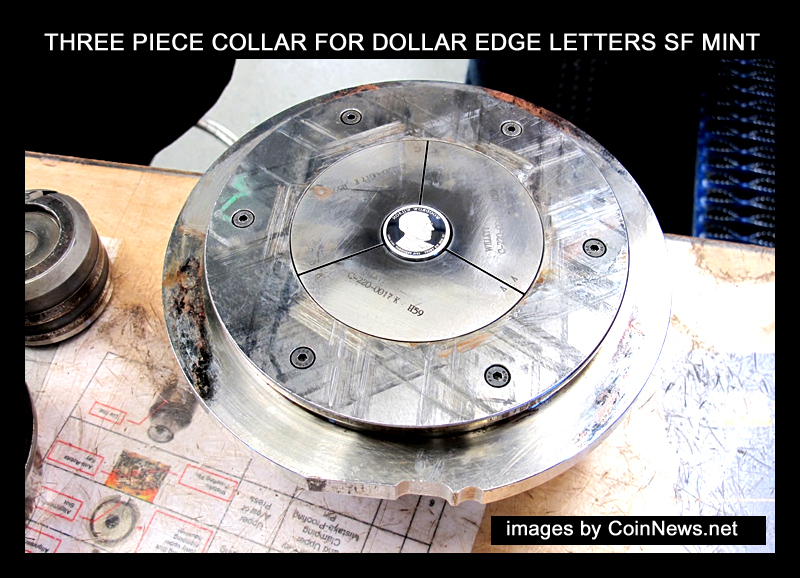
This is not what the collar looks like, but to show how it would sit into the machine. This type of collar is used on the dollar edges that imprint the date and motto on the edges. Thus the business strikes have the edge lettering in a separate step (Thus why some of the have the letters in different directions), but on the proof dies, the edge and the other two sides of the coin are all added at once to the coin. (Thus the letters on the edge, will all be in the same direction)
Check out your foil die on your scope and see the differences a lot clearer. The best was to see what a die would look like. (the dull side)


 Uncirculated American Silver Eagles