| Author |
 Replies: 91 / Views: 14,604 Replies: 91 / Views: 14,604 |
|
|
|
Pillar of the Community
 United States
1314 Posts |
I'm not good with the date doubling on this coin, but I found a die gouge. 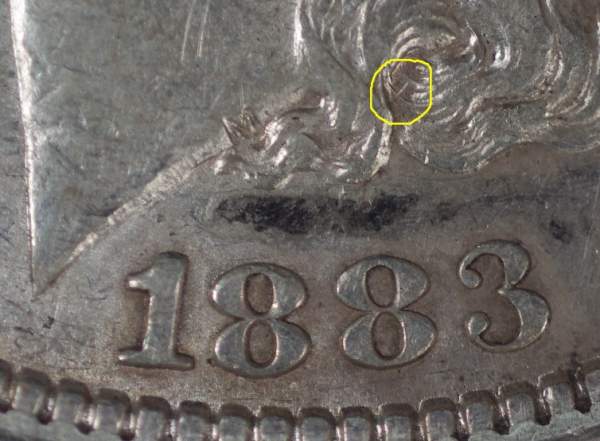 |
|
Pillar of the Community
United States
1314 Posts |
Got some fine shots of a different coin. One with color.
Downloaded Infanview. Seems user friendly, but I cannot get my pictures below 100Kb even after sending them through Infanview's 600x600 pixel optimizer.
Maybe my camera settings reverted to somthing of a larger fike size.
I'll keep trying.
|
|
Pillar of the Community
 United States
4038 Posts |
Focus is pretty good but fuzzier on left side, so coin doesn't appear flat versus camera. Try the mirror trick...replace coin with a mirror and adjust camera til you are looking right down barrel of the lens. If you adjust height correctly you center the sensor in the frame and that's perfect alignment...Ray
|
|
Pillar of the Community
United States
1314 Posts |
Ray,
What a simple solution. And I can't wait to try it. I Just shot some frames of a very nice coin, but the focus was fuzzy on the left or the right. Never all. Was planning to use WW II Naval Navigator's drafting parallels. (Which I keep right here in my drawer, as they are very useful.) But now don't need to.
Still, I am plagued by the same problem. I can futz with the camera until I get a good picture, but I can't post it because it is too large. And I don't know how to make it smaller.
On my Pentax, I have opted for the one star quality, not two or three.
I've chosen 2M instead of 12 M (MegaByte file size?)
And I can't get my files small enough to upload on CCF.
Advice is appreciated.
Thanks
|
|
Rest in Peace
United States
9104 Posts |
Quote:
Seems user friendly, but I cannot get my pictures below 100Kb even after sending them through Infanview's 600x600 pixel optimizer.
500*500 is 30% smaller than 600*600 450*450 is 44% smaller than 600*600 |
|
Pillar of the Community
United States
4038 Posts |
I can't stand having to mess around much with my photos to get them small enough for upload so I host them on Photobucket. It isn't free but it isn't super expensive either. I like their "uploader" feature that allows you to directly upload web photos to their site with a right mouse click. If you post on other forums as well a centralized hosting location makes a lot of sense.
Contact me for photographic equipment or visit my home page at: http://macrocoins.com |
|
Moderator
United States
23522 Posts |
Or, you could get Dropbox and the images never have to leave your computer.  |
|
Pillar of the Community
United States
1314 Posts |
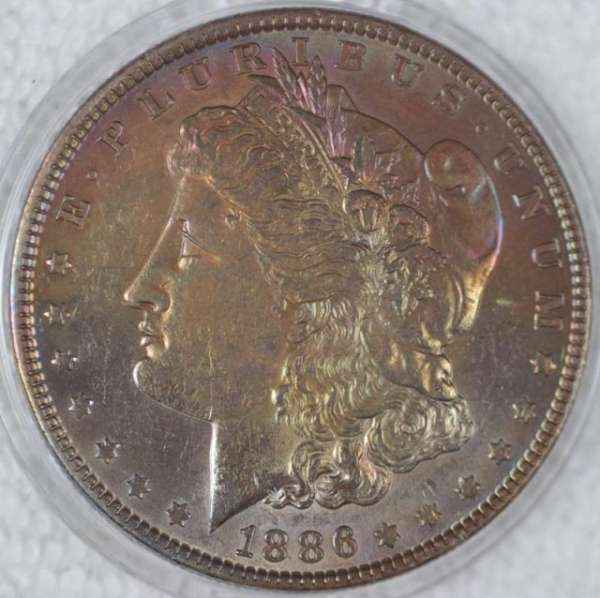  Getting sizing under control. A great relief. At least now I can post, and that is the cornerstone of communication. And the color of these images is as close to "in hand" as I would expect. Still, the left half of reverse is sharper than the right. So I'll try the mirror. Select annother coin, and see what I can do. I've switched from cotton background to placing the coin in a 2" plastic Snap-Tite half. Placing it on the stand base may keep the coin square to the lens, and using the other half, I can turn the coin over without handling it. Maybe later I can explore shooting through the holder of a TPG coin. Wish me luck. |
|
Pillar of the Community
United States
4038 Posts |
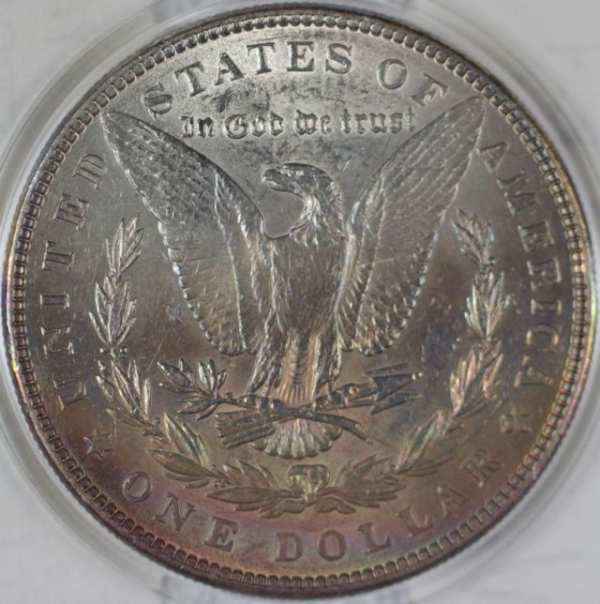
Your lights are still too low an angle. I can tell because the features are outlined with light rather than with shadow. You generally want the opposite, ie the edges of the features should be darker than the surfaces. The type of lighting you are showing is "surface" lighting or "museum" lighting and it shows the surface characteristics well but is not as good at showing color or luster. Now if you are looking for that type of lighting intentionally, that's fine, just want to make sure.
|
|
Pillar of the Community
United States
4038 Posts |
It also looks like you're lighting from both sides at around 3:00 and 9:00, correct? You never want to have lights directly opposite on a coin you want to show luster on. The luster bars show up perpendicular to the direction of the lighting, but they require local contrast to display well. A light at 3:00 shows luster bar from 12:00 to 6:00 across the coin. Problem is that a light at 9:00 does the same thing but from a different angle, and unfortunately luster bars don't add together but subtract from each other due to reduction in contrast. Try moving the lights to 10:00 and 2:00, or better yet 10:30 and 1:30. At 10:30/1:30 you'll create an X pattern of luster across the coin.
Contact me for photographic equipment or visit my home page at: http://macrocoins.com |
|
Pillar of the Community
United States
1314 Posts |
 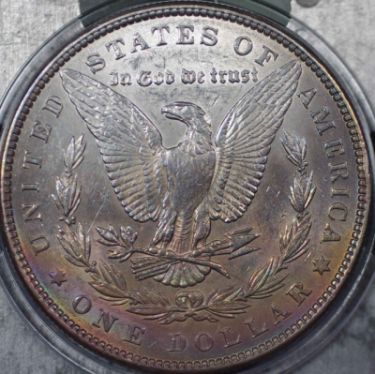 You are so right about the lamp positions. Was 3&9. Tried a 90 degree sepparation from the top. Hope it's better. Lens to coin distance is almost exactly 5 inches. And having a little trouble getting in closer and more verticle with the lamps due to the shades. I've seen your discussion on the LEDs with vellum. May have to explore thoses areas as well. All in time. Unsure I got the mirror trick correctly, but lowered the camera to the base, and it was square. Next I might try... A TPG coin, shot through plastic. An uncirculated coin with whiteness and luster. A close-up of some detail, a VAM pick up point. Or a Morgan with modest toning. Thanks all, Kurt |
|
Pillar of the Community
United States
1314 Posts |
|
|
Moderator
United States
23522 Posts |
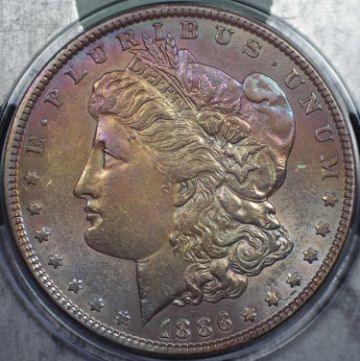
These last are just.plain.nice. Somebody's demonstrating a pretty steep learning curve. The original images are far larger that what's posted, right? |
|
Pillar of the Community
United States
1314 Posts |
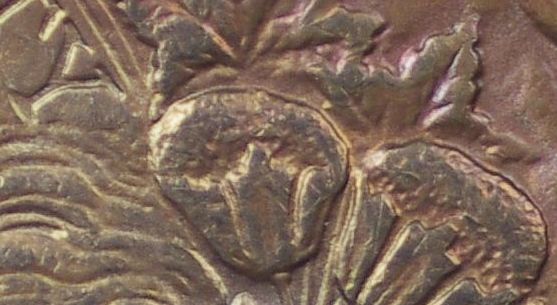 Yes, I've been starting with some really big files. And learning how to crop and optimize them. And learning about lighting. And camera settings. And camera mounting and mirror tricks. In this photo, I wanted to show a little detail. Of specific interest to me (as a student VAMer) are the polish lines in the "Y" of LIBERTY. The cotton bolls aren't as sharp as those captured by SUPER DAVE, but are a good start. Two weeks ago I got my first dSLR camera, did not know what batteries it took, or how to install them. I didn't know how to take a picture, or how to transfer the data from the camera to the computer and then to a web site. I did not know about pixels and file size, nor how to manage them and make them useful. I am aware that I have explored only 2% of my camera's potential, but I feel great about my learning experiences. The last time I felt this way was many years ago when I was exploring my first 2% of a driver's license, and my first 2% of pretty girls. And all the credit goes to each and every one of you at CCF. Your guidance, advice, encouragement, pictures, data, explanations and comradery. I've tried to do most of what you advise, answer most of your questions, and devote some of my own time to learning. I cannot thank you enough. But do not think that we are finished. I have another 98% to explore, and the first 2% to master. Thanks Kurt |
|
Valued Member
United States
70 Posts |
I didn't read this entire post...so forgive me if someone has already mentioned it. But first, that hot pink camera of yours is going to reflect pink light onto the coin. In fact on highly reflective surfaces, you'll be able to see the pink camera body in the reflection of the coin. There is a reason manufacturers make cameras black. Secondly, in order to achieve razor sharp images, the lens needs to be perfectly parallel to the surface of the coin. If your lens is tilted, there will be sections of your coin that are slightly out of focus. That's why if you're going to make your own copy stand, it really needs to be precise or adjustable. You can always tilt the coin, but often times the adjustments are everso slight that you won't be able to find objects to meet your needs.
-LTB
|
| |
Replies: 91 / Views: 14,604 |


