Coin Community Family of Web Sites Join Thousands of Coin, Bullion, & Money Collectors
Specializing in Modern Numismatics Shop for APMEX Bullion on eBay!Join Thousands of Coin, Bullion, & Money Collectors Coin, Banknote and Medal Collectors's Online Mall Vancouvers #1 Coin and Paper Money Dealer 300,000 items to help build your collection! Royal Canadian Mint products, Canadian, Polish, American, and world coins and banknotes.


Username:
Password:
Save Password
Forgot your Password?


This page may contain links that result in small commissions to keep this free site up and running.

Welcome Guest! Registering and/or logging in will remove the anchor (bottom) ads. It's Free!

Combining 3 Disciplines

To participate in the forum you must log in or register.
Author Previous TopicReplies: 8 / Views: 1,717Next Topic  
New Member
ITVirtuoso's Avatar
United States
20 Posts
 Posted 08/11/2012  11:44 am Show Profile   Bookmark this topic Add ITVirtuoso to your friends list Get a Link to this Message Number of Subscribers
Gotta love it when you can begin to combine 3 passions at the same time! At this point I'm ecstatic with the results I'm starting to get and what you're about to see is really only the start of the potential.

I'm still a very recent addition to the coin community and I'm in love with silver pieces (although the gold collection just started last night). I've also begun attempts in photographing the coins. Photography has been a hobby for several years, and coins have got to be some of the trickier things I've ever shot. After creeping this forum for a while, the obvious thing is getting the lighting just right. (although I suppose thats the trick to all photography) I started to settle into a design in my head and 2 days ago set out to move the idea into something tangible. I wanted a ring light that provided lateral lighting as opposed to the traditional on camera ring light setup. I'm moderately versed with CAD and started building a model that would give me what I was after. The idea to string some LED lamps into a small ring that would sit on the desk and allow me to shoot with even and repeatable results. The last part of this equation is another passion that started 6 months ago. I've got a 3D printer that is completely home built. From a CAD model I can print a physical object using plastics. Its really designed as a rapid prototyping machine. (Which is exactly what I needed in this situation). The concept may be new to some people and I'd be happy to explain in more detail, but I'll save it for now. (YouTube search "RepRap Prusa")

I was so excited about the concept I modeled it, printed it and got the electronics together in about 2 days. 4 LEDs, switch and a 9V battery. I've dubbed the project "silverLight" based on the intended purpose. (I like to give codenames to all my projects!)

At this point the photographs are being taken with a 8MP webcam. Its not the best answer I know, but it saves me from dragging out the whole photo rig and gives me instant feedback on screen while I play with what works best. Already looking forward to some revisions (and I already have 2 printed versions). I'm thinking that the next version may more of a 3/4 circle with a break in it so I can raise and lower something thats in a slab and adjust the angle of light. I'm using a small pedestal for loose coins with drastic differences. May also include more LEDs and a potentiometer to vary the light output. For now, I'll just run with what I have.

As far as the photography goes, I might try image stacking with the webcam and see what I get. Maybe if I can get motivated enough, I'll drag out the big gear.

I would absolutely love feedback from you guys!! Good / bad / doesn't matter. Any criticism. Has anyone seen commercial designs like this? I didnt really look into whether or not it was something that was already out there.

Here's a taster image of the reverse of a 95 ASE. The coin does have some toning that gives it a darker look than most. Image is only lightly sharpened and color balanced. The led lights give a slightly bluer white light. Easy enough to compensate. For more images, including the device itself, check out my dropbox. The file names should indicate whether I was using the silverLight or not.


https://www.dropbox.com/sh/a6spp8tg.../silverLight

Combining-3-Disciplines


Josh
Edited by ITVirtuoso
08/11/2012 11:46 am
Valued Member
TJB17's Avatar
United States
492 Posts
 Posted 08/11/2012  1:10 pm  Show Profile   Bookmark this reply Add TJB17 to your friends list Get a Link to this Reply

Quote:
I like to give codenames to all my projects!

So do most mad scientists! Mwuhahahahaha!!!
Valued Member
Mechman's Avatar
United States
275 Posts
 Posted 08/11/2012  2:54 pm  Show Profile   Bookmark this reply Add Mechman to your friends list Get a Link to this Reply

Thanks for sharing your inventions with us. Your pics are great!
Pillar of the Community
CaptainFwiffo's Avatar
United States
4132 Posts
 Posted 08/11/2012  3:05 pm  Show Profile   Bookmark this reply Add CaptainFwiffo to your friends list Get a Link to this Reply
I've always wanted a 3D printer, but I've just squandered all my fun money (and desk space) on my new camera. D'OH!

Search the forum for "smile directors" to find some tips on lighting. I imagine your RepRap will give you a leg up in getting a consistent, repeatable setup.
New Member
ITVirtuoso's Avatar
United States
20 Posts
 Posted 08/11/2012  3:38 pm  Show Profile   Bookmark this reply Add ITVirtuoso to your friends list Get a Link to this Reply
As the printers go, scratch built wasnt terribly expensive. I was able to use alot of salvaged parts. But I kinda have an aptitude for that kind of thing. Desk space however... well, lets just say I needed a second desk.

I've seen the smile directors and may try to incorporate something in the next design. At the very least I may steal the idea of using a vellum paper over the LEDs and see if its any better / different with a diffused light. Thanks for the tip!

JW
Pillar of the Community
Learn More...
United States
4037 Posts
 Posted 08/12/2012  12:25 am  Show Profile   Bookmark this reply Add rmpsrpms to your friends list Get a Link to this Reply
Nice to be able to do 3D prototypes!

Unfortunately I have a few negative things to say. Please take them constructively...

I believe your basic premise of providing lateral lighting is going down the wrong path. Light coming from the sides of the coin tends to emphasize surface finish, and creates highlights on the edges of devices rather than on their surfaces. This inverts light and shadow versus the "normal" or "in-hand" look, and can be seen on your ASE photo. The devices are outlined with a bright "halo" effect, which is not a natural look for a coin.

Now, one thing lateral lighting is excellent for is photographing varieties, though the specific angle to horizontal and vertical distance have strong effect on emphasizing details.

Again, I don't want to discourage your effort, and your technique is superb. I also could provide a number of suggestions if you are open to that.
Contact me for photographic equipment or visit my home page at:
http://macrocoins.com
New Member
ITVirtuoso's Avatar
United States
20 Posts
 Posted 08/12/2012  10:18 am  Show Profile   Bookmark this reply Add ITVirtuoso to your friends list Get a Link to this Reply
I absolutely welcome any feedback on the project! I don't interpret feedback as negative or positive. Its all constructive. (as long as its well founded I suppose) You are absolutely spot on regarding the halo created by this method. I personally like the look from an aesthetic appeal. But I also completely agree that maybe its not the best light to portray the coin as its not a natural look. I have noticed on some coins that I've "tested" under this light, it visually flipped the coin. I dont remember what I was photographing, but after looking at the photo, it looked like it was incussed and I had to double check the coin!

At current setup, the lights are 20mm above the desk surface and at a 15 degree downward pitch. If the coin is placed on the seperate pedestal, its elevated to 15mm which gives a very shallow angle of light. (This is how the ASE in this thread was shot)

I've thought about designing a ring that was taller and using more lights. If I add more lights though, I will almost definetly need to include a pot to dim them. I'm worried that if I get too much more light, I'll completely blow out the coin with reflections. As it is, I have these four moderately undervolted to control the brightness.

I'm really shooting from the hip with these ideas and I absolutely welcome suggestions!! Its the primary reason I share the whole project with the community and not just the end result photographs. Hell, I'm even willing to prototype another persons brainstorm lighting ideas!

Thank you so much for the feedback thus far!

Josh
Pillar of the Community
Learn More...
United States
4037 Posts
 Posted 08/12/2012  12:38 pm  Show Profile   Bookmark this reply Add rmpsrpms to your friends list Get a Link to this Reply
Josh,

Glad you are open to suggestions! First, let me give you a bit more background and then my suggestions...

First, pick up that 
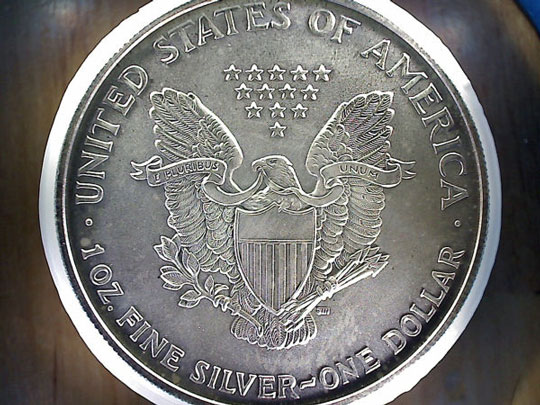
ASE and view it in-hand with your normal coin viewing lights. Tilt it around as you would on a coin show bourse floor, trying to decide to buy or not. What are you looking for? I look for marks, luster, "rub", etc to see if the coin's worth the asking price. Now, how are you holding the coin, and where are the lights that give you the best view of the coin and the characteristics you're looking for?

First thing most folks realize, unfortunately, is that they don't hold the coin "flat" versus their eyes. This is bad news for coin photography, because it's hard to take a good picture of a coin at an angle. There are tricks you can play, such as using Tilt/Shift lenses or bellows to bring the coin back to square from camera perspective and compensate for DOF issues, but that is advanced stuff and it's not always effective. But the question is: why hold the coin at an angle? Usually the answer is that you are trying to get the light to shine straight onto the coin and into your eyes. This gives the best rendition of color and a good rendition of detail, and emphasizes the surface reflections. It does NOT give a good rendition of true luster, which only comes from a slightly angled presentation. Try it! Move the coin around, and see what gives you the best color...the best luster...the best overall "look"...etc.

You'll probably find, unfortunately, that the answer is different for each characteristic you're trying to emphasize! So the next step is to determine what is the best lighting that gives you what you the best balance and minimal tradeoff between the characteristics. I can tell you what I found, after literally years of experimental effort:

- Two Lights, one at approx 10:30 and one at approx 1:30. Exact placement depends on the subtle shadow detail emphasis on the particular coin

- Lights placed a distance from coin that gives approximately a 20-deg radial illumination sweep and <10-deg axial illumination sweep. Smaller lights go closer, larger farther. Diffusion makes the lights look bigger

- Incident angle to horizontal >75deg but less than the aperture-dependent critical angle for direct reflection to the lens

- Elimination of any direct light from source hitting lens

So, my suggestions for you are:

Reduce the inner diameter of the assembly to the same diameter as your lens filter threading. This will help to increase incident angle
Add a blocker/reflector to reflect any light that would shine up to the lens instead downward to the coin
Add diffusion to minimize hotspotting
Attach the light holder to a system that allows you to move it up or down to optimize the incident light angle
Cluster 2 sets of 3 lights each such that the center lights are 90-deg from each other with the other two in each group about +/-20-deg from the center ones
Add switching to allow you to turn on one light from each group at random
Add a light at 12:00 for fill-in or single-light shots
Paint all areas not emitting light with heavy coat of flat black paint or attach flocking

I may have a few other suggestions but this is a start. These are things I would do myself if I had the equipment to make these assemblies.


Contact me for photographic equipment or visit my home page at:
http://macrocoins.com
New Member
ITVirtuoso's Avatar
United States
20 Posts
 Posted 08/12/2012  1:01 pm  Show Profile   Bookmark this reply Add ITVirtuoso to your friends list Get a Link to this Reply
and now muh brain huuurts!

Fantastic insight and I'm gonna reread several times and process. I'll get back when I understand what you're saying!

Sincere thanks
  Previous TopicReplies: 8 / Views: 1,717Next Topic  

To participate in the forum you must log in or register.


Disclaimer: While a tremendous amount of effort goes into ensuring the accuracy of the information contained in this site, Coin Community assumes no liability for errors. Copyright 2005 - 2026 Coin Community Family- all rights reserved worldwide. Use of any images or content on this website without prior written permission of Coin Community or the original lender is strictly prohibited.
Contact Us  |  Advertise Here  |  Privacy Policy / Terms of Use

Coin Community Forum © 2005 - 2026 Coin Community Forums
It took 0.37 seconds to rattle this change. Forums