I mentioned in a previous
post that I was going to have to replace lots of 2x2 cardboard flips as a precaution.
Maybe I picked up a trick that will help someone else in the same predicament. Maybe someone will point out something that I'm doing wrong. Either way...
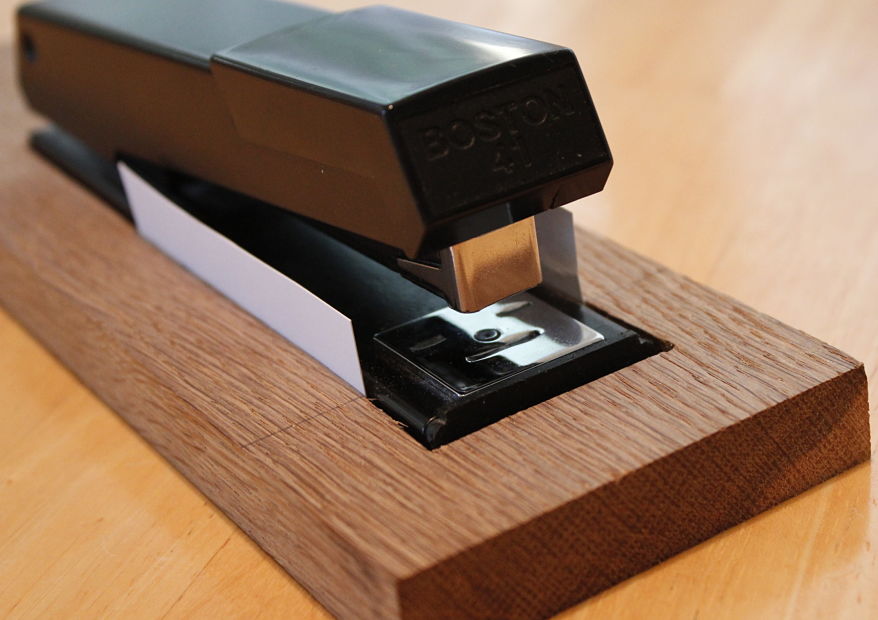
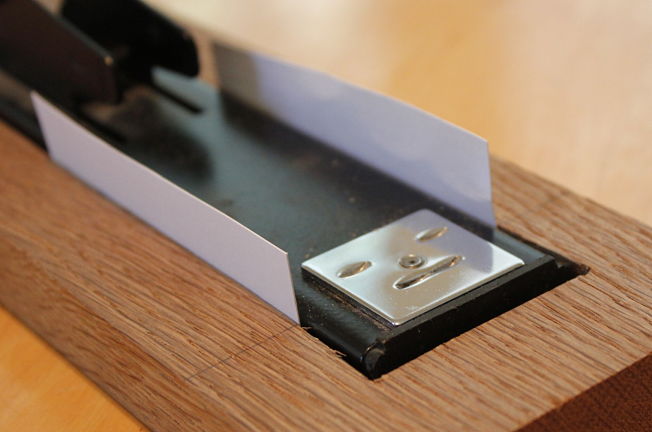
The first thing that I learned is that I stink at positioning the holders in the stapler at a consistent depth and angle. I'm not so bad at side to side positioning. So I made myself a stapling jig / guide. I made mine out of a scrap piece of wood that holds the stapler in a known position and has marks where the guide / fence should be placed. I'm currently just wedging thin pieces of plastic between the stapler and the jig to serve as a fence for the jig. I'll probably replace the wedged plastic with fences mounted in a T-Track as a more permanent solution that can be adjusted based on the window size of the 2x2. If my stupid stapler had sides that were parallel, I'd probably mount permanent fences and adjust the depth of the staple with different sized stop blocks to change the relative position of the stapler. As an added bonus, I'll be able to get a consistent position on the staples 4 years from now.
So the process goes something like this:
1. Pull a row of coins out of the page, reverse side up.*
2. Use a sharp knife to cut around the edge of all of the coins.**
3. Pull out a new cardboard 2x2, swipe the dust off with a clean, lint free cloth.
4. Give the 2x2 a couple of blasts with a hurricane blower for any dust the cloth missed.
5. From about 1/2 inch above the new 2x2, let the coin fall out of the old 2x2 (obverse up).
6. Give the coin a couple of blasts with the hurricane blower .
7. Close the 2x2 to flip it over to the reverse side.
8. Couple more blasts.
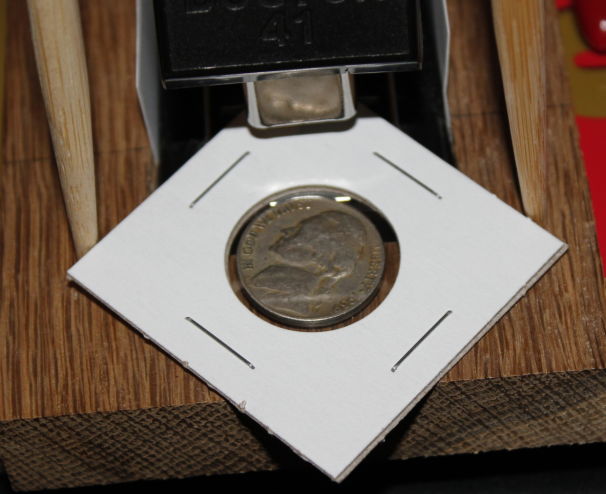
9. Position the coin in the 2x2 window with a bamboo chopstick.* ***
10. Close the 2x2, flip it back over to the obverse and use the handy stapler jig to staple all four sides.
11. Crimp
12. Transfer any data from the reverse of the old 2x2 to the new 2x2
13. Repeat 3-12 for the rest of the coins in the row, set them aside for the ink to be 100% dry
Repeat the process for the second row of coins, then flip the first row of coins over and transfer any data to the obverse.
Repeat the process for the third row of coins, at which point the ink on first row of coins should be dry enough to go back in the page.
* I start the process with the reverse side up because I've been working on US nickels and I find it easier to position the nickels in the window using the straight lines of Monticello than the random head tilt of Jefferson. It also matters that I'm using the hurricane blower on each side of the coin.
** I've been putting coins in oversize 2x2s (nickels go in quarter size, cents go in nickel size, etc), which leaves plenty of room to cut around the edge with a knife. Obviously I go a different route when the coin is in the "right" size 2x2.
*** Yeah, I know. There's probably a better choice for gently moving a coin around than a bamboo stick, but it was handy and clean and not my finger.
Hopefully this is useful to someone,
Baltika