| Author |
 Replies: 199 / Views: 23,252 Replies: 199 / Views: 23,252 |
|
|
|
Pillar of the Community
 United States
1298 Posts |
Thanks everyone. I'm going to take most of the day and work on the suggestions. I'll post an image or 2 for your evaluation.
|
|
Pillar of the Community
United States
1298 Posts |
Took this shot with 3 Jansjos (diffused), and only cropped. Before I continue, what do you think? 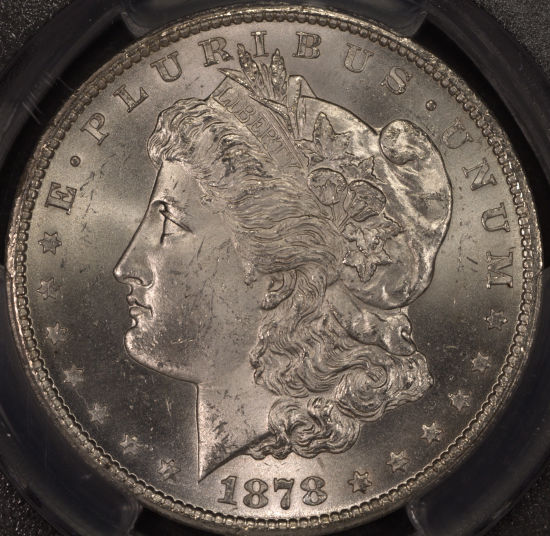 |
|
Pillar of the Community
 United States
4038 Posts |
OK, a few things.
1) White balance looks off. Too red, unless this coin is red for some reason
2) Still showing some blow-outs, especially in red. White balancing may help, but I'd turn down EV by 1/3 more
3) Overall lighting is good
4) Contrast is a bit low. I'd suggest keeping the in-camera settings, but move black to 16
Could do with a tiny bit of sharpening, 50 in DPP
|
|
Moderator
United States
23522 Posts |
Quote:
SsuperDdave, I'm not sure how to save an image at a certain dpi. I reduced the size (less than 100kb) of the image in the program here to be able to post. If you have some suggestions, I'm willing to listen and try. I see what I can find out on my end. It's all in the postprocessing. When you set your camera for the largest image it can give you - as you should - you get that 350dpi (dots per inch, in this case interchangeable with "pixels per inch"). Playing around with an image in postprocessing adds size to the file from administrative overhead; if I process a 1.5MB file and save it at the exact same size, the resulting file might be 1.8-2MB. That's in play when you downsize the image (both in physical size and filesize). Something in your program is attempting to retain the original dpi when you downsize the image. I am not sure how that happens in your program, but there are likely settings for the method the program uses to downsize and/or set "Quality," and changing that will allow it to reduce the dpi as part of the process. I'm going to drop Bobby a note and get you a CCF Gallery. It's a perk for more senior members, if you're unaware. You can upload image files up to 1024KB, and of at least (it's the size I use now) 1000 pixels in diameter, which is the new "normal" when using equipment of this quality. It'll allow you to be less draconian in your downsizing. Like so, 1000px, 285kb:  |
|
Pillar of the Community
United States
1298 Posts |
Ok, I did a few things without shooting another image. 1. adjusted the red 2. sharpened to 50 3. didn't know how to adjust or move black to 16 4. turned down the ev some-for next shot 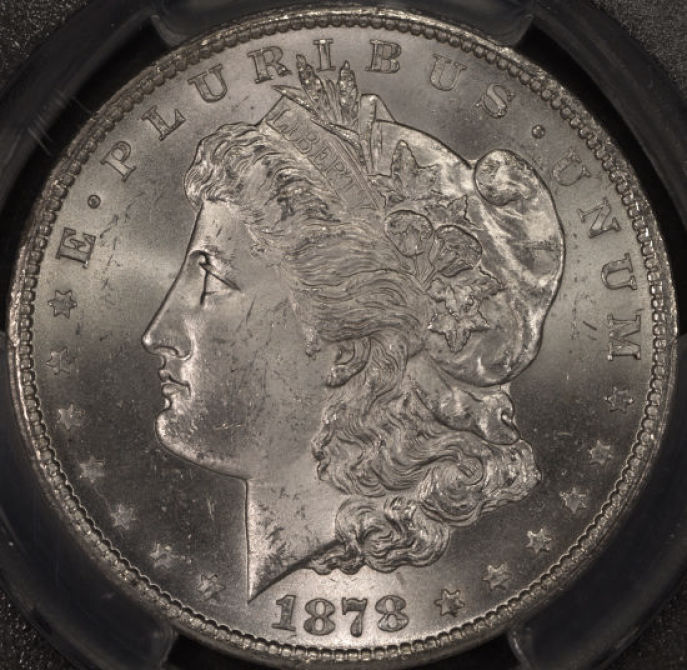 |
|
Pillar of the Community
United States
1298 Posts |
|
|
Pillar of the Community
United States
4038 Posts |
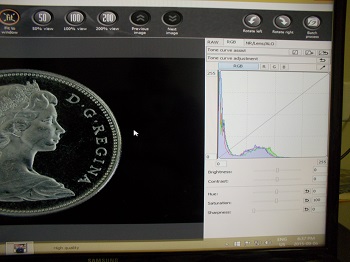
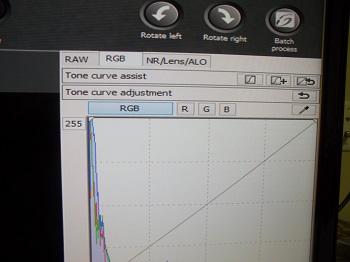
Are you using DPP for editing? Select the image, hit edit image button, and you'll see a histogram. Bottom left corner has a "0" in it. Change that to 16. A problem with the new image you posted is you somehow changed the size, so the sharpness is messed up. I have never used the forum software but it seems to be fractionally-resizing the image, which is really bad, especially if it fractionally-enlarges it!! SD, what might be happening here? Anyway, here is the image after doing the hue change, 50 sharpening, and contrast adjust (black adjust to 16):  Doing just a bit of gamma correction ("tone curve assist" with RGB in DPP) brightens the darks a bit:  |
|
Pillar of the Community
United States
1298 Posts |
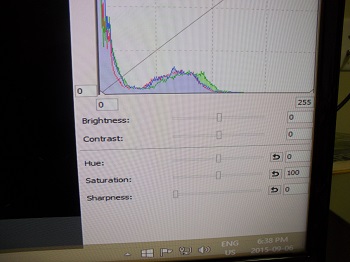
Ray, what you have done is great. I am using DPP for editing, but as a "newbie" don't know where to find all the functions. Sorry about that. When using the "Image Optimizer", I may have changed some settings. Again, I apologize. I do appreciate all the help here. One question, in DPP after seeing the histogram, I know know what the black adjustment is now, but what is the other box close by for (presently has a 0 in it)?
|
|
Pillar of the Community
Canada
2784 Posts |
|
|
Pillar of the Community
United States
1298 Posts |
Rocky, in the histogram image there are 2 boxes in the lower left corner. The bottom one is the black adjustment, what is the other one ? Thanks.
|
|
Pillar of the Community
United States
1298 Posts |
I am totally burned out for today. There is so much to absorb and learn. I will keep on trying. Here is one more shot for your comments. Sorry, but the file is way to large (21.6MB). How do I reduce the size? Will work again tomorrow pm.
|
|
Pillar of the Community
United States
1298 Posts |
Went to preview and reduced the size of the image. 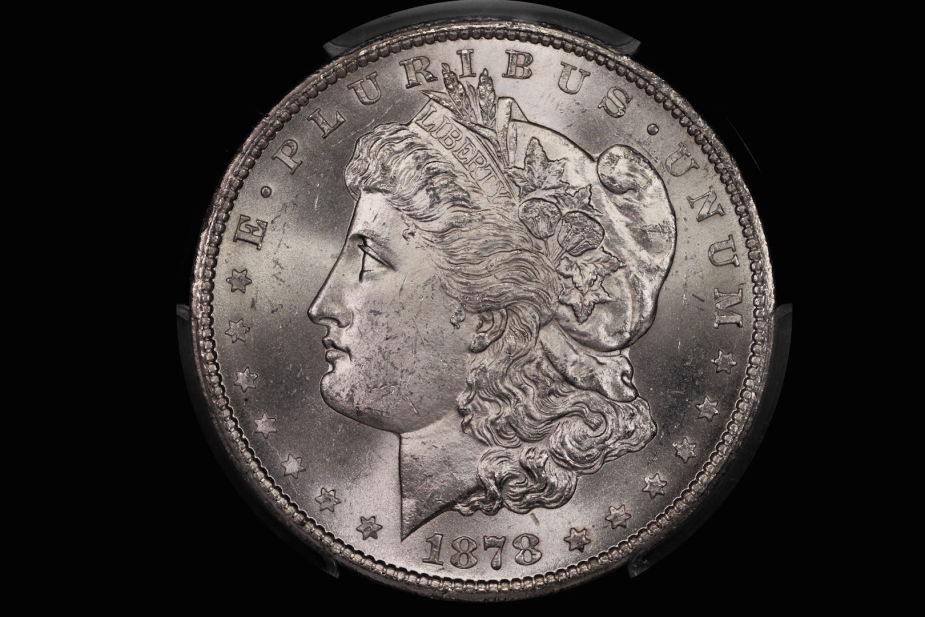 |
|
Pillar of the Community
Canada
2784 Posts |
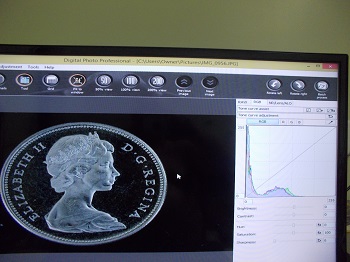
ok ham take a look at this. here's your photo edited by me in DPP. plus cropped ham very nice photo you are doing a great job. I only slightly adjusted your coin to what. I like to see but you are there. lets see what the other think. have a great one  |
|
Pillar of the Community
Canada
2784 Posts |
here's the top photo ham. I have to say your photos are good they don't need much editing  |
|
Pillar of the Community
United States
4038 Posts |
I agree with rocky, the pic is what I call good "raw material". For an image to be such it must be well-focused, color-correct, evenly-lit, and have no blown-out highlights or crushed blacks. With those criteria met, small amounts of post-processing can yield a good image.
Ham, think of the histogram as a graph of output vs input. Before any adjustment, lower left is 0,0 and upper right is 255,255. There is a straight line that goes from 0,0 to 255,255, meaning that the output vs input is perfectly linear and a 0 in the input image RGB maps to 0 in the output, and likewise for 255. Let's talk about the 4 simple adjustments:
1) Move input minimum 0 to a higher number, say 16. This will take any pixels with brightness between 0 and 15 and make them black (0). 16 is now 0. This will take an image that is too bright (commonly associated with low contrast) and make it darker with emphasis on the darker tones. It does not change the brightest highlights. It has the effect of increasing "contrast" and reducing "brightness"
2) Move input maximum 255 to a smaller number, say 200. This will take any pixels with brightness between 200 and 255 and make them white (255). This will take and image that is too dark (no highlights, again commonly associated with low contrast) and make it brighter, with emphasis on the highlights and lighter tones. It will not change the darkest shadows. It has the effect of increasing both "contrast" and "brightness"
So if you have an image with low contrast, you can do one or both of the above to increase contrast IF you want to keep either the brightest highlights or the darkest shadows constant. Generally it's advised to push the darkest shadows to black, and brightest highlights to white, to have best dynamic range and contrast in the image. By using the above two adjustments you can make both of these happen, assuming you don't already have blown-out highlights or crushed blacks. They give you much more control than using the contrast and brightness adjustment.
3) Move output minimum from 0 to a larger number, say 16. This will take pixels that are at black (0) and move them to dark (16). It affects darks and mids as well, but has no effect on brightest highlights. If you have a lot of dark tones, this will lighten the image. It has the effect of increasing brightness while decreasing contrast.
4) Move output maximum from 255 to a smaller number, say 200. This will take pixels that are near whites (255) and move them to brights (200). It affects brights and mids as well, but has no effect on darkest shadows. It has the effect of decreasing both brightness and contrast.
The above two adjustments can be made to images that are not well-balanced and have too high contrast.
|
| |
Replies: 199 / Views: 23,252 |