|
This page may contain links that result in small commissions to keep this free site up and running.

Welcome Guest! Registering and/or logging in will remove the anchor (bottom) ads. It's Free!
To participate in the forum you must log in or register. | Author |
 Replies: 76 / Views: 25,919 Replies: 76 / Views: 25,919 |
|
|
|
Moderator
  United States
23522 Posts |
Step 3: Baseline picturesOK, now the fun begins.  I mount the camera onto the copystand, and set up the sample coin - a Large Cent which I know shoots well, and is big enough to determine image quality even if it isn't that large on the screen. The camera is set to fully Automatic, not even Macro mode. I turn on the camera, and zoom in a little so that the coin fills a fair amount of the LCD. The coin is about 18" from the lens, and I'm using my usual two 50w halogens, plus some ambient sunlight in the room. I'm shooting all of these with a 2-second shutter delay. Here's the result: 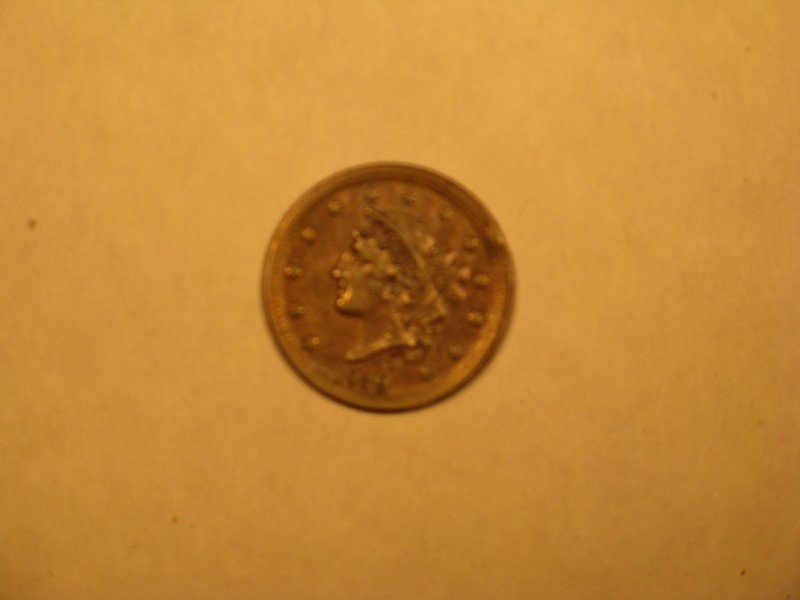 Um, yeah. Problems: Blurry. White balance all wrong. Too small to even consider grading from. Guess I should have used Macro mode, eh? The only reason I shot this one is to illustrate what you can expect just using the camera's zoom - it's blurry because you're too close for the normal mode of operation to focus properly. So, I'm going to shift to Macro mode, and quit playing with the zoom. The white balance, I'm not going to mess with yet. Lets concentrate on getting something big enough and clear enough to work with, and then we'll tweak the white balance to see if we can get the color right. Now, let's digress for a moment.The key to learning how to shoot coins is to record what you've done. Camera settings, light, distance, write 'em all down. "OK," you think, "what if I'm shooting on Automatic? The camera won't necessarily tell me what it's doing...." There's an easy answer to that question, and it's called "EXIF data." EXIF data is EXchangable Image File data, the settings your camera records for each shot taken. Here's how you access it: 1) Either from Windows Explorer, or your usual file management system, or with the picture open on your screen in whatever you use to display it, right-click:  2) Click Properties. You'll see this: 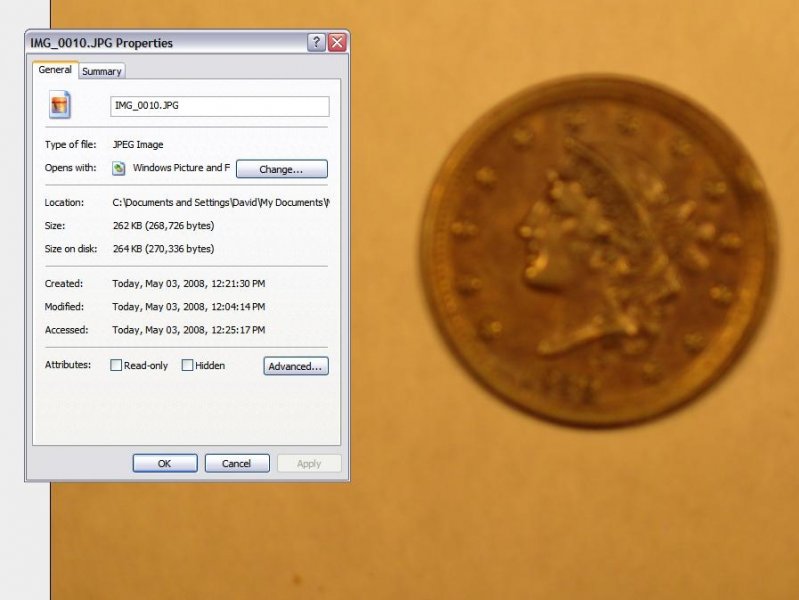 3) Click the Summary tab at the top. This is what you'll see: 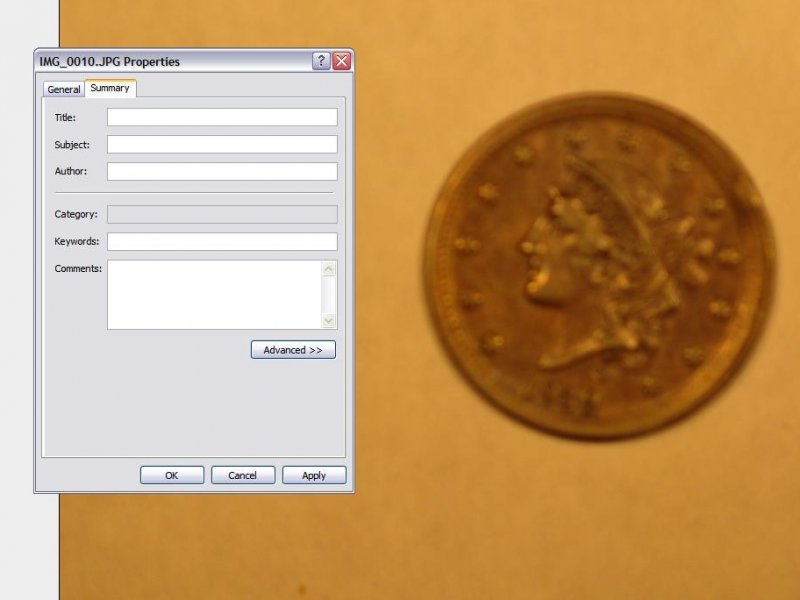 4) Click Advanced. This is the EXIF data for the shot: 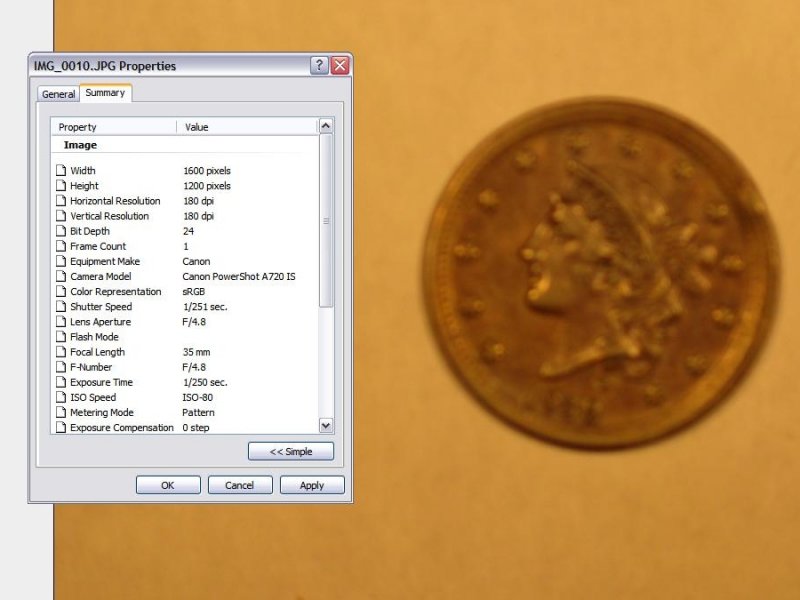 Note that the EXIF data contains exposure, aperture and ISO information, as you've seen discussed elsewhere on this forum. Knowing that you've got access to all this later, you can actually take pics as fast as you like, varying one little thing each time, and then come back and see how you did it later. That suits me just fine. End of digression.So we've decided that I should really be using the Macro setting of the camera. Fine. So I set it to macro, and snap a shot under the exact same conditions as before: 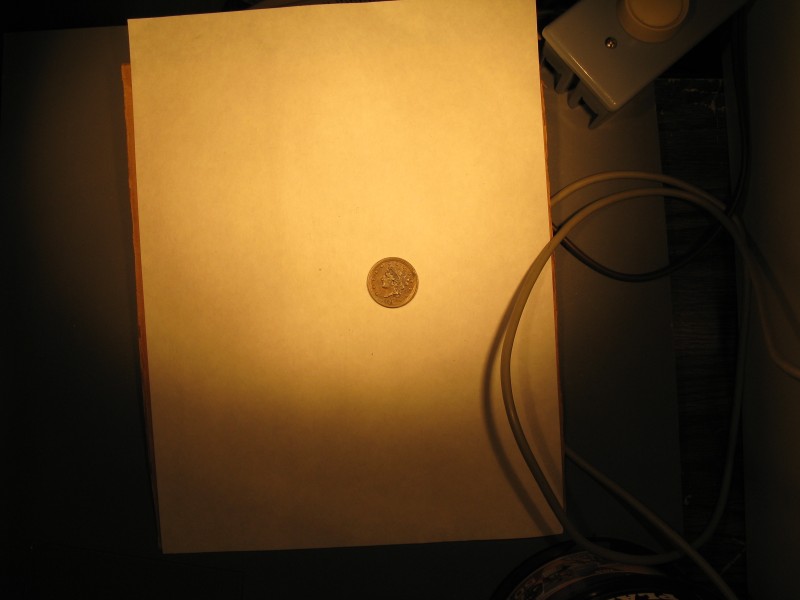 OK. This is what a coin looks like, shot from orbit. At least the focus looks a little better. We'll move the coin a little closer to the camera, and see what happens. From 12" away: 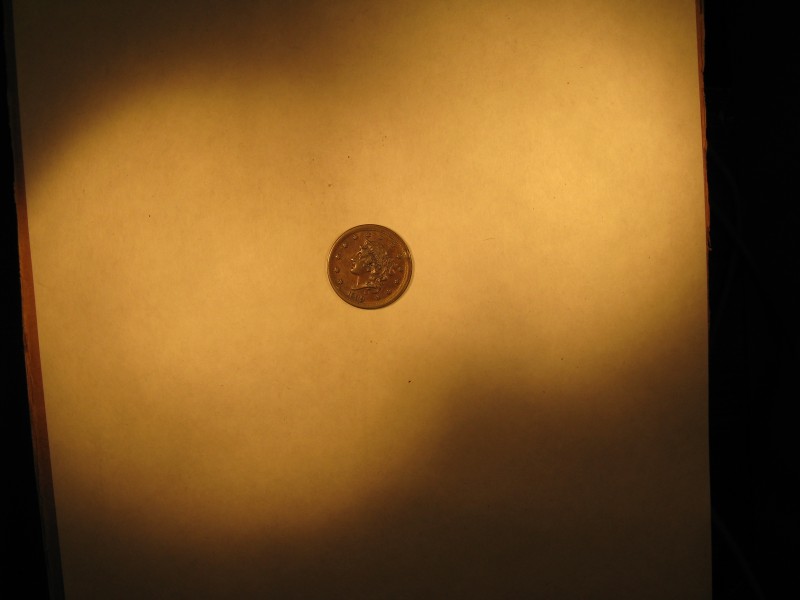 Hmmm. I can tell it's a Cent. I think. OK, closer we go. From 8":  Getting closer. Now, to stop for a moment. Remember, this is an 8 Megapixel camera. At the largest size setting, this thing takes a picture which is 3264x2448 pixels. I think it's about time to see just how big this coin is, by itself. So I fire up the Gimp, my usual editing software, and get to croppin'. This is the coin from the above pic, actual size and not retouched: 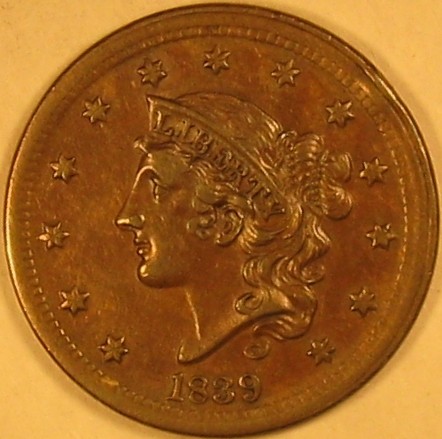 About 440 pixels across. On the lower limit of what we'd consider worth looking at for grading purposes, and better than probably 90% of all ebay coin photos. But now I've only 8" between the coin and the camera. Any closer, and my lighting rig won't get any light onto the coin without major modifications. Yet I need to get the coin closer. Ugh. Well, let's see what we can do. I start stacking Krause books, and achieve a 4" distance between the lens and the coin. That ought to do it. I open all the shades, and turn the overhead light on. We don't care about white balance yet, remember? That'll come last. OK, let's see what 4" does: 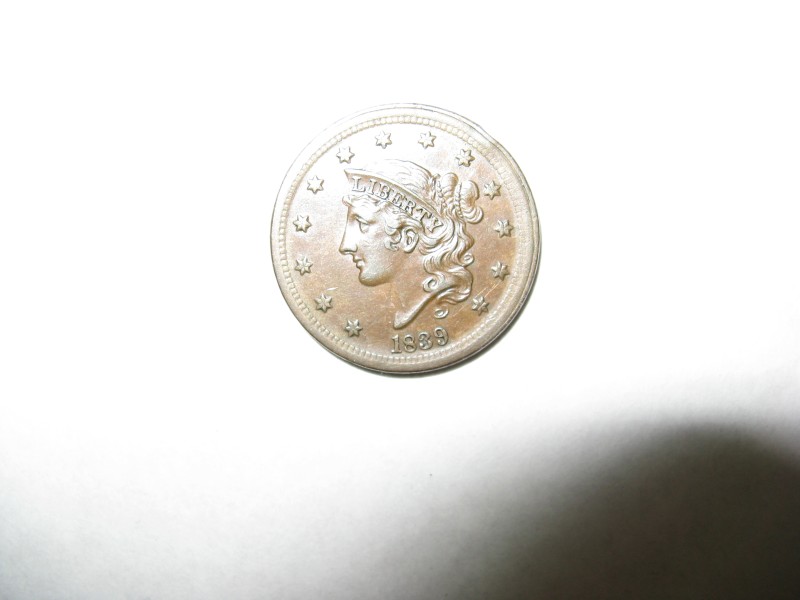 Oops! Guess who forgot to turn off the automatic flash? Heh. Well, there are some good points to this shot. First, it appears to be in pretty sharp focus. Let's crop it and see what we get: 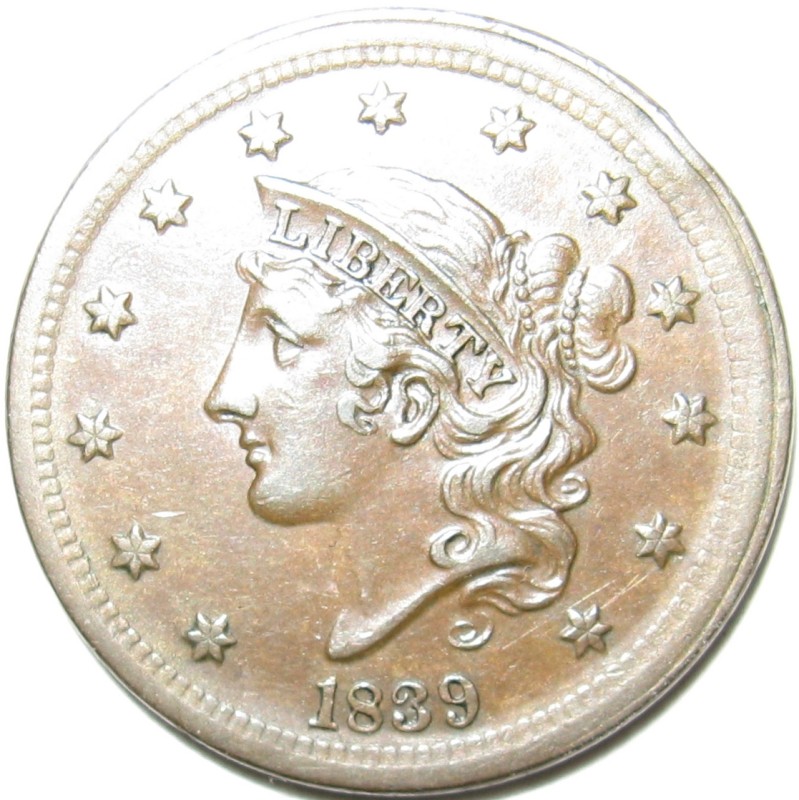 Now Now we're getting somewhere. The original cropped size of this shot is about 1100 pixels; I had to downsize it to post here. The focus is nice and sharp; it's not perfect, but within the ability of the Gimp to sharpen without wrecking the original look of the coin. It's beginning to look like this little A720 is up to the job - all I have to do is figure out how to light things. I start twisting my gooseneck lamps into some really grotesque shapes, and achieve angles that put the bright zone of each bulb onto the coin. The resulting shot is good enough for me to want to pull it into the Gimp and do some playing: 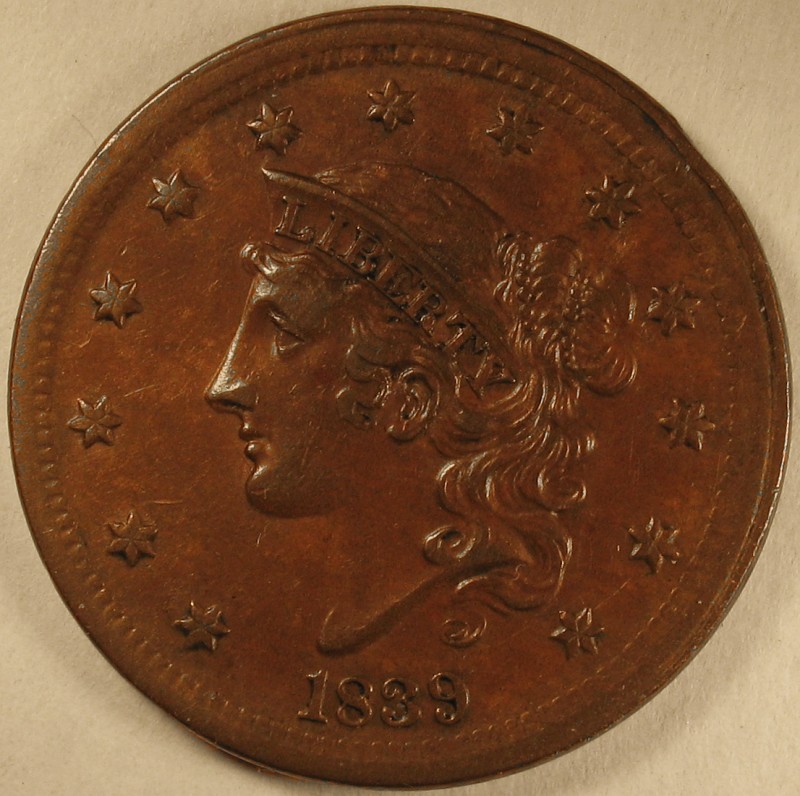 This is where we will stop for today. Remember, I've let the camera choose the settings for all of these shots, and done nothing about white balance. Even still, we're closing with a shot which is *almost* ready for prime time. Our next installment: White Balance Adjustment and Manual Control Part 1.
|
|
Pillar of the Community
United States
1703 Posts |
I have been using a Fuji 6.3 megipixel camera for a number of years now.If I use the macro setting and get a rock steady camera mount,the pictures come out very well.The big problem has always been lighting or finding the right light.I have taken up to 10 pictures of the same coin just to get the right lighting to show what the coin actually looks like. I found a mini studio that has solved this problem and now it 2 maybe 3 pics to capture the true coin with all the details or issues.I do agree that with the new digi cameras that are out that,coin picture taking is much better than it use to be. mini studio,  |
|
Pillar of the Community
United States
527 Posts |
SuperDave, You have jury duty on top of everything else that's going on? That doesn't sound fair.  Good luck with everything, I'm just glad you are taking some time for your friends here. I appreciate all you do, and I'm sure everyone else does as well, this topic has been especially helpful. Thanks for everything. Looking forward to your post on Friday.  |
|
Pillar of the Community
United States
2443 Posts |
Thanks for the write up Dave. I have a camera that's similar to the A720, a A620(7.2MP I think I paid $150 for it two years ago). I have the same problem as you do, that the camera has to be really close to the coin in order to get some descent photos. When I shoot, I keep on getting the reflection of the lens in the coin. I found this about a day ago and I was going to try it out on my camera. I see that it also supports your A720, so if your ever bored... http://lifehacker.com/387380/turn-y...super+camera |
|
Moderator
United States
23522 Posts |
Step 4: White Balance Adjustment and Manual Control Part 1OK, we're starting to get someplace. Now it's time to dial in the color using Custom White Balance. As you all know, differing types of light bulbs have a different cast to the color - regular incandescent bulbs have a yellowish cast, fluorescent bulbs a white/blue cast, etc. Normally, a camera compensates for this automatically, which is fine for normal photography, but macro shooting tends to emphasize the color difference. The problem is, if there's too much of a certain color in the picture, the automatic white balance software in the camera will assume that the ambient light is causing that color, and correct for it. As you've seen, the Auto White Balance setting on my A720 tends to leave the pics too yellow. Like most cameras in this price range, mine also has presets for White Balance. It's possible that one of those will do the trick, but since I can set it for my specific lighting, I might as well go for it. White balance is adjusted by giving the camera a solid white sheet to observe. It's also possible to do with a grey card; indeed, many/most dSLR's tend to give better results when used with an (accurate!) 18% grey card. Since that's not something that the average collector is going to have laying around, we'll stick to white. My personal method for setting a custom white balance involves a coffee filter. I set the camera and lighting up exactly as I'll be using it to shoot coins. The coffee filter goes directly below the lens, so that it fills the viewfinder completely. Now, the specific procedure differs between cameras, so you'll have to figure out your own, but the A720's method is pretty direct. I just use the menu system to navigate to the "custom white balance" setting, and then press the "Disp" button, and the camera does the rest. With the Digital Rebel, one actually had to shoot a focused pic of the filter, and have that on the memory card to reference later when you wanted to tell the camera what the custom white balance setting would be. That had the added benefit of allowing me to have custom settings right on-hand for differing lighting setups. The A720 is a $200 camera; the Digital Rebel....is not. It's a compromise I'm willing to accept. This was before the Custom White Balance: 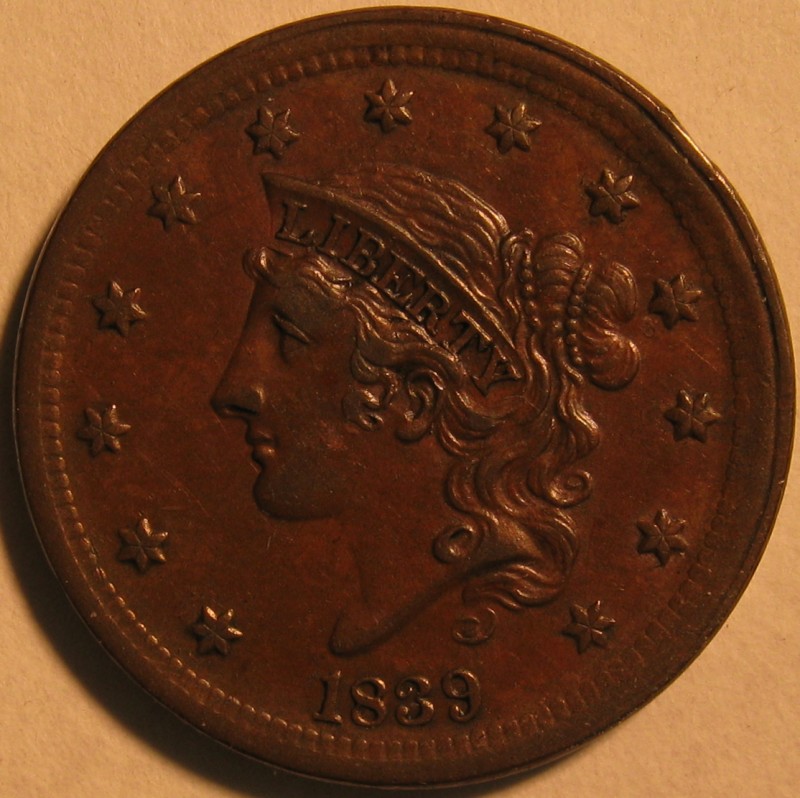 This is with the new custom setting applied: 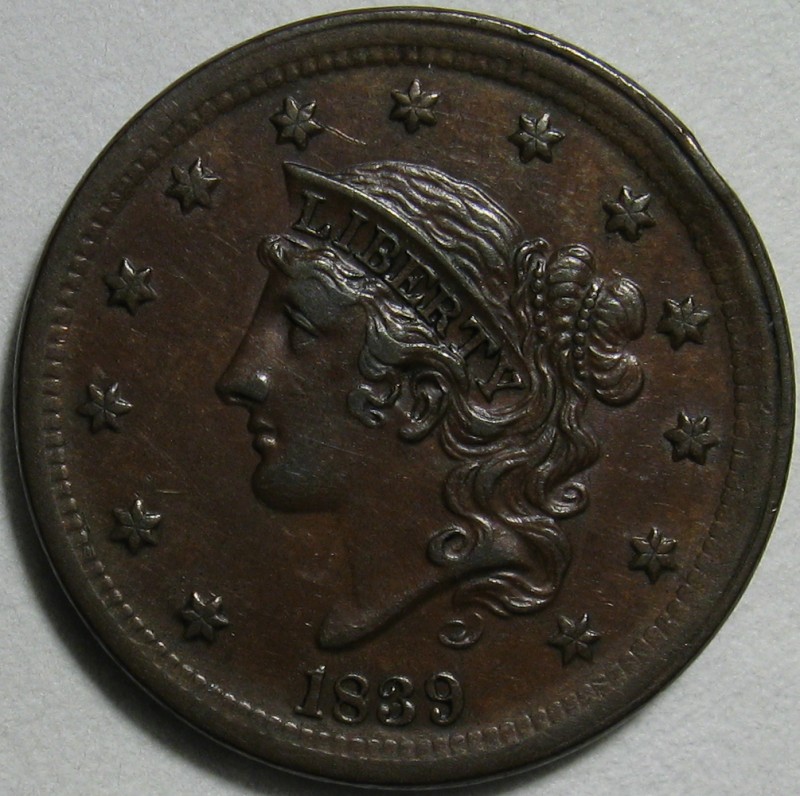 Remember, I'm still letting the camera decide on exposure settings. We haven't even gotten into manual settings yet, and I've already come up with results I'd be willing to grade from. The conclusion? Obviously, having a stable camera, using a delayed shutter, and getting the white balance right is the majority of the battle. I was going to get into the manual settings with this post, but I realized it will involve an explanation of each feature we're setting, and that's going to take a while. So, next will be Step 5: Manual Camera Settings.
|
|
Valued Member
United States
487 Posts |
Dave this is a great topic. It has helped me a lot. Starting with the pictures of your new camera. I noticed my camera had all those same buttons so I got out the manual and it shows the buttons but had no description at all for what they did. I went on line and looked up the camera Olympus C 5500 and they offer to sell you the advanced manual for $10 but they did have a place that you could down load the manual ( 199 pages) to print. I printed off about 70 pages that had info that I thought I might need. This last post about the white balance seems to be just what I need. Thanks, keep up the good work.
|
|
Valued Member
United States
245 Posts |
SuperDave, one question for now, before the manual settings. Why the coffee filter for setting the white balance? Do you encompass the lens so as to block out extraneous light? Why not just use a couple sheets of white paper on your shooting surface?   |
|
Moderator
United States
23522 Posts |
Quote:
Why the coffee filter for setting the white balance? I've read in many places that a bleached coffee filter is as close to "pure" white as you're likely to get. It's just my own habit. A couple sheets of nice, quality white paper will likely get you the exact same results. When you're already set up for macro shooting, even something as small as a coffee filter will more than fill the field of view, and the idea is that you want all the ambient light noted in the white balance setting. So, you don't encompass the lens unless that's exactly how you're going to do it to take the actual pictures. |
|
Valued Member
United States
377 Posts |
|
|
New Member
Canada
36 Posts |
Looking forward to hearing more! In particular how do you cut down on GLARE from the lighting reflecting too harshly off certain parts of the coin?
|
|
Valued Member
United States
61 Posts |
Telfer........ Metalman told me to place a plain white sheet of copy paper between the light sourse and coin. It helps to difuse the light and takes away some of the glare. I was having problems on slabs with the camera itself reflecting in the picture. The white paper cured that. Can't hurt to try and experiment with it.  |
|
Pillar of the Community
United States
1571 Posts |
Another questiopn: you set the camera at 8" from the coin to the camera. Then you say you will set the distance from the coin to the lens to 4". Where did I drop off the cart? thanks,
Dick
Edited by livingdinasaur
12/17/2008 03:37 am
|
|
Moderator
United States
23522 Posts |
OK. The next installment will be published tonight. During the process, I'm going to be splitting off all the extraneous comments into a new thread, to reduce the size of this one and make it more readable. That's a delicate operation, and I'll probably screw it up, but we'll see. |
|
Moderator
United States
23522 Posts |
Quote:
Another questiopn: you set the camera at 8" from the coin to the camera. Then you say you will set the distance from the coin to the lens to 4". Where did I drop off the cart? thanks,
Dick Check my Step 3 post above; it was in that one where I went from 8" to 4". |
|
Moderator
United States
23522 Posts |
Manual SettingsThe 3 major settings we tweak to improve (or worsen ) our macro shots are Aperture, Shutter Speed (maybe "Exposure" on your camera) and ISO. I'll explain each below. It must be noted that these overlap, in terms of the effect on the final photograph, while at the same time each setting has its' own tradeoffs when you tweak it past the "sweet spot." I'll discuss each only in the context of digital coin photography; in the course of "normal" and/or film photography your experience with each setting will differ. Cameras have a mechnical doohickey, called a shutter which opens when you click the button. It opens for a predetermined time ( Shutter Speed), to a predetermined size ( Aperture), and allows light to hit a sensor of predetermined sensitivity ( ISO). 1) Aperture: The shutter of a camera (most popularly) is a set of overlapping leaves which form a rough circle. The "Aperture" setting describes the size to which these leaves open when you click the shutter button. Aperture sizes are expressed in units called stops, using "F-numbers." This number is the ratio between the focal length of the lens and the size of the aperture. The lower the "f-number," the wider the opening and therefore the more light admitted when you click. A setting difference of one full stop means twice (or half) as much light as the next setting. A "faster" lens is one which can achieve a wider (numerically lower) aperture setting, for instance at or below 2.0. A "slower" lens can only achieve an aperture of 4.0 or narrower (numerically larger). Although changing the aperture setting will affect the amount of light allowed in, just like the exposure setting, the main effect of a differing aperture is depth of field. This describes how much of the background of a given shot will remain in focus - larger depths of field mean a deeper area in focus. Macro photography, by nature, involves a very narrow depth of field (I'm not going to get into the technical reasons why), and with most manual-setting cameras you're going to be able to select an aperture which won't allow the entire face of the coin to be in focus. Conversely, it's always nice to blur out the background on which you're setting the coin, so you're going to want an aperture setting which will keep the coin in focus while making the background fade away. The size of the camera's sensor has an effect on depth of field. Smaller point-and-shoot cameras like my A720 achieve the same depth of field as a dSLR at a much wider (numerically lower) aperture - in rough numbers a setting of f/5 on the A720 gives about the same result as a setting of f/16 on my dSLR rig. Therefore, there's a lower limit to the depth of field available with a point-and-shoot; you'll note that in my best pic above, the white background remains in focus. It was shot at f/5; my dSLR at f/5 probably wouldn't have allowed the whole coin itself to be in focus, much less include the background. Different cameras have different sensor sizes. The numbers mentioned here might not work for you. Especially when using a point-and-shoot, I recommend finding the single aperture which works best for you, and then use the other settings (exposure and ISO) to get the light and color right. 2) ISO: This is more of a "virtual" setting with digital cameras than it was with film cameras. ISO describes the sensitivity of the film to light - a "faster" (higher ISO number) film absorbs more light for a given exposure than a "slower" film. This setting is tweakable on modern digital cameras; using a "faster" ISO allows a shorter exposure for the same shot, allowing you to freeze movement more easily. Why not just use the fastest ISO setting, then? In a word, noise. Higher (faster) ISO settings have the tradeoff of more "noise" in the shot, more graininess. Point-and-shoots, especially, suffer from this problem due to their small sensors. Its less of a problem in macro photography, since you're applying lots of light, but the advice here is still to shoot with a lower ISO number (80 or 100) and eliminate the possibility of noise altogether. 3) Shutter Speed: Here's where we're going to do most of our tweaking to get the shot right, since the other two settings are most likely to have a true "sweet spot" for your given camera. The Shutter Speed setting controls the amount of time the shutter remains open, therefore allowing more or less light to hit the sensor. Under "normal" photography conditions, it's more important in that a slower shutter is more likely to show the effects of shake, and a faster setting more likely to capture action; for our purposes, since the camera is securely mounted and using a delayed shutter (right? ), the only reason we're varying shutter speed is to get the brightness of the subject correct. We should be able to play with shutter settings slower than 1/13 second and still get a nice focus as a result. Having said that, some cameras have inherent shake from the shutter mechanism; you may have kids thumping around the house; you could be subject to all kinds of unavoidable outside influences which affect how slow you can go. It pays, then, to be able to vary the amount of light on the coin to compensate for camera limitations. Under a given light condition, with a given coin, only one shutter speed will be right for you. However, what works for a copper coin under two bright lights won't work for a lustrous silver coin under the same lighting. Chances are you're going to shoot a much faster exposure for silver than for copper, because the silver will reflect a lot more light into the sensor. I'm being deliberately vague about what specific settings will work for you, because I don't know what works for you. The type of camera and how you're lighting the subject are the important determining factors. I will say this much, though - if you've got the Aperture and ISO and lighting set up so that you can get nice pics of an RB or Brown copper coin with an exposure around 1/100, you're probably going to have a lot of fun shooting the more difficult subjects. Under the same conditions, a lustrous Morgan will want an exposure around 1/160-1/250, and you'll still be able to do down to less than 1/50 for duller coins.
|
| |
Replies: 76 / Views: 25,919 |
To participate in the forum you must log in or register.
Disclaimer: While a tremendous amount of effort goes into ensuring the accuracy of the information contained in this site, Coin Community assumes no liability for errors. Copyright 2005 - 2026 Coin Community Family- all rights reserved worldwide. Use of any images or content on this website without prior written permission of Coin Community or the original lender is strictly prohibited.
Contact Us | Advertise Here | Privacy Policy / Terms of Use
|
| Coin Community Forum |
© 2005 - 2026 Coin Community Forums |
| It took 0.41 seconds to rattle this change. |
 |
|
| |
| |


