| Author |
 Replies: 10 / Views: 2,373 Replies: 10 / Views: 2,373 |
|
|
Pillar of the Community
United States
751 Posts |
I have had a terrible time trying to get decent photos. I've tried every light combination I can think of. One evening I turned off all the lights in the room and tried different lights. What I found out was, the ambient light in the room was causing my problem. So I made the following shield for my scope. PROBLEM solved I can leave the lights on and still get good photos. Dan 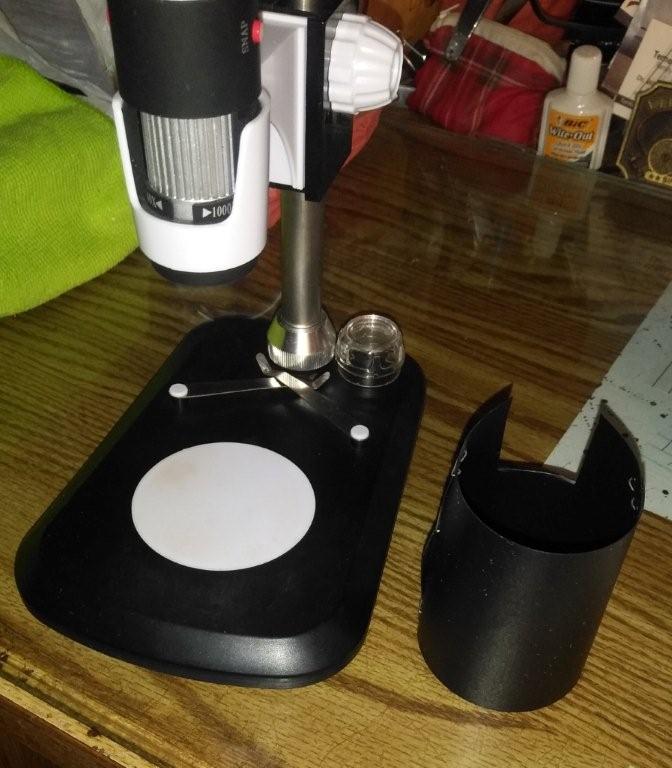 |
|
|
|
Bedrock of the Community
United States
10284 Posts |
Is the shade off and sitting to the right there?
I just yanked my clear plastic end off as soon as I saw yours laying there. I use a translucent third of a Sunny D orange juice bottle on mine with lights and ignore the built in LED light completely.
My images still come out very orang-ish. That seems to be my problem.
Edited by TNG
01/01/2020 5:35 pm
|
|
Valued Member
United States
54 Posts |
I remember reading on here that someone suggested to use a coffee filter over the LED lights to help with the glare. I haven't tried that yet~ I'm having a hard time to find a way to take a pic without a scope. I hope this helps you!
|
|
Bedrock of the Community
United States
10284 Posts |
ah ha! I will try a coffee filter now that I have the clear plastic end off. (Or something similar) Thanks!
Late edit: Naw, the camera needs to look through a hole in the paper too. I'm not giving up tho. LOL
Edited by TNG
01/01/2020 9:50 pm
|
|
Pillar of the Community
United States
7053 Posts |
@ TNG...so what's the brand/model of this scope I should stay away from?
|
|
Bedrock of the Community
United States
10284 Posts |
OK so I got a cap off a plastic dime tube and drilled a hole in the center. I think this might work better if I turn it around inside the glass end. Things got a lot darker. My images were a little better and it did diffuse the LED light ring that showed up before on the surface of the coins. But to tell you the truth, I think a better microscope will be the answer if I were to get serious here. This idea might work for somebody with a better model than my basic Celestron. Watch yourself with that drill and use several smaller bits to get up to final size. 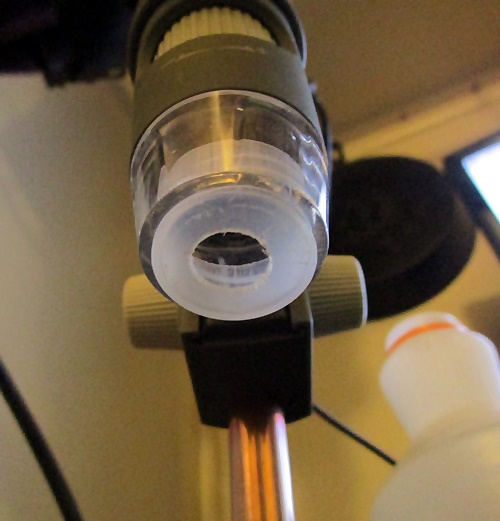 |
|
Bedrock of the Community
United States
10284 Posts |
Greasy, The cheap Celestron is probably OK to take images of overdates, mint marks and doubled dies.
Further out images seem to blur near the rims and are more clear in the center when taking images of a whole coin.
I didn't pay much for mine, some people have had better success than me for sure with this model.
If you're semi serious, you probably get what you pay for. I would rely on somebody else for a better suggestion.
I would not recommend the one I have. You'll only be sorry you didn't get a better one later.
|
|
Pillar of the Community
 United States
751 Posts |
TNG, the cap[ is basically a dust cap fore the scope. It should be removed each time you use the scope.
Yes the shadow tube I made is sitting next to the scope. I place the coin on the scope and then put the shield in place.
I then shine the external light down the top of the shield I made. I do not use the scopes light.
Dan
|
|
Moderator
 United States
189142 Posts |
SilverLee33:  to the Community!
|
|
Bedrock of the Community
United States
10284 Posts |
I turned that coin tube thing around so to move the hole closer to the camera lense and the diffusion ring closer to the ring of LED lights. I took these images and they are the best pictures I think I ever got with this el cheapo microscope. I am going to enlarge the hole a bit and get it more centered. Check out this sellers images I manipulated and then the ones below that I just took. This can mean a whole new appreciation for this gadget. sellers re-worked images 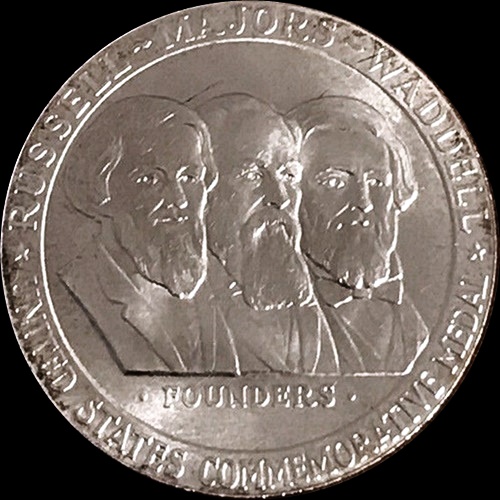 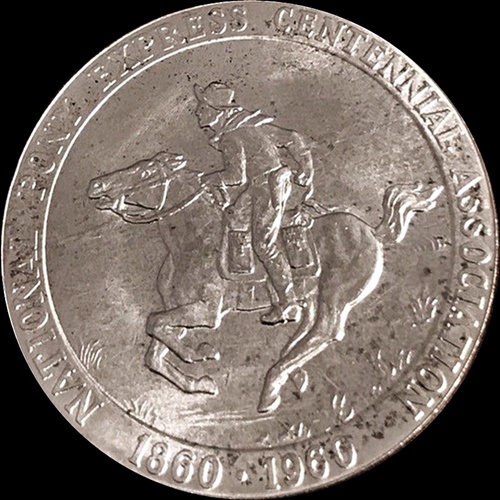 New microscope pictures   |
|
Moderator
United States
189142 Posts |
Looking good!  |
| |
Replies: 10 / Views: 2,373 |
|


