
SolomonValley...I too have tried this method of diffusion as well. For me and what I like, I just didn't like how the coin looks lifeless and flat with no shadows. I like to have a bit of shadowing to hightlight the coin devices/fields. YMMV, depending on what you like to see in your coin pictures.
I've tried alot of other methods as well like milk jugs, tissue paper, cardboard smile directors, styrofoam cups, film canisters, wax paper, pseudo-axial, on-an-on it goes, and have seem to continually come back to the Jansjos, or something similar. Focused light, easily adjustable, cheap. Menards has ssome lights similar to the Jansjo's I'm debating on trying.
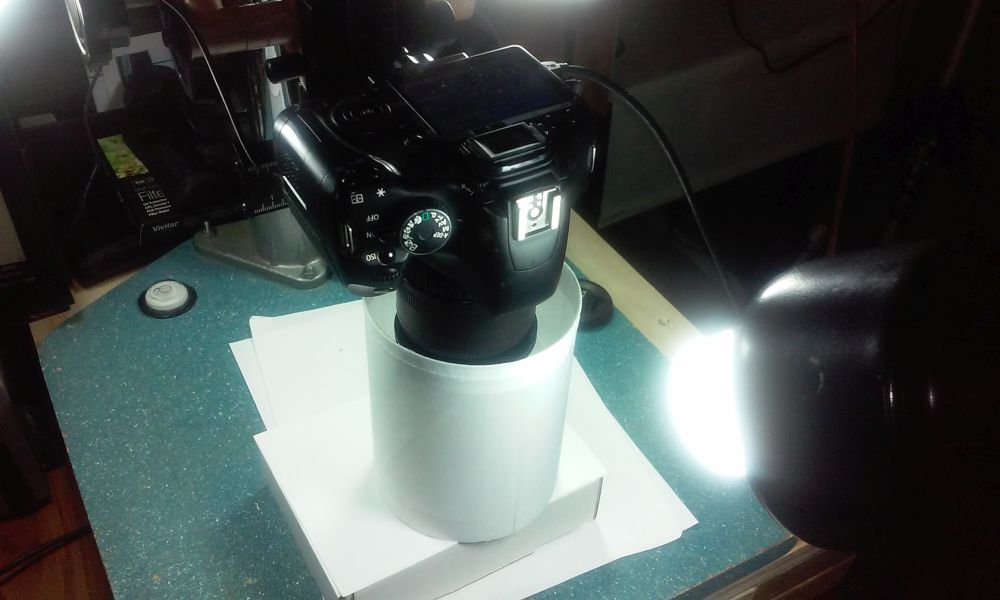
Lights are either diffused at the light itself (cardboard tube pictured or diffuser material taped on light head as pictured below) or having a diffuser attached to the lens body some how with the undiffused lights shining on it at different positions. Light positioning IMHO depends on the topography of the coin and where it's most reflective (or not), while trying to eliminate hot spots if possible. I have my most fights/hair pulling sessions when trying to capture lustrous copper cents.
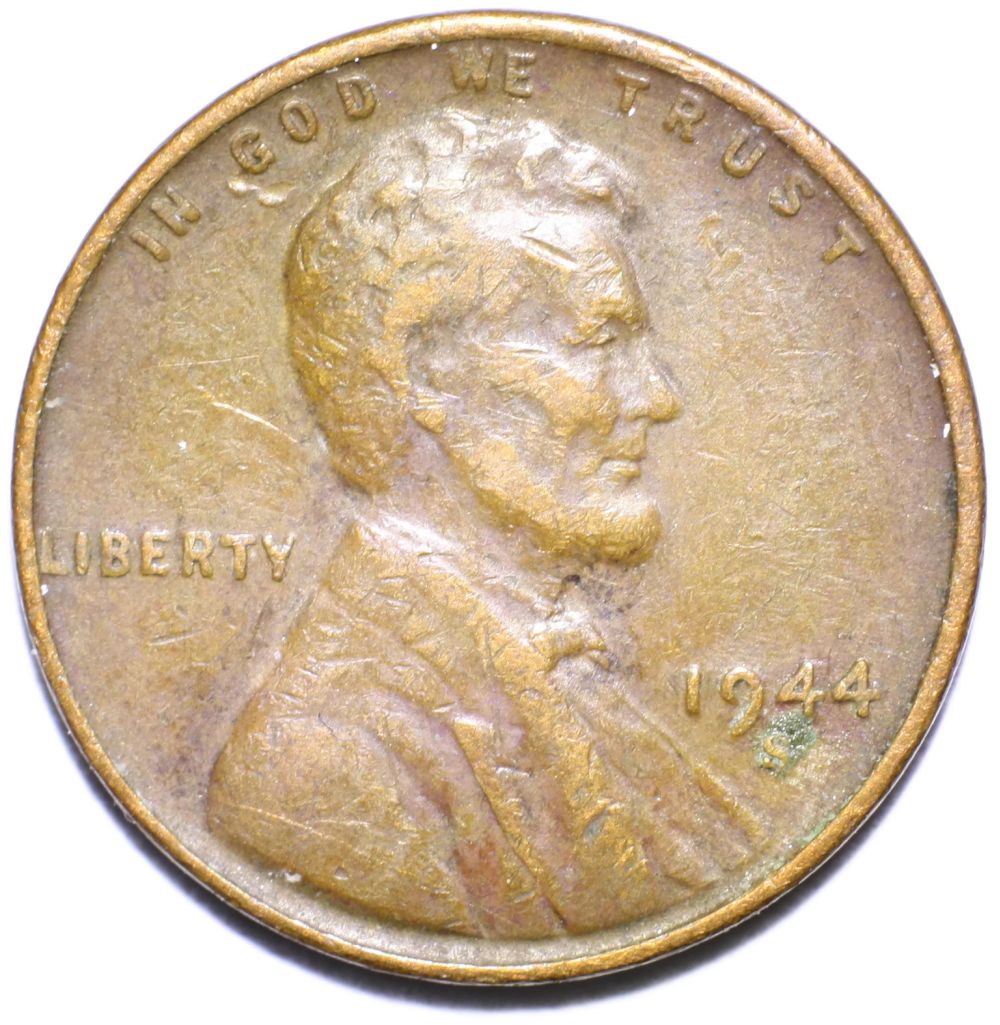
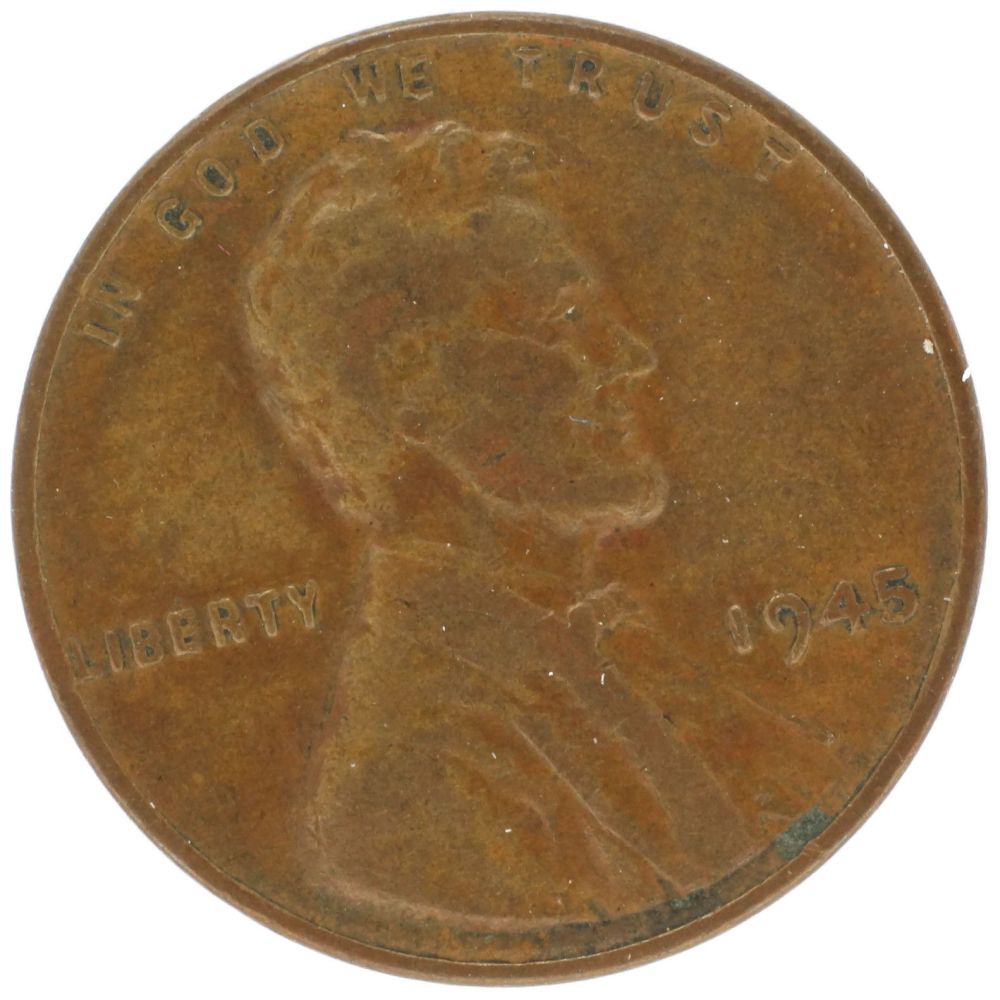
The cent below was a quick shot with (2) Jansjo's diffused directly on the light as shown below; SK Componon-S 4/80mm lens at F8 using Ray's <$400 stand/setup . Some slight hot spots, but in hand, this is what you see; even more so depending on how the light strikes the coin. I could probably add a third light at about 6 or 7 to ward off some of the the bottom shadows. If I want a flatter look, the diffuser that attaches to the lens seems to work best for me. Again, the lights can be set close or far, dependent on your liking and the coin. It really all depends on what you want to see in your pics.

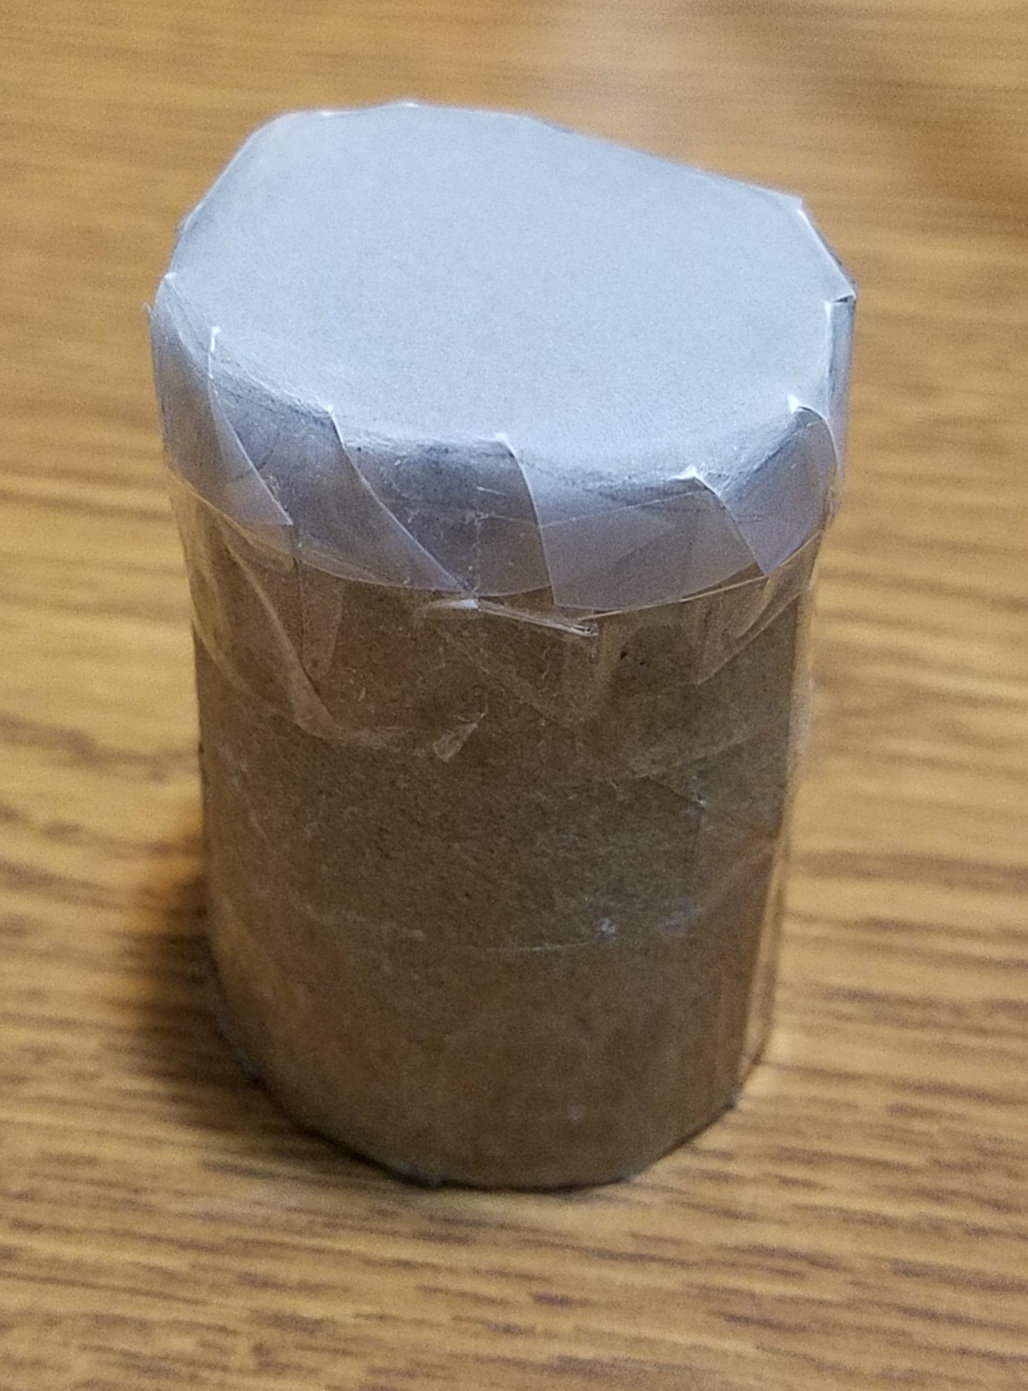
Here's the cardboard tube that will slide over the Jansjo head with a single layer of opalux diffuser on it. Tube can be slid further on/off to dictate how much light is thrown. You can also use as many layers of opalux on this to soften as much as needed. If I could figure out how to build the rectagular diffusers Ray made years back, I'd try those as well. I can't figure out his instructions in the thread on how to assemble them
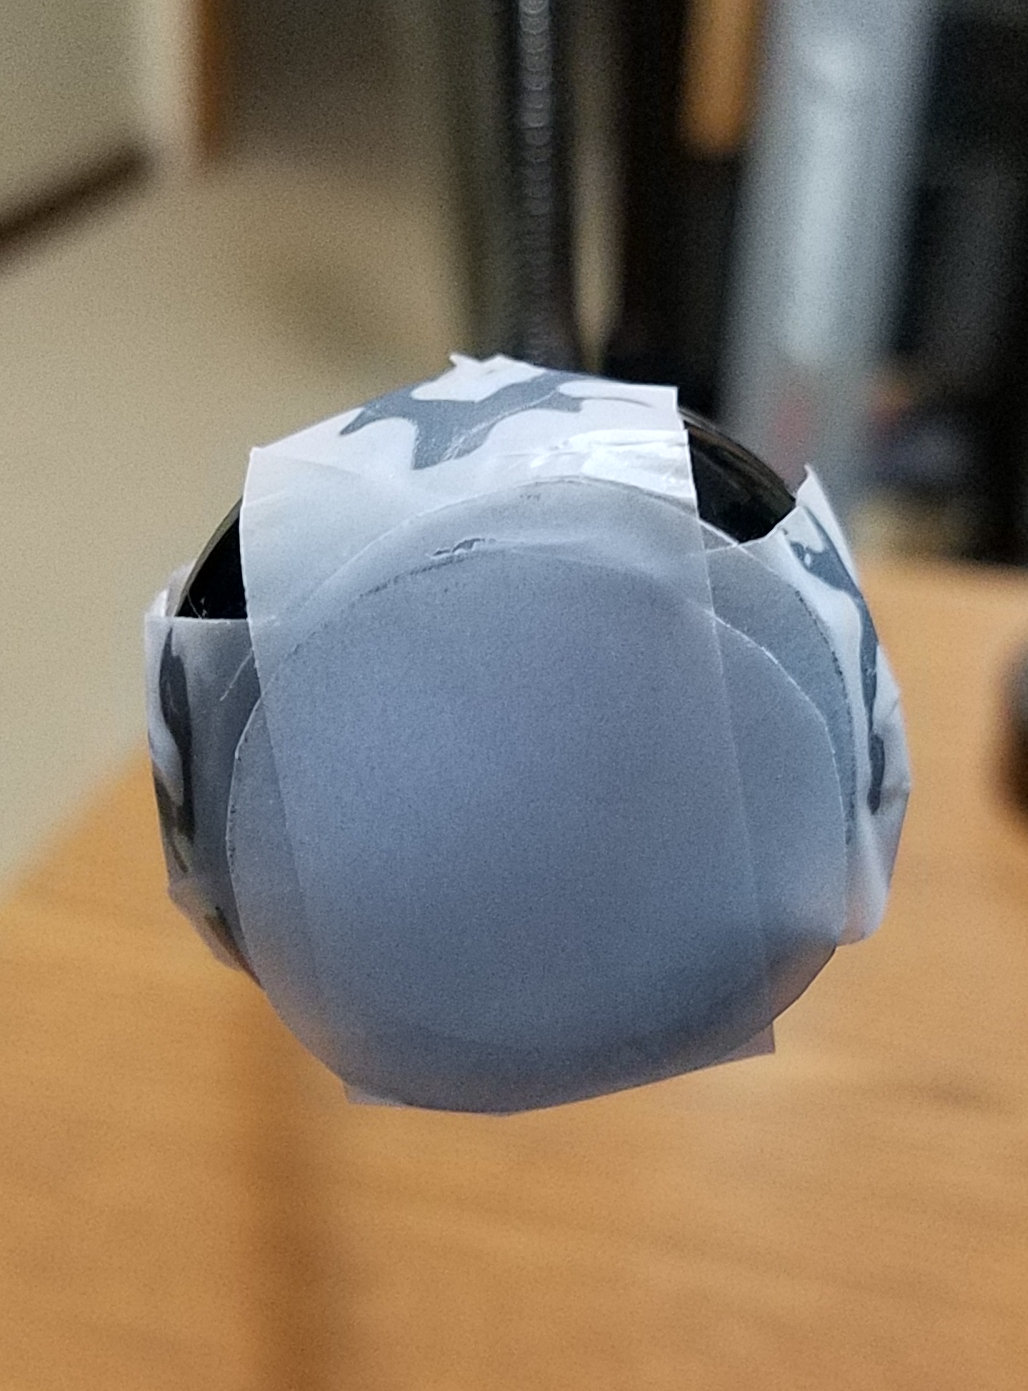
Here's the Jansjo light head with a couple of pieces of opalux taped to the lens. This is the method I mainly use. Tape actually helps to diffuse as well. If the light is bright, I'll just add more layers. I have a bunch of these little circles cut to tape on.
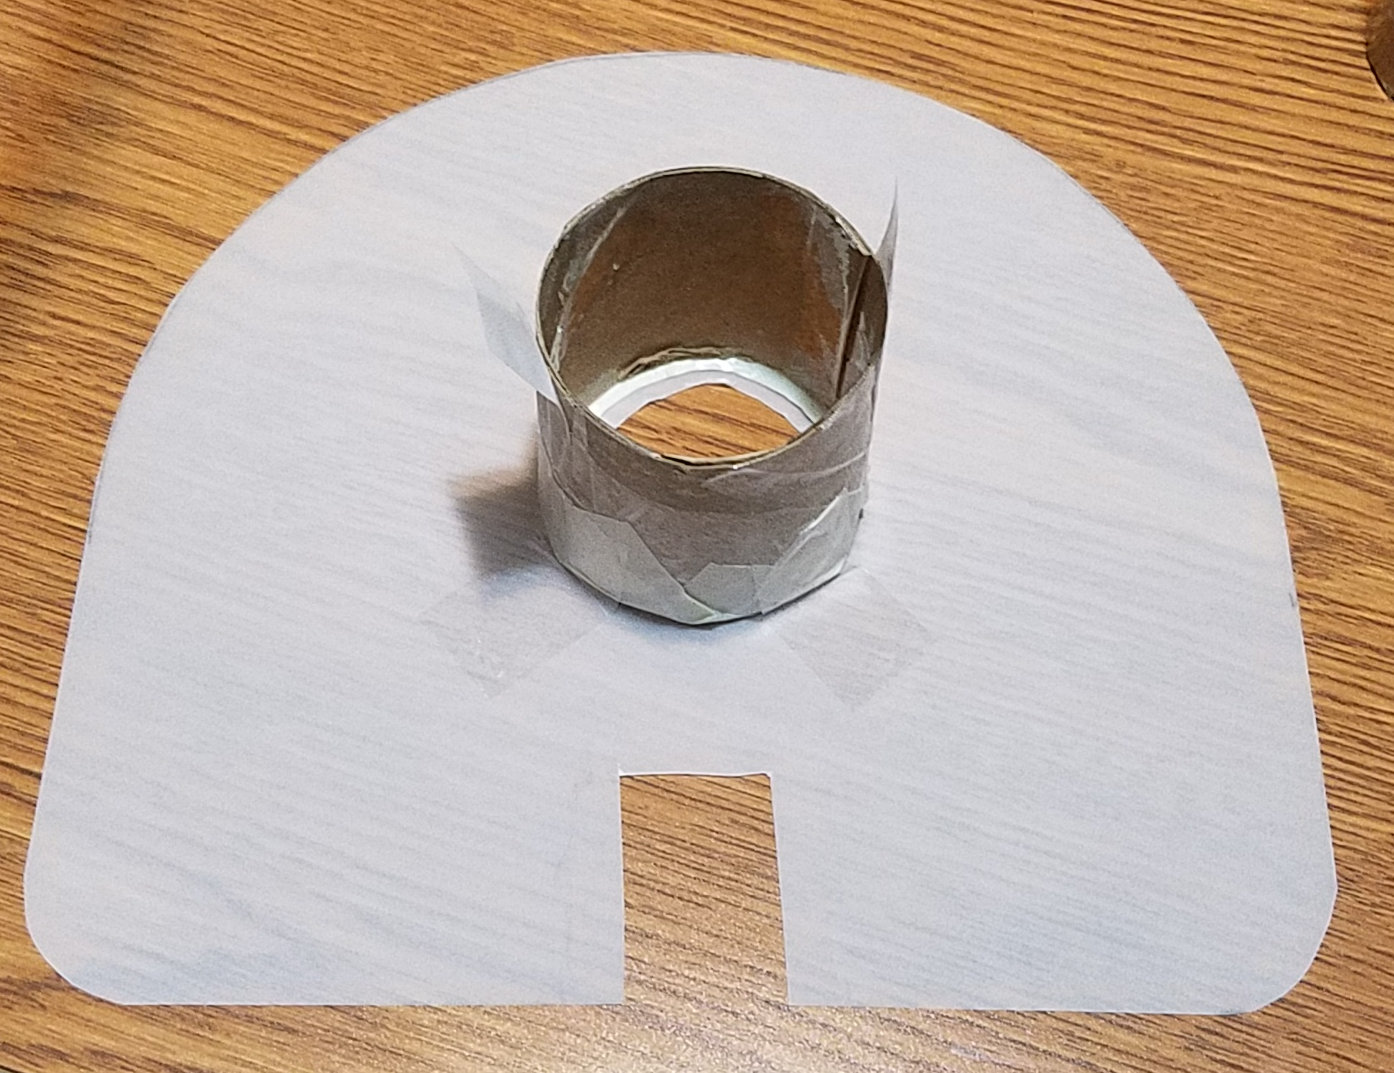
Lastly, this is the diffuser I made that attaches at the lens. The tube will fit up to an 80mm lens. The notch allows it to slide onto the lens and clear the Pentax Autobellows rail. I saw this setup at Ray's site and thought I'd give it a try. Works well depending on what you're trying to convey with the coin....flat, cartwheels luster, etc. Light positioning, number, and intensity will give you alot of different effects.
I've tried alot of other methods as well like milk jugs, tissue paper, cardboard smile directors, styrofoam cups, film canisters, wax paper, pseudo-axial, on-an-on it goes, and have seem to continually come back to the Jansjos, or something similar. Focused light, easily adjustable, cheap. Menards has ssome lights similar to the Jansjo's I'm debating on trying.
Lights are either diffused at the light itself (cardboard tube pictured or diffuser material taped on light head as pictured below) or having a diffuser attached to the lens body some how with the undiffused lights shining on it at different positions. Light positioning IMHO depends on the topography of the coin and where it's most reflective (or not), while trying to eliminate hot spots if possible. I have my most fights/hair pulling sessions when trying to capture lustrous copper cents.
The cent below was a quick shot with (2) Jansjo's diffused directly on the light as shown below; SK Componon-S 4/80mm lens at F8 using Ray's <$400 stand/setup . Some slight hot spots, but in hand, this is what you see; even more so depending on how the light strikes the coin. I could probably add a third light at about 6 or 7 to ward off some of the the bottom shadows. If I want a flatter look, the diffuser that attaches to the lens seems to work best for me. Again, the lights can be set close or far, dependent on your liking and the coin. It really all depends on what you want to see in your pics.
Here's the cardboard tube that will slide over the Jansjo head with a single layer of opalux diffuser on it. Tube can be slid further on/off to dictate how much light is thrown. You can also use as many layers of opalux on this to soften as much as needed. If I could figure out how to build the rectagular diffusers Ray made years back, I'd try those as well. I can't figure out his instructions in the thread on how to assemble them
Here's the Jansjo light head with a couple of pieces of opalux taped to the lens. This is the method I mainly use. Tape actually helps to diffuse as well. If the light is bright, I'll just add more layers. I have a bunch of these little circles cut to tape on.
Lastly, this is the diffuser I made that attaches at the lens. The tube will fit up to an 80mm lens. The notch allows it to slide onto the lens and clear the Pentax Autobellows rail. I saw this setup at Ray's site and thought I'd give it a try. Works well depending on what you're trying to convey with the coin....flat, cartwheels luster, etc. Light positioning, number, and intensity will give you alot of different effects.
Edited by andywoj00
07/20/2016 12:09 am
07/20/2016 12:09 am