| Author |
 Replies: 15 / Views: 2,940 Replies: 15 / Views: 2,940 |
|
|
Pillar of the Community
2087 Posts |
I have been following the following thread with interest: https://goccf.com/t/265373Last weekend I picked up a translucent plastic( or Acrylic) bowl in the supermarket and cut the bottom out of it to make a diffuser. It does the job remarkably well. In another thread discussing 10X magnification work rmpsrmps mentioned masking off parts of a Half ping pong ball. So this afternoon I tried the masking off on the Bowl diffuser....and then I ended up trying rmpsrmps'smile directors. Here is the bowl set up with just the base masked:  Here it is masked off to create smile directors( the smile directors are positioned horizontally): 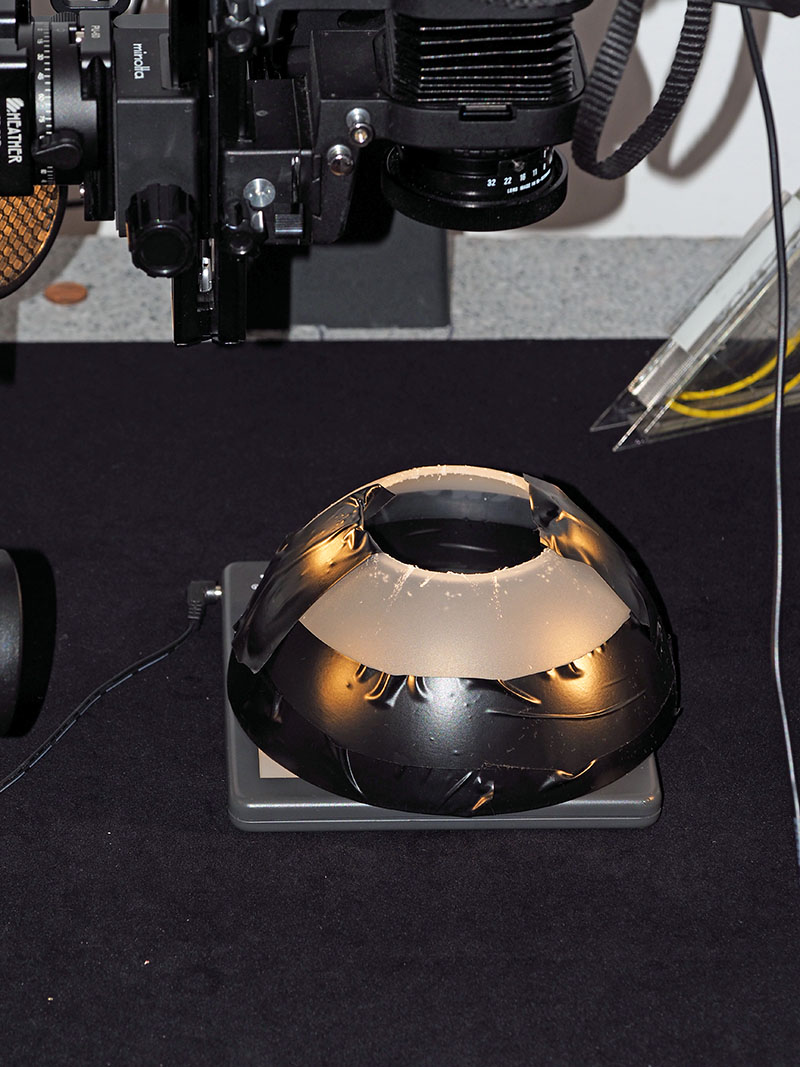 Here is a comparison picture. I am not overly happy with the pictures but I think it demonstrates the smile directors in action. I prefer the shot with the smile directors positioned vertically. For the three shots I switched from the bellows to the Sony FE 90mm F2.8 macro lens set at F6.3. this picture has been substantively reduced for posting.  |
|
|
|
Pillar of the Community
 2087 Posts |
I wasn't fully satisfied with the results I obtained. So I masked off the edge of the hole and created a lip to prevent light leaking through the hole. Seems to have improved the results( smile directors oriented vertically):  |
|
Pillar of the Community
 United States
4038 Posts |
AK, The smile directors should end up looking like sections of small diameter ringlights, with the sections going at most to 3PM and 9PM. My original ones went from approx 9-11 and 1-3, with a very narrow illumination strip. The angle of the strip vs the coin is such that the illumination strip is just outside the radius of the coin. This puts the light as high as possible without allowing direct light from reflecting off the coin, making the technique viable for both raw and slabbed coins. You can make sure the light is hitting the coin according to the above principles by placing a mirror where the coin goes, and adjusting the positions of the light to optimize the angles and placements. I showed how to do this in my original "Final Setup" thread: https://goccf.com/t/108348&SearchTe...onfigurationContact me for photographic equipment or visit my home page at: http://macrocoins.com |
|
Pillar of the Community
2087 Posts |
Like this? Also is the vertical smile orientation the preferred? 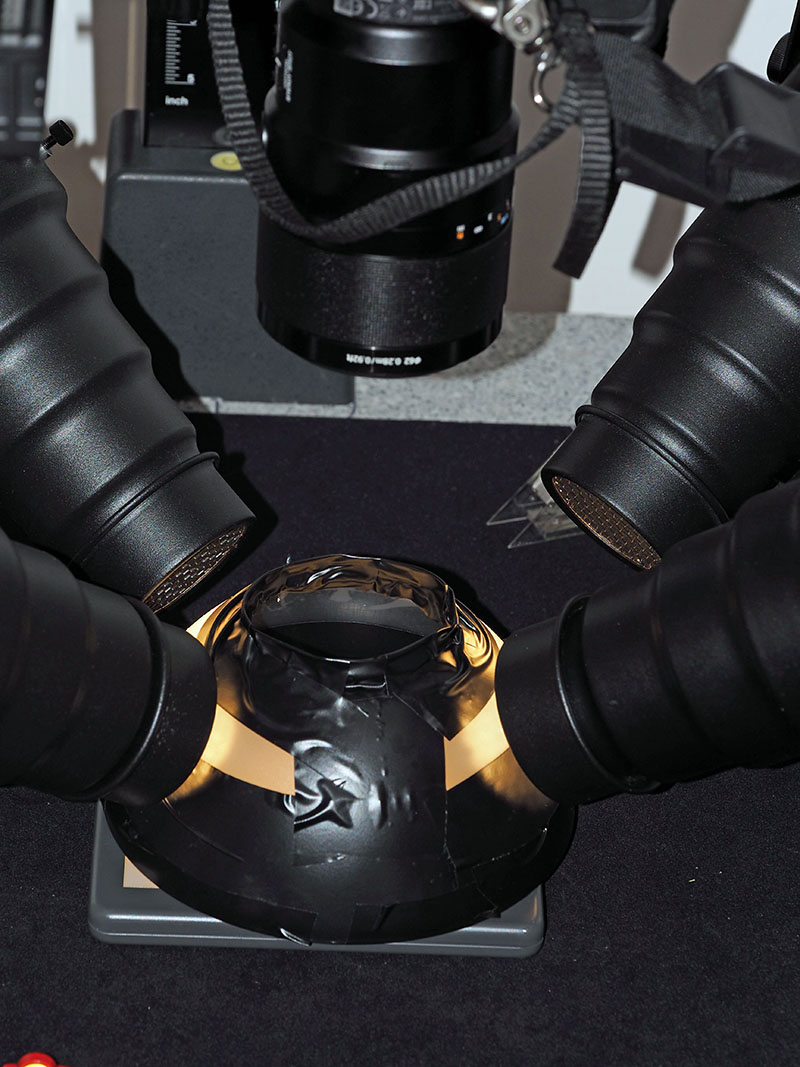 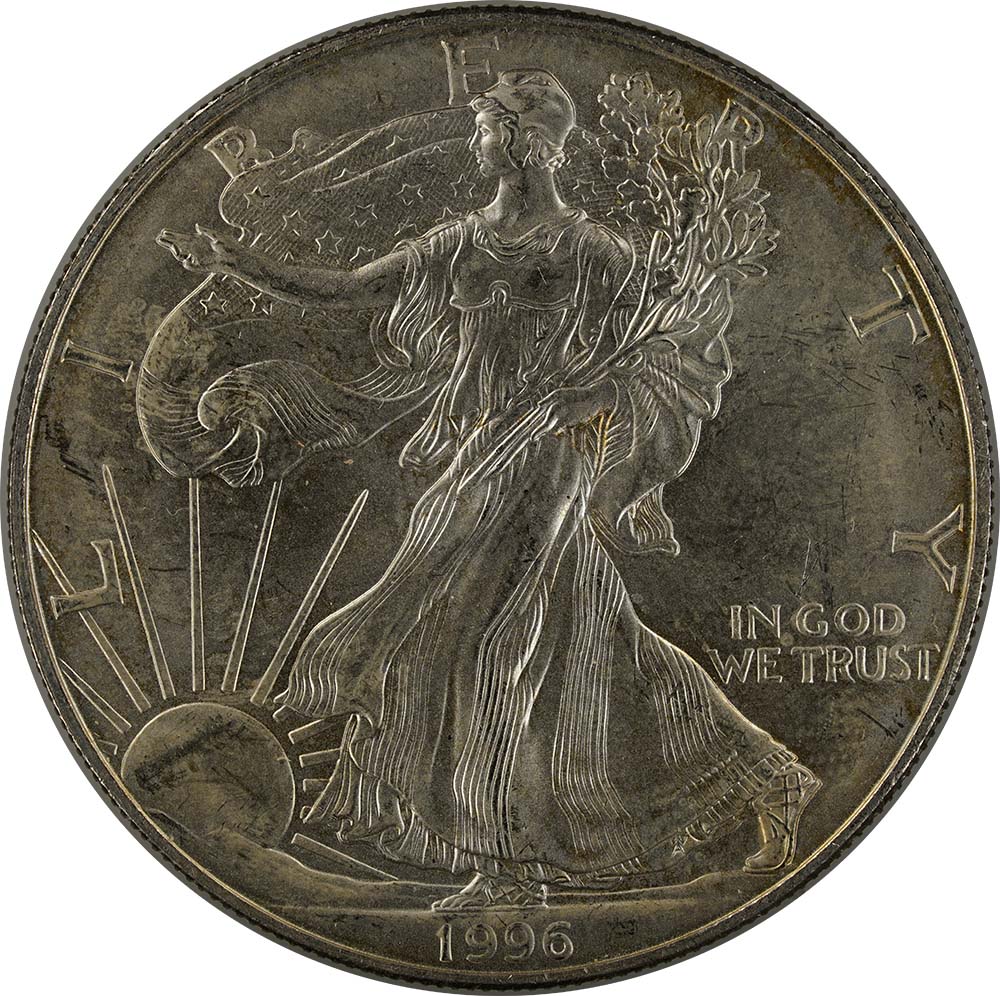 More to of this post to come Edit: I tried to be clever. I turned the normal lights off masked out the center section of the light panel( I had been using it,turned off, as a white background) like this: 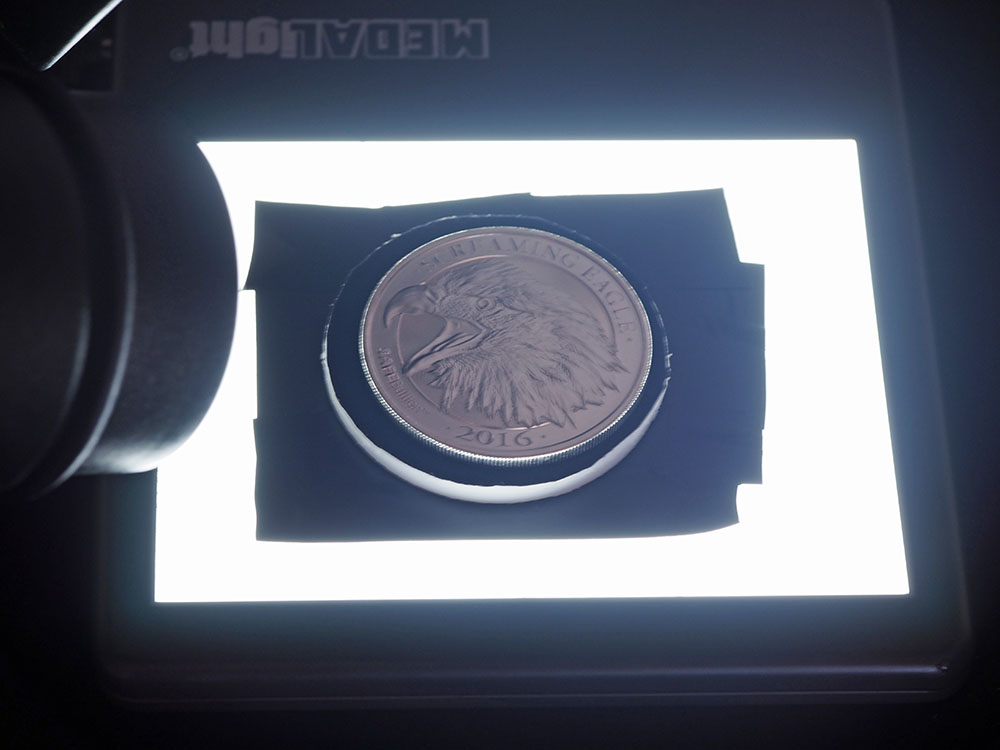 I then photographed an Intaglio mint 2 oz bullion round (in very high grade) with the masked bowl back in place. I am not totally happy with the result...but as work in progress it has potential: 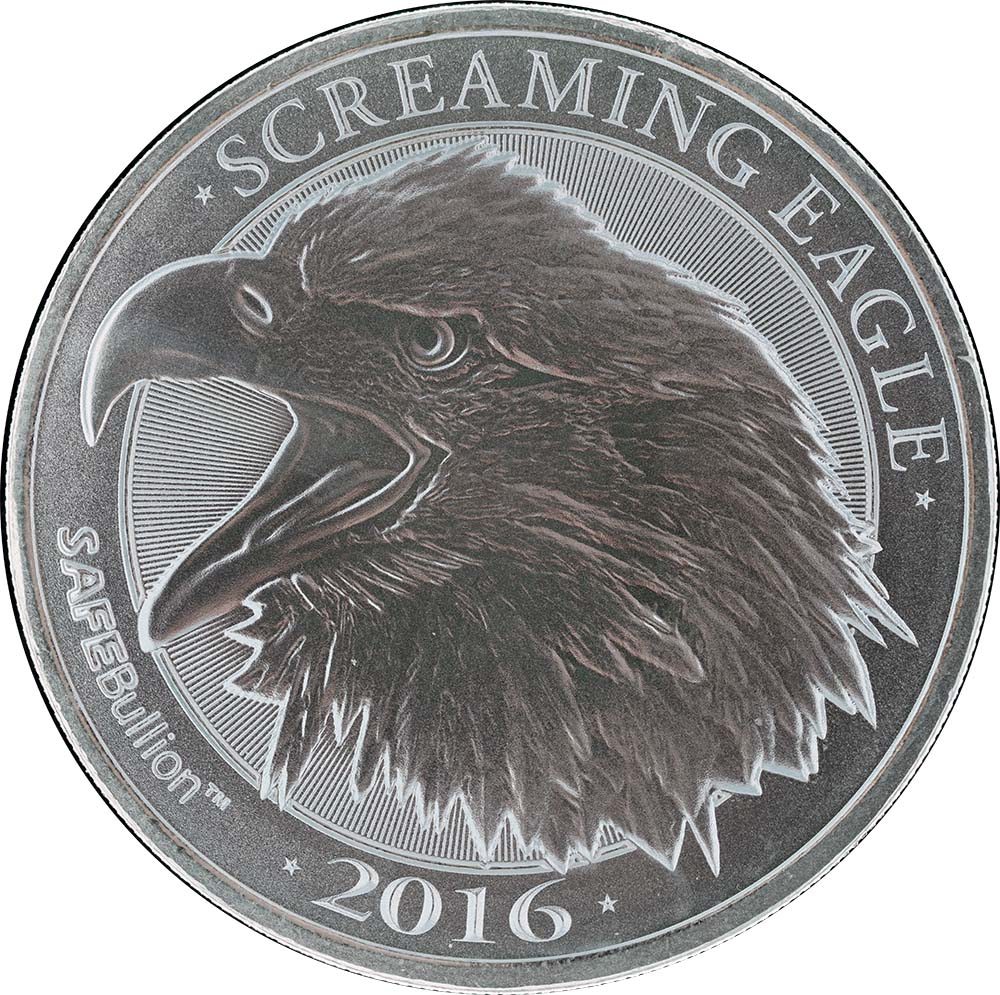 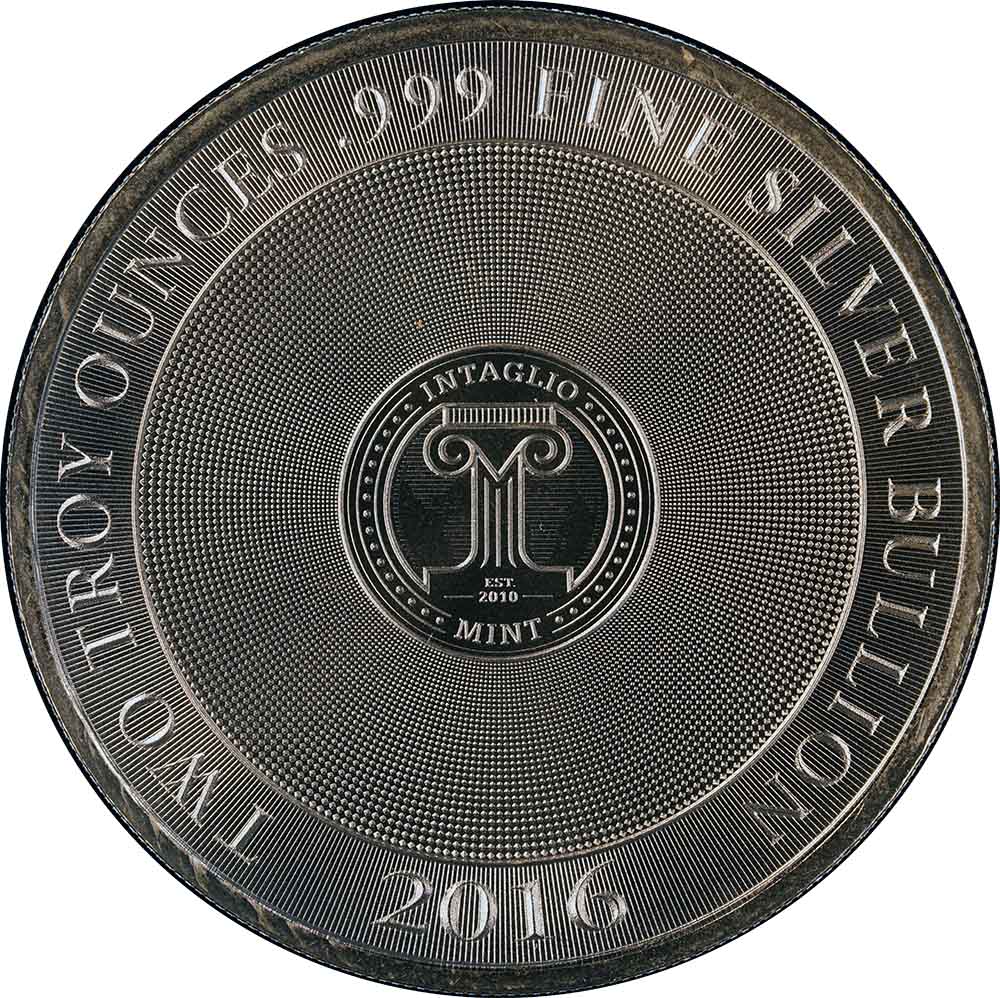 Edited by austrokiwi
07/24/2016 12:26 pm
|
|
Pillar of the Community
Canada
2784 Posts |
austrokiwi wow like that one looks great wow
|
|
Pillar of the Community
United States
4038 Posts |
AK...looks like the light is coming in at too low an angle. Referencing the ASE, the edges of the devices are brighter than the flat surfaces, indicating perhaps a 45 to 60-deg angle. The hole you have in the dome is actually quite large, and the dome seems quite close to the coin, though I realize it is large in diameter. I'd suggest removing the tape from the edges of the hole, and masking all other areas of the dome. Then your challenge will be to shine the lights such that they don't shine into the dome, but only on the top surface. I suspect the hole is too large to get a very high angle, but it's tough to judge from the photos. Only sure way to know what's going on is to put a mirror where the coin goes. This will tell you if your angle is high enough, or too high. edited to add: Here's what the reflection from the mirror should look like at around f22. Note the smiles extend from the perhaps 10-11:30 and 1:30-2. You can extend down to 9 and 3, but I don't recommend having primary lighting between 3:00 and 9:00. If you need some fill lighting in that area, add an extra few layers of diffusion so the light from the lower areas is much less bright than the main lighting. edited yet again to add the picture:  Edited by rmpsrpms
07/25/2016 10:25 am
|
|
Pillar of the Community
2087 Posts |
time to buy another bowl I think ( cost was about 2.00)
|
|
Pillar of the Community
2087 Posts |
OK I will give that ago. Now I see your picture I understand what is required. In the mean time I purchased a smaller sized bowl. I masked off the base and made a rough approximation of a smile director... But I didn't "tune" it as you suggested. I tried a mirror but didn't know what I was looking for. Here is the picture for now( I am not happy with it.) A proof ASE in its capsule 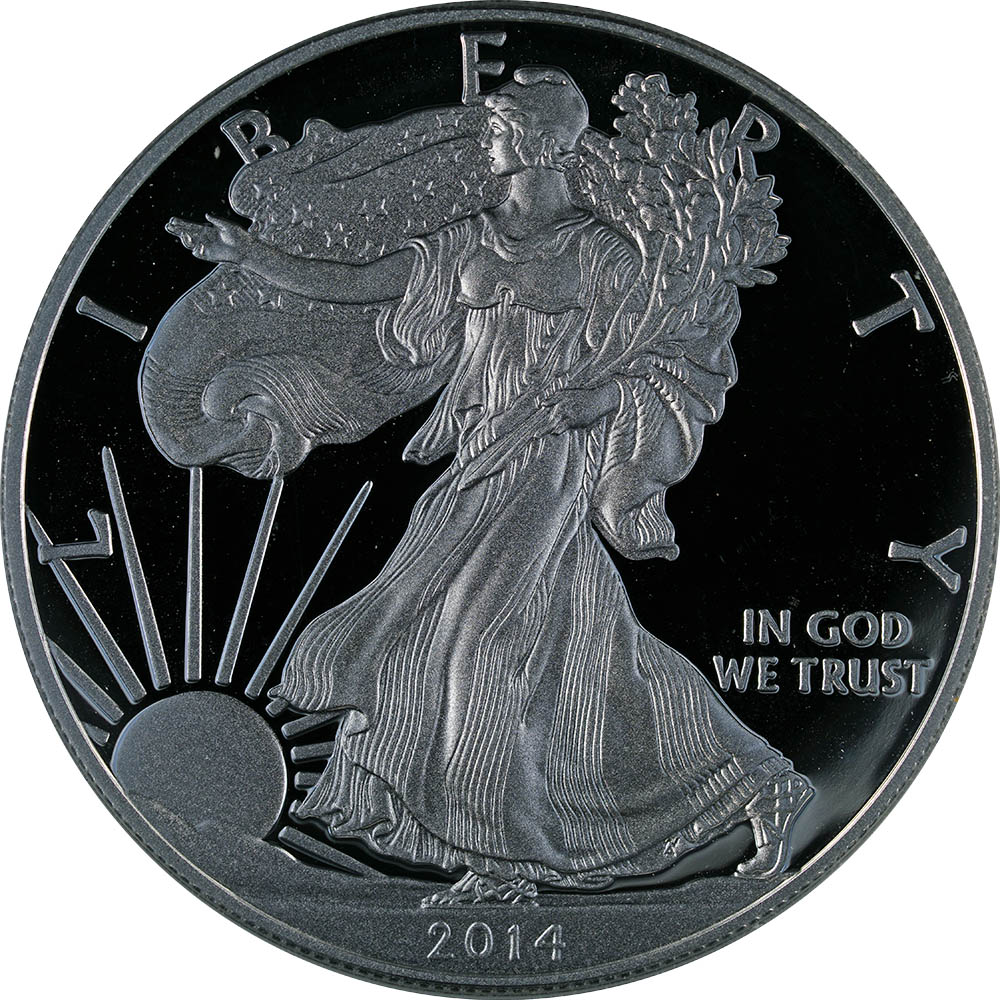 |
|
Pillar of the Community
2087 Posts |
I will try tuning it properly tonight. Here is a cent.... is this anything near the look you prefer? 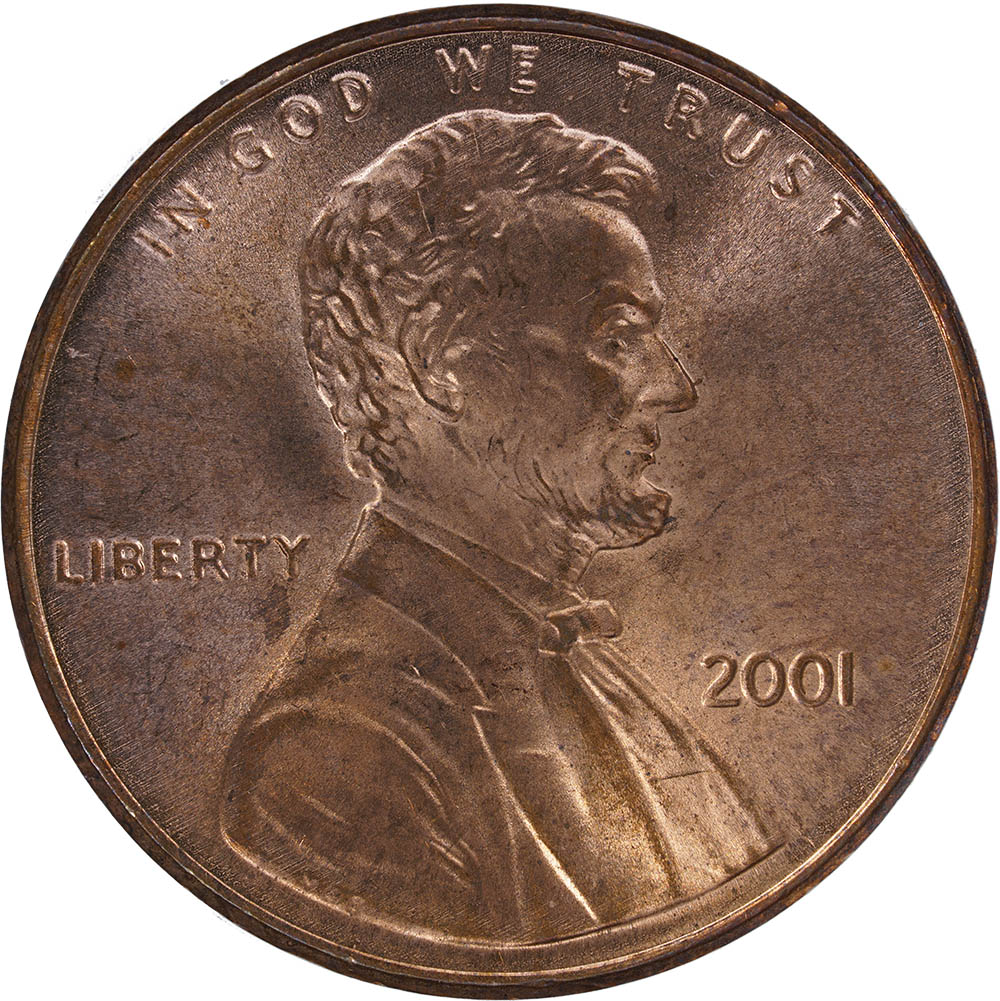 |
|
Pillar of the Community
Canada
2784 Posts |
AK you are getting there. nice photos very well done.
|
|
Pillar of the Community
United States
4038 Posts |
Getting closer but the edges of the devices are still brighter than the surfaces, indicating the light is still at too low an angle. Can you take a pic of the mirror reflection?
Contact me for photographic equipment or visit my home page at: http://macrocoins.com |
|
Pillar of the Community
2087 Posts |
Quote:
Getting closer but the edges of the devices are still brighter than the surfaces, indicating the light is still at too low an angle I assume you are referring to the cent. On both my monitors the edge looks darker than the field. Here is the smaller bowl masked off as used for the 1 cent shot 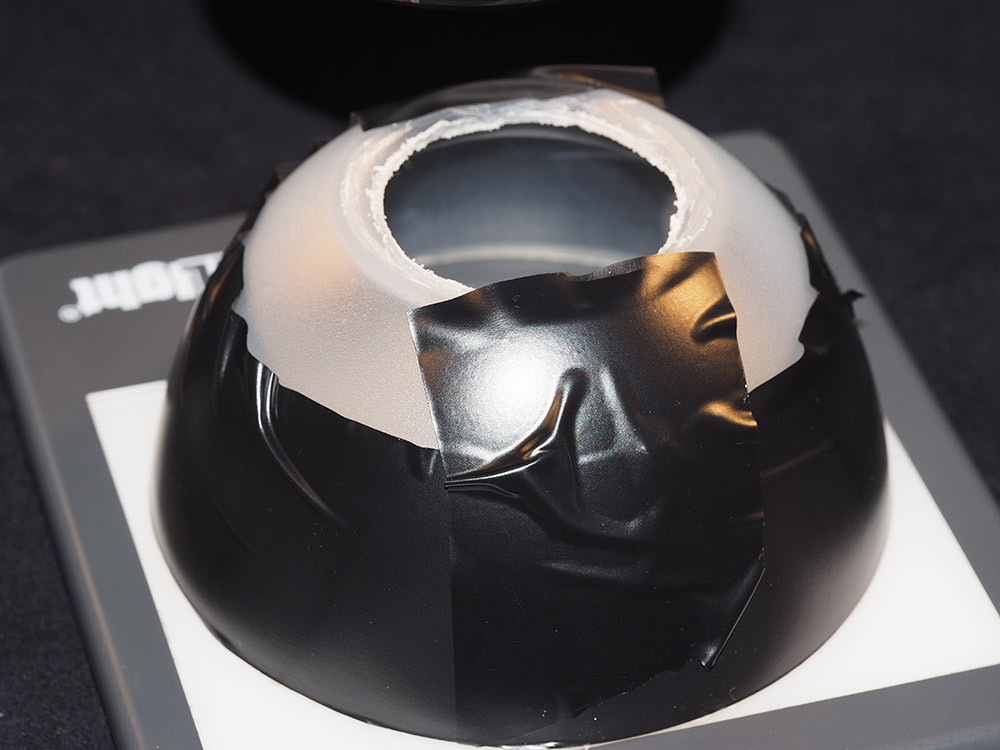 The only bright edge I can see is the inner edge which suggests to me its light coming from the opening at the top of the bowl. Alternately its and artifact of the greater dynamic range of the sensor As for a shot of the mirror I will put one up later today. My first attempt just resulted in a very nice picture of the internal structure of the lens. |
|
Pillar of the Community
2087 Posts |
I had my second morning coffee and then took two more photos. I am convinced the bright edge s due to light coming in from the opposite side through the top. here is the best mirror shot @f22: 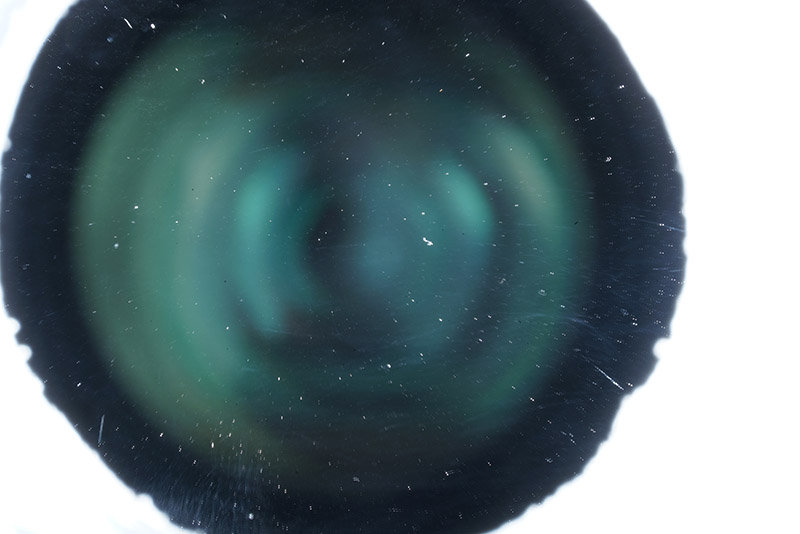 I took another shot of the 1 cent but used some light blockers to limit light coming through the top hole. I still see a bright inner edge. I think the bowls curved surface may be an issue. Combined with the smaller bowl the curved "light source" may just be resulting in lighting equivalent to 2 janscos without smile directors. rmpsrmps... have you found creating smile directors for dollars sized coins more of a challenge? this is the shot with light leaking through the hole moderated. 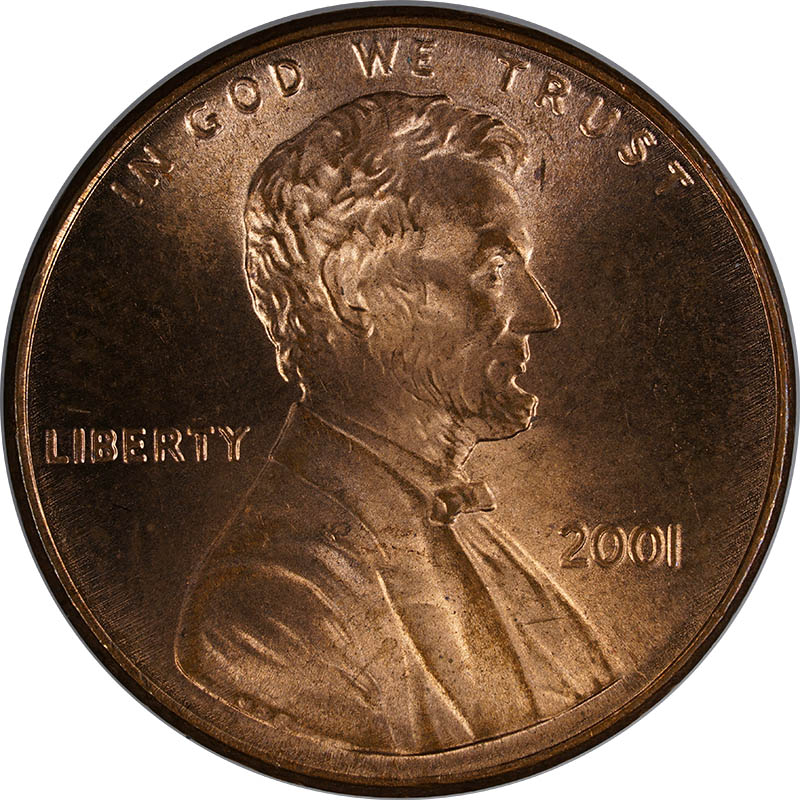 |
|
Pillar of the Community
United States
4038 Posts |
AK...here's what I mean about highlights. Even on the latest shot, the highlights are still most prevalent on the edges of devices:  edited to add: The only issue with larger coins is the radius of the smile director must increase to keep outside the radius of the coin. In you mirror shot, I can't see the reflection from the light. Can you raise the dome up higher, so that the light will be farther from the coin and at a higher angle? Even with the same dome setup, simply raising it higher will improve the situation. I am a little concerned that a lot of light is coming directly off the surface of the dome and hitting the lens. This has potential to reduce contrast due to flare or reflections. It's not necessarily a problem, but could be. Also, because the dome itself is blocking the reflection, it's tough to calibrate the setup. Raising the dome higher will help this as it will move it to a wider angle while reducing the angle of the reflection. What is the diameter of the hole in the dome versus the lens? Ultimately you may end up with something like the configuration I currently use, which is having the director at the same level as the front of the lens. This ensures no direct light hits the lens from the director, and gets the light at a high angle. Note if this angle is still not high enough, you need to resort to making the hole in the dome/director smaller than the lens diameter. In this case, I use a section of a paper cone to mount the director so that there is no direct light hitting the lens. Here is an example of one of the directors I use for Cents, showing the cone concept. This is extreme, and the cone doesn't need to be as long as I have made here. In fact for this director, there is some vignetting due to the small diameter of the aperture, but the vignetting stays outside the diameter of the coin. Added a second picture showing the bottom of the director. Notice I have masked the innermost diameter so that the light is blocked from coming from too high an angle. In reality, the hole in the cone portion can be as large as the masked area, which results in eliminating the vignetting while still maintaining a high lighting angle. Directors such as these must be custom made for every size of coin. If you use my original Smile Directors, attached to the Jansjo light heads directly, you can position the lights at different radii according the specific coin. I mostly shoot Cents, so have optimized my directors for Cent-sized coins. If you mostly shoot Dollars, you can make a custom director for Dollar coins. But if you do all coin sizes, then having flexible diameter (ie separate Smilies) may be more convenient.   Edited by rmpsrpms
07/26/2016 03:29 am
|
|
Pillar of the Community
2087 Posts |
I think the smilie cone is the better way to go for me. I now see the highlights I think that is due to light leaking through the hole which is already smaller than the lens diameter (Filter diameter is 62mm)
|
|
Pillar of the Community
United States
4038 Posts |
One advantage to the Cone Director (or a Flat Director, or Dome Director like the one you built) is that you can control the light intensity, diffusion level, and position of the major light source very easily using the small LED Jansjos. Putting the Jansjos very close to the Director increases local intensity and reduces diffusion, while moving farther away broadens the size of the source and increases diffusion. It is a very flexible system.
|
| |
Replies: 15 / Views: 2,940 |
|


