| Author |
 Replies: 106 / Views: 20,942 Replies: 106 / Views: 20,942 |
|
|
|
Bedrock of the Community
United States
10284 Posts |
Those dogs and that bird look a to be a little lacking in detail!  I was going to mention the pink tint. We'll figure it out. All in all, I am happy with this thing. Now that it isn't balanced on books, I can pretty much find a good fixed height and focus and maybe not mess with it too much. The focus adjustment is not the best to fine tune. I see there are a pair of knobs on the side for raising and lowering too. Might be useful adjusting height of different thickness of coins? |
|
Pillar of the Community
 United States
650 Posts |
Dunno, are those dogs or bears or groundhogs? You think that's a bird? Huh, thought it might be a bat. ;) I have to say, the Effigy Mounds quarter is not the ATB's finest design. Yeah, the focusing wheel is a bit stiff at first and takes some getting used to. I had this model's little brother for a year before I got the "Pro" model, so maybe I got used to the focusing. The limited up and down adjustment is probably for fine tuning the focus, but I found it's easier to just use the wheel. |
|
Valued Member
Russian Federation
172 Posts |
This kind of construction is much better and easy to control. Smooth wheel adjustment and all parts from metal. It cost about $80 with stand, platform and delivery from China and about $50 without stand and platform. I bought one of such microscope holder but with fine focusing wheel also (0,02mm step) There is 25mm hole for stand and 50mm hole for microscope, so I bought 25mm chromium plated tube 3' long for less than $3 in LeroyMerlen store and use old platform photo copy holder with mount on them. I think this mount can be useful for DSLR camera also. 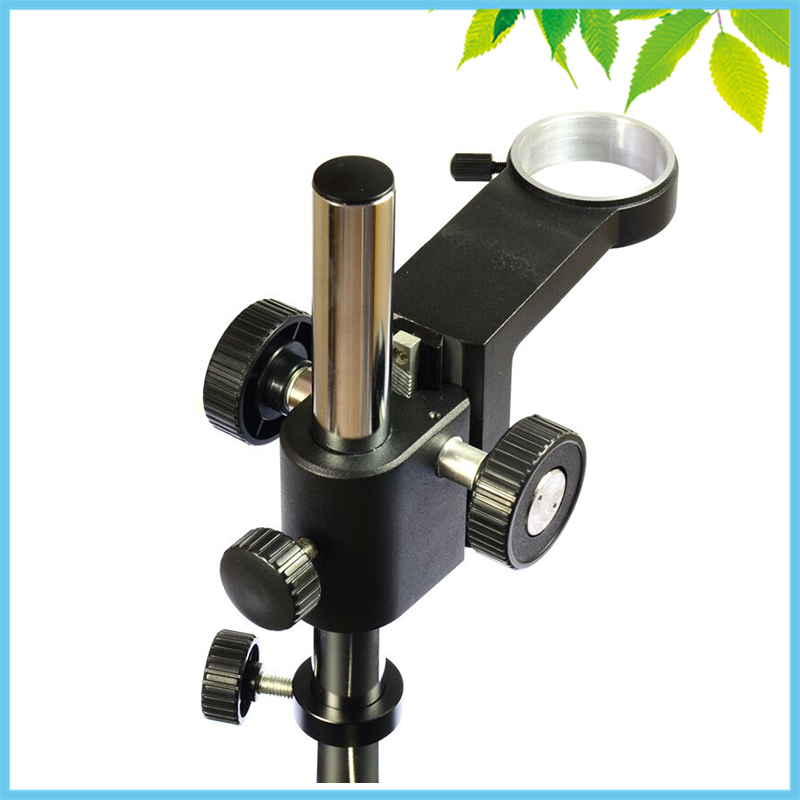 Edited by Justwalking
03/25/2017 4:52 pm
|
|
Pillar of the Community
United States
650 Posts |
Sweet looking device. Bet it does work smooth as silk. The only thing is, it costs about what I paid for my whole setup.
|
|
Valued Member
Russian Federation
172 Posts |
Yep. But if your have huge collection (I'm not) this additional $50 is not much for comfort.
|
|
Pillar of the Community
United States
650 Posts |
Ok, remember back a page I posted my first attempt with a 2017 ATB Quarter? Here is that first pic again so they are all together for comparison purposes. Lighting was overhead room light on and Jansjo lamps providing side fill (Camera light ring off and window drapes closed).  Well, this was what the same coin looked like when I first turned on the scope this morning with just the overhead room light on. I just thought it was a cool looking "artsy" pic.  Daylight fill and camera LED light ring on (overhead room light off and no Jansjo lamps). I thought this shot looked "dramatic" with the dark shadows. 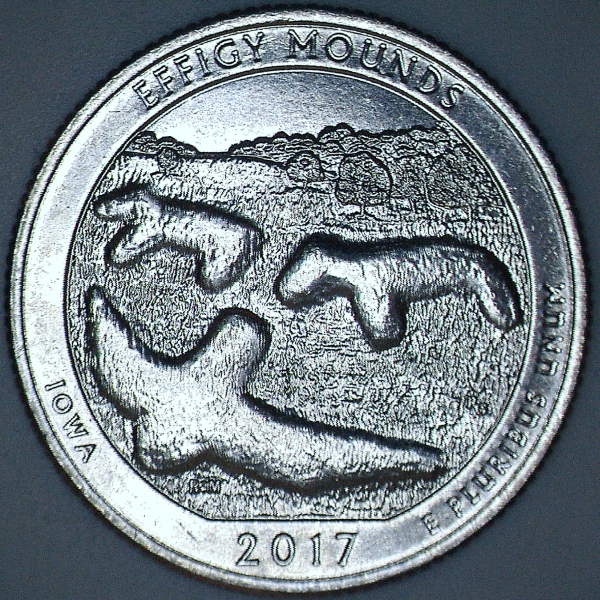 Daylight fill and camera LED light ring on and Jansco lamps provide side fill (overhead room light off). 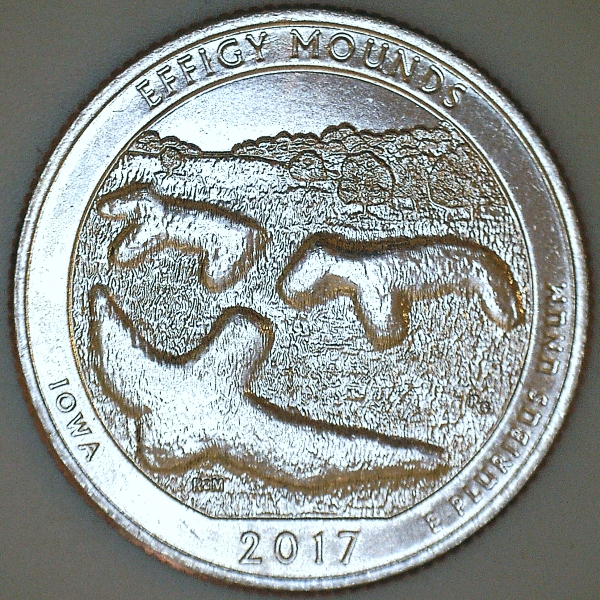 I'm curious to hear what people think of these test shots and welcome any suggestions. Edited by batboy
03/26/2017 10:52 am
|
|
Bedrock of the Community
United States
10284 Posts |
4th one looks best to me. Apparently centering is important too. I am getting good images, but there is a trade off when I move them to one side to avoid glare. The lettering on number 4 on the right is suffering some.
But ... we are taking more macro images now, trying to get whole coins.
For details like rpms and doubled dies, the whole coin isn't necessary.
So ... I would say these images, especially whatever you did with the 4th one is the way to go with unc silver colored coins. It is good enough!
Maybe we should take down some notes on what works best when shooting different size and colored coins.
I am going to use a sharpie on my pvc tube ( pole ) and make a line for micro and macro as to where to stop when taking pics.
|
|
Pillar of the Community
United States
650 Posts |
Nickel, I had not noticed any problems on the fringes of the frame. I do know that different angles of lighting can bring out more details in the lettering. All of the photos except the first one were shot without touching or moving the coin.
I agree that a person probably should take a few notes regarding what lighting works best for various types of coins (i.e. worn copper, shiny copper, silver-colored, proofs, and slabbed coins). As I'm finding out, lighting is a big factor in this game.
|
|
Bedrock of the Community
United States
10284 Posts |
The last two are what my pics used to look like in this album. (That RH token) I started going through my album today. It's gonna take a lot of time, but I started taking better images and uploading these in my Canadian Colonial Tokens Etc. Album here on CCF. http://www.coincommunity.org/galler...p?album=1574 12 down and a ton to go. |
|
Bedrock of the Community
United States
10284 Posts |
 Headed out to the mall today. I bet I come home with some clamp on lights. |
|
Pillar of the Community
United States
650 Posts |
Next up, let's figure out how to shoot a coin while it's in a 2X2. As you can see from my first photo, this ain't gonna be easy. Sure can't use the onboard light ring with all that reflection.  |
|
Valued Member
Russian Federation
172 Posts |
The light ring is very small and close to the optic system that's why reflections from small distance killed the image. The ring idea is good but LED's ring diameter must be triple wider at least. This shot with 144 LED ring also but inner diameter is about 75mm. LEDs are natural wite color compared to popular Jansjo lamp which consist too warm white LED. The yellow color on the pic is the color of paper sheet behind this coin. 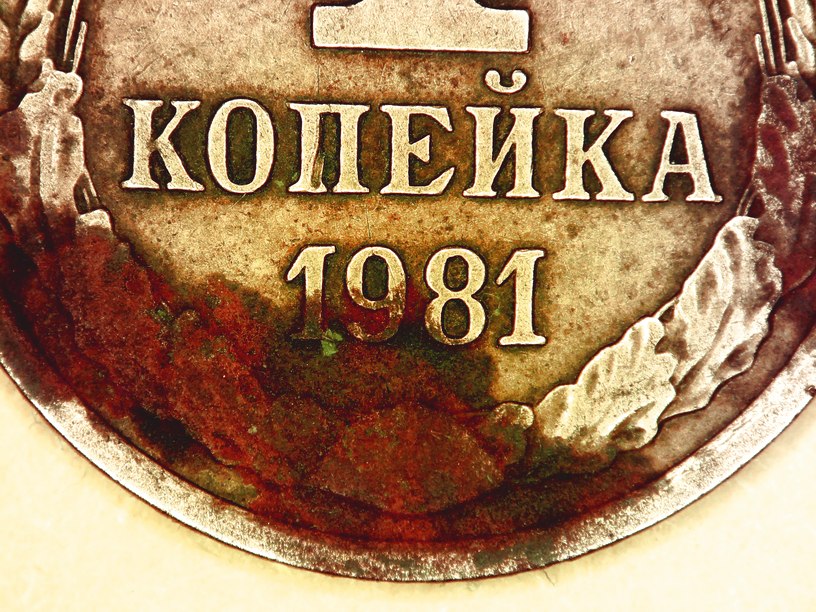 |
|
Valued Member
Russian Federation
172 Posts |
I think such kind of ring would be ideal for coins (my ring is simple with just one whole zone)  Also I saw 8-zones ring but much expensive. Edited by Justwalking
03/26/2017 6:54 pm
|
|
Bedrock of the Community
United States
10284 Posts |
95% of all the pics I took were in the 2x2's so far. The only way it worked for me was with natural daylight. I am just about ready to buy two of these. 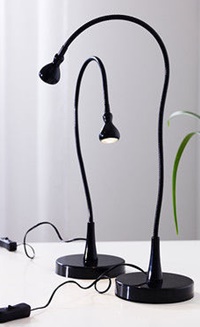 I was day dreaming today and thought about the translucence of a plastic milk jug. I was thinking with an exacto knife it is maybe possible to cut out a round piece from the jug and cut out the center for the lense to see through on the microscope itself. For these Jansjo lamps, I could just cut circular pieces of milk jug plastic and replace the lenses with that? I'm into this thing now, there's no turning back.  |
|
Valued Member
Russian Federation
172 Posts |
Btw for the Cree LEDs one of which is inside Jansjo IT industry was made special lenses with different angel of diffusion and glass clarity. Like this and not expensive 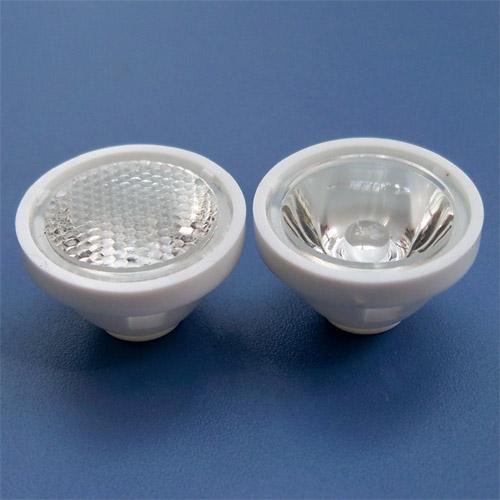 Edited by Justwalking
03/26/2017 7:20 pm
|
| |
Replies: 106 / Views: 20,942 |


