| Author |
 Replies: 106 / Views: 20,934 Replies: 106 / Views: 20,934 |
|
|
|
Bedrock of the Community
United States
10284 Posts |
Funny how the preview before you capture the image doesn't have that grainy appearance that shows in the image you get in the end. It really shows up on your proof dime here.
You know, I could just Print Screen and take it from there if I wanted and work with that if I don't figure out a way around it?
|
|
Bedrock of the Community
United States
10284 Posts |
Naw ... Just tried it and got the crosshairs too.
There's no way around not using additional lighting I'm afraid. I tried the old fashioned incandescent bulb and it just makes the images yellow.
Guess I will have two Jansjo lamps clamped on in the near future.
|
|
Pillar of the Community
 United States
650 Posts |
I got the LED bulbs on the scope camera (light ring around the lens) painted (DecoArt Media translucent white acrylic). Here's a close up of a 1995 DDO Lincoln Cent (doubling in the word LIBERTY is shown). When I tried this last night, I got light reflections on the coin, but it don't look too bad now. Tempted to try another coat and see how that works.  |
|
Bedrock of the Community
United States
10284 Posts |
That's beautiful batboy, what if another coat is just too much? Try that on one of those free Harbor Freight flashlights first maybe.  |
|
Bedrock of the Community
 United States
12477 Posts |
I think that's an excellent image batboy. Try another coat and see if you like it. If you dont, it's easy to remove the acrylic paint with alcohol and reapply a single coat again.
Also, watch out for that split plating left of LIBERTY! (unless it's slabbed)
In Memory of Crazyb0 12-26-1951 to 7-27-2020
In Memory of Tootallious 3-31-1964 to 4-15-2020
In Memory of T-BOP 10-12-1949 to 1-19-2024
|
|
Pillar of the Community
United States
650 Posts |
If alcohol won't remove it, I have some acetone that will... lol. Going to test it some more tomorrow before I do anything else though. What I might do if I decide another coat is needed is paint every other one (8 LED bulbs total). If it shows signs of improvement, then I can paint another coat of the other half. Heck, on my first USB microscope, I put black tape on every other LED (only 6 bulbs total compared to 8 on the new one).
Hey Spruett, I had been trying to figure out what that was to the left of LIBERTY. By the way, it is slabbed and it's graded MS68RD. Had hoped it was something on the plastic, but it really looks like it's on the coin. A split in the plating, huh? Cool, adds character to the coin. I'm surprised it that didn't downgrade the coin. Hmmm, maybe it did? Maybe it could have been a MS69 without the flaw?
Edited by batboy
03/25/2017 12:35 am
|
|
Pillar of the Community
United States
650 Posts |
Ok, I could not wait to play with the scope. I'm convinced the LED bulbs need another coat of paint. I can only turn the dimmer up to about 1/3 of the way before it gets too bright. Before it was basically too bright even at the lowest setting. First photo is with the camera LEDs on, but with no light mods. Second pic is with one coat of translucent white paint on all 8 LED bulbs. You tell me, which is better?   |
|
Bedrock of the Community
United States
12477 Posts |
Quote:
A split in the plating, huh? Cool, adds character to the coin. I'm surprised it that didn't downgrade the coin. Hmmm, maybe it did? Maybe it could have been a MS69 without the flaw? It's not a flaw per se but a common occurence in striking copper-plated zinc cents. I was only concerned because it could end up becoming zinc rot if not sealed and destroy the coin. But, since it's slabbed, I think it will be okay. P.S. I like the second pic better because of the reduced glare from the first. The first doesn't show any details that the second doesn't and the second is more pleasing to the eye. That's my opinion. In Memory of Crazyb0 12-26-1951 to 7-27-2020
In Memory of Tootallious 3-31-1964 to 4-15-2020
In Memory of T-BOP 10-12-1949 to 1-19-2024
Edited by spru
03/25/2017 01:54 am
|
|
Pillar of the Community
United States
650 Posts |
Quote:
Naw ... Just tried it and got the crosshairs too One of the first things I did was turn off the crosshairs. Click on "options" to bring up pull down menu, then click "XY guide". You can turn the crosshairs on or off. Ok, I put a second coat of paint onto the LED bulbs. Here is the results. Lighting appears less harsh now, in my opinion. I'll toss in one more test photo of the off center Zincoln before I move on. EDIT: Actually, the more I look at the one coat of paint photo vs the two coats of paint photo, there is not much difference.  Edited by batboy
03/25/2017 10:23 am
|
|
Pillar of the Community
 United States
4038 Posts |
You have too much light coming from between 3:00 and 9:00. Having the hair, cheek, forehead, and nose dark while the underside of the bottom of the beard is bright looks very unnatural. It's OK to have some "fill" light coming from below, but the main lighting should be from above.
Contact me for photographic equipment or visit my home page at: http://macrocoins.com |
|
Pillar of the Community
United States
650 Posts |
Yeah, the drapes were open on the window and that is the source of the fill coming in at about 7 o'clock. I saw that, but since I had taken all the other photos with the same lighting, I wanted to stay the same for my "scientific" test photos... lol. Once I get the mods done, I'll get serious about figuring out the lighting details. I do know my Dansjo lamps still appear to need another layer of diffuser filter. I don't have the type that you suggested (already ordered this), so I probably got some lame crappy diffuser sheets.
|
|
Bedrock of the Community
United States
10284 Posts |
I just took this image of a 1 cent sized token. I went and found a pc of high temp pvc water line that fits right with the microscope. I am going to cut it down some but leave enough up top for clip on LED lights. I need to make the grove and taper on the end yet. This pic was taken with this cloudy noon daylight about 1 foot from the open window. 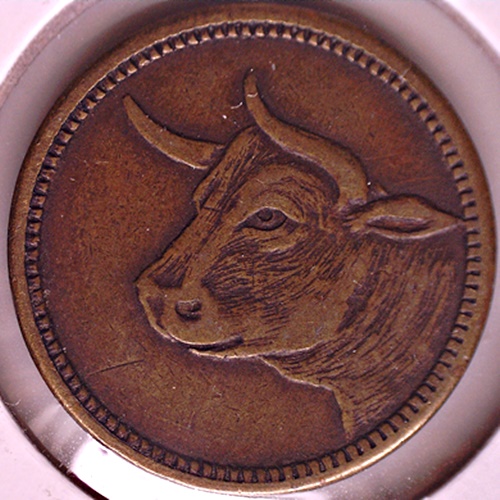 |
|
Bedrock of the Community
United States
10284 Posts |
Here's a 1970 S Lincoln RPM from a mint set. The focus is a bit tricky. Time to tighten things up. Both of these are taken through the window of a 2x2 holder.  Edited by TNG
03/25/2017 12:35 pm
|
|
Bedrock of the Community
United States
10284 Posts |
OK I got mine re-poled. All I need is a steady, easy to get to, place on my desk. 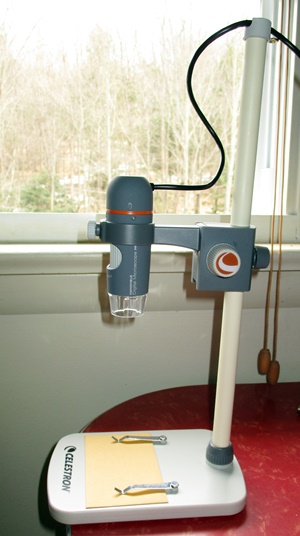 Here's a couple new images that took less effort with the new PVC pole. 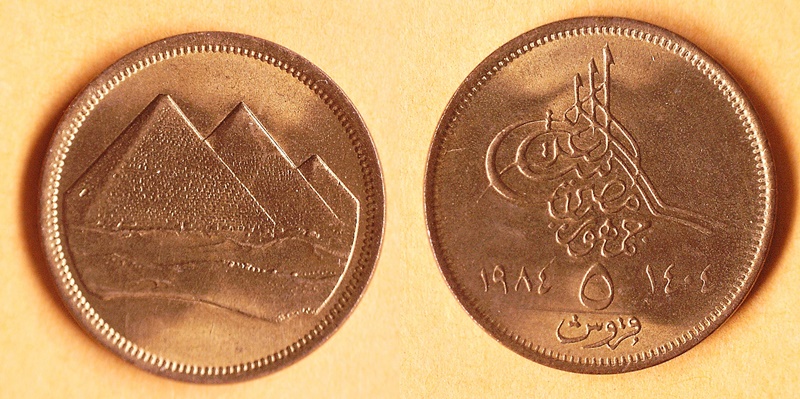 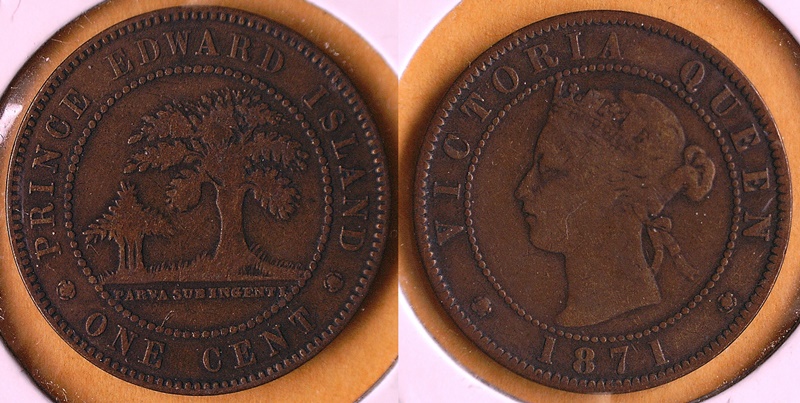 |
|
Pillar of the Community
United States
650 Posts |
Nice close up shot of the date and mint mark. I see you're running into the pinkish to yellow to sometimes tan color too. I have found that dark, worn coins (or tokens) require a bit more light than ones with shiny luster. Sounds like you are putting your own twist on the mods. Very good, this was what I hoped would happen. People throwing out ideas and showing what works (and sometimes what doesn't). CrazyB changed out the rod for brass, I used stainless steel, you're using PVC pipe. Heck, a wooden dowel would probably work ok. Well, just when I thought that I was getting things figured out, I slap a brand new 2017 quarter onto the copy stand. Dang, it's like relearning all over again. I'll post this pic and show y'all how bad the color looks and later I hope to have a better pic.  Edited by batboy
03/25/2017 2:26 pm
|
| |
Replies: 106 / Views: 20,934 |


