| Author |
 Replies: 106 / Views: 20,916 Replies: 106 / Views: 20,916 |
|
|
|
Valued Member
Russian Federation
172 Posts |
From specs of Celestron Handheld Digital Microscope Pro:
Focusing range from 0.4" (10mm) to infinity
Illumination ring consists of 8 LEDs with adjustable brightness
4' long USB 2.0 cable with an integrated shutter trigger and LED brightness wheel
(So probably it is possible set brightness to zero)
|
|
Pillar of the Community
 United States
650 Posts |
Yes, the Celestron 5MP Pro (like shown in the photos) has a dimmer switch for the built in LEDs. You can also turn the lights off. If you look at the first photo in the second post, you can see the dimmer inline switch on the cord, My first Celestron was a 2MP Deluxe and it had no way to adjust the light. I resorted to covering some of the LED bulbs with black tape. The Jansjo lamps are cheap and easy to direct the light anywhere you want because of the flexible neck. However, there are probably many other lighting solutions that are just as good if not better. Just maybe not cheaper. I didn't want to reinvent the wheel or spend a lot, so I went with the Ikea Jansjo lamps. There are two types, clamp on or with a stand. I got the free standing ones (see photo).  Edited by batboy
03/21/2017 7:48 pm
|
|
Rest in Peace
10197 Posts |
Batboy you're right. Once you have the stand issue corrected, then it's just a matter of getting light right. I like that idea for a gooseneck, maybe two at 180 out may do, I have found the adjustment wheel for the 8 LED ring goes from 0-60, isn't true linear adjustment and doesn't work well on super reflective coins when close.. I bought a REAL cheap clipon gooseneck but it has no adjustments, so that idea sounds great
BTW: I did use a file to make the notches, got tired of mentioning it over and over again! And my brass tube came from ACE hardware, just a 5/8" brass stock lamp part.
Edited by Crazyb0
03/21/2017 8:03 pm
|
|
Bedrock of the Community
United States
10284 Posts |
OK I bought one ! Best price I could find on ebay. Finally, I can post decent pictures and I am able to modify it to work just fine. I did stay at a Holiday Inn Express last night.  Edited by TNG
03/21/2017 9:19 pm
|
|
Pillar of the Community
United States
650 Posts |
Ok, got the Ikea Jansjo lamps "hacked". I used the lamp lens to trace a circle out on the diffuser filter sheet. After installing it, I thought the light was still not diffuse enough, so I used two layers of diffuser sheet in each lamp. A plastic ring holds the lens in place. But, I left the lens off and replaced it with the diffuser filters. With it snapped back together, if you didn't know any better, it looks like it was made that way.
The translucent white paint should be delivered tomorrow. I'm going to paint the LED bulbs on the camera. Once that's done, I'll start testing it and hopefully will post a few photos.
|
|
Pillar of the Community
United States
650 Posts |
The color is way off on these Jansjo lamps and I'm not sure what to do. I tried photographing a slabbed coin and was not satisfied with the results. The first pic of the whole coin was shot with the camera LEDs turned off and the Jansjo lamps on. Any suggestions?  I tried a close up with the Camera LEDs on. When I get the bulbs painted, I'll try reshooting the close up and see if there is any difference (this is a MPD Snow-1 variety or commonly called "1 in the neck").  Edited by batboy
03/23/2017 09:43 am
|
|
Bedrock of the Community
United States
10284 Posts |
I was thinking of just using natural sunlight/daylight with the light turned off.
I can shoot near a window when my usb microscope gets here.
Have you tried that?
I also have a good old fashion gooseneck lamps with an incandescent bulb.
LED bulbs make everything look bluish white in my opinion.
I can use a Film Effect program in my photoscape to adjust the images to look more like what it actually looks like in hand.
|
|
Pillar of the Community
United States
650 Posts |
Ok, I got the what I consider very close to the real color using a combination of indirect sunlight (window drapes open) and indirect lighting from the 2 Jansjo lamps.  I'll play around more tonight and try a shiny slabbed silver proof coin. That will be a challenge. Edited by batboy
03/23/2017 3:49 pm
|
|
Pillar of the Community
 United States
4038 Posts |
It's probably better to make minor changes to WB in postprocessing rather than trying to tailor the lighting. The plastic around the coin is very close to gray, and can be used as a gray reference. From there it's easy to tweak for true color.
|
|
Bedrock of the Community
United States
10284 Posts |
Good job! I'd be very happy with that result.
|
|
Pillar of the Community
United States
8517 Posts |
For shooting through plastic that's pretty good.
Oregon coin geek.....*** GO BEAVS ! ! ! ***
|
|
Bedrock of the Community
United States
10284 Posts |
I got my microscope already! Easy set up, but I have to make a proper "stage" Here's what I got so far.  Here's the best I could do with my other camera recently. 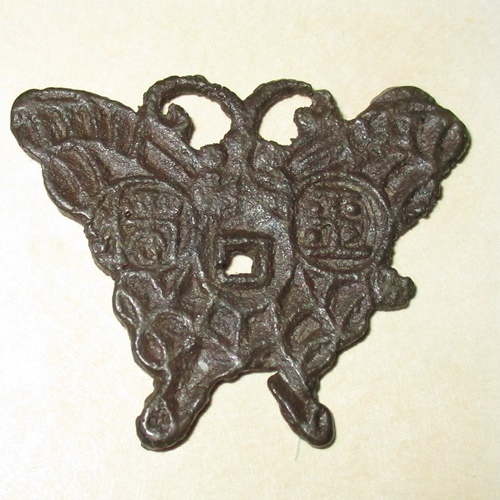 That second picture took a lot of work to finally get a good image. This new microscope gave me a better picture already and it was only a quick set up to try it out. Not bad. |
|
Rest in Peace
10197 Posts |
Hey Nickelguy! Ever figure out what that pattern is?
Yea, nice pix already, only trouble I had was with small shiny silver reflective coina. LEDs would be in pix no matter how low light was set. Works great for darker coins. At the high height with extended tube I find ring LEDs diffuse better, no reflections. Also had problems taking through plastic and flips.
|
|
Bedrock of the Community
United States
10284 Posts |
Yeah I'm on the stacked books mode at the moment. I am going to build a stage of sorts.
I don't even think my base is flat here.
That fella was gonna get back to us with a picture. Rather than hijack this thread, I'll go bump that one.
|
|
Pillar of the Community
United States
650 Posts |
By all means, post here, I don't mind, I was hoping others would tell and show what they did so we'd have a lot of modifications and info in one central thread. NickelGuy, that new photo does show a lot more detail when compared to the other photo, nice. I haven't done much yet, but I did make an attempt to shoot a shiny silver proof dime that's been slabbed. This is about the hardest thing to photograph with a USB microscope. No way can you use the built in camera LEDs, you'll get reflections on the plastic and on the coin. I'll post one photo and hopefully later on figure out how to improve it. Color is off again, think I need more indirect daylight, but today was stormy (heavy dark clouds blocking the sun). I got the white translucent paint, but have not used it yet on the LED bulbs (been working on spring outdoor projects). I'll try to get this done later tonight. 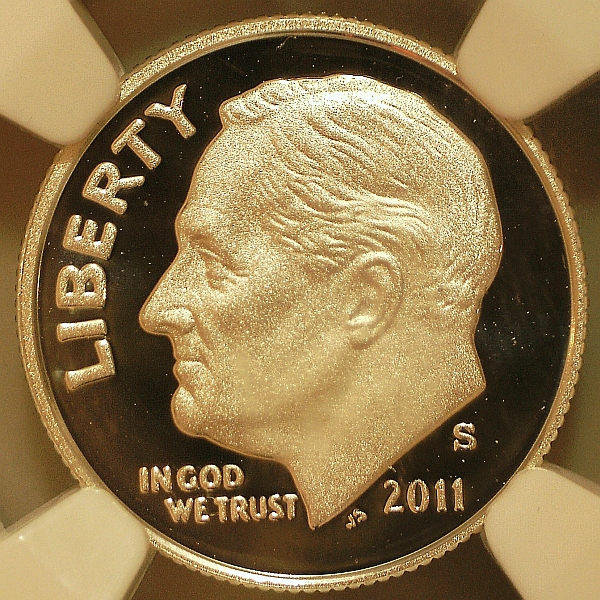 Edited by batboy
03/24/2017 9:17 pm
|
| |
Replies: 106 / Views: 20,916 |


