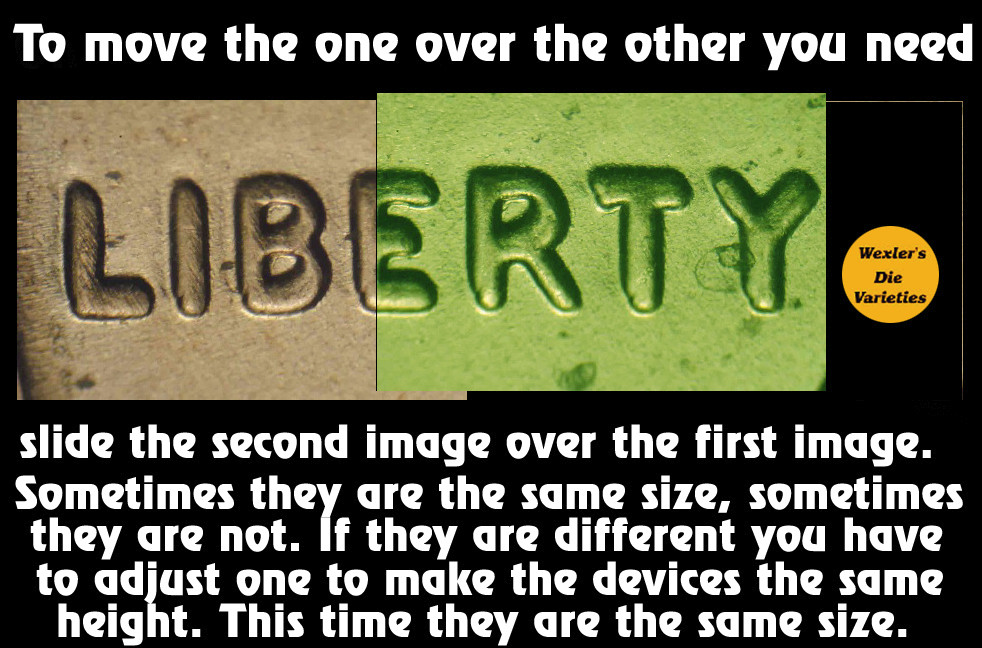
Sides by sides. Why are they important?
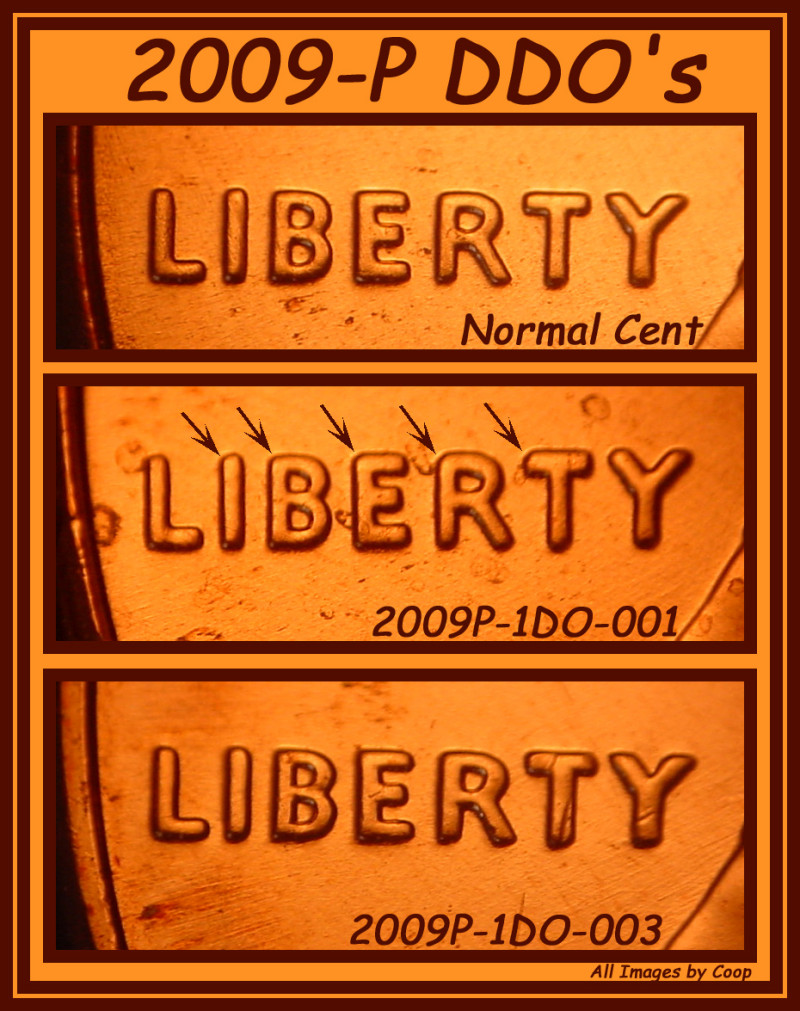
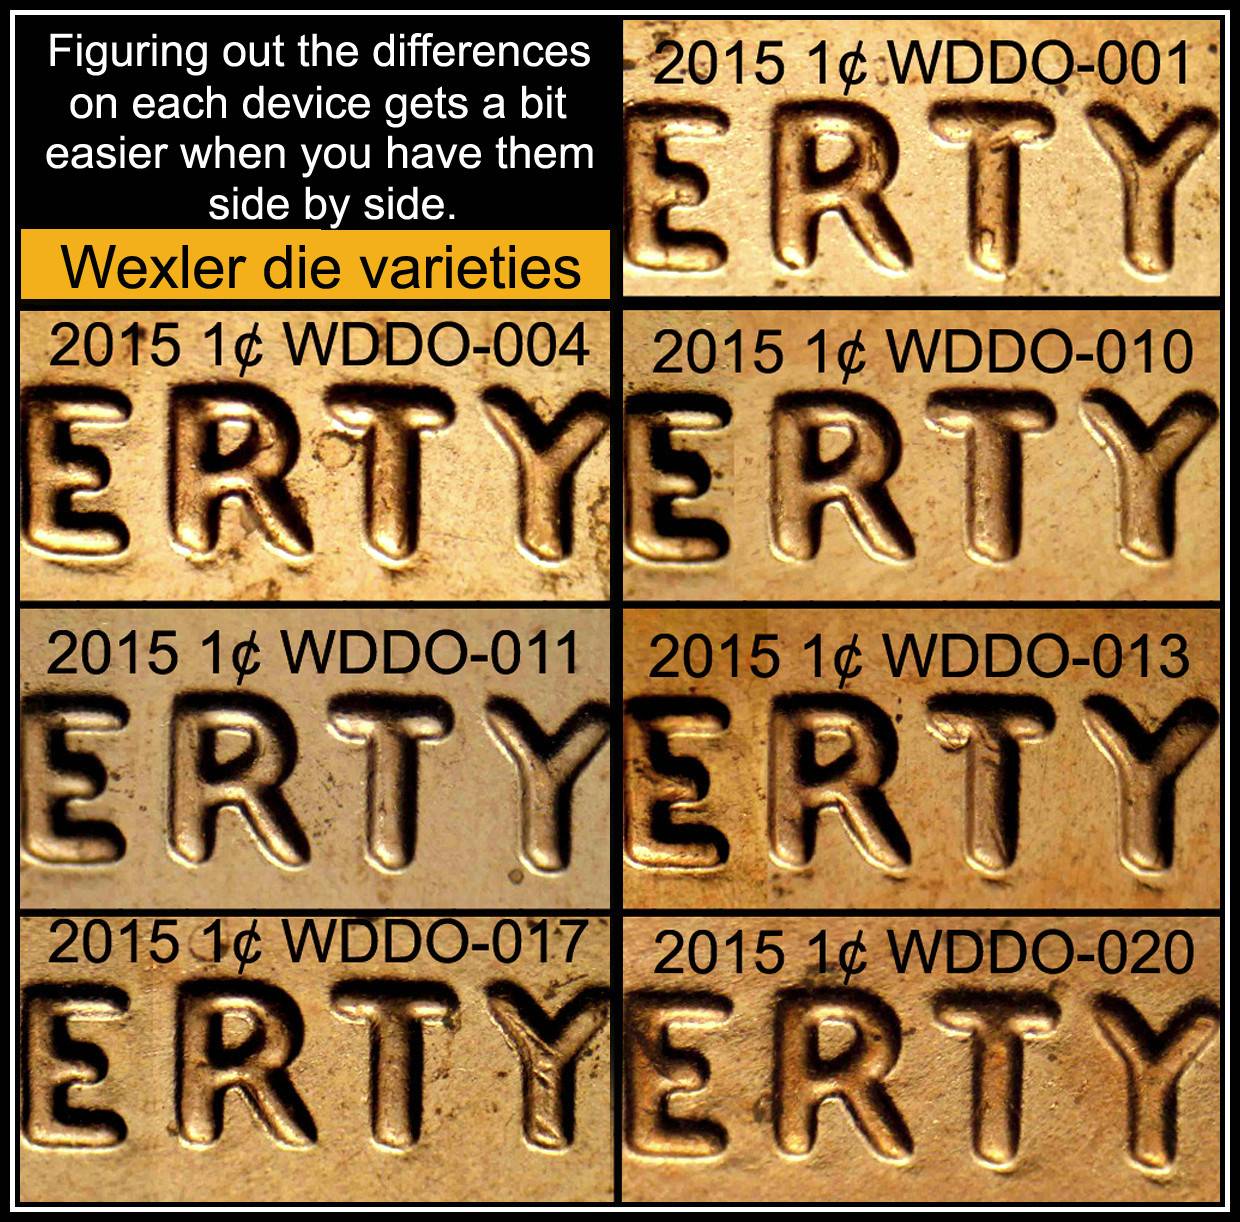
When we look at a coins in a publication/internet site and we compare our coin with it and look here and then there, sometimes the eye looses track of what you saw and what you should see. So side by sides help get them together next to each other to spot minor difference in doubling. Here is an example. On the 2015 we see there are several
DDO's that are similar on the LIBERTY.
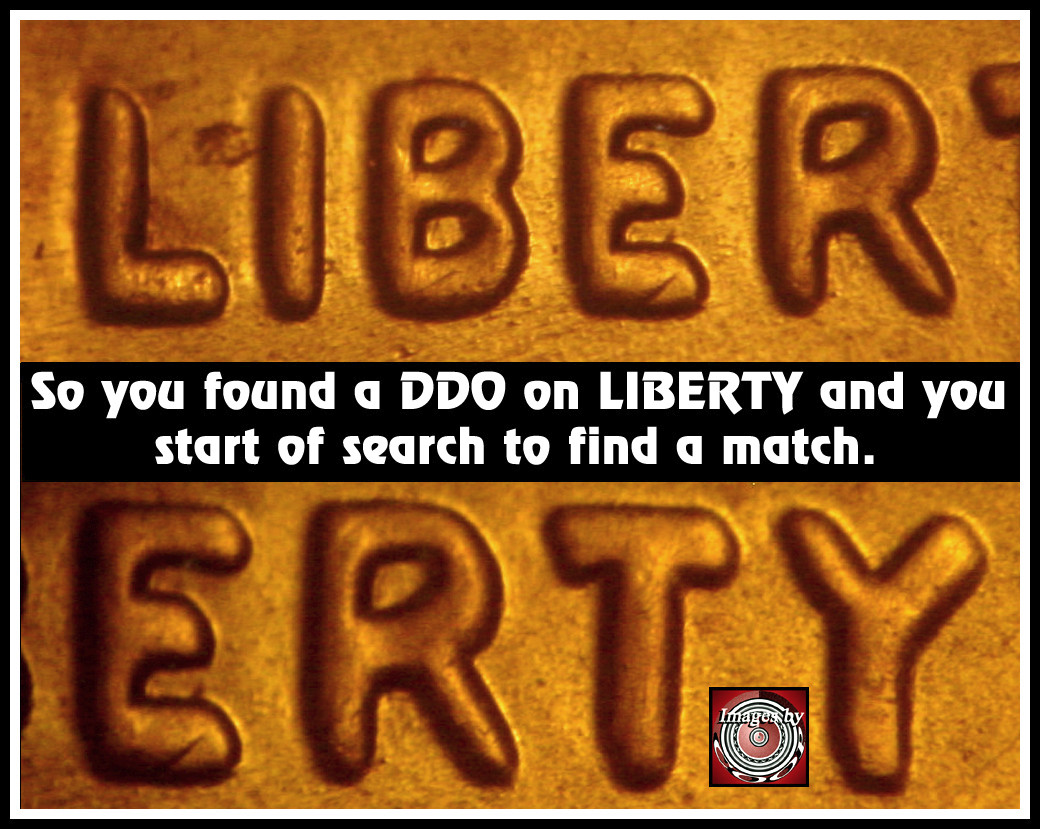
When you go to the site that posts them it maybe harder to figure which one you have.
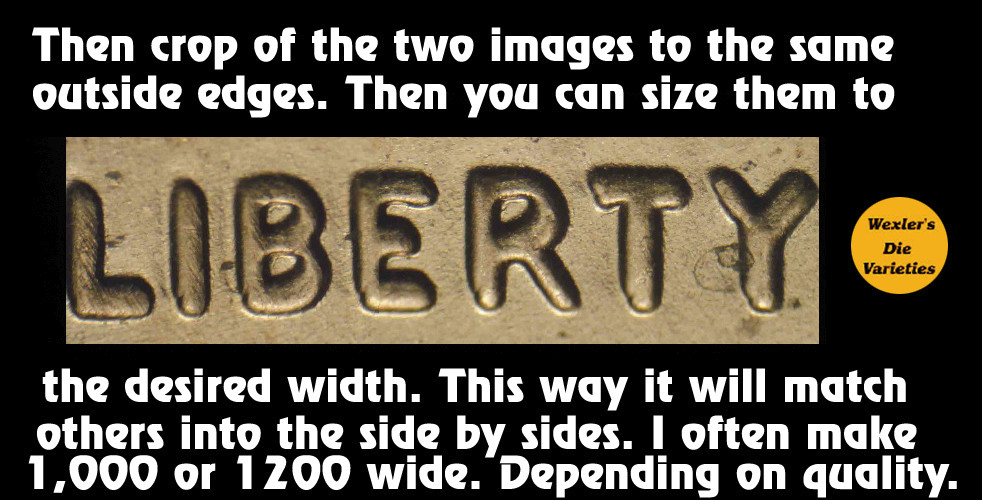
http://doubleddie.com/1542214.htmlSo you scroll down the page and you are looking for just the correct one that you have. But with all the other images going by, you forget which one is which. But by making a side by side you can see them all at once. So you have to put them together if they are two different images. How is this done? With Photoshop this is fairly easy. Here are the steps;

This is just the prep work for the side by sides. When you get to this point, then you need to find other examples to compare with to make them all the same size as the first batch. Size then you have all steps above done to make them all the same. Then add a canvas to what ever number you need to make them. 3 you might want to make them vertical.
4 in a square pattern.
For odd numbers you can use a square of two vertical rows to make 6/8, but make one blank for information.
6 in a rectangle with two columns.

Keep the columns to two wide as the detail will be reduced when you put more than that number of rows. If you need to add more than 6, you might make it in two separate images.
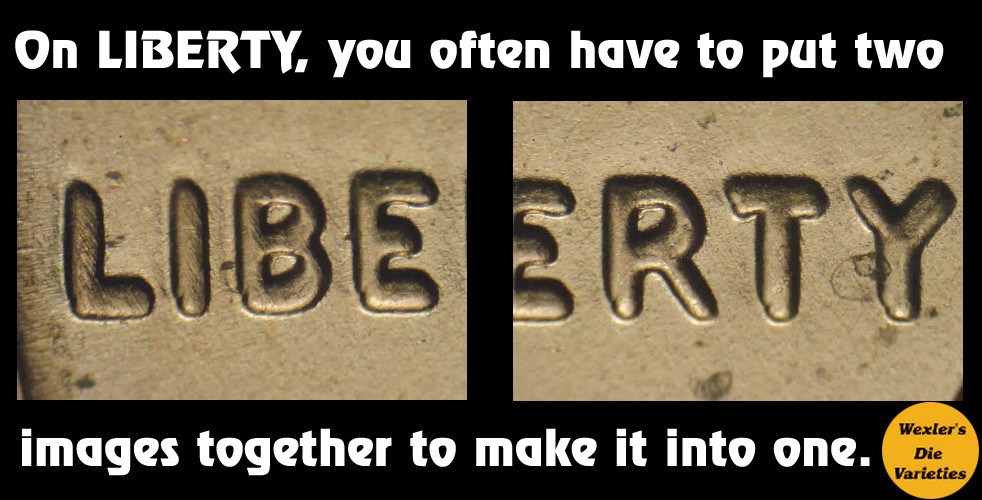
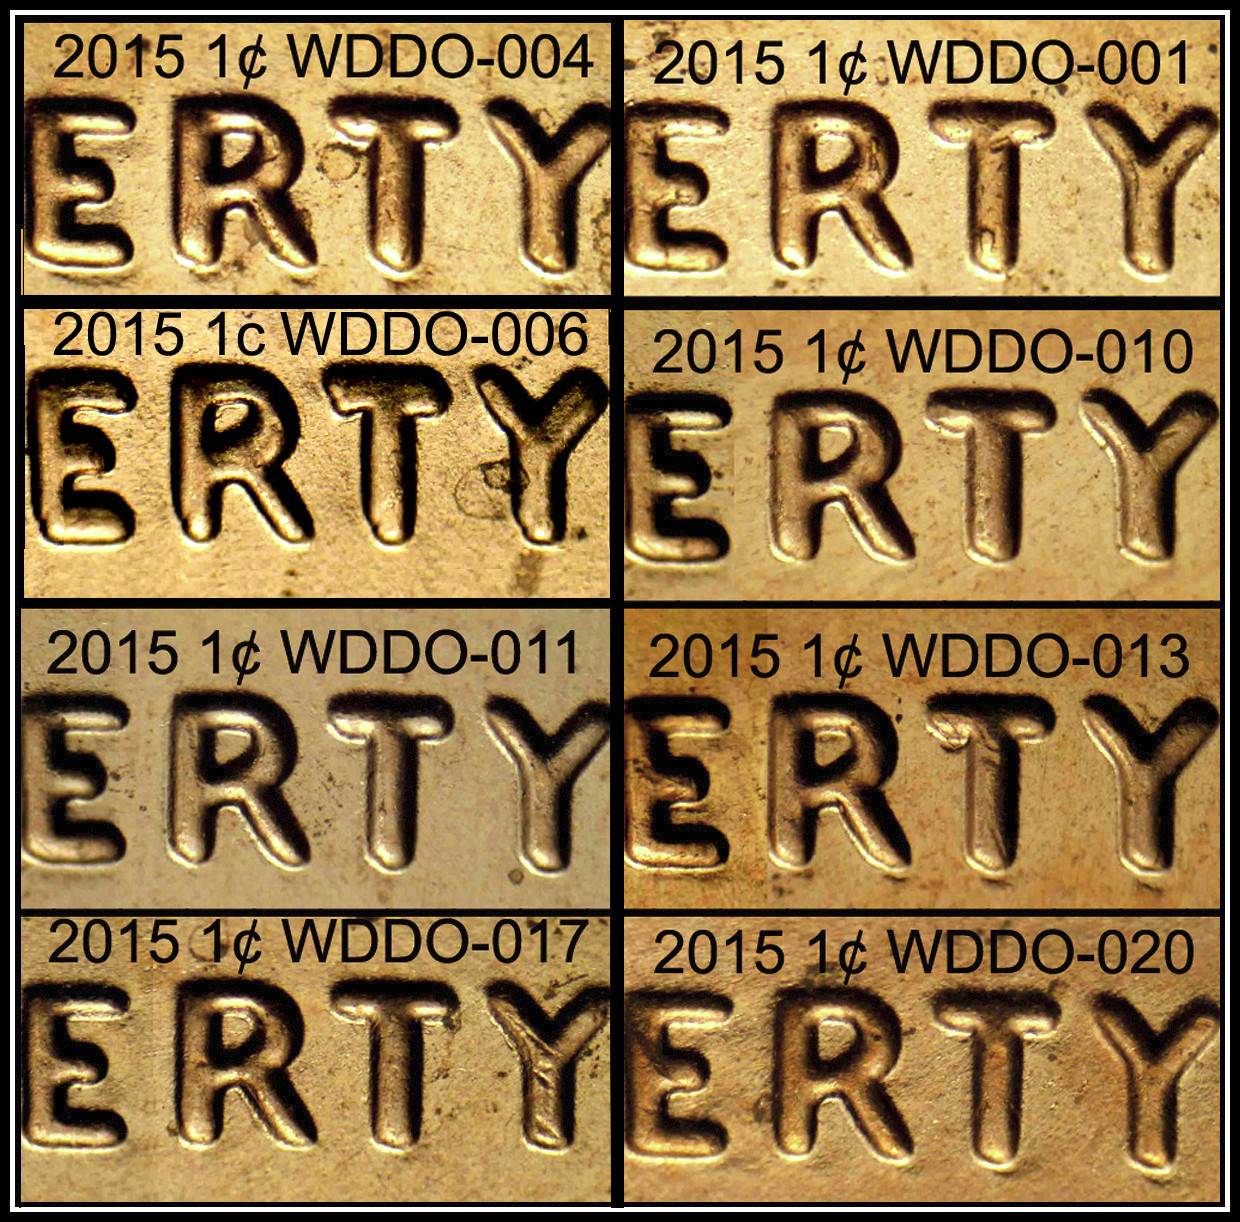
Sometimes you just need part of LIBERTY to cover most of the bases. On the example of odd ones I posted with 7 images, just the 'ERTY' was used. So because if was already divided, that will also work. So how do I insert the image into an existing image. How do I know what size to make it? First you make a duplicate. Then crop the image to just one image from 7 down to 1. The size of the one image will tell you what to make the image to fit into the desired size for the already created image. So I'm going to change the 7 image 'ERTY' images to 8 images. How do I do that? First open the image on Photoshop. Then make a duplicate image. That will tell me the size I need to make the new addition image to.
Note the 004 needed to be moved upwards to make the order correct. But when I med the image up, the bottom edge of the image was too long. So I need to erase that part to match the line across both columns. From the duplicate, I cut out the image that was in that space the 004 (which is not moved), but on the duplicate, it is still in that space. I crop if from the image and make the new image fit into that space. (image size is 596 X 296. So I take that cutout and make turn it all black. So Now I know the image size I need to make the image to. But I need to leave a bit of space for the black border. so I reduce the width to 586 ( was 596) So I take the image and crop on the outsides of the outer edges of the cut out image that is now black. But when cropping the image only crop the width to 586. The other edge we can crop of the correct height later. But when looking at the image, part of the 'E' is missing. So taking the image I made earlier, I am able to get the 'E' to make the full ERTY.
Editing that image, first cropping the image to "ERTY" to borders of those devices and making them to 586, I moved them over the blacked new border to fit the image into the set of 8 images.


So that is how you add an image to determine what size to make them. most of the time you don't have that issue, unless you need to add something to the collage. I had to edit a bit on the black borders and the image was smaller in height of the area I used. So I had to move some image material to fill above and below the devices to cover the area. A lot of little tricks you learn as you use this program in order to make things work. Hope this helps.