This is intended as a brief tutorial on how to detect a counterfeit Cap and Ray 8R when you have the coin in hand - but the techniques apply equally well with any MODERN counterfeit made using transfer dies or molds.
This counterfeiting method (transfer technologies) results in a coin that looks real. The design being a transfer of the image is CORRECT. That makes identification from a photograph VERY difficult if not impossible - based on the design alone.
First I will show the coin itself - this coin LOOKS real and even in person it looks like an original sea salvaged coin. The coin is something you might pick up at a flea market when you don't have a scale. Should you buy it or pass it by? Is it worth $5 as a gamble to get 0.78 ounces of silver?
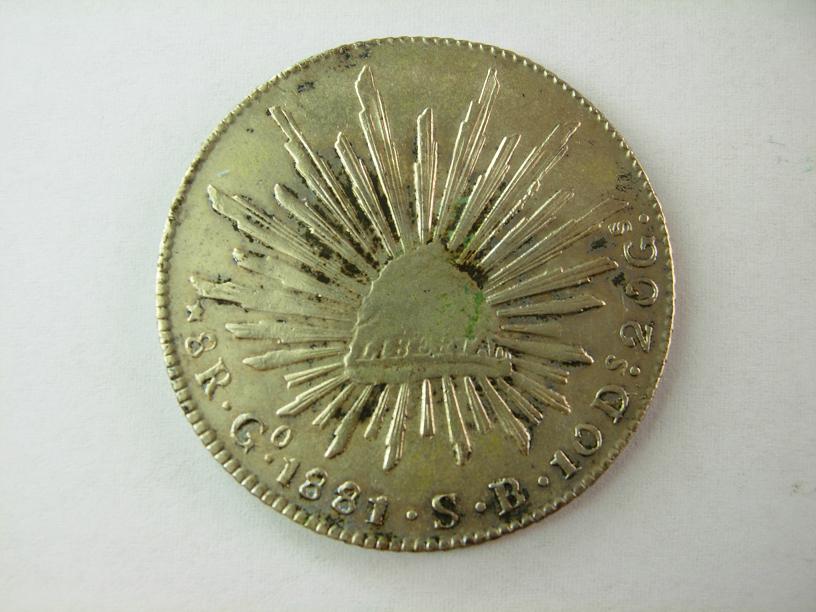
I know the coin is not great looking and it is not a numismatically valuable coin - but many people might think "at least it is a hunk of silver". In this case, that is also an error. This is a non-silver forgery in a white metal.
IT HAS ABSOLUTELY NO INTRINSIC VALUE.
I decided to do this because recently there have been several questions about other 8Rs and we always seem to get back to the same few issues based what the photos look like. I am afraid that some people might be getting the wrong idea about what is correct and what is not. So I figured we should look for clues on a coin where there is no uncertainty at all.
In this case, I am using a coin from my own collection that I guarantee is a MODERN FORGERY so there is no chance the details are caused by any NATURAL
Die Deterioration issues. The coin is not silver and it weighs less than 21 grams. If you have a scale it is a blatant forgery and most people stop right there. The diameter is correct as is the thickness. The edge design is CORRECT as to size and shape of the segments. It was edged and struck in separate steps.
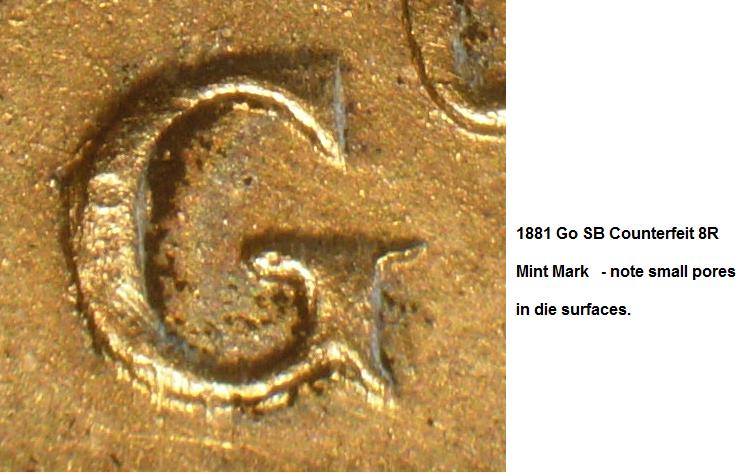
One recurring issue I raise is the presence of roughness on the die surface that tends to accumulate near die features like letters and numbers. So here are just two of several similar spots where that happens on this coin. The fields are better but not perfect.
First at the Mint Mark. Note that the lumps occur near the G where they can not be polished off the die. There is also a lack of smooth sides on the letter. The closer to the letter one gets the harder it is to smooth out the problems.
Then around the date, the same kinds of things happen:
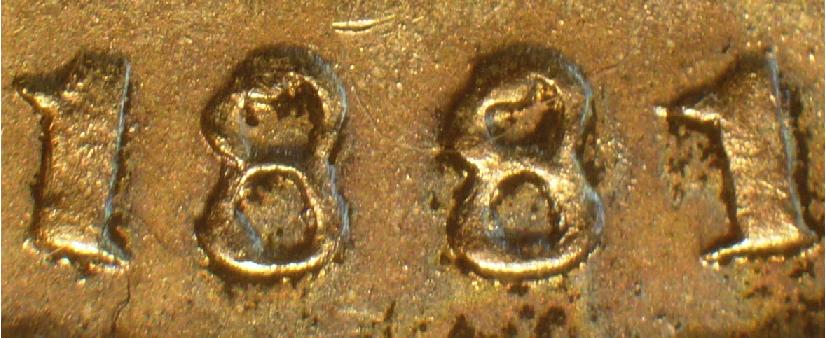
On the mint mark you can see some of the flow marks that prove the coin is struck.
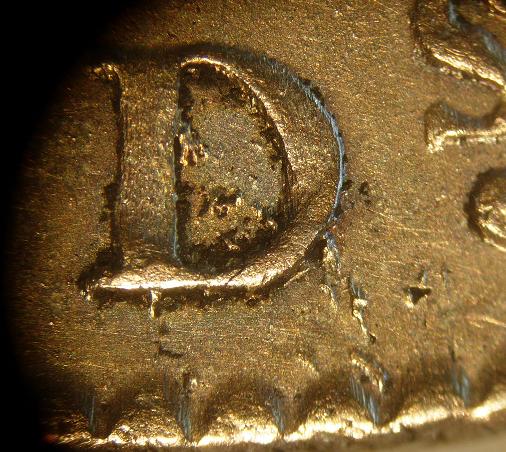
The next subject that comes up quite often are the things I call "soft cracks". They are features that superficially resemble die breaks until you see them up close. They may be copies of actual die breaks but something gets lost in the process. There is an area of "soft cracks" in and around the Ds in the assay value. This photo shows the breaks but they look fairly good. Like older cracks that have worn in a bit.
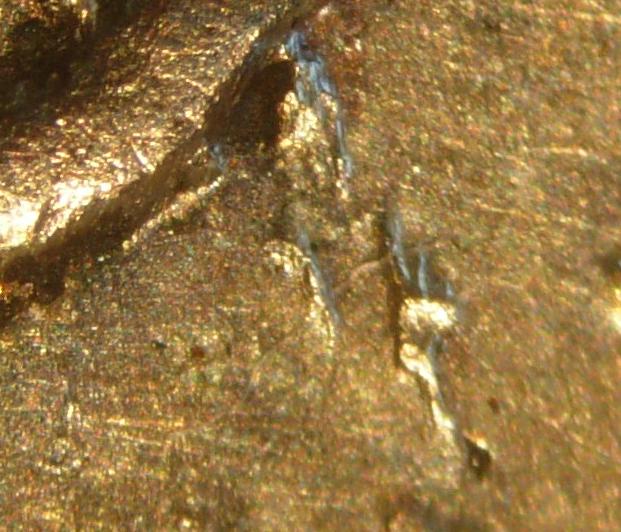
Here is an enlargement of the portion of the crack that really looks incorrect. There are fingers like projections that emanate from the "crack" near the center. The appearance here is typical of "soft cracks" in my experience.
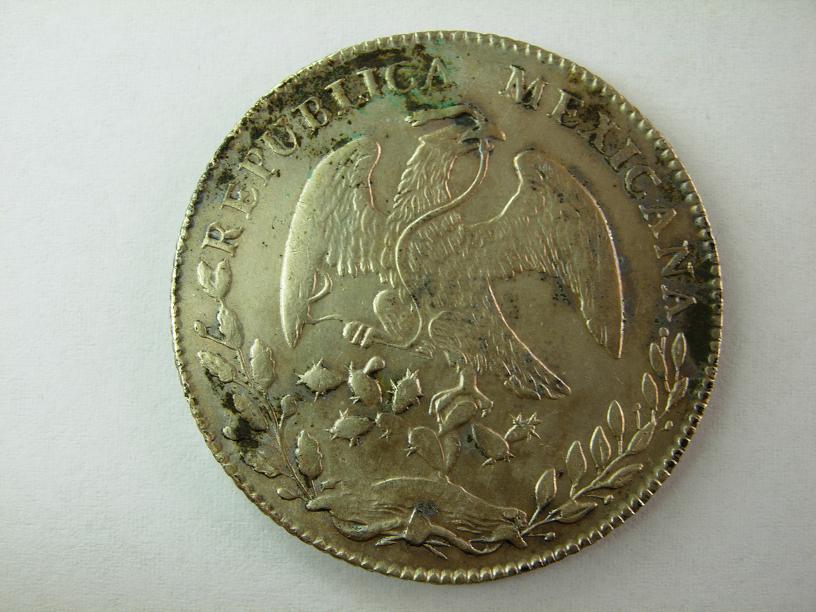
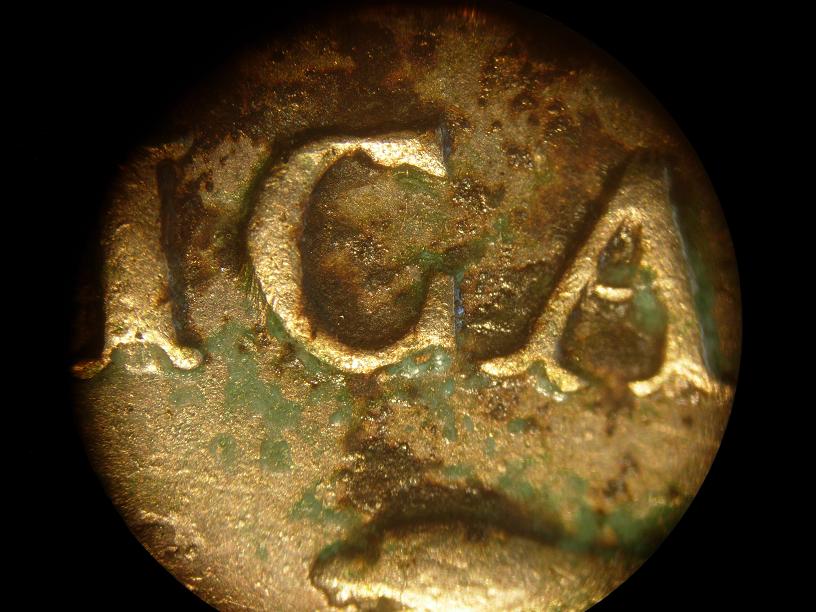
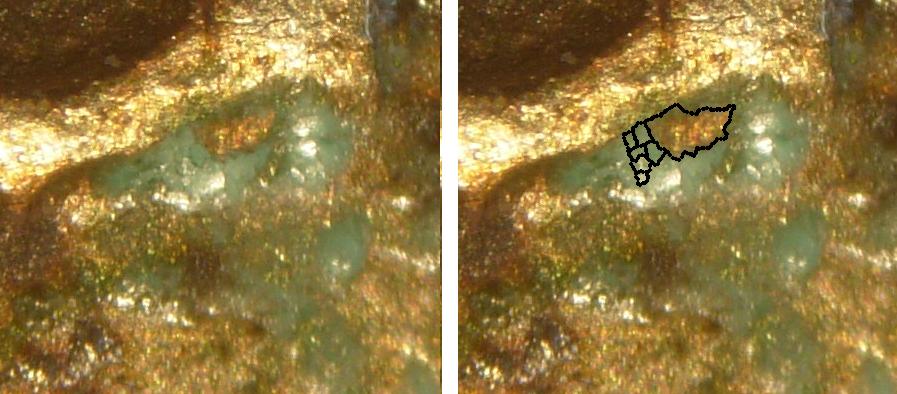
Next - we often discuss the FAKE verdigris seen on some modern chemically aged 8Rs. First is a wide angle view of some of the "green". Even at this level of magnification the green material looks funky. But if you have never studied verdigris you might not know. This picture is taken centered on the C in REPUBLICA. If you note there is a tiny gap in the green material directly below the center of the C. That is a break in the verdigris done by pressing on the surface.
This is an enlargement of the same area where the verdigris is broken. On the right is a picture touched up to show CRACKS in the smooth surface of the fake verdigris. The verdigris should be solid and a bit difficult to remove - it should not flake off or crack under very minor pressure. It should also NEVER expose a pristine surface below it.
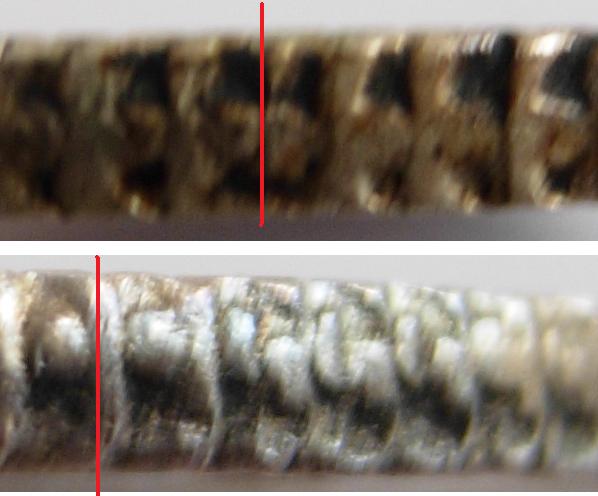
The last subject that comes up repeatedly are the edge die overlaps. I have attached a picture of BOTH overlaps that occur on this coin. They didn't come out to well - it was done hand held. On the picture, I added the RED lines at points that are 180 degrees apart on this coin. The two overlaps are not exactly aligned but more critically they not of equal length. One (the one at the top) is essentially butted with almost no overlapping while the lap at the bottom is several segments in length. It appears to me that the forgers were mimicking the correct edge but got it just wrong. They were most likely using a single die edger and inserted the blank twice allowing an overlap.